Tablet with pressure sensitive pen (I'm sure this tutorial can be done with a mouse - you'll have to figure that out for yourself though.)
Photoshop (I use CS2, but any version should be fine.)
A working knowledge of the Photoshop tools.
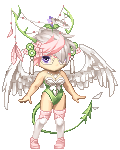
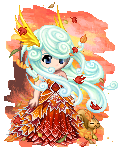
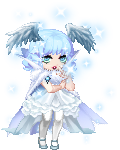
Avatar base body (I use a white mannequin body and a normal skin toned base with eyes.)
- Before you begin your edit you should have a hairstyle in mind - decide what you're going to draw before you start drawing it, because this takes a bit of planning. Grab a reference photo or drawing if you like.
Place your base on a transparent layer - you won't be pixeling directly on your base at all. Name this layer "Base".
Create a layer above your base layer. Name this layer "Hair - Front".
If you are creating a long hairstyle that hangs behind the back and arms, create another layer below the base layer. Name it "Hair - Back".
Select a colour that is easy to see against your background and using the Pencil tool, start outlining your hair. While you are doing this, keep in mind the shape of the hair - draw in individual locks or pieces of hair if it helps you plan out how you are going to shade.

Hair that covers the top of the head and hangs over the face or body should be drawn on the Hair - Front layer. Hair that hangs behind the body or head (such as a pony tail or long, loose hair) should be placed on the Hair - Back layer.
I like to draw in most of the hair that would be in the back, but if you prefer you can just draw in the chunks that would be visible from the front view.
Now fill the entire outline with your solid colour.
On your Layers menu lock the Transparency of the layer.
Next we are going to selectively outline your block of colour using the Burn tool.
For any other type of CG artwork I would not advocate using the Dodge and Burn tools for shading - the results generally look really awful. However they seem to work nicely for doing avatar edits. Proceed with caution though.
Burn
Brush settings:
Size: 1px
Range: Highlights
Exposure: 60%
Size: 1px
Range: Highlights
Exposure: 60%
Once the shape is outlined, we will start defining the shapes of the pieces of hair. Continue with the Burn tool on the same settings as above. Right now we will just worry about adding definition to the hair using lines.
Using the Paintbrush tool on 50% Opacity, fix any mistakes by touching up with your base colour.
You may need to unlock your layer Transparency and make small changes to the outline of your shape using the Eraser tool.
Eraser
Brush settings:
Size: 1px
Mode: Pencil
Opacity: 100%
Size: 1px
Mode: Pencil
Opacity: 100%
For the Hair - Back layer, I like to add a large shadow over the top of the colour block. If you remove the base body the hair looks very wig like and the shapes on the Hair - Front layer are easier to see against the darker background.
Now the shape of the hair is defined, we will give it volume by adding shadows. Continue with the Burn tool at the same setting, start adding shadows to round out larger chunks of hair and make pieces of hair that are behind others appear to recede.
As you add shadows, you will need to darken up the lines that define the different pieces of hair, and your outline.
Now we will add highlights. We will do this using the Dodge tool in two stages, with two different settings.
Our first step is to brighten up pieces by increasing the brightness and saturation.
Dodge
Brush settings:
Size: 1px
Range: Highlights
Exposure: 30%
Size: 1px
Range: Highlights
Exposure: 30%
Next we will add white highlights for reflection - smooth hair is shiny and reflects light. Again we will use the Dodge tool but with different settings.
Dodge
Brush settings:
Size: 1px
Range: Midtones/Shadows
Exposure: 30%
Size: 1px
Range: Midtones/Shadows
Exposure: 30%
Experiment with using the Dodge tool affecting Midtones and Shadows range. One may work better than the other, depending on how dark and saturated your hair is.
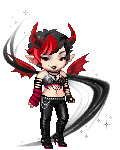
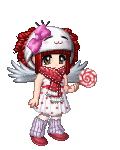
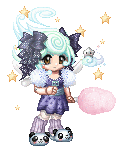
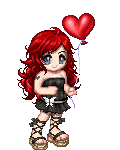
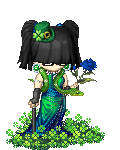
After adding the highlights I replace the white mannequin base with a regular avatar base, and use the eyes as a guide for drawing in eyebrows. I add these pixel by pixel, sampling colours from the hair.
You're pretty much done. Use the Dodge and Burn tools again to increase the contrast on the highlights and around the outline until you're happy with the piece.