|
|
|
|
|
|
|
|
|
 Posted: Wed May 30, 2007 1:31 am Posted: Wed May 30, 2007 1:31 am
|
|
|
|
|
|
|
|
|
|
Posted: Wed May 30, 2007 1:52 am
Larva

Hit Points: 25
Size: Small
Supply: 0
Cost: N/A
Build Time: 20
Produced at: Hatchery
Requires: Hatchery
Base Ground Attack: N/A
Base Air Attack: N/A
Base Armor: 10
Range: N/A
Sight: 4
Cooldown: N/A
Production Hot Key: N/A
The closest creatures to the original Zerg insectoids are the Zerg Larvae. Although their size and toughness were greatly boosted by the Xel'Naga during their experiments, they still possess the two traits that originally intrigued the ancient masters: genetic versatility and psychic sensitivity.
Maggot-like, Zerg Larvae contain within them the genetic code for all other Zerg breeds. When a new breed of Zerg is needed, an individual Larva will enter a pupal state and begin replicating the DNA of one specific Zerg breed at an astounding rate. After a short gestation period, the new mature Zerg hatches.
A young hive will only have the genetic code for the most basic of Zerg breeds, such as the Drone, but as it grows and develops new structures, its library of genetic strains is expanded. With a command from the Overmind, the Larva will enter a pupal state and begin the metamorphosis into whichever breed is required by the hive.
Larvae are produced at the Hatchery, Lair and Hive. They spawn one at a time up to a maximum of 3 per Hatchery/Lair/Hive. They require the Creep to survive and should the Creep ever dissipate from beneath them, the Larvae die shortly after. Unlike the mature Zerg breeds, Larvae do not require Overlord control and therefore can only be commanded to mutate by a Cerebrate.
To easily select all the Larvae from a particular Hatchery/Lair/Hive, select the Hatchery/Lair/Hive and hit the S key and all available Larvae will be highlighted. An alternate method can be used by holding down the Ctrl key while left clicking on one of the Larva -- this will select all the available Larvae on screen. Be sure to use one of these techiniques when you've progressed far enough to begin producing the mature Zerg breeds, as it will greatly increase the speed that you'll be able to morph Larva.
The Larvae are susceptible to many special abilities from each race:
Defensive Matrix
As with any other unit, Defensive Matrix will provide a temporary 250 HP defensive barrier for the affected unit. The effect will carry over even if the Larva is morphed into a mature Zerg unit. Can be useful if an entire colony is destroyed and a Larva is needed to survive to rebuild the Brood.
Ensnare
Ensnare does slow down the movement of the Larva, but it serves no purpose other than to maybe help the Larva's controller to more easily select and morph them.
Hallucination
Hallucinated Larvae can be confusing for the controlling player since they will not be able to do anything with them, but the occasion may arise when the races involved may find it amusing.
Irradiate
While Larvae are immune to the direct effects of Irradiate, they can still cause secondary damage to any other adjacent Zerg units. However, if a Larva is morphed into a mature Zerg unit within the span of an Irradiate, the mature unit will begin taking damage as soon as it hatches.
Maelstrom
Maelstrom effects can immobilize groups of Larvae, thus preventing them from mutating or morphing into the mature Zerg breeds but for a shorter period of time than Stasis Field.
Parasite
Parasite can be used on Larva, and the symbiote will continue to function even if the Larva morphs into a mature Zerg unit.
Plague
Larvae are as susceptible to Plague as any other unit and can have their HP reduced to 1 by a Plague.
Psionic Storm
Larvae are not immune to the effects of Psionic Storm and die rather quickly when facing a Storm's destructive power.
Stasis Field
Stasis Fields can halt any Larva from being able to mutate or morph into the mature Zerg breeds for an extended period of time.
Yamato Gun
Yamato Gun blasts will instantly kill a targeted Larva.
Larvae have a base armor of 10 and are more difficult to destroy than one might expect. This can become a great advantage for the controlling Zerg player since enemy players may opt to move on after destroying a Zerg Colony leaving the Larvae to squirm on the Creep, however these lone Larva can be used to morph into Drones and rebuild the base in a short period of time.
Upgrades
.....Carapace - Each upgrade adds +1 to the Carapace for a total of +3 when fully upgraded.
|
 |
|
|
|
|
|
|
|
|
|
|
|
|
|
|
|
|
Posted: Wed May 30, 2007 2:12 am
Drone 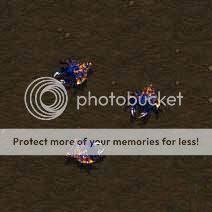
Hit Points: 40
Size: Small
Supply: 1
Cost: 50M
Build Time: 20
Produced at: Hatchery
Requires: Hatchery
Base Ground Attack: 5
Base Air Attack: N/A
Base Armor: 0
Range: 1
Sight: 7
Cooldown: 22
Production Hot Key: D
Like the Larvae from which they hatch, Zerg Drones contain within them the genetic code required to morph into any of the large Zerg "buildings", which are actually living (but immobile) structures. They can only grow on areas where the Creep has established itself, as they require its nourishment and building material. The Drones also harvest any raw materials that are needed. Vespene gas is very important to the Zerg: the high energy state of the gas powers their accelerated metabolisms and is essential for the production of the more advanced Zerg breeds.
Using the Burrow Ability
The Zerg Drone has one major advantage over the Protoss Probes or the Terran SCVs, and that is the ability to Burrow. Before a Drone can use this ability, Burrowing must first be evolved at one of the Hatcheries/Lairs/Hives. Since Drones are relatively weak attackers, Burrowing Drones for ambushes is almost never a good idea. However, Burrow can become very useful for the Drones when an enemy force comes pouring in. By Burrowing the Drones, you can give them the chance to survive until reinforcements arrive, or until the enemy has the ability to detect the Burrowed units. Should you repel the attack, you can quickly unburrow all of the Drones and resume resourcing immediately.
In the case of an attack, the fastest way to quickly Burrow your Drones is to either double-click a Drone or hold down Ctrl while left-clicking on a Drone (this will select up to 12 of the Drones onscreen) and then hitting the U key to Burrow all the selected units. With practice, you should be able to quickly get your Drones out of harm's way, giving your warrior units more fighting room to repel an attack.
Construction
The Zerg Drone contains the genetic template to morph into any of the basic Zerg structures. As the colony moves up the evolutionary ladder, the Drone is infused with additional genetic code to morph into more advanced structures.
The key difference between the Zerg method of colony construction and the Terran or Protoss methods is that the Drone actually morphs into the structure. The Drone can be recovered during the morphing process if the structure is canceled, however once the structure is completed, the Drone is permenantly lost. Note, however, that the once the Drone enters into its morphing stage, the control for the Drone is no longer needed and a few interesting strategies have arisen with this particular property.
One of the side effects of this type of colony construction is that the Zerg constantly need to replenish their Drone supply to maintain a balance between resourcing and tech tree advancement. Should Drone replacement ever be neglected (especially in the early game), the Zerg can find themselves either climbing the tech tree too slowly, or having too few Drones gathering resources.
Another key difference between the Zerg means of construction and those of the Terrans or Protoss is that the Creep limits where the Zerg can place their structures. Although this is not usually a problem, the dependence on Creep does present a few obstacles for Zerg advancement. Creep Colonies are almost always required at a main Zerg base to provide enough room to build all the necessary defenses and tech tree advancing structures. In an expansion situation, the Zerg MUST build a Hatchery first and thus are unable to fortify the position before expanding. This can leave the Zerg vulnerable during expansion attempts so be sure to bring an escort along to fend off enemy strikes.
Resource Mining
The Drone is capable of mining both minerals and Vespene gas. To gather minerals, just right-click on a mineral cluster with the Drone and it will automatically begin resourcing. Each mineral cluster can only be mined by one Drone at a time. If only one Drone is assigned to a particular cluster, it will mine only from that cluster. However, having only one Drone per mineral cluster isn't the best ratio for mineral gathering -- usually you will want to have at least 2-3 Drones per cluster to get the most out of the minerals (however, depending on the distance of the Hatchery from the clusters, you may want more or less). Note that there can be too many Drones mining at one time and those Drones that are unable to access a Mineral cluster will usually just end up sitting idle until a cluster frees up. With experience you should be able to find optimal numbers for mineral clusters for a particular resource area.
In the case of Vespene gas, an Extractor needs be built on top of the mine before Drones can collect from it. Once the Extractor is completed, just right-click on it with a Drone to begin collecting the refined Vespene gas. The number of Drones you'll want gathering from a mine will depend on the distance between the mine and the destination Hatchery. Note that although only one Drone can be inside the Extractor at a time, 3-4 Drones set to gather from each nearby Extractor will usually offer maximum efficiency. The general rule of thumb is to keep adding Drones to the Vespene gas Extractor until only one Drone waits outside at any given time. If more Drones begin waiting around the Extractor, then those additional Drones provide no improvement in the rate of Vespene gas harvesting.
As with the Terrans and Protoss, if you plan to build quickly up the tech tree, you will need to concentrate more on Vespene gas collection early in the game, since that is the slowest incoming resource. If you plan for a rush or other low-tech tactic, you will want to concentrate more on gathering minerals, since the lower tech units and structures are more mineral dependent.
Upgrades

...Burrow - Using the Burrow ability Drones will be able to hide from more powerful enemies.

...Carapace - Each upgrade adds +1 to the Carapace for a total of +3 when fully upgraded.
As mentioned earlier the Burrow ability can be extremely helpful to your Drones during an early game invasion -- if you have the resources available, you should evolve it as soon as the chance arises. While the Drone can attack and defend, it is a fairly weak unit and although the Carapace upgrades may help a little, they will rarely make a difference in a battle as far as the Drone is concerned.
|
|
|
|
|
|
|
|
|
|
|
|
|
|
|
Posted: Wed May 30, 2007 2:26 am
Overlord
Hit Points: 200
Size: Large
Supply: N/A
Cost: 100M
Build Time: 40
Produced at: Hatchery
Requires: Hatchery
Base Ground Attack: N/A
Base Air Attack: N/A
Base Armor: 0
Range: N/A
Sight: 9 (11 with upgrade)
Cooldown: N/A
Production Hot Key: O
The extent of the Overlords’ control over the Zerg is unknown, but it is clear that these flying behemoths provide direction for the other Zerg breeds. Although they resemble the Portuguese man-o-war of Earth, they are fairly docile creatures that tend to young larvae and transport other Zerg across the depths of space by carrying them within their shelled bodies.
With the ability to transport, detect cloaked/burrowed units, fly and provide "supply" units for the Zerg, the flying Overlord is one of the most useful and versatile Zerg units. The key to winning most battles will lie in the utilization of every ability the Overlord has to offer. Once those abilities are mastered, the Zerg can truly become a race to be feared.
Control/Supply Issues
As the provider of control and direction for the Zerg breeds (similar to the Terran Supply Depots or the Protoss Pylons in terms of "supply"), producing many Overlords is a requirement for colony growth.

When selected an empty Overlord will list Control used, Control provided, Total Control, and Control Max (which is usually 200 - except in Team Melee games where the maximum may be higher) numbers. [ Note that these stats can be seen at all times at the top right hand corner of the screen. ]
One of the major drawbacks of the Overlords is that compared to the Supply Depots or Pylons, Overlords are rather weak and vulnerable, and if left unescorted, can be easily destroyed. Because of this, Overlord Hunting often becomes a viable tactic for enemy forces. 8 control(supply) units are lost with every Overlord lost and untimely losses of Overlords will quickly put a cap on population growth. This can become a serious hindrance if it happens in the early game (particularly from Terran Marines), where there aren't enough resources to build an army and maintain an excess of Overlords, so be sure to protect them well. In the later game, be sure to have excess Overlords so that if a few are picked off, the colony will still be able to grow.
Maximizing Detection
Another highly valued function of the Overlord is its ability to detect cloaked or burrowed units. With the relatively large number of Overlords that you will have for maintaining control of the Hive, there should never be a problem defending against or attacking those cloaked/burrowed units. If using Overlords as part of an attack force, bring along more than one. The enemy may directly target the Overlords in order to reduce your detection ability, and using multiple Overlords to witness a fight will help counter this tactic. Without any detection nearby, enemy cloaked units will be able to engage your own forces undetected. In most cases a single Overlord will not suffice and the more present, the better the chances of a successful attack. To maximize the ability to detect, be sure to evolve the Overlords for Pneumatized Carapace (faster movement upgrade) and Antennae(increased sight range).
Transportation
Finally, the Overlord's ability to transport comes once its genetic code has been evolved for Ventral Sacs.
The Overlord, like the Dropship and Shuttle, has 8 transport slots and can carry:
8 Drones (1 slot each)
8 Zerglings (1 slot each)
4 Hydralisks (2 slots each)
2 Lurkers (4 slots each)
4 Defilers (2 slots each)
2 Ultralisks (4 slots each)
OR any combination of these units up to but not over the 8 slot limit
With the abundance of Overlords that should be present by the time Overlords evolve Ventral Sacs, the sheer number of units that can be transported at any given time becomes quite intimidating. Use this to your advantage and overwhelm enemy bases with large "drops" at a location that they may least be expecting. Be careful with the approach when using large numbers of Overlords to drop, since if spotted, the enemy will mostly likely figure out what is coming and may have enough time to ready a defense. If possible, take unusual routes to the enemy to minimize the chance of being seen. Note that the Pneumatized Carapce (faster movement upgrade) is almost required for successful drops.
There are 4 different ways to load units into your transport capable Overlord:
Select the Overlord, click on the Load button, then click on the ground unit to load
Select the Overlord, hit the L keyboard shortcut for the Load command, then click on the unit to load
Select the Overlord, then right-click on the unit to load
Select the unit to load, then right-click on the Overlord
Group selecting is possible with all 4 methods, as is command queueing using the Shift key. The best method to use will depend on the situation, though practicing the different methods will allow you to quickly load your units in any situation. (one very useful method is to select a group of ground units, hold down the Shift key, then right click on one Overlord at a time. Your units will load into the first Overlord as space provides. The remaining units will then load into the next Overlord. This will continue until all units are loaded).
To Unload your Overlord, either:
Select the Overlord, issue the Unload command (either by clicking on the Unload button, or using the U keyboard shortcut) then select the drop location. The Overlord will move to the target location and unload all its units.
OR
Select the Overlord, then click on the wireframe of a single unit you wish to unload. That unit will then be unloaded directly under the Overlord's current position.
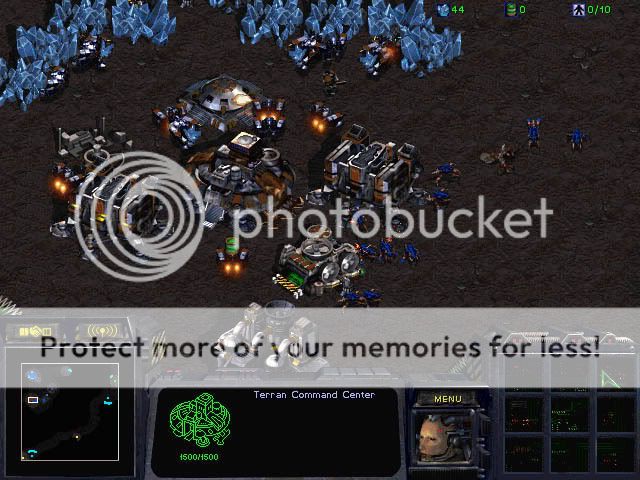
 An Overlord watches the outskirts of a Terran outpost. An Overlord watches the outskirts of a Terran outpost.
Countermeasures
Use every opportunity to hunt down and destroy Overlords should they happen to fly astray or be left unguarded. By doing so, you reduce the Zerg control/supply, limit their detection abilities and destroy any possible means of transport (and any units they might be carrying).
Terrans
Use Marines to quickly dispatch any scouting Overlord early in the game. For the best results, position your Marine(s) directly below the Overlord before attacking so that your Marine(s) do not waste time having to walking up or chasing after the Overlord.
Goliaths, with their explosive air attack, can deal serious damage to Overlords.
Use cloaked Wraiths to quickly dispatch the Zerg means of detection. If attacking or defending against a Zerg force accompanied by Overlords, kill the Overlords first and cloaking will give you the distinct advantage when attacking the rest of the force.
Valkyries can quickly destroy packed groups of Overlords in an alarmingly short amount of time.
Science Vessels with Irradiate are probably the Overlord's worst enemy. Once infected with an Irradiate, the Overlord is as good as dead (unless a Medic uses Restoration to save it).
 Wraiths go Overlord Hunting. Wraiths go Overlord Hunting.
Protoss
Dragoons can be used to destroy Overlords, but with their long cooldown times, be sure to position the Dragoons below the Overlords before attacking to get the kill before they can escape.
Corsairs are probably the single best anti-Overlord solution. With a group of 5 or more Corsairs, Overlords are easy prey, whether they're alone or in groups.
Scouts deal incredible aerial damage and are another prime choice for Overlord Hunting. If outfitted with weapons and speed upgrades, the Scouts can put a quick end to any Overlord.

Two Dragoons trap and fire on a spying Overlord.

Two Dragoons prevent an Overlord from spying on the Protoss town.

A Scout chases down an Overlord.

Two Corsairs seek to destroy a criticialy wounded Overlord.
Zerg
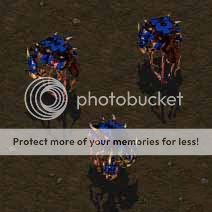
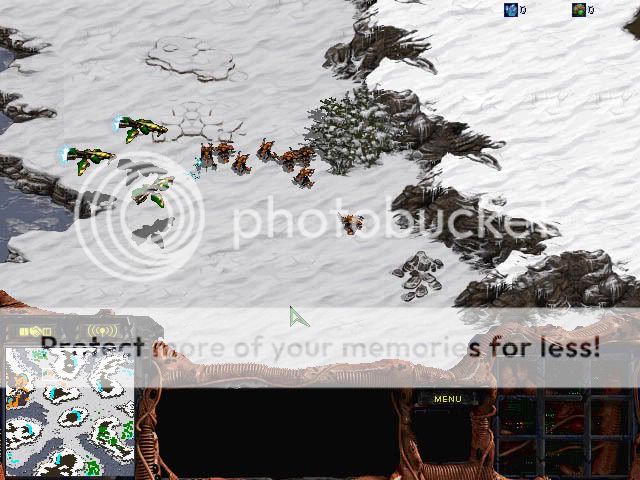
Hydralisks are the early game solution for Overlord Hunting. Be sure to position them below the Overlord before attacking to get the most out of the attack.
A pair of Scourge is all it takes to destroy an Overlord. Use them to quickly clear out lone scouting Overlords.
Packs of Mutalisks can quickly destroy lone Overlords, and are even better against packs of Overlords.
Upgrades
Ventral Sacs - This upgrade will allow your Overlords to act as a transport for ground troops.
Antennae - The added sight range is useful in exploring enemy bases at a safe distance, as well as for spotting Cloaked or Burrowed units.
Pneumatized Carapace - This speed upgrade is a an extremely useful evolution for the Overlord. Not only does it provide for faster transportation, the Overlord will also have a better chance of escaping from a fatal situation.
Flyer Carapace - Each upgrade adds +1 to the Flyer Carapace for a total of +3 when fully upgraded.
|
|
|
|
|
|
|
|
|
|
|
|
|
|
|
|
|
|
Posted: Wed May 30, 2007 5:23 pm
Zergling

Hit Points: 35
Size: Small
Supply: 0.5
Cost: 25M
Build Time: 28
Produced at: Hatchery
Requires: Spawning Pool
Base Ground Attack: 5
Base Air Attack: N/A
Base Armor: 0
Range: 1
Sight: 5
Cooldown: 8 (6 with upgrade)
Production Hot Key: Z
The small, savage Zergling is one of the few breeds that a core species has been found for. It is so closely related to the dune-runners of Zz’gash that it is believed that the Zerg at some point encountered and "absorbed" the DNA structure of the dune-runners. Mutated by the Zerg to be more efficient killers, the voracious Zergling are capable of ripping a larger creature to shreds with their razor-edged forearms and sharp fangs. Their DNA structure is so simple that two Zerglings can be created from a single Larva.
Zerglings are the first producible attack units the Zerg have at their disposal. With the ability to spawn in pairs, they can be produced in large numbers in a very short period of time. They serve as prime choices for rushing and depending on the build order used, they can execute the fastest rush in the game. Their small size and large pack movement make them virtually impossible to select one at a time, making it difficult for an enemy to systematically destroy them.
Although the Zergling is small and relatively low in vitality (HP), do not understimate their usefulness. In addition to the early game rush, Zerglings can be a vital tool in the later game as well serving as the frontline of an attack backed by Hydralisks, Mutalisks, or Guardians. As cannon fodder, they give the more expensive units a longer lifespan and better attack potential while they tie up the enemy. Also, since Zerglings require no Vespene gas to be produced, they are a good choice to use up the usual mineral overhead that is accumulated in the later game to balance the gas usage for the more advanced breeds.
In some cases, the Zerglings don't even need to be used as decoys or fodder. Once their melee attack, Carapace, Metabolic Boost and Adrenal Glands have been upgraded/evolved, they can be a huge threat when built in substantial numbers. A swarm of 100 or more fully upgraded Zerglings can be fairly cheap for the amount of sheer havoc they can wreak. The unending flood of these units can cause even the most stalwart enemy to tremble in their feet.
Race Specific Strategies
Against the Terrans Zerglings are useful for mobbing groups of Marines. They are not as useful if the Marines are accompanied by Medics or Firebats and especially not if the Marines are in a Bunker. They are also handy for clearing out sieged Tanks since the Tanks are unable to hit areas directly adjacent to them, but again, if those Tanks are covered by Bunkers, using Zerglings can be a bad idea.
Against the Protoss the Zerglings are good against Zealots but even better against Dragoons. The slow firing Dragoons a simply no match for a large group of the fast attacking Zerglings (which they are almost all the time). Zerglings are also helpful for catching High Templar off guard during their recharge period, but use caution when targeting them since a single Psionic Storm can slaughter Zerglings by the dozen.
Against the Zerg use Zerglings to tie up Sunken Colonies while using Hydralisks to finish them off. Zerglings are also a good counter against Hydralisks (since Hydralisks deal explosive damage) but be sure to outnumber them at least 5 to 1 for a succesful attack/counter. Zerglings also work well against the slow and cumbersome Ultralisks. However, be sure to have a high ratio of Zerglings in these encounters.
If Defilers are available, Zerglings make the perfect counterpart for them. They can be used for the Defiler's Consume ability, quickly recharging the Defiler's energy stores. Also, when Zerglings are used in combination with the Defiler's Dark Swarm ability, they can really cause massive damage (since only melee attack units can hit beneath a Dark Swarm). With a Dark Swarm over a blockade of Siege Tanks/Bunkers or Photon Cannons, Zerglings can make quick work of them, clearing a path so that the more powerful ranged attack units like Hydralisks can break through.
Using the Burrow Ability
Zerglings can also be evolved to gain the ability to Burrow. With it, they can be used to burrow at resource nodes or choke points to keep track of enemy expansion or movement. With their extremely low cost, burrowed Zerglings can cover an entire map making it much easier to plan out strategies or defenses.
If using the Zerglings to spot expansions, there are two methods for burrowing. One, place the Zergling in the spot that is closest to the minerals and gas and your opponent will not be able to build at that particular spot either forcing them to build at a position further away from the resources (which will slow down the expansion's resource efficiency) or move to another resource node. The other method is to burrow a Zergling right next to or behind the mineral clusters at a resource node. This will make it very hard for an opponent to notice it, even with detection, and they won't suspect that they've been spotted. Once they begin the expansion construction, strike before they can defend the position and hopefully you'll be able to destroy the rising structures before the enemy can cancel, forcing them to forfeit the cost to build those structures.

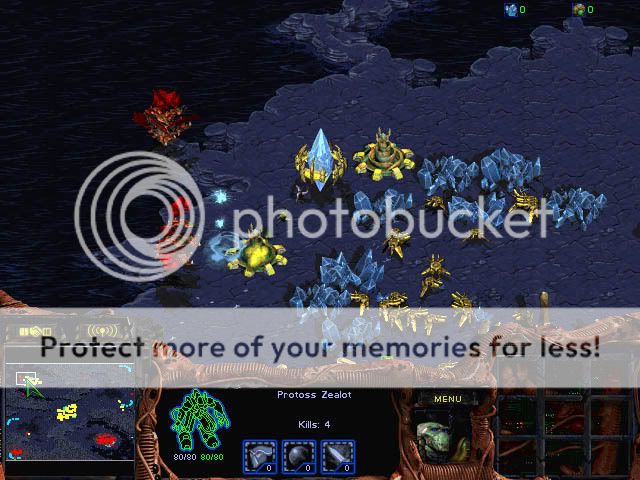
A group of Zerglings swarm a Zealot.

Zerglings and Sunken Colonies fend off a Zealot attack.

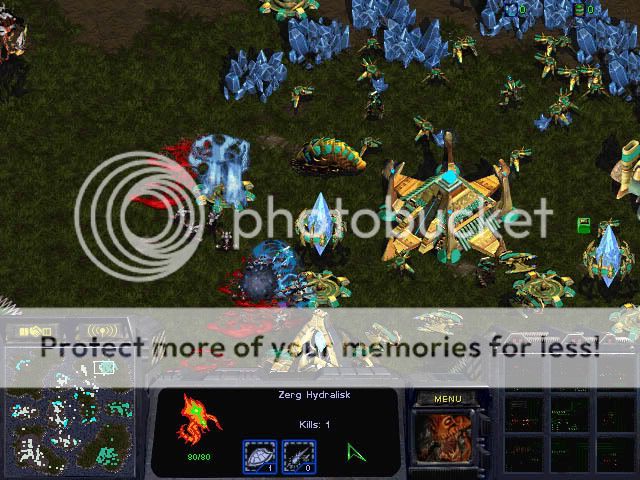
Zerglings sneak into the rear of a base and attack enemy Drones mining.

Zerglings quickly raze an enemy Zerg brood.

Zerglings engaging Zealots with a little help from a Lurker.

Zerglings are excellent for destroying enemy Templar with their cheap cost and quick attack and movement.
Countermeasures
Terrans
Stimpacked Marines/Firebats backed by Medics make quick work of Zerglings.
Bunkers filled with Marines/Firebats and repaired by SCVs can quickly stop a Zergling invasion.
Use the Vulture's Spidermines to clear out patches of attacking Zerglings.
Any aerial unit with ground attack (Wraiths or Battlecruisers) can destroy Zerglings with complete impunity.
Bunkers being repaired by SCVs can fend off large amounts of Zerglings. Try to attack targets outside the defensive range of the Bunkers.

Groups of Firebats, Marines and Medics pile up the Zergling carcasses.
Protoss
Zealots with at least a 1:2 ratio against Zerglings will usually prevail. If upgraded to +1 Ground Weapons, the Zealots will be able to kill unupgraded Zerglings with only 2 strikes rather than 3.
Photon Cannons can make quick work of small/midsized groups of Zerglings.
Scouts or Carriers can attack Zerglings with complete impunity.
Reavers can cause massive damage to groups of Zerglings.
The High Templar's Psionic Storm can ravage groups of Zerglings.
The Archon with its splash damage attack can mow down Zerglings (works even better if there is a group of Archons).
Scouts halt a Zergling advance.
A Reaver takes out large numbers of Zerglings. Photon Cannons and Zealots support the Reaver.
Zerg
Hydralisks with Grooved Spines (increased range upgrade) can work well against small/midsized groups of Zerglings.
Tightly packed Sunken Colony groups can quickly impale incoming Zerglings.
Lurkers can destroy droves of Zerglings, even if they are detected.
Mutalisk or Guardians can attack Zerglings with complete impunity.
Upgrades
Burrow - With the Burrow ability, Zerglings will be able to hide from more powerful foes, watch an area undetected, and ambush the enemy.
Melee Attacks - Each upgrade adds +1 to Melee Attacks for a total of +3 when fully upgraded.
Carapace - Each upgrade adds +1 to the Carapace for a total of +3 when fully upgraded.
Metabolic Boost - This will allow your Zerglings to travel across the map much more quickly, and reach their targets at a faster rate.
Adrenal Glands - This upgrade gives the Zerglings a faster attack and combined with the Metabolic Boost, the adrenalized Zerglings can reach and attack an enemy at an alarming rate, quickly tearing down any opposing enemy force or base.
|
|
|
|
|
|
|
|
|
|
|
|
|
|
|
Posted: Wed May 30, 2007 5:54 pm
Hydralisk
Hit Points: 80
Size: Medium
Supply: 1
Cost: 75M 25G
Build Time: 28
Produced at: Hatchery
Requires: Hydralisk Den
Base Ground Attack: 10e
Base Air Attack: 10e
Base Armor: 0
Range: 4 (5 with upgrade)
Sight: 6
Cooldown: 15
Production Hot Key: H
This species, first seen in security camera footage discovered on a dead Terran cargo vessel, is one of the fiercest and most dangerous of the Zerg strains. The upper carapace plates of the Hydralisk can open to expose hundreds of spines that are projected with such force that they can penetrate 2cm Neosteel. Fortunately, they move quite slowly on open terrain.
The Hydralisk is easily the most versatile breed for the Zerg. With the ability to strike both ground and air targets, Burrow (once evolved), and health regeneration, the Hydralisk is a force to be reckoned with. Also with their short build times and relatively low cost, they can be produced in mass numbers to overwhelm the enemy.
With the ground/air strike capability, Hydralisks are the best support units in the Zerg race. Combine their attack with Zerglings, Mutalisks, Guardians, etc. and the enemy will have a much more difficult time halting them. Another excellent combination is using Hydralisks with Dark Swarm. Casting Dark Swarm over a large Hydralisk force can increase their lifespans by quite a bit and can be particularly useful against large ranged attack unit groups like Carriers, Dragoons, Goliaths, Vultures, Guardians, etc. Watch out for melee attack units (i.e. Zerglings, Zealots, Firebats) when using this combination since they will have the advantage under the Dark Swarm.
One thing to remember when producing Hydralisks is that you can never have enough. To help increase production, be sure to build multiple Hatcheries whenever the opportunity arises. With a steady resource stream you should be able to keep the Hydralisks pumping out in a seemingly neverending stream.
Between battles give your Hydralisks a chance to regenerate their health by Burrowing them near the battlefields. Keeping them Burrowed will give them a better chance of being able to heal since if the enemy can't spot them, they can't attack them. Also while Burrowed, they can serve as temporary scouts/observers giving your more healthy forces a better chance of survival by knowing what is coming their way. For more offensive purposes, the Hydralisk is one of the best suited units for Burrow ambushing. Use the ambush to either surprise an incoming enemy force or wait til an enemy passes by and ambush the enemy from behind.
Hydralisks also serve as the ideal drop unit with Overlords. With four Hydralisks in every Overlord, it is easy to transport a huge force of these deadly units to the backside of an enemy base, killing them before they know what hits them.
Keep in mind, however, that although the Hydralisks are very useful, they are not the ultimate unit. Mass producing only Hydralisks can bring out their flaws and give a more well balanced enemy force a better chance of defeating them. Simple Psionic Storms can wipe out legions of Hydralisks and Terran Siege Tanks can make mince meat of oncoming Hydralisk hordes before they can even get within range to hit the Tanks. So build a lot, but be sure to build other units as well to keep your opponent guessing as to what strategies you might be using.

A group of Hydralisks respond to a Zealot attack.

A large group of Hydralisks makes a crushing attack against the enemy resource collection operations.

A group of Hydralisks chase a Scout away.

Zerglings and Hydralisks engage a group of Zealots in fierce combat.
Countermeasures
With all the Hydralisk abilities and traits, you can expect to face them in almost every Zerg encounter.
Terrans
If you decide to use Marines/Firebats against Hydralisks, make sure you have the advantage in numbers or be backed by Medics. Also get the U-238 Shells upgrade for the Marines as quickly as possible so at worst case, the Marines will be able to hold ground against them. Also, take the time to build Bunkers for your Marines against Hydralisk hordes, since not only do they provide protection, but they increase the Marine attack range as well.
Reinforce Bunkers with Siege Tanks in siege mode to keep Hydralisks at bay (preferrably at a choke point, if possible).
Use Irradiate with Science Vessels to destroy tight packs of Hydralisks.
Make good use of Cloaked Wraiths to attack Hydralisk groups that have no nearby detectors.
Battlecruisers with their thick hulls and Laser Batteries can hold well against Hydralisks, but be sure to build them in fleets.
Protoss
Zealots can be a good counter against Hydralisks in larger numbers. They're better yet if escorted with Dragoons.
If there are no nearby detectors, use Dark Templar to quickly dispatch Hydralisks.
Reavers can quickly depopulate incoming groups of Hydralisks with their superior range and power.
Psionic Storms serve as the best counter against groups of Hydralisks. A few seconds beneath a Psionic Storm and even the mightiest Hydralisk can be reduced to nothing.

The Hydralisks unload from the Overlord in an attempt to defend the base, but one Psionic Storm takes care of all four Hydralisks and the Overlord as well.

Reavers make quick work of Hydralisks.

A Templar puts a Psionic Storm on a group of attacking Hydralisks. This is one of the most effective counters to attacking Hydralisks.

Dark Templar are a great counter to Hydralisks. Use Corsairs to push away the Overlord detection support then follow up with Dark Templar attacks.
Zerg
Use upgraded Zerglings in mass numbers to overwhelm groups of Hydralisks. (Even better if accompanied by Hydralisks)
In equal number confrontations, Hydralisk vs. Hydralisk encounters will boil down to who has more upgrades and better unit control.
Lurkers can shred Hydralisks if they have no nearby detection.
In the latter game, Guardians can use their superior range to attack from high ground where Hydralisks will be unable to reliate.
Use Queens to Ensnare enemy groups of Hydralisks, giving your force a better chance of survival.
Use Defilers to utilize Plague against enemy Hydralisks or Dark Swarm over friendly Hydralisks.
Upgrades
Burrow - Burrow can give Hydralisks time to regenerate or set up an ambush.
Missile Attacks - Each upgrade adds +1 to Missle Attacks for a total of +3 when fully upgraded.
Carapace - Each upgrade adds +1 to the Carapace for a total of +3 when fully upgraded.
Muscular Augments - To make sure Hydralisk attack groups can attack or retaliate when needed, get this upgrade to increase their speed so that targets can be reached as soon as possible.
Grooved Spines - Getting the increased attack range upgrade will give the Hydralisks the ability strike the enemy sooner, keeping them at bay or damaging them while they approach. An essential upgrade for the Hydralisk.
Special Abilities
Once the ability is evolved at the Hydralisk Den, the Hydralisk has the ability to morph into the Lurker. During the transformation, the Hydralisk can still be recovered, but once it's complete, the Hydralisk is lost.
|
|
|
|
|
|
|
|
|
|
|
|
|
|
|
|
|
|
Posted: Wed May 30, 2007 6:07 pm
Mutalisks

Hit Points: 120
Size: Small
Supply: 2
Cost: 100 100
Build Time: 40
Produced at: Lair/Hatchery
Requires: Spire
Base Ground Attack: 9
Base Air Attack: 9
Base Armor: 0
Range: 3
Sight: 7
Cooldown: 30
Production Hot Key: M
Frankly, the Mutalisk is an enigma. It is not known how they are capable of maneuvering through a vacuum, or even of controlled flight within an atmosphere, but they have been able to stand toe-to-toe (so to speak) against Wraith fighters along the Coreward border worlds. The Mutalisk's attack is quite unusual. The Mutalisk produces and projects much smaller, voracious creatures that rapidly fly between enemy targets as it disintegrates explosively.
The Mutalisk serves as the basic flying support unit for the Zerg and has the ability to strike both air and ground targets. However its Glaive Wurm attack has the special property of hitting several targets within close proximity of the inital strike and against packed groups of enemy units, Mutalisks can quickly tear them apart. The inital hit does 9 base points of normal damage (more if upgraded), the 2nd hit strikes the enemy nearest to the first target and does about 1/3 damage and the 3rd hit strikes the enemy nearest to the 2nd target while doing about 1/9 damage.
The Small size classification of the Mutalisks can become critical if an enemy begins producing anti-air units with explosive attacks like Hydralisks, Goliaths or Dragoons since the Mutalisks will only take 50% damage. Use this advantage whenever the chance arises and keep the damage ratios in mind when deciding whether or not to attack an enemy force or not.
The Mutalisk can attain tremendous air speeds and can travel across battlefields in a very short amount of time, making them perfect as scouts, interceptors and hit-and-run attackers. Probably the best use of the Mutalisk is in the hit-and-run tactics. With their mobility, enemy expansions or stray attack groups make easy targets for the Mutalisk and often they can raze an enemy base or force before they have the chance to properly retaliate. But be sure not to fall into an enemy trap since with a fairly weak vitality, the Mutalisks are easy prey for the more powerful anti-air units of any race. Keep the advantage with the Mutalisks by keeping them constantly moving to avoid as much damage as possible while attacking weakly defended enemy areas.
One Mutalisk property that can work both for and against it is the ability to stack when grouped together. For an opponent this can be fairly frustrating since it is very difficult to select individual Mutalisks when they attack. However, this can be a curse when the enemy uses area attack units like the Corsair or Valkyrie or area-effect abilities like Psionic Storm, Ensnare or Irradiate. When facing these kinds of defenses Mutalisks will usually die or be affected en masse. Should the enemy use these area-effect abilities or attacks regularly, try splitting the Mutalisks into smaller groups so that the damage done against the attack force in minimized.
Even if Guardians and Devourers are producible, it is still usually a good idea to keep a few Mutalisks around to serve as escorts, support and fodder. They can supplement the anti-air or anti-ground attacks of the Guardians or Devourers while absorbing the damage and directing attacks away from the more expensive units.

This Protoss town has no anti-air defenses making it a perfect target for a large group of Mutalisks.

Mutalisks are great counters to Reavers. Use Mutalisks to kill Shuttles carrying Reavers then direct them to attack the Reavers themselves.
Mutalisks attack a Protoss Expansion Mutalisks put Tanks on the run

These Mutalisks catch a Protoss expansion early before Photon Cannons are warped in. If the enemy has no anti-air defenses such as Dragoons, Templars/Psionic Storm, or Photon Cannons, Mutalisks are the perfect unit to use for the attack.
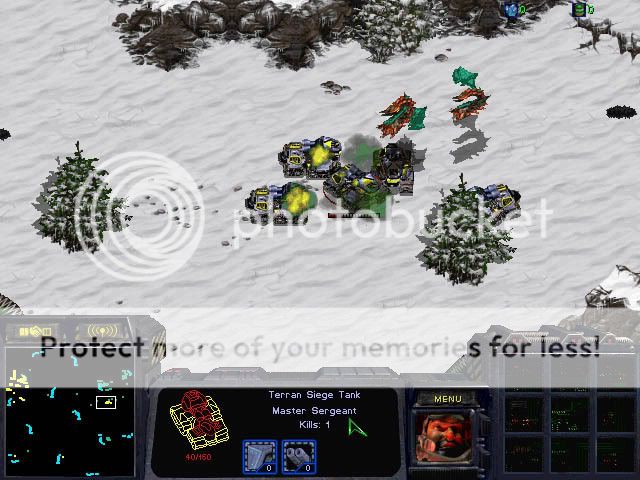
Terran Tanks without the proper support of Marines, Goliaths or Valkyries make perfect targets for these Mutalisks. The Tanks are soon forced to retreat.
Mutalisks overwhelm Terran defenses Mutalisks finish off a Terran Town
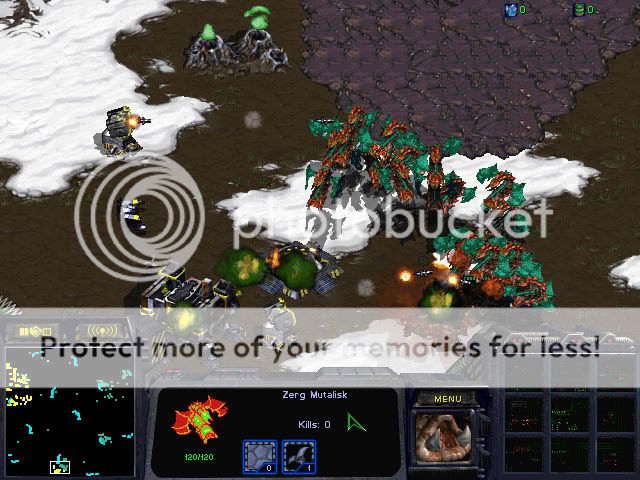
In large enough numbers, Mutalisks can overwhelm anti-air defenses such as Missile Turrets and Bunkers (even being repaired). If the Terran enemy does not use Irradiate, Valkyries, and Battlecruisers, large groups of Mutalisks will put a quick end to them.

Mutalisks finish off a Terran town.
Countermeasures
Terrans
Marines are the best means of defense against an oncoming Mutalisk group with their Normal damage attack and cheap cost. If backed by Medics and Stimpacked or protected within a Bunker, the Marines can cause serious damage to Mutalisks.
Cloaked Wraiths have the advantage over Mutalisks if there are no detectors nearby.
Irradiate from Science Vessels can be particularly nasty to stacked groups of Mutalisks.
Battlecruisers in groups can withstand many Mutalisk attacks and with their powerful Laser Batteries, they can quickly whittle down a group of Mutalisks.

A Science Vessel Irradiates Mutalisks as they try to attack some Siege Tanks.
Protoss
In the early game, Dragoons are necessary to defend against Mutalisk attacks, however, it's a good idea to make sure they stay near Shield Batteries and recharge their shields whenever possible.
The High Templar's Psionic Storm is probably the best defense against Mutalisks since any Mutalisk will perish should they remain under the entire duration of a Psionic Storm. If they happen to be stacked beneath one, they will all take heavy damage.
Archons in numbers can cause staggering damage to groups of Mutalisks with their psionic might and splash damage.
A few Photon Cannons hold off a Mutalisk attack.

Don't use Mutalisks to attack Archons unless you significantly outnumber the Archons. One Archon can take quite a few Mutalisks by himself.
Zerg
Hydralisks beneath Dark Swarm work well against Mutalisks, but in the open, Hydralisks usually aren't a good idea to use against them.
In Mutalisk vs. Mutalisk encounters, unit control, upgrades and sheer numbers will determine the outcome.
Scourge, though not very good against enemy Mutalisks by themselves, can be very useful if they're used to escort friendly Mutalisks. They can quickly dispatch or heavily damage enemy Mutalisks, giving the friendly Mutalisks a much better chance of winning the encounter. Be sure to keep close control of the Scourge though, making sure that all of them don't target a single Mutalisk.
Devourers with their splash Spore attack and heavy armor can withstand groups of Mutalisks, but not if they're severely outnumbered. Use them sparingly.
Upgrades
Flyer Attack - Each upgrade adds +1 to the Flyer Attack for a total of +3 when fully upgraded.
Flyer Carapace - Each upgrade adds +1 to the Flyer Carapace for a total of +3 when fully upgraded.
Special Abilities
Once the Spire has been morphed into the Greater Spire, the Mutalisk becomes capable of mutating into the Guardian. During the cocoon phase, the mutating Mutalisk is vulnerable to attack and can be reverted back into its Mutalisk form. However, once the Guardian emerges the transformation cannot be reversed.
Also, after the Greater Spire has been set up, the Mutalisk becomes capable of mutating into another form: the Devourer. As with the Guardian, the morphing Mutalisk is vulnerable to attack and has the option to revert back to its Mutalisk form. However, once the Devourer emerges, the Mutalisk cannot be recovered nor can it be morphed into a Guardian.
|
|
|
|
|
|
|
|
|
|
|
|
|
|
|
Posted: Fri Jun 01, 2007 4:21 pm
Scourge

Hit Points: 25
Size: Small
Supply: 0.5
Cost: 12.5 37.5
Build Time: 30
Produced at: Lair/Hatchery
Requires: Spire
Base Ground Attack: N/A
Base Air Attack: 110
Base Armor: 0
Range: 1
Sight: 5
Cooldown: Instant
Production Hot Key: S
The Scourge serve as kamikaze-attack flying units, capable of causing 110 damage to aerial targets. Like Zerglings, Scourge spawn in pairs from a single Larva and can be produced in mass numbers in a very short period of time.
Their low vitality (HP) and inability to hit ground targets make them vulnerable to attack and therefore they should be used with stealth and caution so that they can best achieve their destructive potential. They prey easily on lone or small groups of enemy air units, but they lose their usefulness against larger groups of aerial units capable of counterattack.
To get the most of the Scourge, use them in combination with Mutalisks, Guardians or Devourers. The Scourge can quickly even the odds in the favor of an already established Zerg air force and with the Mutalisks/Guardians/Devourers there to absorb most of the damage from the enemy, the Scourge have a much better chance of a successful attack run.
Scourge acquire their targets very quickly and if used to patrol key areas, can be useful for putting an end to an enemy drop tactic. However, in the battlefield, all available Scourge may lock onto a single target and may simultaneously attack, resulting in a huge waste of resources for only one kill. As a result, you should either keep a watchful eye and tight control on your Scourge groups or separate them into pairs in case of auto acquiring as well as for easier management during a heated battle.
Determining the number of Scourge for a Kill
One thing to keep in mind when using Scourge is knowing how many are needed to destroy any given target. Using too few Scourge will only damage a target and with the Terran ability to repair, Protoss ability to recharge shields and the Zerg ability to regenerate, only damaging a target can be a waste of time and resources. Using too many Scourge is a waste of precious Vespene Gas and should be avoided whenever possible. Listed below is the minimum number of Scourge needed to destroy each unit (but more may be necessary if these units are in groups):
Wraith - 2 Scourge
Dropship - 2 Scourge
Valkyrie - 2 Scourge
Science Vessel - 2 Scourge
Battlecruiser - 6 Scourge (1 will always be killed en route)
Observer - 1 Scourge
Shuttle - 2 Scourge
Scout - 3 Scourge
Corsair - 2 Scourge
Carrier - 5 Scourge
Arbiter - 4 Scourge
Overlord - 2 Scourge
Mutalisk - 2 Scourge
Guardian - 2 Scourge
Devourer - 3 Scourge
Of the listed units, the best choices for a Scourge attack are the Dropship, Science Vessel, Observer, Shuttle, Carrier, Arbiter, Overlord and Guardian. These units make prime candidates either because they have little or no means of stopping the Scourge attack run and the damage they can potentially cause make it worth it to kill them as quickly as possible to neutralize the threat. The one unit you will almost never want to kill using Scourge is the Battlecruiser. Their immense firepower can easily annihilate Scourge as they move in for the kill and if the Battlecruisers are in groups of 4 or larger, the sheer number of Scourge needed to kill even one Battlecruiser becomes ridiculous. At best, use Scourge to kill lone Battlecruisers and even then be wary of any support they might have from the ground or air. If you absolutely have to use Scourge against Battlecruisers, be sure to upgrade the Flyer Carapce. This can give the Scourge a slighty better chance of success by being able to survive two shots rather than one (given that the Battlecruisers are unupgraded).

Two Templars bail out just before Scourges destroy a Shuttle.
A group of Scourges shatter a Cloaked Wraith attack wing after being revealed by an Overlord.
Countermeasures
The Scourge are particularly vulnerable to anti-air ground units of any kind, so whenever possible, use those ground units to eliminate the Scourge threat.
Terrans
Marines and Goliaths can both attack Scourge with complete impunity.
Cloaked Wraiths can destroy packs of Scourge quickly (if undetected).
Irradiate from Science Vessels can quickly destroy/damage packs of Scourge.
Battlecruisers are the ultimate Scourge killers, especially with attack upgrades.
Protoss
Dragoons and Archons can both attack Scourge with complete impunity.
The High Templar's Psionic Storm can instantly eradicate groups of Scourge.
Fleets of Scouts or Corsairs can do well against Scourge.
If unescorted, Arbiters can use Stasis Field to halt an incoming Scourge attack.
Zerg
Hydralisks can attack Scourge with complete impunity.
Mutalisks or Devourers in large groups can deal with Scourge.
Upgrades
Flyer Carapace - Each upgrade adds +1 to the Flyer Carapace for a total of +3 when fully upgraded.
|
|
|
|
|
|
|
|
|
|
|
|
|
|
|
|
|
|
Posted: Fri Jun 01, 2007 4:29 pm
Queen

Hit Points: 120
Size: Medium
Supply: 2
Cost: 100M 100G
Build Time: 50
Produced at: Lair/Hatchery
Requires: Queen's Nest
Energy: 200 (Upgrade to 250)
Base Ground Attack: N/A
Base Air Attack: N/A
Base Armor: 0
Range: N/A
Sight: 10
Cooldown: N/A
Production Hot Key: Q
The Zerg "Queen" (a misnomer, as it does not produce Larvae) is capable of producing biotoxins that have dramatic effects on both Zerg and other lifeforms. There have also been reports of Queens spawning smaller Zerg creatures (Broodlings) by injecting other species with thrown egg clusters. Like the Overlords, the Queens appear to tend to Larvae, and are generally found near the central nest.
A Queen has no physical attack of its own, but it does have the ability to hover through the air at great speeds, allowing it to escape from harm relatively quickly. What makes the Queen a truly deadly Zerg breed are the abilities it has at its disposal including: Ensnare, Spawn Broodling and Parasite. For more details on these abilities, check out the Special Abilities section below.
Countermeasures
Queens are completely vulnerable to attack of any kind, however the ability to fly limit the number of units that can successfully destroy a Queen. Know which units can hit these Queens and use every opportunity to hunt them down.
Terrans
Stimpacked Marines are a prime choice to hunt down any Queen hovering over open ground.
Goliaths with the Charon Booster upgrade can hit Queens from a great distance while inflicting considerable damage. They come in especially handy for hitting Queens using terrain to stay out of harm's way (i.e. over water, space, high ground).
Missle Turrets are probably the best defensive measure against Queens. Build a ring of them around a base to keep the Queens at bay.
Cloaked Wraiths can quickly dispatch Queens, but beware of being Ensnared or Parasited in the process.
Use Irradiate with Science Vessels to destroy Queens.
Battlecruisers and Yamato Gun are especially nice for killing stray Queens unfortunate enough to get in the way.
Protoss
Use Dragoons to clear out any Queen presence over open ground.
Scouts and Corsairs make excellent Queen hunters with their powerful attacks and quick speed.
The High Templar's Psionic Storm can be useful for damaging any idle Queens within range. However, with their quick speed and reflexes, Queens will typically escape before a Psionic Storm can deal its full damage to them.
Carriers can be used to chase away Queens, but with the Queen's speed, it is usually difficult to actually kill one with a Carrier.
Use the Dark Archons Maelstrom ability to immobilize a Queen, use the Feedback ability to cripple or damage it, or take over a Queen completely with Mind Control.

4 Corsairs chase down a Queen.
|
|
|
|
|
|
|
|
|
|
|
|
|
|
|
|
|
|