|
|
|
|
|
|
|
 Posted: Sun Jun 09, 2013 6:27 pm Posted: Sun Jun 09, 2013 6:27 pm
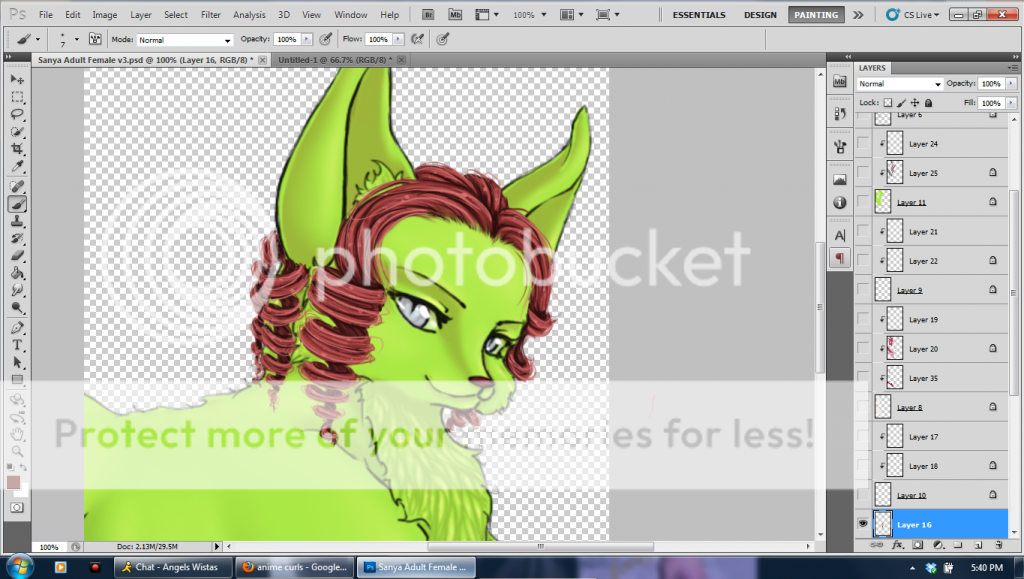
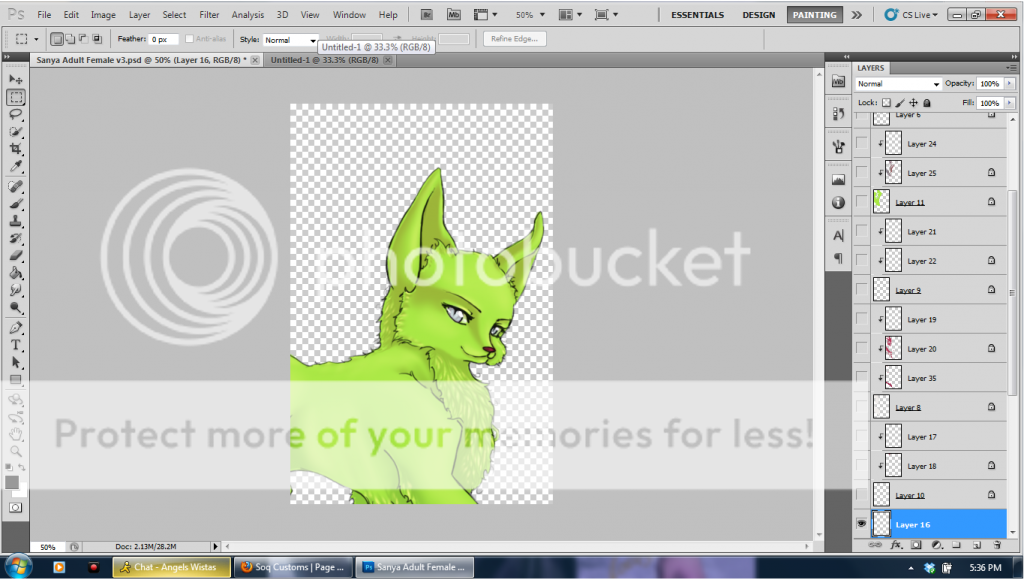 Today I will show you how to do curly hair. I will do this all on 1 layer, you can do this on multiple layers but I generally color hair all on one layer like most of my edits. To begin I was using the Female Sanya template and somewhere I accidentally started coloring on one of my prtsc pictures if you notice further prtscs looking weird.. that is why, but its no matter. I still get the same result either way. Now on to the tutorial. Today I will show you how to do curly hair. I will do this all on 1 layer, you can do this on multiple layers but I generally color hair all on one layer like most of my edits. To begin I was using the Female Sanya template and somewhere I accidentally started coloring on one of my prtsc pictures if you notice further prtscs looking weird.. that is why, but its no matter. I still get the same result either way. Now on to the tutorial.
|
 |
|
|
|
|
|
|
|
|
|
|
|
|
|
Posted: Sun Jun 09, 2013 6:31 pm
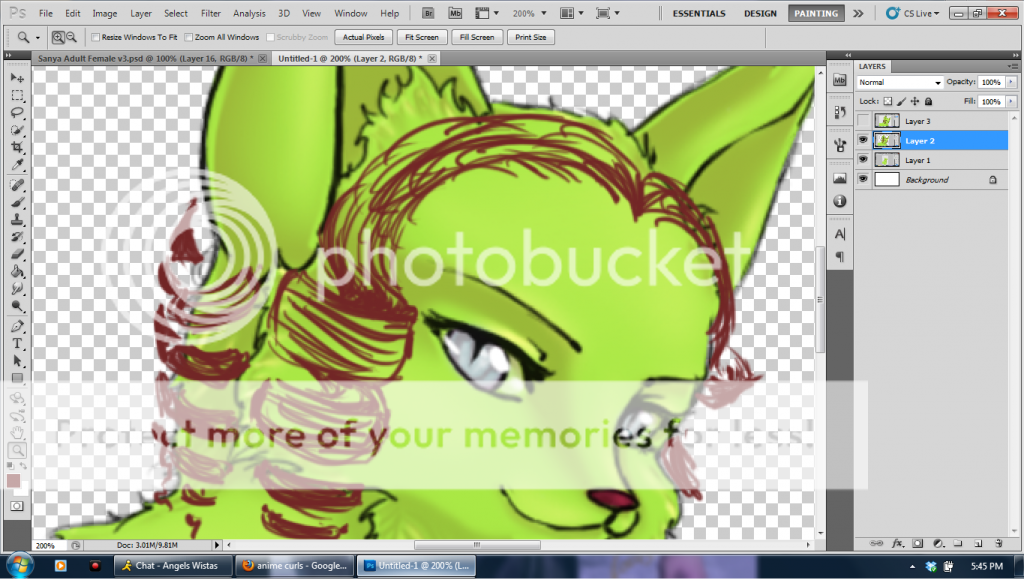
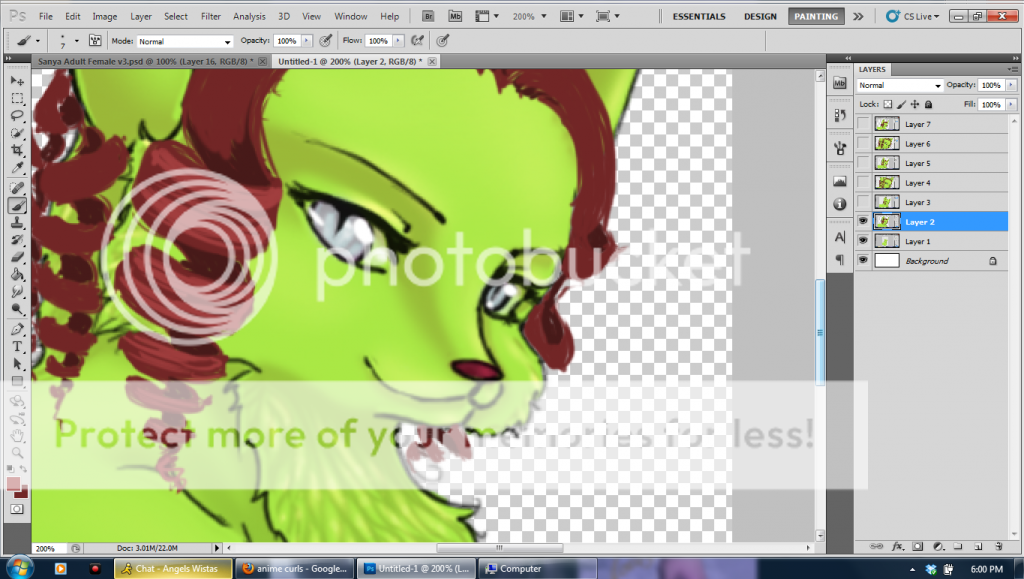
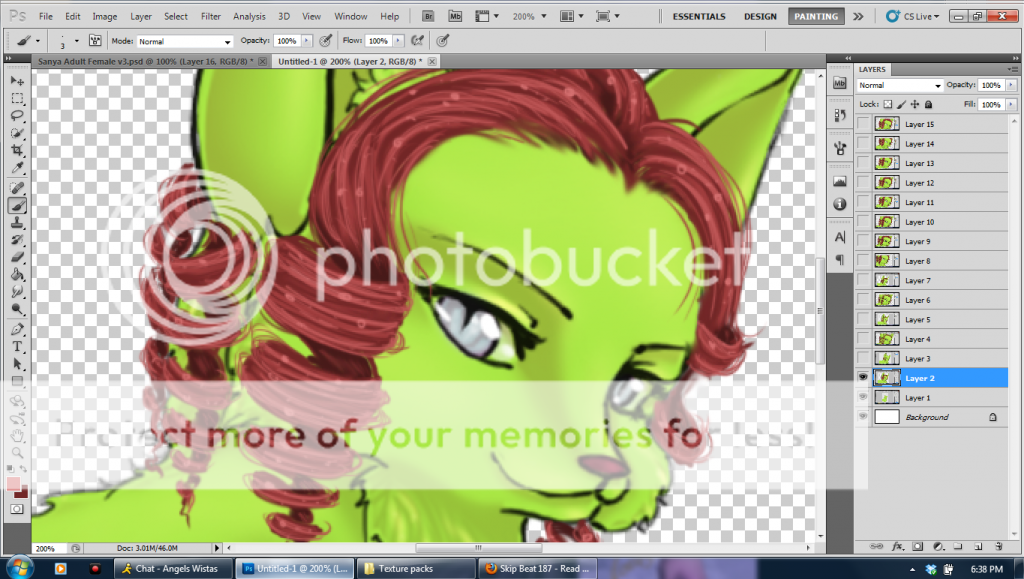
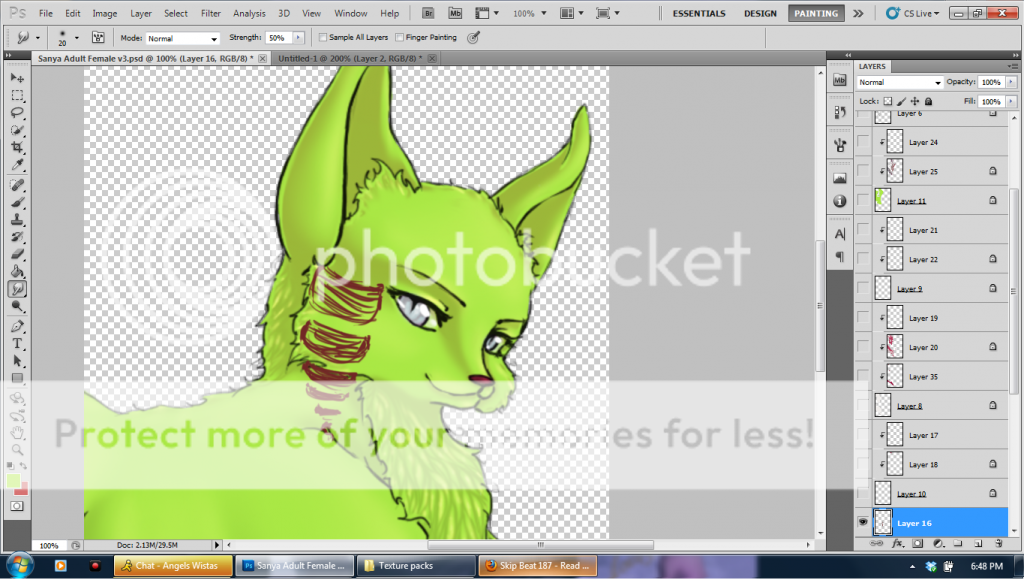 First take a fuzzy brush of any size smaller than 10 pixels and begin to sketch in the areas where the curls on your pet are going to go. This is just the rounded part of the curls, nothing more. They will start out big at the top of the hair because there is more hair up there and then get gradually smaller towards the end usually. Your color needs to be a shadow color, not your base color of hair. It should be the darkest color that your curls are going to be. First take a fuzzy brush of any size smaller than 10 pixels and begin to sketch in the areas where the curls on your pet are going to go. This is just the rounded part of the curls, nothing more. They will start out big at the top of the hair because there is more hair up there and then get gradually smaller towards the end usually. Your color needs to be a shadow color, not your base color of hair. It should be the darkest color that your curls are going to be. 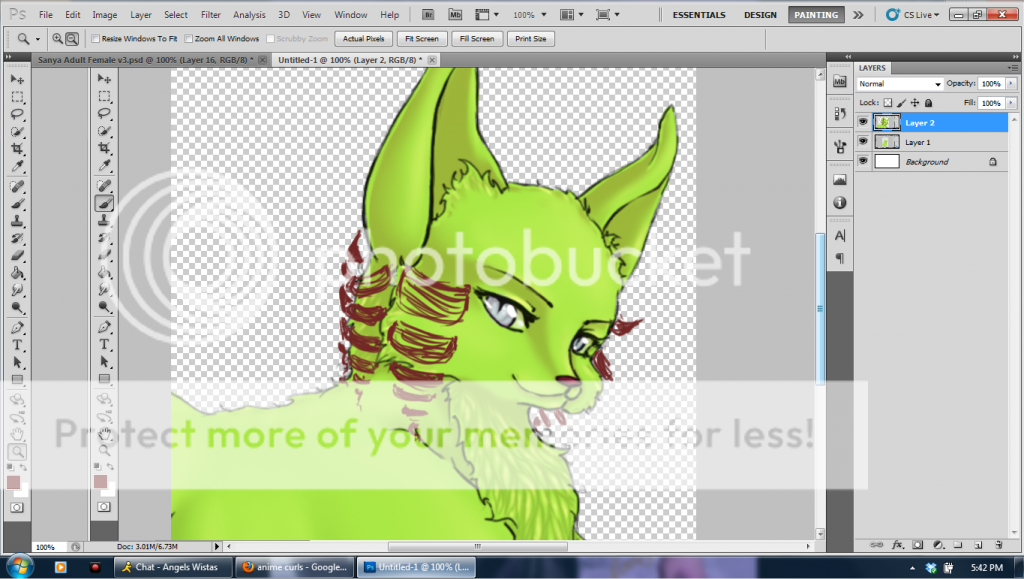 Do this with all your curls. Do not worry about perfection ever with hair. There is no need for it. You will never make lineart for hair here if you follow my tutorial the way I make it. It is much easier. Do this with all your curls. Do not worry about perfection ever with hair. There is no need for it. You will never make lineart for hair here if you follow my tutorial the way I make it. It is much easier.
|
|
|
|
|
|
|
|
|
|
|
|
|
|
|
|
|
|
Posted: Sun Jun 09, 2013 6:37 pm
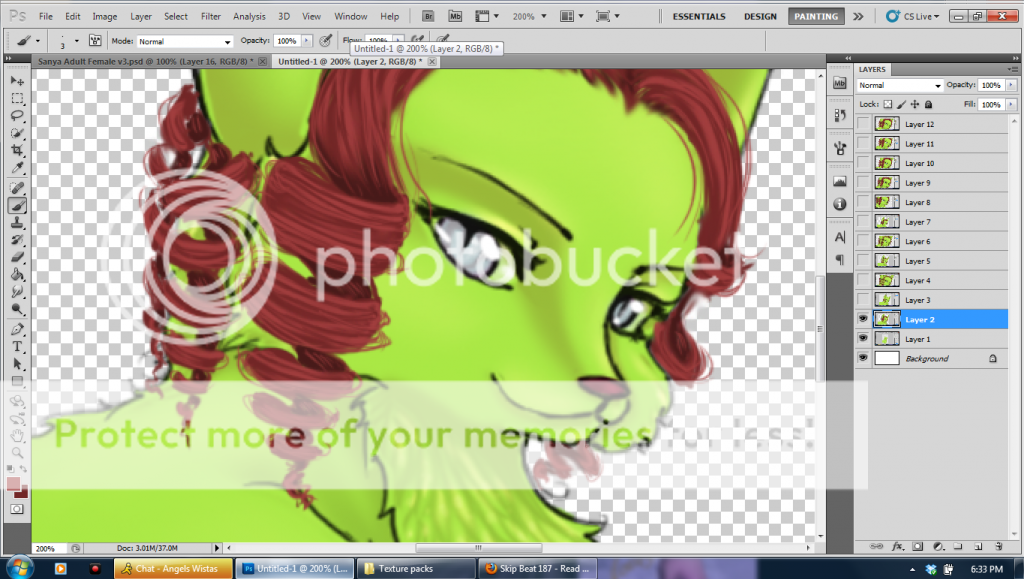
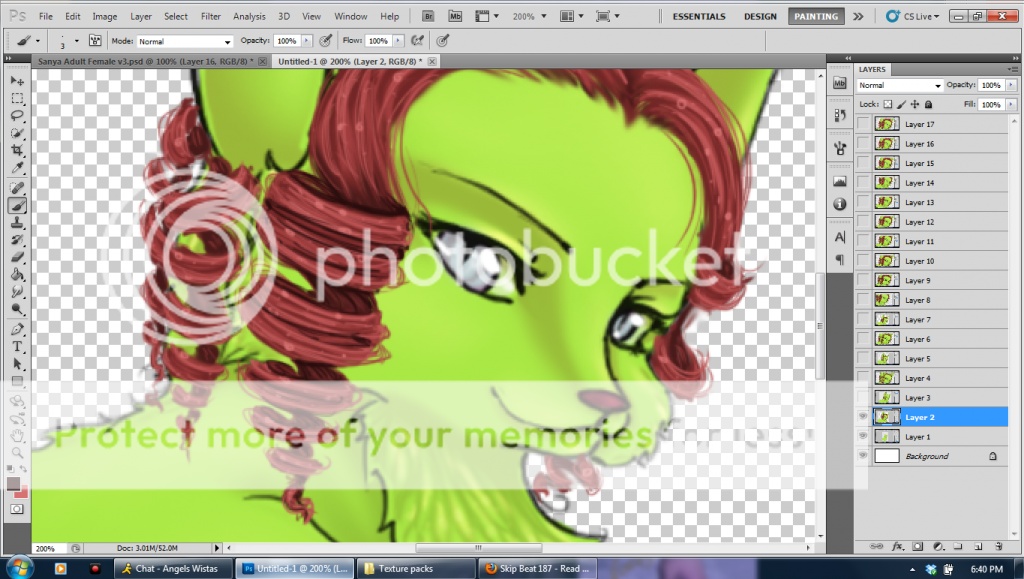
 Now sketch in really dark (pressing hard on your tablet if you have one) where your hair meets your curl on one side. It should not matter which way it curls as long as all curls are going in the same direction, it will be fine. They should form an S pattern if you follow mine exactly as they are. This is because when your curls are going down to the next they must connect like so Now sketch in really dark (pressing hard on your tablet if you have one) where your hair meets your curl on one side. It should not matter which way it curls as long as all curls are going in the same direction, it will be fine. They should form an S pattern if you follow mine exactly as they are. This is because when your curls are going down to the next they must connect like so---- /// // / ---- Corner to corner you see. Once you've completed sketching connecting all the curls and the rest of your hair's design it should look something like this.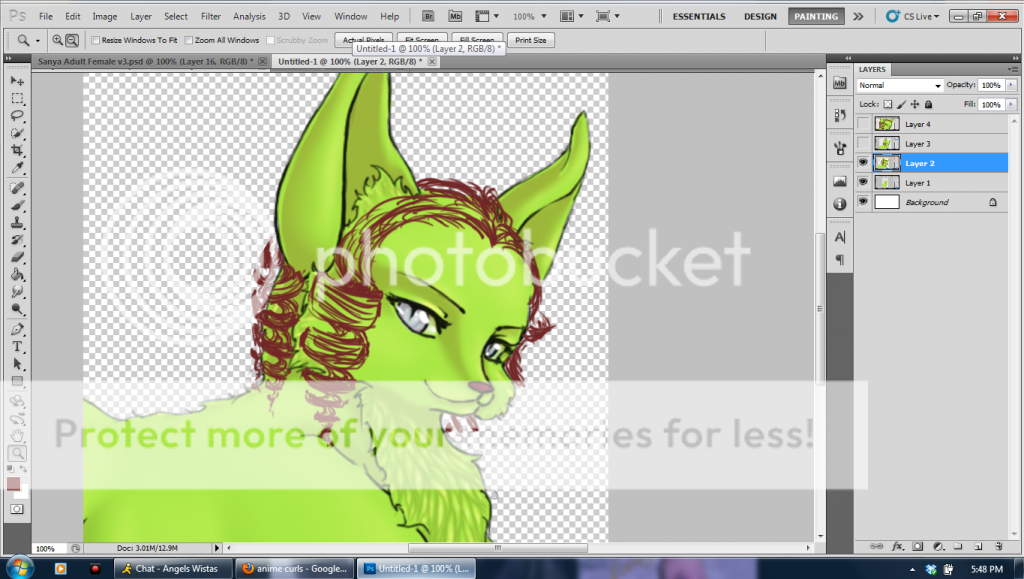 It looks rather messy now but that's fine. We are going to build upon this now just like you would paint on a canvas. It looks rather messy now but that's fine. We are going to build upon this now just like you would paint on a canvas.
|
|
|
|
|
|
|
|
|
|
|
|
|
|
|
Posted: Sun Jun 09, 2013 6:39 pm
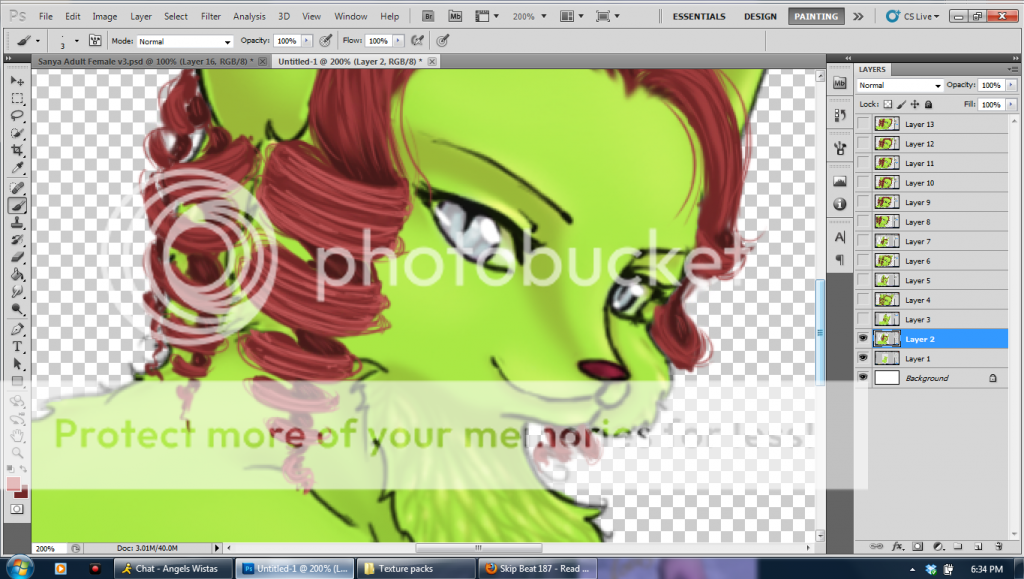
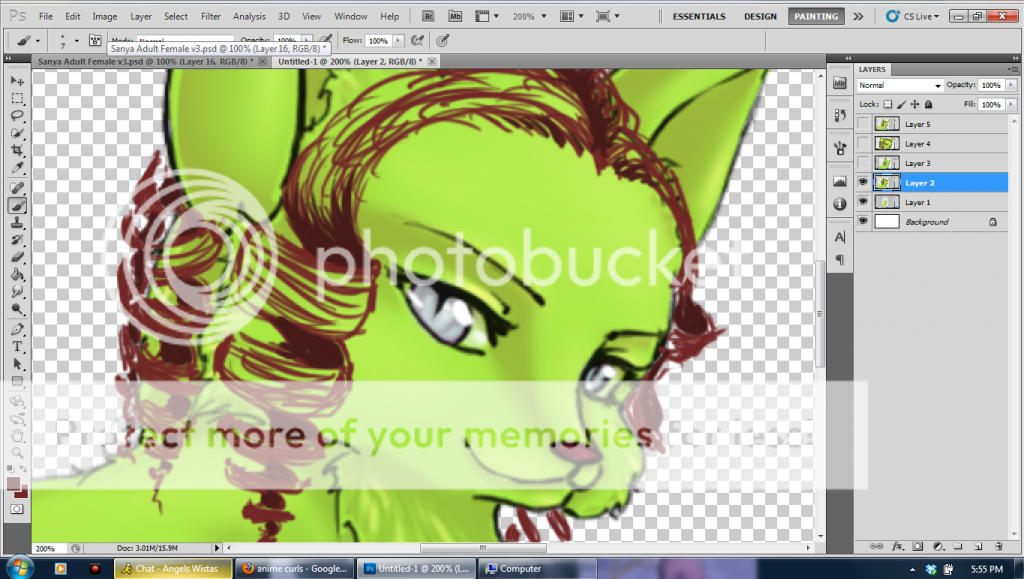 With a darker color, show the shadows of what is behind the curls where they are curling and any other areas of your hair that is hidden from the light. With a darker color, show the shadows of what is behind the curls where they are curling and any other areas of your hair that is hidden from the light. 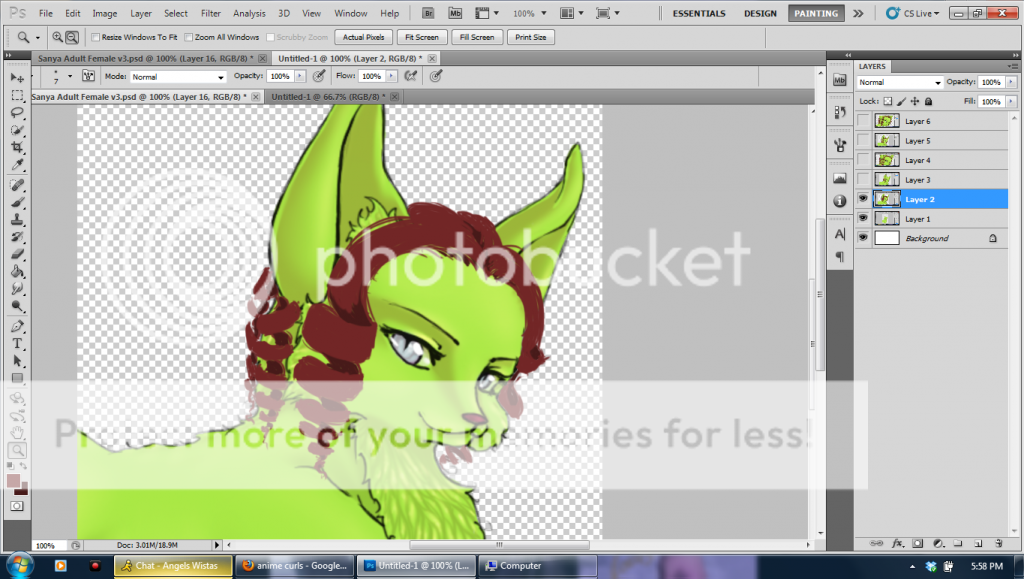 Then with your previous color begin to block in your hair. Now you know what is separated of it for your curls. You can see it. Then with your previous color begin to block in your hair. Now you know what is separated of it for your curls. You can see it.
|
|
|
|
|
|
|
|
|
|
|
|
|
|
|
|
|
|
Posted: Sun Jun 09, 2013 6:44 pm
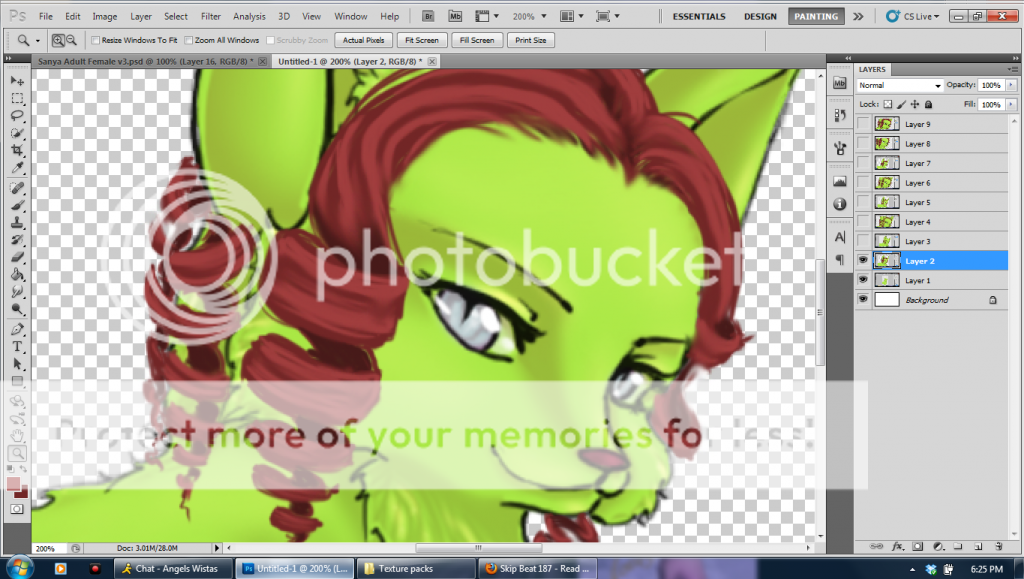
 Now begin to block in LARGE Strands with the real color of your hair. These are strands you know the light is going to hit the most of so block in these areas completely. You will need to make sure to alternate between it and your darker color in order to make the strands the way you want. I have learned that for a lot of anime style hair, that the curls are darker in the middle almost like layered fabric if you know how to make that, if not, just do what you can to make your hair strands here in the way you know how to make hair. Now begin to block in LARGE Strands with the real color of your hair. These are strands you know the light is going to hit the most of so block in these areas completely. You will need to make sure to alternate between it and your darker color in order to make the strands the way you want. I have learned that for a lot of anime style hair, that the curls are darker in the middle almost like layered fabric if you know how to make that, if not, just do what you can to make your hair strands here in the way you know how to make hair. 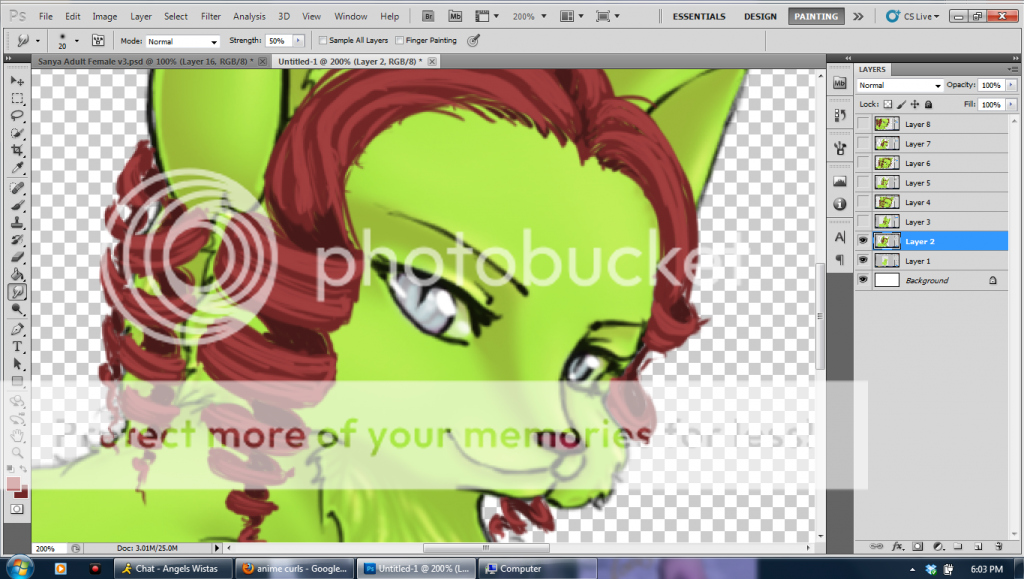 When you've completed making LARGE strands it should look similar to this. You shouldn't have many small ones other than its sketchy so that's okay. When you've completed making LARGE strands it should look similar to this. You shouldn't have many small ones other than its sketchy so that's okay.
|
|
|
|
|
|
|
|
|
|
|
|
|
|
|
Posted: Sun Jun 09, 2013 6:47 pm
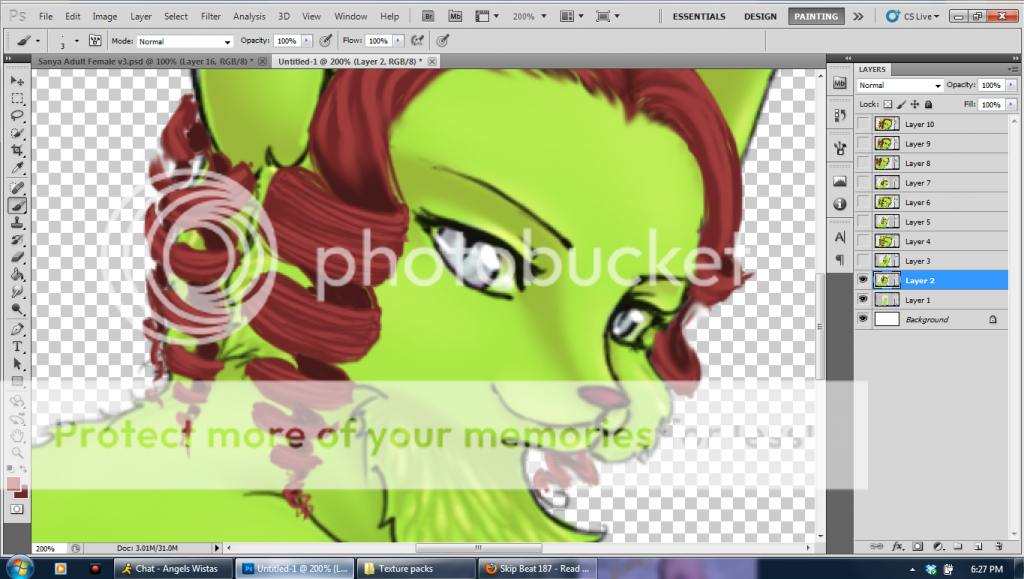
 Next Smudge in your hair lightly. You want it all to look connected with each other and shaded. Next Smudge in your hair lightly. You want it all to look connected with each other and shaded.
|
|
|
|
|
|
|
|
|
|
|
|
|
|
|
|
|
|
Posted: Sun Jun 09, 2013 6:50 pm
 Now you begin to make little strands through the large strands of hair you just created. Be sure to alternate between your colors so you get proper strands. Now you begin to make little strands through the large strands of hair you just created. Be sure to alternate between your colors so you get proper strands. 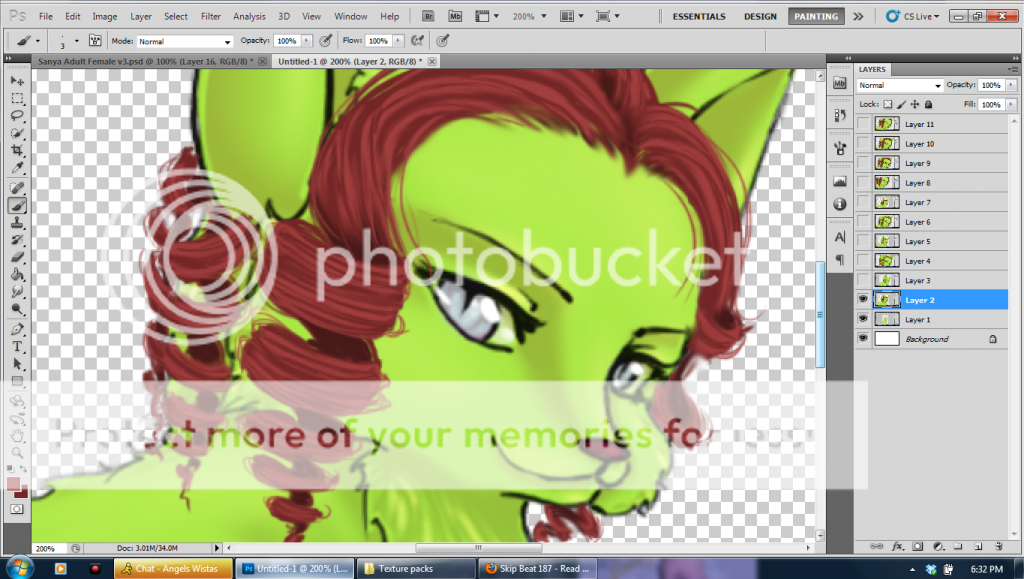 Extend your base color strands outward from where you currently have your hair, giving the effect of "fly aways" or hair that is looser than the rest. Hair is not perfect when you have it somewhere is it? I've never seen curls that stay perfectly in spirals for very long irl if I do say so myself even with hair spray. Extend your base color strands outward from where you currently have your hair, giving the effect of "fly aways" or hair that is looser than the rest. Hair is not perfect when you have it somewhere is it? I've never seen curls that stay perfectly in spirals for very long irl if I do say so myself even with hair spray.
|
|
|
|
|
|
|
|
|
|
|
|
|
|
|
Posted: Sun Jun 09, 2013 6:52 pm
 Next take the darker color and put it in the DARKEST color you had made there for your spirals so it looks like it has a few strands being hit by the light there. That is all you will have to do there. Next take the darker color and put it in the DARKEST color you had made there for your spirals so it looks like it has a few strands being hit by the light there. That is all you will have to do there.
|
|
|
|
|
|
|
|
|
|
|
|
|
|
|
|
|
|
Posted: Sun Jun 09, 2013 6:55 pm
 Now begin highlights. You will want a color lighter than your base color but not so bright its like OMG WTF BRIGHT..... it should be subtle unless you have a thing for Shiny hair and in that case save your shinies for the "shiny" part of hair coming up. we aren't there yet. You also want to place these on or very near to where you've put all your base color strands or you will mess up the effect you have now for shading up to this point. Now begin highlights. You will want a color lighter than your base color but not so bright its like OMG WTF BRIGHT..... it should be subtle unless you have a thing for Shiny hair and in that case save your shinies for the "shiny" part of hair coming up. we aren't there yet. You also want to place these on or very near to where you've put all your base color strands or you will mess up the effect you have now for shading up to this point. 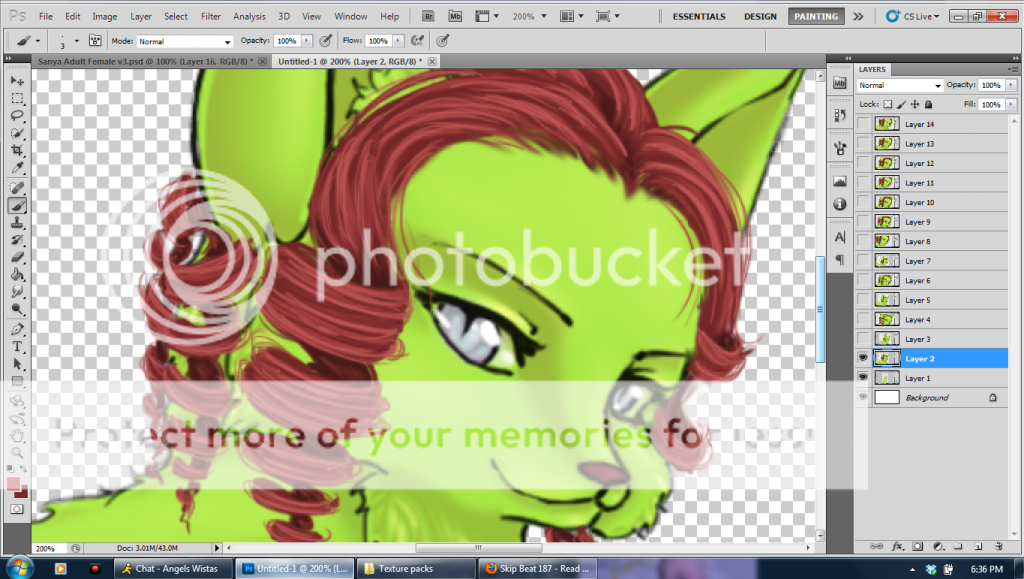 Do this where you need to and you will be finished with this. Do this where you need to and you will be finished with this.
|
|
|
|
|
|
|
|
|
|
|
|
|
|
|
Posted: Sun Jun 09, 2013 6:58 pm
 Now pick the next lightest color you will need. These are your "shinies" of your hair. If you have a particular style you want to use for this, go for it, idc.. but what I use is dots, different sized dots. I place these all over on the highlights and then once I'm finished I have completed hair. it is random where I put them, I just don't clog up the hair with a ton of them. Now pick the next lightest color you will need. These are your "shinies" of your hair. If you have a particular style you want to use for this, go for it, idc.. but what I use is dots, different sized dots. I place these all over on the highlights and then once I'm finished I have completed hair. it is random where I put them, I just don't clog up the hair with a ton of them. 
|
|
|
|
|
|
|
|
|
|
|
|
|
|
|
|
|
|
Posted: Sun Jun 09, 2013 7:01 pm
 Now your hair is really going to pop. Take a color darker than your darkest color, it should be near to black but not so if you are using colored lines like wistas does, and then go around making in the darkest areas of the hair almost "strands" and then around the some of the edges just so define them a little bit more. Now your hair is really going to pop. Take a color darker than your darkest color, it should be near to black but not so if you are using colored lines like wistas does, and then go around making in the darkest areas of the hair almost "strands" and then around the some of the edges just so define them a little bit more. 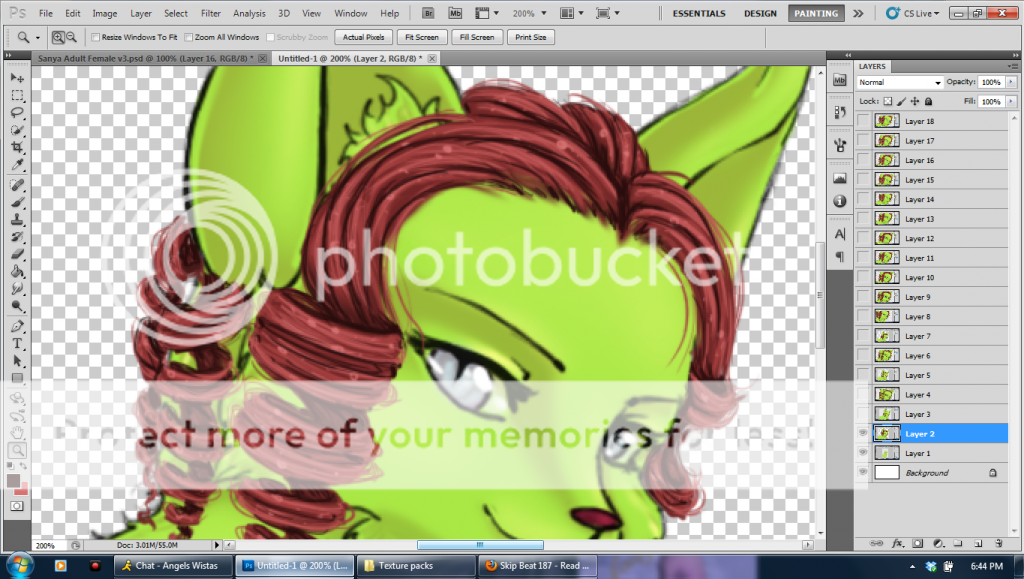 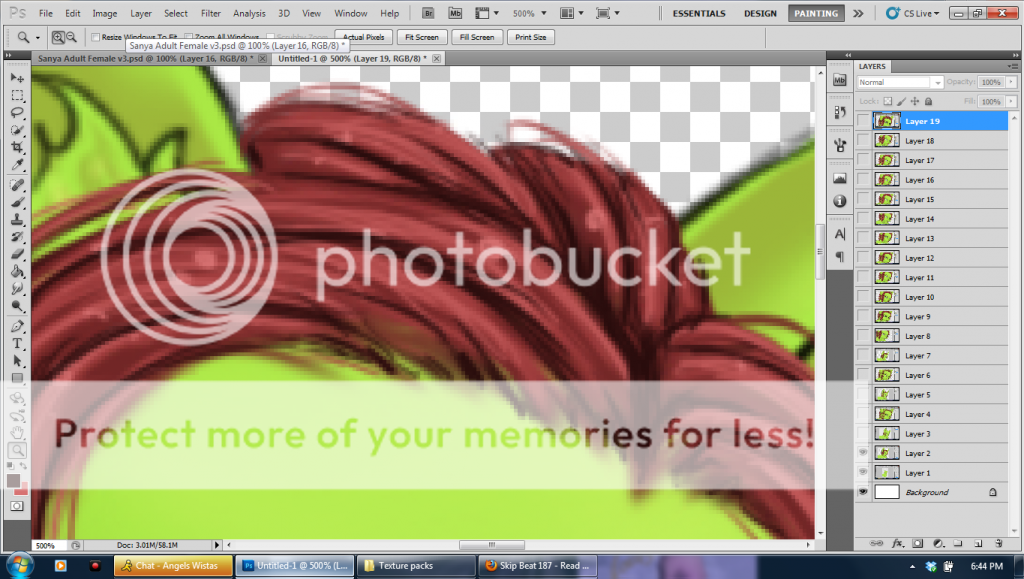 Be messy with it, its okay see. Be messy with it, its okay see. 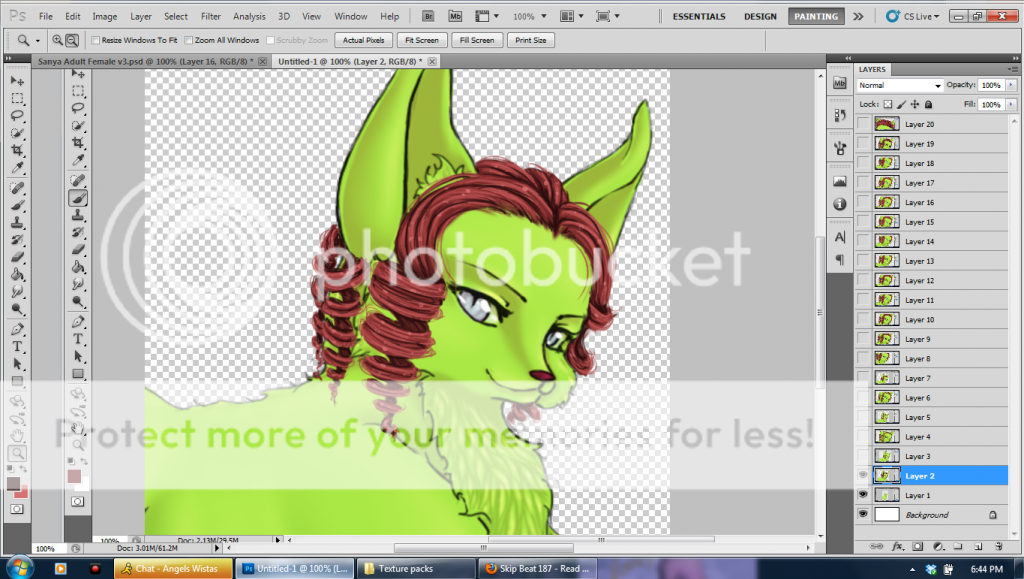 no need for perfect lines or anything when you make this. Its still so pretty no need for perfect lines or anything when you make this. Its still so pretty
|
|
|
|
|
|
|
|
|
|
|
|
|
|
|
Posted: Sun Jun 09, 2013 7:03 pm
Then.. Take your lightest color again, the one you made the shinies with, and make a few fly away strands that will go over the dark lines you just made here or there. It gives depth. 
|
|
|
|
|
|
|
|
|
|
|
|
|
|
|
|
|
|
Posted: Sun Jun 09, 2013 7:09 pm
 Last, where your hair connects to your pets forehead, you want to make that appear like its coming out of the pet's head right? well, erase a bit there jagged like to make it seem like the pet's base color is "flowing" INTO the hair you just made and smudge it just a little. It will look like the pets body hair and the pets hair on its head were just going into each other there instead of there suddenly being.. BAM hair. Last, where your hair connects to your pets forehead, you want to make that appear like its coming out of the pet's head right? well, erase a bit there jagged like to make it seem like the pet's base color is "flowing" INTO the hair you just made and smudge it just a little. It will look like the pets body hair and the pets hair on its head were just going into each other there instead of there suddenly being.. BAM hair.
Now if this is all you wished to do, you would be done. But you may add multiple layers of curls in the same way, just adding curls that are "underneath" the current top ones. They would have to be darker than the top curls or else they wouldn't look right if they were not shaded properly by making them darker.
You can also add in multiple colors instead of making just 1 color. Once you created all of this point. It is simple to add a new color just by adding in strands of that color in. You've made strands already there on your base color, just color over them with new colored strands. If you do it right, you'll have pets like this.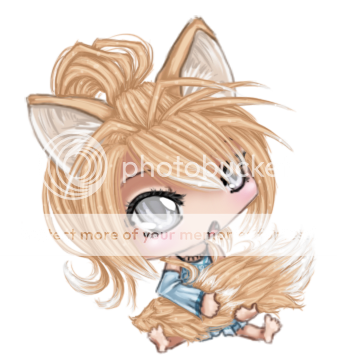 See her tail there. I had done it in cream first and then added the white. See her tail there. I had done it in cream first and then added the white.
|
|
|
|
|
|
|
|
|
|
|
|
|
|