|
|
| What do you do as part of the KH fandom? |
| I draw KH fanarts! |
|
20% |
[ 1 ] |
| I write KH FF! |
|
0% |
[ 0 ] |
| I just love to play! |
|
40% |
[ 2 ] |
| I RP! :D |
|
0% |
[ 0 ] |
| I discuss theories! |
|
0% |
[ 0 ] |
| I watch my friends play. Does that count? |
|
0% |
[ 0 ] |
| I like to look at the art. ^^ |
|
0% |
[ 0 ] |
| All the above! I'm a TRUE fan! :D |
|
40% |
[ 2 ] |
|
| Total Votes : 5 |
|
|
|
|
|
|
|
|
 Posted: Wed Apr 09, 2008 11:02 am Posted: Wed Apr 09, 2008 11:02 am
~*KH Reference Guide*~ Hello everyone and welcome to the KH Guide! This is the place where we try to store as much KH info as possible for our members! Use this thread to enrich your Fan Fictions, RPs & theories! You can also give us feedback on the information or update us on things you know or find out! Remember, knowledge is power! *Most of this was originally done by Belladona Nightshade.
|
 |
|
|
|
|
|
|
|
|
|
|
|
|
|
Posted: Wed Apr 09, 2008 11:04 am
~*Story up to Date*~(as written in Wikipedia)Kingdom Hearts begins on Destiny Islands, where Sora, Riku and Kairi live. The three friends seek to leave the islands to explore new worlds and have prepared a raft for this purpose. One night, the islands are attacked by darkness and shadow creatures. Sora seeks out his friends, only to find Riku, who disappears into darkness. At the same time, Sora obtains the Keyblade. Despite his efforts at battling the shadow creatures, the islands are destroyed, and Sora is left adrift. Meanwhile, King Mickey Mouse has left his world to deal with the increasing power of darkness and left instructions for mage Donald Duck and knight Goofy to find the "key". Donald and Goofy use a Gummi Ship to travel to Traverse Town, where Sora has drifted. Sora encounters the shadow creatures again, and meets Leon, who explains the shadow creatures are called Heartless, creatures that consume hearts, and that the Keyblade is the only weapon capable of defeating them. A man named Ansem, the leader of Leon's home world, is said to have studied the Heartless. Sora meets Donald and Goofy and the three decide to travel together: Donald and Goofy to find Mickey, and Sora to find Kairi and Riku. The three travel to various worlds based on Disney films, finding that the Keyblade also locks "Keyholes", passages that the Heartless use to take the heart of the world. A group of Disney villains, led by Maleficent, seek out the seven Princesses of Heart to unlock the Keyhole that leads to Kingdom Hearts, a repository of knowledge and power and the source of all hearts. This group includes Riku, who Maleficent promises will help find Kairi. Maleficent sows distrust in Riku, telling him that Sora has abandoned him and Kairi for new friends and the Keyblade. An increasingly antagonistic Riku finds Kairi's body, but cannot find her heart. Sora and his friends eventually arrive at Hollow Bastion, the home world of Ansem and the headquarters of Maleficent. Riku takes the Keyblade from Sora, claiming that he was simply the "delivery boy". Donald and Goofy, taking their order to follow the "key" seriously, leave with Riku. Sora then challenges Riku again, stating that his heart derives strength from his friends; his friends return to him, as does the Keyblade. Shamed, Riku meets a cloaked man who goads him to give into the darkness. The three engage and kill Maleficent but then meet a strangely-behaved Riku with a Keyblade that unlocks hearts. Sora finds Kairi's body and Riku, who reveals himself to be Ansem, possessing Riku's body. Ansem explains that Kairi is a Princess of Heart and that her heart was trapped within Sora's body since Destiny Islands was decimated. After defeating Ansem, Sora uses Ansem's Keyblade to unlock his heart, releasing both his and Kairi's heart. Kairi's heart returns to her body, in turn completing the final Keyhole, while Sora's heart becomes a Heartless. Sora is then returned to human form by Kairi's heart and resolves to follow Ansem. Ansem is found in End of the World, the combined remnants of worlds taken by the Heartless. Ansem explains his belief that darkness is the heart's true essence, and he seeks Kingdom Hearts, as that would be the ultimate darkness. However, upon opening the door to Kingdom Hearts, it reveals its light, killing Ansem. Beyond the door are Mickey and Riku, and they help Sora and the others close the door, as there are many Heartless beyond it. Mickey and Sora use their Keyblades to lock the door. The worlds reconstruct themselves, separating Sora and Kairi. The game concludes as Sora, Donald, and Goofy resolve to find Riku and Mickey. Kingdom Hearts: Chain of Memories takes place directly after the ending of the first game, Kingdom Hearts. Sora and his friends Donald, Goofy and Jiminy Cricket are walking down a winding path, when a mysterious man dressed in a black, hooded coat appears. He directs Sora towards a massive fortress called Castle Oblivion and then disappears. When the travelers enter, they find the mysterious figure again. When Sora and his companions attempt to engage the figure, they find that their abilities seem to have no effect. The figure explains that they forgot all of their abilities when they entered the castle.He continues by creating a deck of cards made from Sora's and his friends' memories, and tells them that everything they encounter in this castle will be based on their memories. However, the higher they go, the more memories they will lose in the process. A cloaked figure explains the rules of Castle Oblivion. Meanwhile, floors below, Riku has been transported from the realm of darkness and fights his personal demons as he battles upward from the basement levels of Castle Oblivion. Neither Riku nor Sora, however, are aware that they are being manipulated by a mysterious group called the Organization. Marluxia, the Organization's lord of Castle Oblivion, hopes to control Sora with Naminé's memory altering powers and use him to overthrow the rest of the Organization. Zexion and Lexaeus seek to counter Marluxia using Riku's as their pawn. As Riku ascends Castle Oblivion, he, like Sora, encounters various members of the Organization. Vexen fights Riku to obtain his data and creates a replica of him. The replica embraces the darkness and believes himself to be stronger. After the Riku Replica battles Riku and flees, Vexen decides to use the Replica against Sora, after reworking the Replica's memory with Naminé's powers. As Sora ascends through the castle, he battles Larxene, a co-conspirator in Marluxia's plot. Afterwards, he remembers the name of a friend of his that he forgot: Naminé. He learns that she is being held in the castle, and continues to ascend, clashing with the Riku Replica who now believes himself to be the real Riku. After witnessing the death of Vexen, Sora learns about his shifting memories and Marluxia's plans from Naminé; Axel, another Organization member who serves as a double agent, had allowed Naminé to meet Sora to foil Marluxia's plans. Sora forms an alliance with the Riku Replica—who discovers that his memory was also altered by Naminé—and they fight to the top of the castle and defeat Marluxia. Naminé then puts Sora and his friends into pod-like machines to help them regain the memories they lost in the castle, even though they would forget the events that transpired in the castle. As this occurs above, Ansem, who took over Riku's body in the previous game, attempts to regain control of Riku below, but is continually thwarted with the intervention of King Mickey. On the way, Riku battles another Organization member named Lexaeus, who sacrifices himself to force Riku's darkness to the surface. Later, Riku confronts by Zexion, a manipulative Organization member now seeking to dispose of Riku, but Riku embraces his darkness and overcomes him. Arriving in Twilight Town, Riku meets DiZ, an enigmatic man interested in Riku and sends him to speak with Naminé, but the Riku Replica, who now seeks to justify his existence, fights Riku. After eliminating the Replica, Riku learns from Naminé that what remains of Ansem lives in his heart. Riku chooses to face him and DiZ pulls Ansem from Riku's heart to battle. After defeating Ansem, Riku learns that as long as he has darkness at his command, Ansem still resides within him. He sets out with King Mickey as his companion. Kingdom Hearts II begins one year after Kingdom Hearts: Chain of Memories. Sora, Donald and Goofy have been asleep for the past year to regain their lost memories. Meanwhile, Roxas is trapped in a virtual simulation of Twilight Town created by DiZ so that Roxas, the Nobody of Sora, may merge with his original self to fully restore his power. This was done as part of DiZ's revenge on Organization XIII. DiZ's plans are threatened when Organization XIII's Nobodies infiltrate the virtual town, but Roxas finally merges with Sora. Sora, Donald and Goofy wake up in the real Twilight Town and King Mickey Mouse and Yen Sid send them on another journey. Their goal is to find Riku and stop the plans of Organization XIII, who control the Nobodies—the body and soul left over when a heart is turned into a Heartless. Sora also receives a new set of clothes that allow him to fuse with party members to gain special abilities, known as Drive Form. Afterwards, Maleficent is resurrected and joins with Pete to continue her quest for power. Sora travels to many Disney-themed worlds, both old and new, and resolves the troubles caused by Organization XIII, the Heartless, Maleficent and Pete, and local villains. Meanwhile, Kairi is kidnapped by Organization XIII. During a visit to Hollow Bastion, they again meet King Mickey, who reveals the true nature of Ansem, the antagonist of Kingdom Hearts. The Ansem who Sora defeated was actually the Heartless of Xehanort, a student of Ansem the Wise. Xemnas, the leader of Organization XIII, reveals himself to be the Nobody of Xehanort. Organization XIII's plan is revealed: they seek the power of Kingdom Hearts, which is the sum of all the hearts that Sora released by destroying the Heartless with his Keyblade. Sora then revisits the worlds to solve lingering problems and new complications, while seeking a path to Organization XIII's base of operations. Through a passageway in the virtual Twilight Town, Sora, Donald, and Goofy arrive at the World That Never Was, the headquarters of Organization XIII, with Kingdom Hearts looming overhead. There, Sora finds Kairi and Riku, who reveals the nature of Sora's and Roxas' relationship. Mickey meets DiZ, who reveals himself to be Ansem the Wise. Ansem the Wise uses a device that dissipates some of Kingdom Hearts' power, but a system overload causes the machine to explode and kill Ansem.[28] At the top of Organization XIII's castle, Sora and his friends battle Xemnas, who uses the remnants of Kingdom Hearts to power his multiple forms. After Xemnas' defeat, Sora and Riku are reunited with their friends at Destiny Islands, their home. The game concludes as Sora, Kairi and Riku read a mysterious letter stamped with King Mickey's seal.
3 New Games to come out Soon:
To be continued... on HK3... in like... 3 years. >_<
|
|
|
|
|
|
|
|
|
|
|
|
|
|
|
|
|
|
Posted: Wed Apr 09, 2008 11:06 am
~*Our Heroes*~
Learn about the main heroes of the series! Be warned however that certain spoilers will apply.
~*Sora*~
Age 14 (KH1) - 15 (KH2)
As a teenager he has his share of concerns, but overall, he manages to keep an upbeat attitude. He seems too simple-minded at times, but he has a strong sense of justice. By the time the KH2 comes around Sora is a year older (not to mention a few inches taller) and finds himself experiencing new feelings, even romantic ones for Kairi.
~*Riku*~
Age 15 (KH1) - 16 (KH2)
He may seem cool and collected for his age, but he is far from the quiet type. Always curious about the unknown, he begins to question the small, closed world in which he lives and his ambitions grow into something he never imagined. Riku is probably the one to go through the most self-doubt in the entire series. Though out KH1 he is always trying to find him place in the world and is persuaded that to do so, he has to sever ties with his past. By KH2 however, Riku is now sure for which side to fight on, even if he still believes himself unworthy of his friend's light.
~*Kairi*~
Age 14 (KH1) - 15 (KH2)
She arrived at Destiny Islands when Sora and Riku were little kids. She is originally from Hollow Bastion. It is revealed in Kingdom Hearts Final Mix that Xehanort sent her off from Hollow Bastion, knowing that she was a Princess of Heart and hoping she would lead him to the Keyblade bearer. She did, though Sora didn't have the Keyblade at the time, which is probably the reason why Xehanort didn't attack Sora outright. Though she may appear delicate, she possesses a strong, unyielding will. Kairi is stong and calm even in the most desperate of situations. The one thing that seems to fuel her strength is the believe in her friends (Riku and Sora) and that they will make it through the derkness no matter what. Her gentle but firm nature suits her well.
~*Donald and Goofy *~
Goofy is captain of the royal knights, a soldier who despises weapons. Under the king's orders, he accompanies Donald on the quest to find the key. An easygoing, clumsy knight with a warm and gentle heart.
Donald Duck is the court wizard and loyal servant to the king. He embarks on a journey to carry out the missing king's orders: to find a mysterious "key" and its owner. A feisty, impatient magician who gets into spats with Sora quite often.
~~~~~~~~~~~~~~~~~~~~~~~~~~~~~~~~~~~~~~~~~~~~~~~~~~~~~~~
~*Character Images*~
Sora
Sora in KH1
SoraOp KH1
HK1 Op (Sora Cute =3 )
Sora KH1 Flag
Sora in Chain of Memories
Sora in KH2
Seasalt Icecream
Riku
Riku in KH1
Riku Shadow
Rku & Sora Chain of Memories
Riku Blind
Riku Heartless
Riku in KH2
Riku Ending (Movie)
Kairi
Kairi KH1
Kairi KH1-2
Kair and Sora Reading King's letter
Kairi in KH2
Kairi Opening KH2
Kairi SchoolUniform KH2
|
|
|
|
|
|
|
|
|
|
|
|
|
|
|
Posted: Wed Apr 09, 2008 11:08 am
~*Worlds*~
In the Kingdom Hearts universe, travel between worlds is normally not possible.
Worlds are protected from extraterrestrial interference by an invisible shell. When the heart of a world is opened, the shell breaks apart, appearing as a meteor shower. Fragments from the wall are able to be constructed into "Gummi Ships", which serve as the main mode of travel between the various worlds. Gummi Ships are constructed from "Gummi blocks" and can be shaped into any structure; the origin of the Gummi Ship material allows for travel to other worlds. Gummi blocks can serve different functions, from navigation to offense and defense. Another method to travel between worlds are the "corridors of darkness"— inter-dimensional pathways which erode the user's heart with darkness. These pathways are normally used by Heartless and Nobodies, but have been used by other characters in the series.
Destiny Islands
A portion of the Destiny Islands, where the children play. The Destiny Islands are featured in all three of the main Kingdom Hearts games, though playable only briefly in Kingdom Hearts and Kingdom Hearts: Chain of Memories. They form an original world created for the Kingdom Hearts series. Some of the main characters of the series reside here; Sora, Riku, Kairi. Other characters include Tidus, Wakka, and Selphie, which were originally Final Fantasy characters. The world is enveloped by the darkness in the beginning of Kingdom Hearts, but is restored after the sealing of the door to Kingdom Hearts at the end. The islands are an archipelago that consists of several land masses. Close enough to the main islands to be reached by small boats is an island that several of the character visit for recreation. The keyhole of the islands is located here in a small cave which Riku discovered as a boy. The main island is a regular town with a school. A superstition of the island is the power of the paopu fruit which is said to bind together the destinies of any two people who share one.
Disney Castle
(found in KH 2 Only)
Disney Castle is the home to many classic Disney characters including Mickey, Donald and Goofy. It is featured in Kingdom Hearts and Kingdom Hearts II, though it is not accessible in the first game. Disney Castle is ruled by King Mickey, and his queen, Minnie Mouse. King Mickey has been absent for more than a year, having left without warning at the outset of the first wave of the Heartless. The world is protected by the Cornerstone of Light, a magical artifact that prevents darkness and the Heartless from entering the world. In Kingdom Hearts II Final Mix, a portal was added in this world. The portal leads to battle with Terra, a Keyblade-wielding knight that was featured in the unlockable trailers of Kingdom Hearts II.
Timeless River
Based on Steamboat Willie and other early Disney cartoons of that era, Timeless River is the "past" of Disney Castle, shortly before it was built.[34] This world is accessed via the door Merlin created in the Hall of the Cornerstone chamber in Kingdom Hearts II. The world is portrayed in black and white. Nomura had intended it to be this way from the beginning of development. The world has many throwback effects including intentionally poor sound quality to imitate old cartoons. In this grayscale world, Sora's character model is simplified to the style of early cartoons, while Goofy and Donald Duck revert to their original designs from when they first appeared in Disney cartoons. Past versions of many Disney characters also appear including Pete and King Mickey, who Pete refers to as the "boat-boy king", a reference to his previous employment on Pete's steamboat. Timeless River also contains reenactments of some popular Mickey Mouse cartoons with locations such as Lilliput and Scene of the Fire.
Traverse Town
Traverse Town is an original world that is featured in Kingdom Hearts and Kingdom Hearts: Chain of Memories. It acts as a hub of sorts for Sora during his journey. Its architecture is reminiscent of the High Victorian style popular in England during the 19th century. It serves as a home for people who manage to escape the destruction of their own worlds by unknowingly drifting through "corridors of darkness". Traverse Town is separated into three major districts. The First District is generally devoid of Heartless and houses various shops. The Second District contains the bell tower, a gizmo shop, and a small hotel. The world's keyhole is located in the fountain in this district. It also has the entrance to the Dalmatians' house. The Third District is a plaza that has been overrun with Heartless. This district leads to a guarded alcove where Merlin lives. It also is where Leon and his allies have their secret hideout. Aside from these areas, Traverse Town also has a sewer system where Leon practices his swordplay and a back alley behind the hotel.
Wonderland
Wonderland, based on Disney's thirteenth animated feature, Alice in Wonderland, is featured in Kingdom Hearts and Kingdom Hearts: Chain of Memories as one of the first worlds visited on Sora's journey. Its colorful inhabitants seem to speak in riddles and code. Wonderland is ruled by the despotic Queen of Hearts. The most dominant feature of Wonderland's entrance is the Bizarre Room. Many of the items here can be pushed flat into the walls and strange potions here can change Sora's size. The next area is the Queen's Castle where most of her courtly functions are carried out, a verdant hedge maze surrounds this area. Connected to the courtyard is the Lotus Forest, which leads to the Tea Party Garden. Throughout the world are hidden entrances to the Bizarre Room which have effects on the direction of its gravity.
Olympus Coliseum
Olympus Coliseum is featured in all three of the main Kingdom Hearts games. It is based on Disney's thirty-fifth animated feature, Hercules. The Coliseum is protected by Hercules and antagonized by Hades. Sora is able to train here and can compete in various tournaments. Olympus Coliseum is one of the smallest worlds in the first Kingdom Hearts, consisting of only the main entrance, a lobby and the coliseum itself. Because of the popularity of Hades, the Underworld was added to the sequel. In Kingdom Hearts II, Hades opens a portal to the Underworld near the exit of the Coliseum. The Underworld consists of its own "lobby" which is one boat ride across the river Styx to the Underdrome, the Underworld's equivalent to the Coliseum, the Lost Road to the Lock and the Cave of the Dead which leads to Hades' Chamber. All of these Underworld areas are infested with Heartless, as well as mysterious white puffs of smoke.
Deep Jungle
Deep Jungle is based on Disney's thirty-seventh animated feature, Tarzan, and is only featured in the first Kingdom Hearts game. It is a lush tropical forest of diverse animals and exotic plants. The primary inhabitants of this world are gorillas, who live in the secretive corners of the jungle and resist intrusion. An exploratory party has arrived to study them but its guide, Clayton, has other plans. The jungle is also home to hippos and other jungle creatures, including the Heartless' mimicry of the local animals. Traveling in this world is done by climbing up trees and jumping onto vines. Much of the world is covered with dense jungle but some areas have signs of civilized inhabitance. There is an abandoned treehouse near the canopy that contains the remains of a previous visitor to the world. Also, the camp set up by Clayton contains many conveniences including stoves and slide projectors. The Bamboo Thicket near the camp ultimately leads to the Waterfall Cave, a secluded place that hides the world's keyhole.
Agrabah
Agrabah is an arid desert city featured in all three of the main Kingdom Hearts games. It is based on the fictional city of Disney's thirty-first animated feature, Aladdin. Agrabah's hot climate disguises a world of intrigue, both magical and political, as an evil sorcerer schemes to usurp the throne from the sultan of the realm. Little is as it seems in this world as it gets turned upside down through the antics of a certain genie. The city of Agrabah is primarily made of adobe buildings though the palace appears to be carved from marble. In the first game, there are only two small blocks for the marketplace, but the city area was expanded in Kingdom Hearts II. Just outside the city walls is a desert area. The desert itself leads to the Cave of Wonders and the ruins of an ancient civilization.
Monstro
Monstro is an enormous whale from Disney's second animated feature, Pinocchio[32] and is featured in Kingdom Hearts and Kingdom Hearts: Chain of Memories. Monstro is not a world unto himself and thus has no keyhole. Rather, his belly is large enough to serve as a substitute world, filled with luminescent acid, blubber, and Heartless. Monstro swims through the dimensional drift between worlds as if it were water, attacking and swallowing any vessel that passes his way. Monstro escaped from the world of Geppetto and Pinocchio just before it was destroyed by the Heartless. Geppetto finds himself inside Monstro's belly while searching for his "son," Pinocchio. Monstro's anatomically disoriented insides consist of two major parts. His enormous mouth contains many of the ships he has swallowed over the years, including Geppetto's. His throat leads to his Heartless-filled intestines, which are a sickly purple color with vessels and valves separating the body cavities.
100 Acre Wood
The 100 Acre Wood is an optional world based on the fictional locale of author A. A. Milne and Disney's 22nd animated feature, The Many Adventures of Winnie the Pooh. The world takes the form of a magical book located in Merlin's house. As Sora collects Torn Pages, new areas of the 100 Acre Wood become available as the story is retold. When Sora "enters the book", he lands on a version of the flat map of the 100 Acre Wood featured in many Pooh books. Classic locations such as Pooh's and Piglet's House appear as well as the Muddy Path and Spooky Cave. In each location is usually a minigame with prizes which help Sora on his journey.
The book is first given to Sora by Cid near the beginning of Kingdom Hearts and he collects Torn Pages throughout the game until he finds and seals the 100 Acre Wood's keyhole. Along the way, he makes friends with each of the Wood's inhabitants, particularly Winnie the Pooh, with whom he plays a Christopher Robin-like role. 100 Acre Wood appeared again as a recreated world in Kingdom Hearts: Chain of Memories. In Kingdom Hearts II, Merlin moves to Hollow Bastion and takes the book with him. When Sora returns, he excitedly enters the book to check up on his friends. While he is greeting Pooh, he is suddenly ejected from the book as the Heartless try to steal it. During the battle to recover the book, it is damaged. Upon return, Sora finds Pooh with severe amnesia, unable to remember him. Sora then continues to find Torn Pages which slowly restore Pooh's memory. Shortly after fully repairing the book, Sora admits that he has to leave again but reassures Pooh that they will always be in each other's hearts.
Atlantica
Atlantica, based on Disney's animated feature, The Little Mermaid, is an underwater kingdom featured in all three of the main Kingdom Hearts games. Ruled by King Triton and his powerful magic trident, its inhabitants are mermaids and sea creatures. While here, Donald uses his magic to transform the main characters in order blend into the environment. Sora's legs become a dolphin's tail, Donald's legs become octopus tentacles and Goofy's body becomes that of a sea turtle.[1][30] In Kingdom Hearts II, there is no battling in Atlantica and it featured minimal exploration. The main form of gameplay was an interactive rhythm game.
The main city of Atlantica is the only "constructed" area, made of what appears to be coral and other underwater vegetation. King Triton's chamber can be found here. Outside the city is the Undersea Gorge, which is a sort of hub to other areas. Here can be found Ariel's Grotto, a secret place where Princess Ariel stores her human artifacts. Also, a path from here leads to a rotting sunken ship that has become the home to many sea creatures. A more sinister area of the sea can be accessed from here: the Den of Tides and the sea witch Ursula's lair.
Halloween Town
Halloween Town is an eternally dark village featured in all three of the main Kingdom Hearts games. It is based on Tim Burton's The Nightmare Before Christmas, a stop motion animated film released by Touchstone Pictures. The residents of Halloween Town are obsessed with their eponymous holiday and each year, they seek to outdo the last year's celebration. Though it has a mayor, the de facto leader of Halloween Town is the Pumpkin King, Jack Skellington. Using Donald's magic, Sora, Donald and Goofy disguise themselves as spooky characters to blend in with the Halloween Town folk.
Halloween Town's nexus is Guillotine Square, which has entrances to Dr. Finklestein's lab, Jack Skellington's house and the Graveyard. The Graveyard has been overrun by Halloween-themed Heartless and leads to Moonlight Hill. A secret switch in Moonlight Hill allows access to Oogie Boogie's Manor. The back of the Graveyard also houses a forest called the Hinterlands. Here, several trees with strange symbols lead to other holiday-themed towns. The most prominent is Christmas Town, where Santa Claus lives and has his workshop. In the Final Mix version of Kingdom Hearts II, Sora's Halloween outfit is replaced by a Christmas outfit. It is a mixture of both Christmas and Halloween themes. Donald and Goofy also receive new Christmas outfits. Like the mask of his Halloween outfit, the Santa hat of his Christmas outfit changes when activating a Drive Form.
Neverland
Neverland is a world featured in Kingdom Hearts and Kingdom Hearts: Chain of Memories. It is based on locations from Disney's fourteenth animated feature, Peter Pan and author J. M. Barrie's fictional island. Although the world is officially called "Neverland", there are no signs of the timeless island where people do not age. Instead, it primarily consists of Captain Hook's ship, the cabins and decks therein. Also accessible is a large clock tower which Wendy refers to as "Big Ben". Peter Pan sneaks aboard Captain Hook's ship in order to save his friend, Wendy, whom Captain Hook had captured, believing her to be a Princess of Heart.
Hollow Bastion
Hollow Bastion is an original world created for the Kingdom Hearts series which serves as the home to many Final Fantasy characters in the series. It is featured in all three of the main Kingdom Hearts games, and served as the hub world of Kingdom Hearts II, similar to how Traverse Town did in the first. The gathering of the various Final Fantasy characters and the overall look of Hollow Bastion was changed for the third installment in order to help with the progression of the story.
Hollow Bastion is dominated by a castle which, now derelict, once was the world's seat of power. Underneath the castle entrance are the Waterways which provide plumbing throughout the castle. A library is here, containing knowledge collected by its former scientists. Aside from the castle itself, there is a town at its foot which is the base of operations for the Hollow Bastion Restoration Committee in Kingdom Hearts II. A previously unknown entrance here leads to Ansem's Study and his computer room.
Hollow Bastion was once a peaceful kingdom called the Radiant Garden, ruled by Ansem the Wise. In his thirst for knowledge, he began studying the darkness in people's hearts, with six apprentices, including Xehanort. Ansem grew wary of the experiments and stopped them. Unknown to him, his apprentices continued his work, producing the Heartless from hearts that were overwhelmed by darkness. A chain of events led to Ansem the Wise being banished, Xehanort splitting into two beings, and the world overwhelmed by darkness. Empty, the castle was later adopted by Maleficent as a headquarters.
Space Paranoids
Space Paranoids is a world inspired by the 1982 live-action science fiction cult film, Tron. Sora, Donald, and Goofy get immersed into a computer world to find clues regarding the past of Hollow Bastion and a caption they found behind Xehanort's portrait in Ansem's Study saying Door To Darkness a.k.a. D.T.D, fighting alongside Tron to defeat the evil MCP and its equally villainous commander, Sark. There is also a Light Cycle mini-game which strongly deviates from the original game. Nomura included this mini-game because he knew people associated the Light Cycles with Tron.
Space Paranoids is only playable in Kingdom Hearts II. Tron at one point mentions that Space Paranoids was copied from an existing world designed by ENCOM, the company from the original film. It can be assumed that the Space Paranoids in Kingdom Hearts II exists alongside the original (though Tron said that the original was deleted). The term Space Paranoids comes from one of the games Kevin Flynn created in Tron. Tron can join Sora, Donald and Goofy when they enter into the system. The overall feel of the world was meant to emulate an old computer game. Nomura got the idea to include this world after seeing a Disney employee making a Tron game. Because it was so different from the other worlds, he hoped that it would be enjoyable to players.
End of the World
End of the World is the final world in Kingdom Hearts. This world is made out of the worlds that lost their hearts to the Heartless.[45] It is also the home of Chernabog, the huge winged demon from the Fantasia segment "Night on Bald Mountain". Director Tetsuya Nomura has called it the "Nobody" of worlds. The World Terminus is also located here, which gives the Heartless access to the corridors of darkness leading to other worlds.
Castle Oblivion
Castle Oblivion (Bōkyaku no Shiro) is a mysterious fortress featured in Kingdom Hearts: Chain of Memories and serves as the main setting of the game. The castle is decorated with a rose motif and has twenty five levels; thirteen floors and twelve basements. The lord of the castle is Marluxia, a member of Organization XIII. This castle is one of the few worlds known to be found in neither the realm of light or the realm of darkness, but is instead found on a plane somewhere in between the two realms. In the balance between light and darkness within this in-between realm, however, Castle Oblivion is more closely tied to the realm of darkness than the realm of light.
Castle Oblivion is dominated by the use of cards. When entering the castle, one's memories and abilities are quantified into cards. Castle Oblivion's floors can be transmuted into different forms and layouts through the use of "world cards" derived from one's memories, as well as "map cards" which determine the properties of individual rooms. World cards based on Traverse Town, Wonderland, Olympus Coliseum, Agrabah, Halloween Town, Monstro, Atlantica, Never Land, Hollow Bastion, 100 Acre Wood, Twilight Town, and Destiny Islands have been created from Sora and Riku's memories.
Twilight Town
Twilight Town was introduced in Kingdom Hearts: Chain of Memories, in which Sora explored the memories of the other side of his heart. In Kingdom Hearts II, it is a major part in the story where Hayner, Pence, and Olette reside DiZ created a simulation of the town and its people to keep Roxas trapped and away from Organization XIII until Sora's restoration was complete. Roxas is playable only in this world.
Twilight Town is split into two parts, the shopping district and the residential district, with a train and underground tunnel system that connects the two. There are plenty of stores here, including an accessory shop, as well as lots of houses lined up. Within the world of Twilight Town is also the Tower, the residence of Yen Sid and Flora, Fauna, and Merryweather. Both Twilight Town and Yen Sid's Tower are other worlds to be found between light and darkness. Twilight Town holds the perfect balance between the two realms, while Yen Sid's Tower is more closely tied to the realm of light than any of the known worlds on this in between plane.
Beast's Castle
Beast's Castle is an ornate chateau based on the castle of Disney's thirtieth animated feature, Beauty and the Beast. It is featured in Kingdom Hearts II as one of the first worlds visited on Sora's journey. Despite its large size, the castle is inhabited only by the Beast himself, Belle and the servants who have been turned into objects suited to their names, jobs, and personalities by an enchantress's spell.
The Land of Dragons
The Land of Dragons is an imperial kingdom, based on ancient China, featured in Kingdom Hearts II and based on Disney's thirty-sixth animated feature, Mulan. The Land of Dragons has an oriental atmosphere, characterized by harmony with nature. Nomura chose it for its unique atmosphere, and had already wanted to use it for while. After a border skirmish heralds the impending invasion by the Huns, the country rapidly prepares for war, conscripting young men from every family. Unfortunately, the dark heart of the leader of the Huns, Shan-Yu, has allowed him to take control of the Heartless and lead them in his invasion. The Encampment is the center of military activity in the area. The Checkpoint leads to both the Imperial City and a mountain village. The summit of the snow-capped mountain is the entryway for invading armies.
Pride Land
Pride Land is a savanna world based on Disney's animated feature, The Lion King. It is featured in Kingdom Hearts II. The in-game graphic for the name displays the name as "Pride Land", as did the same graphic in the Kingdom Hearts II official strategy guide. However, it is referred to as the "Pride Lands" in in-text dialog from Kingdom Hearts II as well as in content from the guide. While in Pride Land, Sora is transformed into a lion cub, Donald becomes a hornbill bird and Goofy takes the body of a tortoise. They transformed into animals because Nomura felt that since The Lion King film lacked any humans, it would appear odd to have Sora and the others interact in their standard forms. It was originally considered for inclusion in Kingdom Hearts but the game's engine could not correctly handle a quadrupedal animal as the player without an additional program. It was later added into Kingdom Hearts II.
After the death of the previous king, Mufasa, his deceitful brother Scar took the throne. Since then, the Pride Land has seen a steady decline in living conditions, due to his poor rule. Pride Land is dominated by a large central savannah area which branches off in three directions. To the north is Pride Rock, home of the lions and the seat of the world's political power. The area southwest of the savanna is where outcasts from Pride Rock, such as the hyenas, live. The skeletons of several large elephants earns this area its nickname, the Elephant Graveyard. Southeast of the savanna are the Wastelands, an arid desert of little life. Beyond the Wastelands, however, is a lush oasis.
Port Royal
Port Royal is a port with surrounding waters, based on Disney's live action film, Pirates of the Caribbean: The Curse of the Black Pearl, and is featured in Kingdom Hearts II. The inclusion of this world was aided by technology that generated the character models from live-action pictures. A local legend tells of a fearsome pirate ship called the Black Pearl with a crew of undead pirates led by Captain Barbossa. Another legend is of a grand Aztec treasure hoard of eight-hundred and eighty-two pieces which curses those who disturb it with eternal un-life. Port Royal, named after the eponymous town in real life, is a well-defended port city in the Caribbean. The mystical island where the Aztec treasure is kept, Isla de Muerta, cannot be found except by those who already know its location.
World That Never Was
The World That Never Was (Sonzaishinakatta Sekai), introduced in Kingdom Hearts II, is home to Organization XIII, and is situated next to the realm of darkness in an in-between realm. It also houses the headquarters to Organization XIII, the Castle That Never Was, which is portrayed as a huge white castle decorated with the emblem of the Nobodies, in addition to Dark City, a deserted metropolis of skyscrapers.
The most distinct feature of this world is its seemingly eternal night, with the large, heart-shaped moon, Kingdom Hearts, continually shining in the sky. Kingdom Hearts was designed to appear as the heart-shaped moon from the cover of the first Kingdom Hearts game. When the scenario writer, Kazushige Nojima, created the scenario, he described it as a moon floating in the World That Never Was. Upon reading that, Nomura thought of using the visuals from the first game to create a connection.
|
|
|
|
|
|
|
|
|
|
|
|
|
|
|
|
|
|
Posted: Wed Apr 09, 2008 11:10 am
~*Party*~ Members
Donald: Donald is one of two party members who travels with you almost all throughout the game, and who gains abilities as he levels up. Donald is the Court Wizard at Disney Castle, and as such his specialty is Magic. He fights with a magic wand, and is useful to have in battle because of this. Donald learns magic at the same pace as Sora does, for example, when Sora learns Gravity, so does Donald, at the same time. Donald also learns Cure, same as Sora, and this is extremely useful when you get busted up in battle and don't have the magic or items to heal yourself. Donald uses magic to attack at long range, and that gives him even more of an edge. However, Donald is extremely delicate...a few solid, powerful hits, and Donald will probably get knocked out, or at least hurt very badly. He can cure himself, but that means he has less MP to attack or heal you.
Goofy: Goofy is the other party member who travels with you almost all throughout the game, and who gains abilities as he levels up. Goofy is the Captain of the Royal Knights at Disney Castle, but despite his title he can't stand weapons. As such, Goofy uses a shield to fight. Goofy uses a variety of close range attacks, some of which hit multiple times and can cause some pretty respectable damage. He can also deflect attacks with his shield, and since he fights at close range, unlike Donald, Goofy is much more durable. One of Goofy's most notable abilities is MP Gift, which can actually restore 3 bars of MP to Goofy's target, be it himself, Donald, or Sora. Final Mix players enjoy an added bonus, as Goofy sports a new ability that heals a small portion of all party members' HP. It doesn't heal as much as Donald's Cure, but even Donald can't heal all 3 members at once.
Tarzan: Tarzan is a party member only available in the Deep Jungle. He fights with a normal spear, and being raised in the jungle, he doesn't use it with any particular fighting style, but instead usually goes into battle swinging it madly. However, Tarzan has enough brute strength in him to knock out some of the stronger Heartless with just one swipe of his spear during a special attack. He also sports abilities that mimic the spells Cure and Aero. A very useful ally who fights at close range, and it would be very wise to include him in your party during your journey in the Deep Jungle.
Aladdin: Aladdin is a party member only available in Agrabah, who fights at close range and uses a cutlass style sword to fight. Aladdin is quite deft of blade, but his special attacks emphasize strength over style. It definitely gets the job done, however. He is fast on his feet too, able to dodge quite a few enemy attacks and has been known to even attack while opponents are still trying to recover from their own attacks.
Ariel: What a surprise! Ariel is an especially powerful ally who only comes in Atlantica, and uses her entire body to fight, as well as a couple magical abilities.. She usually fights at close range, but she can also use her Thunder Potion ability to zap enemies from afar. She also has Cure Potion and Aero Potion abilities that are virtually identical to Sora and Donald's Cure and Aero. Ariel's signature attack is to charge in at high speed, drilling through the water. This attack, while it costs MP, often sends even Aqua Tanks to untimely demises. A friend of mine once got knocked face first into a wall because Ariel used this attack to charge off after an Aqua Tank, and he was in the way. Not to be underestimated, Ariel is one of the more useful allies due to her high strength and aggressiveness.
Jack Skellington: Jack is amazing! He is available in Halloween Town, and he uses punches and kicks, as well as magic, to fight. As such, he is perfectly balanced between close and long range combat! Jack uses abilities exactly similar to Fire, Blizzard, Thunder, and Gravity. He also has special close range attacks as well, such as a slide kick that causes some serious damage and trips up any Heartless that it hits. Because of his slenderness and grace, Jack is very proficient at using dance-like tactics to dodge enemy attacks. Keep this one in your party as much as possible!
Peter Pan: Peter Pan is the only party member who can fly naturally. Donald and Goofy can only do it once they learn how to at the very end of Neverland's story, which is the world that Peter is available in. He specializes in close range combat and fights with a small dagger. Pan puts a new spin on close range combat, though: he freezes his opponents with his own version of Stop, and then rushes in and rapidly attacks his frozen opponents. He also uses an Aero-like ability as well. Pan is very good at weaving and dodging, since he can fly, but his attacks are not very powerful at all. This means that he can only keep dodging for so long until a couple of lucky shots hits him. Still a useful ally, but it would be wise to back him up a little with some powerful attacks of your own, so that he can go on freezing and attacking your opponents. Also, he can take some of the pressure off of you due to his dodging capabilities. So if you are getting ganged up on, you might wanna try using Pan's aerial antics as a nice little distraction.
The Beast: The Beast is a close range fighter only available in Hollow Bastion. He uses his razor sharp claws to fight. This big bruiser is the exact opposite of Peter Pan: he can't dodge enemy attacks to save his life, and he has zero magical abilities. However, even normal attacks from the big guy can absolutely shred opponents. A common special attack of his is a dashing claw drill not unlike Ariel's drilling attack. This attack is so powerful that it can drill straight through a Defender's shield and cause damage. Any Heartless that isn't a Defender has almost zero chance of surviving this attack, unless your party is WAY underlevel. The Beast is the undisputed strongest party member in the game. He may be bad at dodging, but this often doesn't matter: after all, enemies can't do much damage to the Beast when they're dead.
There are some differences in the way friend cards function between Re:chain of Memories and the normal Re:chain of memories, as well as one new friend only found in Re:com. For example, Goofy functions a little differently, so I will have two Goofies: Goofy and Re:com Goofy.
Donald: Donald is present in every world except the first run through of Destiny Islands. Once called upon,Donald appears and casts two of four spells; Fire, Blizzard, Thunder, and Cure. Two Donald cards makes him cast the "ra" spells, and three makes him cast the "ga" spells. He's powerful, but don't use him against elemental foes. For example, if you are fighting Axel and you call on Donald, he may actually be stupid enough to cast Fire and heal him. Use with caution.
Goofy: Appears in every world, except the first runthrough of Destiny Islands. Goofy charges in and slams foes with his shield. Two Goofys stun the opponents he runs down, and three cause him to spin in a circle around Sora and bash any enemies surrounding him.
Re:com Goofy: Goofy spins around Sora and smashes any enemies that get too close. The more Goofys stocked, the longer he stays around.
Aladdin: Aladdin appears only in Agrabah. Once called upon, he madly swings his cutlass next to Sora, slicing up any enemy that approaches. More Aladdins means more time he stays for.
Re:com Aladdin: Same as our Aladdin, but with each hit Aladdin lands the enemy drops Moogle Points. More Aladdins means more time, and more Moogle points per hit.
Jack Skellington: Jack is only available in Halloween Town. Once called upon, Jack appears, casts one standard spell (Fire, Blizzard, Thunder, or Gravity, than vanishes. Two Jacks nets you two "ra" level spells, and three Jacks earns you three "ga" spells. When Jack casts a second or third spell, he vaults across the stage to get a better vantage point for each spell.
Ariel: Only appears in Atlantica. Once called upon, Ariel appears and rams foes in a quick pass across the screen. More Ariels means more passes across the screen, and hence more chances to damage foes.
Re:com Ariel: Ariel homes in on a target and whips it with her tail. Stocking more Ariels means more chances to bash people with her tail, but you must hit Triangle, Reaction Command style, to do it. The final blow is her signature spinning, drilling attack from KHI.
Peter Pan: Only appears in Neverland. Once called upon, Peter Pan swoops down and slices enemies in his path with his dagger, almost exactly like Ariel. And just like with Ariel, more Peters means more passes at enemies.
Re:com Peter Pan: Pan appears and starts rapidly jabbing enemies with his dagger, but you must button mash Triangle to optimize the damage count. More Pans means more time to jab at enemies. It should be noted that Peter progresses very slowly across the screen, making it fairly difficult to chase down a second target once the first target is defeated. Make sure your target has most of it's HP before calling on Peter Pan with three cards.
The Beast: Only available in Hollow Bastion. Once called upon, the Beast hurtles across the stage, trampling any enemies in his path, similar to Ariel and Peter Pan. Two Beasts causes anything he hits to be stunned, and three Beasts causes him to literally throw himself on top of his foes, flattening them as if they had been hit with Gravity.
Re:com Beast: The Beast runs down a target until he vanishes, often shoving it far away from it's original position on the field...if it lives that long. More Beasts prolongs the length of his charge.
The King: The only friend card available in Riku's story. The ultimate friend card, King Mickey causes minor damage to and stuns every enemy on the field, sends them flying, and heals Riku of damage. More Mickey cards means more HP healed. The only worlds Mickey doesn't appear in is Hollow Bastion and Twilight Town.
Re:com King: No differences, save for two. If you combine Mickey and two Soul Eater cards, Mickey pulls out his keyblade, leaps up back to back with Riku, and they both start shooting off Pearl blasts in every direction imaginable. Using this in Dark mode causes every Pearl Riku shoots (not the King) to possibly confuse the target it strikes. The other difference is that Mickey appears in Twilight Town, unlike in the original Com.
Re:com Only Friend Card-Pluto: Pluto only appears when you have almost completely burned up all the cards in your deck. Not just used up, but also un-re-loadable. As such, you probably don't want to be in a position to see the Pluto friend card. Pluto can dig up cards that are unreloadable, and scatter them across the field, allowing you to collect them and put them back in your deck. Needless to say, if you do get in a situation like this, you MUST collect the Pluto friend card. More Plutos stocked means more cards that are dug up for you to collect and return to your deck. Pluto appears in every world, even in the first run through Destiny Islands.
Donald: The magical duck of doom is back, and once again accompanies Sora on every world. Donald learns skills depending on both level and get bonuses from bosses, as opposed to learning magic when Sora does in KHI. He learns Fire, Blizzard, Thunder, and Cure. Donald eventually learns to do two Limits with Sora, Comet and Flare. The former causes Sora to be invincible while attacking normally, as Donald flies around shooting fireworks at the target you have locked onto. The finale, Comet Rain, causes the area around Donald to explode in a frenzy of fireworks, propelling any enemies caught in the explosion into the air. Duck Flare causes Donald to conjure rockets and launch them at opponents, while Sora attacks normally below, once again enjoying the fruits of invincibility. The finale, Megaduck Flare, causes a storm of rockets to pummel the target you have locked onto. Donald also causes fireworks to draw in and explode on enemies during the mighty Trinity Limit.
Goofy: Goofy returns for more shield bashing action, and once again travels everywhere with Sora. While Goofy can't restore MP anymore he's received a few upgrades that more than makes up for the loss. Goofy now sports a long range attack, which involves him throwing his shield at a foe that hits multiple times. Goofy also can block attacks far more easily than in KHI, and has even been known to reflect energy blasts with his rear end. No, I am not kidding. You are not being punked. I've seen this happen on many, many occasions, sometimes with blasts far bigger than Goofy himself. Goofy also learns two limits. Knocksmash causes Sora to smack Goofy's shield at opponents, then throwing both of their weapons in a Strike Raid-ish manor. The finale, Cosmo Boost, launches Goofy from Sora's shoulder like a missile, homing in on multiple enemies at once and causing heavy damage. Whirli Goof causes Sora and Goofy to hold on to each other and roll around to damage opponents on contact. It has homing capabilities, until the finale, Whirli Goofga, which allows you to steer towards any enemy you want to strike and hit them many, many times, also causing serious damage. Goofy is responsible for shooting off countless drive orbs and allowing you to steer the direction of the blast of orbs during the mighty Trinity Limit.
Mulan: Mulan has two forms, but in both she fights with a Chinese sword, and appears only in the Land of the Dragons. Mulan is next to useless when she is pretending to be Ping. She fights at close range, but possesses no special attacks, and often trips over herself when trying to take a swing at an opponent. You are unable to remove her from your party while she is posing as Ping. However, once she ditches the guise, enemies had better get out of dodge quick! Mulan proves to be an amazing figher! She still fights at close range, but using a special attack allows her to zoom up on her opponents faster than the eye can see, shrowded in flames due to Mushu. Mushu pops up during Mulan's special attacks, and provides backup with his flames. Mulan and Sora's Limit, the Red Rocket, provides both close range and long range fire breathing action from Mushu, as well as Mulan and Sora streaking across the battle to slash opponents, both attacks homing in on opponents. The finale, Red Meteor, causes Mushu to breath huge fireballs that violently slam into the ground all around Sora and Mulan. A pyromaniac's joy.
The Beast: Beast is back, and is as powerful as ever. Using his claws and outrageously powerful lungs to fight, Beast can do some serious damage. He appears in Beast's Castle, which I know was hard to guess. His special attacks include a multi-hit charge that does serious damage, often ending in the demise of his target, and a roar that blows away any enemies stupid enough to get too close to the Beast. His Limit, Twin Howl, sports homing capabilities that allow you to not worry about steering. Sora cries out, producing powerful shockwaves, while the Beast lunges through the air at another target, slamming his claws into the ground, causing a powerful shockwave of his own. It should be noted that unlike Sora's shockwave, enemies must be touching the ground for the Beast's shockwave to do damage, unless the Beast falls on top of a midair enemie just before hitting the ground to cause the shockwave. The finale, Last Howl, sucks in opponents close, and Sora and Beast roar in anger, causing incredible amounts of damage. If a Heartless somehow survives, it is blown sky high, making it wide open to even more attacks.
Auron: Auron may have the use of only one arm, but that's all he needs. This powerful ally fights with a huge sword at close range, and appears in Olympus Colliseum. In addition to special moves that cause Auron to fly through the air at foes to attack in midair, he sports a curing ability very similar to Donald's Cure. His Limit, Bushido, renders you immobile except for when you are attacking, but believe me, that's all that's necessary. Alternating between Triangle and X allows Sora to rip towards and through enemies in almost a leapfrog-like fashion. Sometimes Auron uses a downward plunge that causes flames to erupt from the ground. The finale, Spiral, makes Sora and Auron to link their weapons and spin them so fast that a huge tornado is generated, causing damage to all enemies and blowing them very, VERY far away. A personal favorite of mine. Unfortunately, to make up for Auron's power, he is not often available during Olympus Colliseum.
Jack Sparrow: In need of a pirate? Jack Sparrow fights with a rapier like pirate sword normally, but has other weapons that are utilized in his special moves, which allows him to fight at both close range and long range. He only appears in Port Royal. Jack possesses some pretty nimble sword strokes as normal attacks. For his special attacks, Jack can chuck bombsat his opponents that blow them into the air, and leave them vulnerable. Sparrow also sports throwing knives that he pitches rapidly at foes, not leaving them time to recover during each throw. Jack's Limit is pretty amazing, as well. It's called Bluff, which admitedlly does not sound very intimidating, but is definitely powerful. Sora opens a treasure chest, and a stream of light bursts out of it, drawing in more enemies for much longer than any Magnet spell could. Jack flies through the air, whirling and slicing the helpless enemies, while Sora keeps his feet planted on the ground, striking from below. They are basically immobile, but since this Limit sucks all the enemies to you, you don't need to move around anyway. The finale, Final Trap, causes Jack to drop a larger than normal bomb into the chest while Sora shuts the lid. Sora and Jack get the heck out of dodge just before the chest explodes, obliterating the Heartless while they are still trying to recover from being sucked into the air for so long. Another of my personal favorites.
Aladdin: Aladdin has undergone quite a few changes from the other games. He still fights at close range with a scimitar, but his power has dropped a lot. However, that guy can seriously move now! Aladdin's special attacks strike so fast that he is often just a blur flying through the air, or circling his foes while slicing them. In addition, each slice that an enemy takes from one of Aladdin's special moves causes that enemy to drop MP balls. His limit is rather unique as well, called Speedster. It's indeed a weak limit, and once activated, the screen blacks out as Aladdin attacks all on screen enemies. Then, Aladdin and Sora home in on enemies when their corresponding button is pressed to deliver slices to the targeted foe. However, each hit causes the enemy to drop HP balls instead of MP balls! The finale, Trickster, blacks the screen out again as this time both Sora and Aladdin cut up the opponents, causing them to drop a veritable horde of Drive orbs. Sora and Aladdin then high five, creating the mother of all Draws that causes you to suck in and collect every last pickup dropped during the limit. So, while this Limit may be weak, it also allows you to heal and refill your drive gauge at the same time, which is more than enough to make up for what it lacks in power.
Jack Skellington: The Bone Man has also undergone a couple changes since the other games. He fights barehanded and with magic at long range, but his versions of Fire, Blizzard, and Thunder are much different than your own. Jack's Fire ignites his body and he runs straight into enemies for multiple close range hits. His Blizzard moves through the air quite slowly, but sports some major homing capabilities that not many other party members can match, often chasing enemies for almost 30 seconds at a time. If it connects, it just stays on the enemy to hit it multiple times. Even if you hit it away from the Blizzard after it hits, the ball of ice will just keep chasing it's target. Jack's Thunder is actually about a medium range attack, but it causes multiple thunder strikes to hit the opponent instead of just one. Therefore, both with his magic attacks, and normal physical attacks, Jack's strength doesn't lie in single blows, but in his particularly vicious combos. Jack's Limit, Dance Call, is as graceful as it is deadly. It begins by twirling Sora along the ground, allowing you to steer him into enemies for multiple hits. Then, Sora and Jack begin to dance, and every time you press X or Triangle, jack-o-lanterns pop out in front of them, causing serious damage to all opponents caught in the blast. The finale is literally called Finale, and it causes ghosts to circle around Sora and Jack as they dance, pulverizing all surrounding enemies. Finally, Sora and Jack finish their dance, and laser like beams burst from the ground surrounding them, damaging all enemies who landed too close to Sora and Jack to be blown back into the air, leaving them vulnerable to regular attacks once the limit officially deactivates.
Simba: He was just a summon in the other games, but now Simba returns as a full blown party member to wreak some havoc! Simba fights with his claws, fangs and deadly roar. For his size, the big cat is deceptively fast, and his attacks are powerful as well. His special attacks include multiple claw swipes that are both powerful and so fast they could give Aladdin a run for his money, a roar that causes major damage to any enemies around Simba, and a curing ability that he uses on himself and others. His Limit is called Wildcat, and upon activation both Sora and Simba roar and cause jagged pillars of rock to erupt all around them, piercing their foes. Then, the two begin racing on the ground and flying through the air, whirling and slashing with claws, fangs, and Keyblade, causing multiple hits with heavy damage for each. The finale, Proud Roar (yes, that name is from the other two games!) causes Sora and Simba to roar again, hitting the enemies multiple times, with the final hit knocking off a huge chunk of HP on all enemies caught in the blast.
Tron: Tron here fights with magic and the data disc on his back. Tron specializes in medium and long range attacks. He likes to chuck the disc on his back at enemies. Also, Tron sports the most unique variation of Thunder in the game. It's a medium and close range range attack, and it causes lighting to erupt from data pools from the ground up instead of striking from the sky. Multiple strikes erupt from the ground at different points in front of Tron. He isn't the fastest character, but because he doesn't fight at close range often, enemies have a hard time making it to Tron to fight back, and hence he is rarely knocked out when fighting Heartless. Since it is hard for party members to keep a boss at bay, this does not apply to bosses, although Tron has got some pretty decent defense as well. He can take quite a few hits without being knocked out. His limit, Setup, causes crystals of data that I believe are called Bits to erupt from the ground and grind themselves into enemies. Once the first phase is over, you are able to move the data platform Tron and Sora are on, causing it to glide across the ground at a fairly rapid pace to pursue enemies. One attack option causes Bits to erupt in a straight line in front of you in a multi-hitting long range attack. The other option causes Bits to burst up in a small circle around Tron and Sora, for a multi hit close range attack. The finale, Reprogram, summons a horde of Bits to chase down your opponents and cause serious damage for a fairly long time after the limit is through, which means you can attack normally while the Bits back you up. One of the more damaging limits.
Riku: Squealing fangirls, unite! Riku is finally a party member! He fights mostly at close range with a Keyblade all his own called Way to Dawn. He sports a high flying multi hit combo as a special move, as well as a very potent Curing ability which comes in handy against the final boss. In addition, you can actually control Riku a little bit. When you take damage, a reaction command pops up called Dark Shield. Once activated, it teleports Riku in front of you and causes him to generate a shield to at least partially block any attacks that might try to hit you while you are off balance. It isn't nearly as good as Reflega, but it is useful in a bind, as it doesn't cost you any magic. Also, when you perform a combo finisher on an enemy, a reaction command called Dark Firaga pops up. Once activated, Riku appears beside you and shoots multiple blue fireballs that cause fairly mild damage. However, once again, since Riku is doing it, it costs you nothing to launch this attack, so there is no loss in using it! Riku's Limit is the most powerful Limit in the game, putting even Trinity Limit to shame. It is called Session, and it has multiple phases to it. Once activated, Sora and Riku madly slash the enemy closest to them, unless you locked onto an enemy before hand. The first phase is designed for a single opponent. The first option causes the pair to rush in and rapidly stab the target, while the other option launches a horde of blue fireballs to pummel the target. The second phase begins when Riku says, "I'll take em!" This phase is designed for multiple opponents. The first option causes the pair's weapons to extend to a huge size, and then they swing the extended weapons at all enemies in front of them. The other option causes 13 swords to appear all around Sora and Riku, and then the blades spin around them, hacking up all enemies ignorant enough to be to close. The finale, called All's End, has Sora and Riku throw their Keyblades into the air, and their power draws in all enemies on and off the screen. The enemies are hit an incredible amount of times, and the final hit causes a devastating amount of damage. I have never seen any opponent short of a boss to survive this Limit, even if they start out at full health.
And that's all the party members! Use them in the right situations, and you'll be in pretty good shape throughout the games!
|
|
|
|
|
|
|
|
|
|
|
|
|
|
|
Posted: Wed Apr 09, 2008 11:14 am
~*The Heartless*~
Shadow
Heartless that emerge from various places. The Shadow ambles around and attacks without warning. They are extremely tenacious, often chasing their prey to the end. It is completely invulnerable while hiding within the darkness.
Soldier
Heartless that emerge from various places. A swift-moving Heartless that attacks its prey with a spin kick. Its whimsical nature makes the Soldier a less than tenacious foe. They are brisk in their movements, and rush into their opponents. They often appear in numbers, though they lack teamwork.
Large Body
A rotund Heartless. They seem tame and laid-back, but go berserk when they are angered. The Large Body repels frontal attacks with its jiggly belly. Sometimes it throws its weight around and shakes the ground, so jumping is the key. With their brute strength, they can inflict great damage, so be on your guard.
Red Nocturne
A spell-casting Heartless that drifts through the air. While hovering about, they attack by casting Fire and absorbs Fire damage. It's flighty and hard to hit. Having low HP, they keep their distance from their opponents, making them difficult to attack.
Blue Rhapsody
A spell-casting Heartless that drifts through the air. The Blue Rhapsody attacks with Blizzard once it's close enough, and absorbs Blizzard damage.
Yellow Opera
A spell-casting Heartless that drifts through the air. Besides attacking with Thunder, they hurl themselves against their enemies. They absorb thunder attacks.
Green Requiem
A spell-casting Heartless that drifts through the air. It doesn't attack, but it can cast Cure to heal other Heartless. The Green Requiem is slow, but its immunity to magic attacks makes it tough to squash.
Powerwild
A Heartless resembling a monkey that excels at jumping. With great physical strength and agility, they often strike with combination attacks. Avoid close-range battles with them if possible. It has destructive instincts and attacks with punches and sliding kicks.
Bouncywild
Heartless resembling a monkey. Unlike Powerwilds, they attack from long range with a sling shot. They scamper about during battle, making them difficult to hit. It teases its enemies and throws banana peels from far away. Be careful not to slip!
Air Soldier
A winged Heartless. They fly over their enemies and dive to strike them. Their high endurance and quickness make them tough to beat.
Bandit
Heartless that mostly appears in Agrabah. They can travel under the sand.
The Bandit deftly wields the schimitar it carries, and should be approached cautiously.
Fat Bandit
Heartless that mostly appear in Agrabah. They are well-balanced offensively and defensively. Besides strong physical attacks, they can use fire, and they block attacks against them. Their movement is their weakness. The Fat Bandit repels frontal attacks with its jiggly belly.
Pot Spider
Ordinary pots turned Heartless. They lie in wait as ordinary pots, then reveal themselves and attack when their enemies draw near.
Barrel Spider
Gunpowder barrel turned Heartless. The Barrel Spider sets upon anyone foolish enough to think it's an ordinary barrel, charge into their enemies and explode. Any physical impact or fire will set them off.
Search Ghost
Heartless that mostly appear in Atlantica. They roam in dark areas and emit light from their eye to target their enemies. The Search Ghost can warp out of harm's way and absorb its enemies' HP, making it a tough opponent.
Sea Neon
Heartless resembling a jellyfish. It might look laid back, but the Sea Neon's long tentacles can propel it toward enemies for a ferocious attack. They also attack in numbers. Overall, they are not tough opponents.
Sheltering Zone
Heartless resembling a jellyfish. You receive damage just from colliding with it. They move slow, but break up into many Sea Neons if struck. They fling their tentacles away to keep their enemies away.
Screwdiver
A Heartless that likes to team up with the Aquatank. Unpredictable creatures, dashing forward one minute, cowardly retreating the next. They are invigorated by the sparks from Aquatank. It attacks with a spear or charges its enemies.
Aquatank
A fish-like Heartless that lazily wanders the sea. They are often carrying Screwdrivers. Leisurely large creatures do not attack unless provoked. The Aquatank attacks with Thunder or by whirling its sizable body about.
Wight Knight
Heartless that mostly appear in Halloween Town. Their jerky, dancelike attack moves are fairly easy to dodge, but cause large damage. The Wight Knight's long appendages make it dangerous to approach.
Gargoyle
Winged Heartless that mostly appear in Halloween Town. They can move from one place to another almost without notice. Since they are prone to sneak attack, they often get caught off guard by counter attacks. It pelts its stunned opponents with fire.
Pirate
Heartless that mostly appear in Neverland. A skilled swordsman, the Pirate can knock its enemies out cold then finish them off with a vicious combo. They often just focus on the enemies in front, making them vulnerable to attacks from behind. If its sword flashes, watch out!
Air Pirate
Winged Heartless that mostly appear in Neverland. It's not armed, but it doesn't need to be. They are extremely combative and are hardly ever caught off guard. They attack with martial-arts-like techniques. The Air Pirate deals a brutal punch right after it flashes.
Battleship
Heartless that fused together with a pirate ship. They attack with homing and magic projectiles. Attack them at close range.
Darkball
Heartless born purely out of darkness. Their movements are unpredictable, as they often make sudden moves and attacks.
Defender
Heartless that mostly appear in Hollow Bastion. They carry an eerie shield with a face that casts Fire and Blizzard and bites nearby enemies. Its sheild stops head-on physical and magical attacks, and can launch fireballs.
CoM: The Defender is also a skilled card user, and will break the cards of unprepared opponents.
Wyvern
Giant Heartless that attack from the air. They are quite swift for their size and are hard to attack, especially while they are high in the air.
Upon sighting its prey, it rushes forward and attacks with a flurry of kicks. Counterattacking when they come down would be most effective.
Wizard
A Heartless proficient in magic. The Wizard is a formidable opponent that attacks with high-level Fire Blizzard, and Thunder spells. Eludes enemy attacks by teleporting, making them tough to beat.
Behemoth
Immensely powerful Heartless. With their large frame, they trample enemies and repel most attacks. Damaging their weak point make them lose consciousness. Strike them with potent attacks while they are down.
Invisible
Heartless wielding a large sword. These winged Heartless can move freely through the air. Besides their sword, they attack with their tail and wings. With their high attack power, they often defeat their foes quickly.
Angel Star
Flying Heartless that cast potent spells. They are born of holy spells. They attack from long range with magic. They block physical attacks with their wings, making them difficult to defeat.
Shadow Sora
A unique breed of Heartless created by Riku in Neverland. This odd creature uses a drop kick technique to fight, but isn't very dangerous. It vanishes when you inflict too much damage on it, but reappears once you leave the room. I've only completely destroyed one of these things once, and I'm not sure that it wasn't a glitch. Just hit it as fast and hard as possible. If it vanishes or is destroyed, it will leave many HP balls in it's wake.
White Mushroom
Non-attacking, friendly Heartless with an unusual affinity for people. The White Mushrooms never attacks, and may even reward someone who comes to its aid.
Black Fungus
Hostile Heartless, unlike White Mushrooms. They attack with poison. Defeating them may bring good things, but it is not easy.
CoM: The Black Mushroom likes to paralyze its foes and toy with them. It's tough to beat, but victory doesn't go unrewarded...
Rare Truffle
Nonattacking Heartless that are rarely found. They like to jump, so helping them stay in the air may bring good things.
Darkside
Enormous Heartless that appeared in Destiny Islands with Shadows. It led the Shadows in the battle against Sora when he first received the Keyblade. Although Sora defeated it, the island was swallowed by the darkness.
CoM: Sora fought valiantly to protect the islands and his memories there.
Guard Armor
Leader of the Heartless in Traverse Town. It falls apart when it receives damage, but each part attacks individually. It appeared when the bells rang to wreak havoc on the town. Sora meets Donald and Goofy for the first time just before fighting this Heartless.
Opposite Armor
Heartless that guards the Keyhole in Traverse Town. It is a modified form of Guard Armor, but is more powerful.
Trickmaster
Heartless that Sora and company encounter while they search for Alice. Its herky-jerky attacks and juggling act flustered Sora and the others.
CoM: The Heartless in Wonderland that stole the Queen of Hearts's memory. Victims of memory theft don't even remember what it is that they forgot.
Stealth Sneak
Heartless that attuned to the darkness in Clayton's heart. It somehow manipulated the light to turn invisible and fought alongside Clayton.
Pot Centipede
Heartless called by Jafar to stop Aladdin. Its long body is composed of a number of a Pot Spiders linked together. Even if its body comes apart, it can regenerate itself by gathering other pots.
Parasite Cage
Heartless that appeared inside Monstro. It's known to swallow its enemies. Sora and the others rescue Pinocchio, who was trapped inside it.
Antisora
The most powerful of the dopplegangers Riku created, equipped with its own shadowy Keyblade. This creature can split into 3 to confuse you, but their attacks are all standard swings that Sora himself uses. Defeat Antisora, and all the Shadow Soras will disappear for good.
Kurt Zisa
Heartless that emerged from the Keyhole opened by the princesses. It swung its six powerful arms to attack Sora and company and block their attacks. But Sora sought out its weakness and emerged the victor.
Phantom
Ghostlike Heartless that haunted the clock tower standing far away from Neverland. Fluttering its eerie cloak, it cast a spell to take Sora's heart. Having no physical body, regular attacks were useless, but in the end Sora and company discovered its weakness and prevailed.
Newcomers
Giant Shadow
Just like normal Shadows, only 10 times their original size! If they hit you, they disappear, but they hit hard. Also, the more that disappear, the less likely you'll get their rare synthesis item at the end of the battle. Fight carefully!
Stealth Soldier
Like a normal Soldier, but a little bigger, a little lankier, and a different coloring scheme. These things are dangerous, though; they can turn invisible, and can break lock on targeting with incredible ease. Their main attack is a super fast headbutt that leaves a blue streak of light through the air. Keep moving, and use the telltale light to find them and strike!
Black Ballade
This creature is in the same class as the Red Nocturnes and the others. This tricky little creature will create 4 illusions of itself. The real one will give a quick hop, then they will all scatter. You must keep track of and then attack the real Ballade. Be careful, as a wrong choice will result in a bolt of lightning striking you!
Sniperwild
Like a Bouncywild, but infinitely more dangerous. You must not be detected by this creature until you are literally slicing it up, and even then, make sure it's buddies don't see you. As long as you do this, you'll get prizes for each group you wipe out. But if you are detected, an endless horde of Sniperwilds that never drop pickups of any kind will come and attack. They rarely miss, unlike the Bouncywilds. The only way to end the onslaught is to run like hell for the exit and get out. Before detection, they are also capable of dropping banana peels to trip you up.
Pot Scorpion
Not nearly as strong as a Pot Centipede, but just as annoying. The Pot Scorpion is completely invincible unless you knock it off balance by parrying one of its attacks, at which point you will have a limited time to inflict damage. Work fast, Keyblade Master.
Grand Ghost
This thing is an enormous version of a Search Ghost. This creature is invincible to physical and magical attacks, but throwing healing items at it will damage it. Elixirs will blow off over half its health. Kill it with kindness!
Chimera
A strange, robot-like Heartless that uses melee attacks and summons Gargoyles to support it in combat. It has incredible defense, and your attacks barely knock off 1 HP every 5 hits! However, when you attack it enough, you release 4 different colored balls out of the canister in it's head. If you can smack them back into it, it causes massive damage! Use this tactic to put it down.
Jet Balloon A flying version of the Aqua Tank. Incredibly fast, it darts around the room and releases Screwdriver-shaped missles at you from a distance. These projectiles are called Missledivers by some, but they are not Heartless by themselves, as they do not appear in Jiminy's Journal. They are mere extensions of the Jet Balloons.It's too fast to catch unless you are really lucky. Cast Stop to freeze it for a few seconds, or cast Aeroga to power your way through the missles while it's shooting to strike it.
Neoshadows
These guys are as tough as small fry will ever come. With a horde of tricks and attacks that even include holding you in place while another one rams you at top speed, these creatures are very annoying and dangerous. When there is only one left, it will call for reinforcements. Clobber the newcomers before they fully form to stop them! Neoshadows appear in future games as well, but they aren't nearly as tough as they are in Kingdom Hearts Final Mix.
Pink Agaricus
The undisputed king of the Mushroom Heartless. Freeze it's White Mushroom lackey's with Stop to make it reveal itself. Then, hit it with Stop and attack as fast as you can! If you can hit it 100 times before it unfreezes, you will earn a very special prize.
Destruction Behemoth
A breed of Behemoth only found in the Olympus Colliseum. It sports the same attacks as a normal Behemoth, but has different stats and a different coloring scheme. It is the most powerful of the 3 kinds of Behemoths.
Arch Behemoth
A breed of Behemoth only found at the End of the World. It sports the same attacks as a normal Behemoth, but has different stats and a different coloring scheme.
Red Armor
Exactly the same as Guard Armor...only red. And it has different stats. It is only found in the Olympus Colliseum. More powerful than Guard Armor, and increases in power as you move through the different cups.
Sneak Army
Exactly the same as Stealth Sneak, only purple, and with different stats. It is only found in the Olympus Colliseum. It has less HP than Stealth Sneak, but has far more attack and defensive power.
---------------------------------------------------------------------------
Newcomers:
Creeper Plant
A flower-like Heartless. It's rooted in one place, but staying far away isn't enough, since it can spit seeds or attack from below with its sharp roots.
Tornado Step
A Heartless that flies about using its arms like propeller blades. Whether moving or attacking, it's always spin, spin, spinning--but never seems to get dizzy.
Crescendo
A hopping, horn-like Heartless. It's a bothersome foe that can honk and call other Heartless.
-----------------------------------------------------------------------
Newcomers:
Silver Rock
It quickly disappears into a ball of light, setting off an explosion when it reappears. Use reaction commands when it's in light form. It easily resists magic, so don't be shy about using the Keyblade!
Emerald Blues
Attack from a safe distance, while watching out for its sudden tackle. When its HP gets low a tornado forms, drawing the enemy close. It easily resists magic, so don't be shy about using the Keyblade!
Crimson Jazz
It chases its target with determination while scattering mines, so be wary when fighting this creature. When its HP gets low, it places a large mine. Avoid it before it explodes. It easily resists magic, so don't be shy about using the Keyblade!
Trick Ghost
It has two faces, both of which need to be fought differently. When in the air, move in close to seal its long-range attacks. When on the ground, move far away to avoid its short range attacks.
Rabid Dog
It won't move until approached, so move in swiftly and attack. It becomes tired and lets its guard down after counterattacks. Attack them for an easy battle.
Hook Bat
It generally flies around scoping the area. When it swoops, use Bat Battery to capture it and attack surrounding enemies. After this attack, use combos while in the air to defeat it.
Bookmaster
A great mage who can handle all three types of elemental magic. It bears a striking resemblance to Red Nocturne, Blue Rhapsody, and Yellow Opera when changing stance for use of each magic. It is immune to all elemental magic, and should be defeated immediately.
Minute Bomb
When attacked, it counts down for self detonation. Use Dodge Roll seconds before the explosion to lure surrounding enemies into it. To play it safe, parry its tackles to make it lose its will to fight.
Hammer Frame
It taps the ground to create a sonic wave. Jump to avoid the wave and defeat it with combos. When its HP gets low, it attacks with a series of tackles, so defeat it immediately!
Bulky Vendor
A rare Heartless that can be found in certain worlds. It appears when you poke around various areas of the map. It only appears in certain areas, and once it appears, it wil not appear in that area for a while. Use the reaction command to get items. Figure out its secret pattern to get specific items.
Fortuneteller
It uses and is immune to all ice magic. When its HP gets low, it uses magic to try and freeze its target. Try counterattacking with Clear Shot.
Cannon Gun
It shoots bombs from afar, so defeat it immediately. Avoid areas of potential bomb drops while attacking. It runs off when approached, so follow it closely and defeat it.
Rapid Thruster
It attacks in a group, so be ready to attack with reaction commands. Start with Speed Trap, followed by the wide Aero Blade attack. It chases its target with determination when counterattacking. Run!
Driller Mole
It moves underground, so follow the clouds of dust for its position. Use a finishing move to lure it out of the ground. Attack when its face pops out of the ground!
Lance Soldier
The soldier and lance don't get along, so it will be easy to catch this enemy off guard. When its HP gets low, the lance goes nuts. Grab it with Lance Tug to attack surrounding enemies. A good strategy is to lower its HP and wait for the chance to use Lance Tug.
Morning Star
When its HP gets low, it unleashes its Press attack. Use Bump and Meteor Strike for a counterattack combo! Meteor Strike can be done in succession, so make sure to grab surrounding enemies as well!
Fiery Globe
It runs before it attacks, making its movements easy to read. It has little HP and is weak against ice. Use ice magic to defeat it.
Icy Cube
It jumps before it attacks, making its movements easy to read. It has little HP and is weak against fire. Use fire magic to defeat it.
Luna Bandit
It backs away during combat, so close in with thrust attacks. Catch it off guard after parrying its attacks to defeat it.
Gargoyle Knight
Although it looks like an ordinary statue, it attacks with no warning. Immune to elemental magic, it can attack from any range. Parry its attacks for a chance to use reaction commands.
Gargoyle Warrior
Although it looks like an ordinary statue, it attacks with no warning. Immune to elemental magic, it is skilled in ranged attacks. Fully avoid its spinning attacks for reaction commands. If timed well, it can be defeated in a single blow.
Graveyard
It boldly approaches its target, but catch it off guard after it attacks. It summons persistent ghouls when it turns into a headstone. Defeat it before it has a chance to call forth these annoying ghouls.
Toy Soldier
It merely sits and waits for the enemy to come closer, so attack from afar. When it turns into a box, it begins to attack from a distance, making it impossible to close in on.
Aeroplane
It shoots bullets from midair, but only in a forward direction. Its movement and speed increases when retaliating, so defeat it while it's flying slowly.
Hot Rod
It attacks and withdraws quickly, making it hard to hit. Use magic to defeat this enemy. When its HP gets low, it moves around even quicker, so be sure to defeat it as soon as possible.
Assault Rider
Avoid getting hit with his spear by using the well-guarded Jump attack to defeat it. When its HP gets low, its attacks begin to get bold. Use big attacks to defeat it before it uses its explosive attack.
Nightwalker
It jumps around while attacking persistently, so attack it and defeat it immediately. Watch out for its powerful counterattack.
Bolt Tower
It has a very high defense, and can only take damage in the face. Attack the face! If caught by its snag laser, use the reaction command Bolt Reversal continuously to escape. If successful, a big explosion will unleash damage upon nearby enemies.
Magnum Loader
It moves in a clockwise motion around its target, so keep that in mind when attacking. It moves swiftly, so attack it in the few instances it slows its movements. Keep an eye out to avoid and counter its high-speed tackle with Quick Blade.
Strafer
It moves in a clockwise motion around its target, so keep that in mind when attacking. Make sure to close in, as it attacks far away targets with a laser.
Devastator
It can fly around or transform into a tank. In the air, it follows its target around, so keep a fair distance. The tank attacks from afar, so close in while dodging the cannons. Watch out for the electrick attack unleashed during its transformation!
Living Bone
Make sure to dodge its strong attacks as they deal huge damage. Weaken it instantly by crushing its head with the reaction command! With a shaman, it powers up to unleash deadly curses, but merely defeat it as you would a Shaman.
Shaman
It attacks from afar and moves around very little. It is very magic-resistant and nullifies all attacks while taking on its mask form. The cursed flame it occasionally unleashes firmly chases its target, but it can be used advantageously with reaction commands!
Aerial Knocker
Once the battle begins, there is no fleeing. It has three types of punches, so figure out which it will unleash and choose an appropriate strategy. Its tackling punch is powerful, so defeat it quickly with successive reaction commands!
Armored Knight
It charges the target in a group. Use the reaction command Rising Sun when it jumps into the sky, as it is about to unleash a tackling attack. Use Rising Sun in succession for various combos!
Surveillance Robot
Use reaction commands Snag then Sparkle Ray to attack surrounding enemies with a laser! Keep an eye out for opportunities to use reaction commands even if the laser attack is parried!
Volcanic Lord
A Heartless called forth by greedy Pete in Agrabah. It appeared with Blizzard Lord. It was weak against ice, but it tormented Sora and his friends with its use of fire.
Blizzard Lord
A Heartless called forth by greedy Pete in Agrabah. It appeared with Volcanic Lord. It was weak against fire, but it tormented Sora and his friends with its use of ice.
Thresholder
The doors possessed by Possessor that attacked Sora and his friends. Possessor was separated from the doors with Release, in which the power of the Keyblade was poured into the keyhole blocked by its arms.
Possessor
A Heartless that appeared in Beast's Castle. It possessed the dungeon doors, turning it into Thresholder. It had the power to conceal itself, but had very few other powers.
Shadow Stalker
A Heartless that attacked Belle in Beast's Castle. It jumped around on the floor, pillars, and chandelier of the ballroom, creating mayhem.
Dark Thorn
A liberated version of Shadow Stalker that appeared in Beast's Castle. It appeared and disappeared, running wild, creating a chaotic battle for Sora and his friends.
Illuminator
A Heartless called forth in Port Royal by Pete. It had glowing eyes and a lantern on its tail, which was used to absorb light and create darkness to help Barbossa, whose weakness was moonlight.
Grim Reaper
A Heartless that appeared in Port Royal, it was said to be born from the curse of the Aztec gold. Using the curse to become undead, it became a ghoul, making it hard to be defeated.
Groundshaker
A giant Heartless that appeared in the Pride Lands. It was created by the many illusions of Scar. The main body on the back of the creature controlled its bones, creating chaos in the savannah.
Prison Keeper
A Heartless called forth in Halloween Town by Maleficent to get revenge on Sora. It held Lock, Shock and Barrel captive while dealing various elemental attacks.
Storm Rider
A giant Heartless that appeared in the sky of the Land of Dragons. An intense battle was fought by Sora above the palace. Originally a creature that gave strength to the earth and people, it was turned into a Heartless.
------------------------------------------------------------------------------------
Newcomers:
Air Champion
An upgraded version of the Aerial Knocker. It has the same attacks, but is much more powerful. Since you don't fight them in Lion form, Reaction Commands are not an option.
Air Viking
An upgraded version of the Air Pirate. It has the same attacks, but is much more powerful and much faster. There isn't much of an opportunity to use the Reaction Command with these guys, so be careful when attempting it.
Evil Bumper
An upgraded version of the Hot Rod. It has the same attacks, but is much more powerful. Engage as you would a normal Hot Rod, but don't be afraid to retreat and regroup if it has too many allies backing it up.
Iron Hammer
An upgraded version of the Hammer Frame. His attacks have much more range than ordinary Hammer Frames. Beware when retreating, because these guys are very persistent. I've seen one jump 40 feet in the air to get to a retreating player, long after the battle music returned to the normal stage music. Assume no place is safe and be constantly on the move when trying to regroup.
Lance Warrior
An upgraded version of the Lance Soldier. It has the same attacks, but is much more powerful and slightly faster. Be very careful when attempting to use the Reaction Command on this creature.
Magic Ghost
An upgraded version of the Trick Ghost, and one of the more bothersome foes you will have to face in the Cave of Remembrance. It has the same attacks for the most part, but is incapable of shooting triple fireballs while on the ground like the Trick Ghost can. However, it is more powerful and very, very fast. While in the air, this creature is immune to physical attacks. You can damage it by hitting it with magic, or by knocking it's own fireballs back into it. When it lands on the ground, it's vulnerable to physical attacks, so swing away when you get the chance! Parrying it's candle swing attack makes it more likely to land on the ground.
Perplex
An upgraded version of the Hook Bat, but still not a very big threat. Use the Reaction Command to pummel surrounding Heartless with it.
Reckless
An upgraded version of the Devastator. It may be much more powerful, but it is incapable of shifting into tank mode for a ground-based assault. However, it is still capable of "transforming" to attack, but it will just go right back into aerial mode. Transforming is the biggest threat, as it will zoom to your location at incredibly high speed to catch you in it, and it causes heavy damage. It can only do this low to the ground, so stay in the air to avoid this bothersome attack.
Runemaster
An upgraded version of the Bookmaster, and one of the most annoying and dangerous Heartless of all. Its book is made of solid steel, and can parry all but the most powerful of physical attacks. It is also completely immune to elemental magic. You can either attempt to circle around and hit it's body, use Reflega's backlash to damage it, or knock it off balance with Magnega to destroy it with physical attacks. Be quick about the last method, as Magnega won't keep it off balance forever...
Silent Launcher
An upgraded version of the Cannon Gun. It has the same attacks, but is more powerful, and it have a longer range than its weaker cousins. Also, as its name implies, it fires blasts quietly, and so doesn't give you much of a tipoff. Still, these creatures are not much of a threat.
Spring Metal
An upgraded version of the Emerald Blues, but more mobile and more powerful. Another bothersome foe, it has the same attacks as a normal Emerald Blues, but it uses it's big tornado attack more often and is capable of homing in on your location while executing its big tornado attack. Engage with extreme caution.
Necromancer
An upgraded version of the Shaman. It has the same attacks, but is much more powerful and capable of turning invisible for a certain length of time. It doesn't move around much, so if it appears and then disappears, swinging in the spot you last saw it generally works. Since you can't engage this creature in Lion form, you cannot use the Reaction Command against its will-o-wisp attack. Hope you have Reflega set to shortcut, because this attack is 100% accurate and cannot be dodged, only blocked by magical means.
No. 1
An Organization Mushroom. You must hit this Heartless 70 times in 30 seconds to defeat it. Use Reaction Commands to confuse it. Wisdom or Final Form recommended.
No. 2
An Organization Mushroom. You must score 80 points by dodging laser attacks and reflecting lasers back into it to defeat it. Summoning Stitch will keep your Magic filled while you abuse the Reflect.
No. 3
An Organization Mushroom. Collect 450 of the orbs it drops to defeat it. Strap on Glide Lv. 3 and all the Draws and Draw Rings you have to do it. Using Follow the Wind helps, as well.
No. 4
An Organization Mushroom. Destroy 85 of its clones without getting hit to defeat it. Wisdom Form recommended.
No. 5
An Organization Mushroom capable of regenerating HP. Knock off all its HP in under 10 seconds to defeat it. Valor form or Limit Form's Zantasuken recommended.
No. 6
An Organization Mushroom. Wipe out all it's dopplegangers in under 45 seconds to defeat it. Final Form recommended.
No. 7
An Organization Mushroom. Knock off all its HP in under 10 seconds to defeat it. Physical attacks will not work very well at all. Final form's Blizzard and Thunder recommended.
No. 8
An incredibly annoying Organization Mushroom, like a Rare Truffle from hell. Attack this one 85 times without letting it touch the ground to defeat it. Strap on Beserk Charge and Endless Combo, turn off all your MP Haste-like abilities, use up all your magic before engaging, and let fly with a horde of physical attacks with Master Form. This monster will take several tries to defeat.
No. 9
An Organization Mushroom. Attack it 80 times without letting it stop spinning to defeat it. Wisdom Form and 2 Finishing Pluses recommended. If you aren't playing on Critical, use Rumbling Rose to provide the second Finishing Plus.
No. 10
An Organization Mushroom with the same strategy as a Black Ballade. It creates 4 illusions of itself, breaks formation, then reforms and lets you pick which one is the real one. Keep a close eye on it and you'll do fine. Knock off all its HP in 55 seconds to defeat it. Final Form recommended.
No. 11
An Organization Mushroom. Attack this one 99 times in 19 seconds to defeat it. Equip all the Finishing Pluses you have, and fire away in Wisdom Form. Keep a medium distance from it for maximum hits.
No. 12
An Organization Mushroom. Kill 40 of its dopplegangers to defeat it. Turn off all of your MP Haste-like abilities, and turn on Beserk Charge. Use up all of your magic before engaging, and fire away with Wisdom Form.
No. 13
The only Organization Mushroom that doesn't challenge you in any way, but it appears only when the other 12 have been defeated. Stand in the spotlight, use a Reaction Command to summon it, and another Reaction Command to get it to give you two new items! You get two items for this. One is called the Winner's Proof, a new Keyblade with EXP0 as the ability attached, 5 strength, and a whopping 7 magic! The other is the Proof of Tranquility, the first of 3 orbs that proves your mastery over KHIIFM+!
|
|
|
|
|
|
|
|
|
|
|
|
|
|
|
|
|
|
Posted: Wed Apr 09, 2008 11:19 am
~*Organization XIII*~(as written in Wikipedia)

Number in Organization: 01
Original Name: Xemnas is the Nobody of Xehanort.
Title: The Superior/Leader
Weapons: He controls Sorcerer Nobodies, and in battle he uses Aerial Blades and manipulates nothingness to phase through solid matter and manifest energy-based shields and projectiles.
Voice Actors: Xemnas is voiced by Norio Wakamoto in the Japanese version of Kingdom Hearts II, and by Paul St. Peter in the English version.
He is the leader of the Organization, and the main antagonist of Kingdom Hearts II. His original self was named Xehanort, but prior to becoming a Nobody he took his master's name, Ansem. In Kingdom Hearts Final Mix, Xemnas appears as an optional boss in Hollow Bastion, called "Unknown". In Kingdom Hearts: Chain of Memories, he is infrequently spoken of by the members of the Organization, who refer to him only as the "Superior".
In Kingdom Hearts II, Xemnas initially appears in Roxas's dreams, as he struggles to remember what he is. Xemnas also makes two appearances at Hollow Bastion; in the second, his identity is clarified and his face revealed. His plan is explained as increasing the power of Kingdom Hearts by having Sora destroy Heartless, releasing the hearts inside them. Xemnas appears again, in the World That Never Was, when DiZ attempts to contain Kingdom Hearts's power with a device of his creation. However, DiZ's machine overloads and explodes, killing its creator, leaving a huge hole in Kingdom Hearts, and causing many of the hearts to rain down and become Heartless. Xemnas uses what is left of Kingdom Hearts's power to summon the emotions of rage and hatred and take on a new form to fight Sora's party. Though Xemnas is thought to be defeated, he manages to separate Sora and Riku from the others, and attacks them. However, the two defeat him, and he then fades into darkness.

Number in Organization: 02
Original Name: Xigbar is the Nobody of Braig.
Title: The Freeshooter
Weapons: He controls Sniper Nobodies, and in battle he uses Gun Arrows and manipulates space to teleport himself, warp his bullets, and levitate upside down.
Voice Actors: Xigbar is voiced by James Patrick Stuart in the English version of Kingdom Hearts II and Hōchū Ōtsuka in the Japanese version
Xigbar initially appears before Sora at Hollow Bastion near the beginning of Kingdom Hearts II, though he never takes off his hood, and compares him to Roxas. During the player's second visit to the Land of Dragons, he transforms a dragon into a Heartless, and leaves after Sora confronts him in the Emperor's Palace, summoning his Nobodies to cover his escape. In the World That Never Was, Xigbar confronts Sora again, confusing him by calling him Roxas. Xigbar fights Sora's party, and after they defeat him, he fades into the darkness, refusing to clarify to Sora the mystery of "Roxas".

Number in Organization: 03
Original Name: Xaldin is the Nobody of Dilan.
Title: The Whirlwind Lancer
Weapons: With his powers, he uses wind to manipulate his six lances and shield himself. Xaldin's lances can transform into a dragon-shaped contraption to attack opponents with whirlwinds. He controls lance-wielding Dragoon Nobodies.
Voice Actors: Xaldin is voiced by David Dayan Fisher in the English version of Kingdom Hearts II and Yōsuke Akimoto in the Japanese version
Xaldin first appeared in Kingdom Hearts II at Hollow Bastion with other members. He later confronts Sora in Beast's Castle when he manipulates the Beast's rage by various means so that a powerful Nobody and Heartless could be created from the Beast. But Sora's interference with his plan forces Xaldin to steal the Beast's mystical rose to temper the Beast's rage. Sora and the Beast find him, and he reveals that the Organization needs Kingdom Hearts to become complete beings. He then kidnaps Belle, forcing the Beast to choose whether Belle or the rose is more important to him. The plan fails when Belle gets away with the rose and Xaldin falls against Sora and the Beast.

Number in Organization: 04
Original Name: Vexen is the Nobody of Even.
Title: The Chilly Academic
Weapons: Vexen can control ice and carries a large shield in battle that blocks any frontal attacks made against him.
Voice Actors: Vexen is voiced by Tatsuya Kando in Kingdom Hearts: Chain of Memories and Nachi Nozawa in Kingdom Hearts Re:Chain of Memories.
Vexen was interested in studying Xehanort's memories. In Chain of Memories, Vexen sides with Zexion and Lexaeus, other members occupying the castle's basements, to prevent Marluxia's plan to overthrow the Organization. He first battles Riku in order to gather data to create a replica of him. However, Vexen cares nothing for his "experiment" and allows Naminé to manipulate the Riku Replica's memories against his wishes. When the Replica fails to defeat Sora, Marluxia threatens to reveal the shortcoming to Xemnas, forcing Vexen to kill Sora. Encountering Sora, Vexen says that he came to collect his "debt" and provokes Sora's anger by making him believe that he controlled Riku rather than created a replica.
After their battle, Vexen gives Sora the card to Twilight Town with the intention of revealing Roxas's existence. Marluxia considers him a traitor as a result and sends Axel to kill him. In Twilight Town, Vexen attempts to reveal to Sora why he feels as though he has been to Twilight Town despite being fairly certain that he had never been there. Sora and Vexen battle again after Vexen tells Sora to throw away his memories and listen to his heart. As Vexen is about to reveal Marluxia's plot, he is killed by Axel.

Number in Organization: 05
Original Name: Lexaeus is the Nobody of Aeleus.
Title: The Silent Hero
Weapons: Lexaeus employs a large tomahawk and earth, throwing his tomahawk, breaking rocks and shaking the arena itself.
Voice Actors: Lexaeus is voiced by Tatsuya Kando in Kingdom Hearts: Chain of Memories and Fumihiko Tachiki in Kingdom Hearts Re:Chain of Memories.
Lexaeus is a well-built fighter in Organization XIII's ranks and one of the two members of the Organization in Kingdom Hearts: Chain of Memories that only appear in Riku's story.
Lexaeus, along with Vexen and Zexion, are older members of the Organization who occupy the basement levels of Castle Oblivion in the second game. When they find Marluxia plans to overthrow the Organization by capturing and manipulating Sora, Lexaeus and Zexion decide to capture Riku and use him in the same fashion to counter Marluxia. When it becomes dangerously apparent that Sora might fall into Marluxia's grasp, Lexaeus confronts Riku directly, trying to convince him to open himself up to the power of the darkness in his heart. Riku refuses to give in and Lexaeus attacks him. Riku manages to defeat the warrior, but with his last bits of strength, Lexaeus releases all of the darkness within him in hopes of overwhelming and consuming Riku. However, King Mickey protects Riku from the part of Xehanort's Heartless in his heart. Kingdom Hearts Re:Chain of Memories alters Lexaeus's death; Xehanort's Heartless possesses Riku's body and kills Lexaeus.

Number in Organization: 06
Original Name: Zexion is the Nobody of Ienzo.
Title: The Cloaked Schemer
Weapons: Zexion uses his power of illusion, used to mimic others' weapons, disguise himself as others, and create duplicates of himself. His unique weapon is a lexicon
Voice Actors: Zexion is voiced by Akira Ishida in Kingdom Hearts Re:Chain of Memories
Zexion is a manipulator appearing in Chain of Memories. Zexion's original self was Ansem the Wise's youngest lab assistant named Ienzo. He convinced Ansem the Wise that they should build an underground lab for research. His unique weapon is a lexicon. Before Kingdom Hearts II Final Mix, Zexion's weapon and powers were unknown because he had died without fighting. Because Nomura was unsure if it would be revealed later, he kept information about it secret. The development team also destroyed his gravestone in the World That Never Was that would have shown his weapon.
Zexion is one of two Organization members who appear only in Riku's story in Chain of Memories. Zexion tracks Riku's actions until Vexen's death; Zexion and Lexaeus then decide to use Riku to counter Marluxia's plan to use Sora. After Marluxia is killed, Zexion sees Riku as unnecessary and attempts to destroy Riku himself. He leads Riku into a manifestation of Destiny Islands, Riku's home. There, Zexion tells Riku about how he threw away his friends and his home and opened the door to darkness, thus destroying the islands. Following Riku's battle with a large Heartless, Zexion disguises himself as Sora and attacks Riku, telling him that he's become a pawn of the darkness. He engulfs Riku in light, but a vision of Kairi convinces Riku to accept darkness and light. With newfound confidence, Riku follows Zexion's scent through the light and causes Zexion to flee. Axel brings the Riku Replica to Zexion and convinces the replica that he can become "real" by gaining power that the real Riku does not have. The replica agrees, and as per Axel's suggestion, kills Zexion.

Number in Organization: 07
Original Name: Saix has no known Original Name.
Title: The Luna Diviner
Weapons: He wields a claymore. He draws power from the moon and controls the Berserker Nobodies, who wield weapons like his own.
Voice Actors: Saïx is voiced by Kirk Thornton in the English version of Kingdom Hearts II and Ginpei Sato in the Japanese version.
He has an X-shaped scar on his face. Saïx first appeared in Kingdom Hearts II in Hollow Bastion. He appears again in Twilight Town after Sora defeats his Berserker Nobodies and warns Sora of Axel's intention to turn him into a Heartless. After Sora defeats the Heartless army at Hollow Bastion, Saïx appears and explains Sora's purpose in the Organization's plans and refuses Sora's request to meet Kairi, whom Saïx kidnapped. After Saïx summons a horde of Heartless, Maleficent attempts to use her own Heartless to battle Saïx, but his Nobodies quickly dispatch them and overwhelm Maleficent. Later, at the World That Never Was, when Naminé helps Kairi escape, Saïx appears to deal with the two, but is stopped by Riku in the guise of Xehanort's Heartless; Saïx fled. Once Kingdom Hearts neared completion, Xemnas gives him permission to destroy Sora and his friends. Despite appearing calm, Saïx shows his true nature when he fights Sora in the World That Never Was by absorbing the light from the Kingdom Hearts moon, which puts him in a berserk state where he wildly attacks with his claymore. After Sora defeats him, he dies while pining for Kingdom Hearts to give him his heart.

Number in Organization: 08
Original Name: Axel has no known Original Name.
Title: The Flurry of Dancing Flames
Weapons: Axel who utilizes a pair of chakram, as well as fire with the Assassin Nobodies under his control. Axel can create walls of fire or throw his weapons.
Voice Actors: Axel is voiced by Keiji Fujiwara in Kingdom Hearts: Chain of Memories and the Japanese version of Kingdom Hearts II, while he is voiced by Quinton Flynn in the English version of Kingdom Hearts II.
In Kingdom Hearts: Chain of Memories, Axel pretends to join with Larxene and Marluxia in their plan to seize control of the Organization. To gain their trust, he assassinates Vexen when ordered by Marluxia. He later attempts to derail the plans by setting Naminé free so that she can reveal to Sora the truth about how she manipulated his memory. Eventually, Axel confronts Marluxia, prepared to destroy him. Marluxia uses Naminé as a shield to keep Axel at bay, though Axel resolves to go through her. When Sora makes a sudden appearance, Marluxia vanishes with Naminé, leaving Sora to fight Axel. Sora defeats Axel, after which he states the existence of their relation before vanishing. After Marluxia is defeated by Sora, Axel enlists the aid of the Riku Replica to get rid of Zexion in Castle Oblivion's basement levels.
In Kingdom Hearts II, Axel attempts to rescue Roxas from DiZ's virtual Twilight Town. In Kingdom Hearts II Final Mix it was shown that he received orders to bring back or kill Roxas. Despite Axel's efforts, Roxas merges with Sora. Later, acting separately from the Organization, Axel kidnaps Kairi to bait Sora to him. However, Saïx takes her away so the Organization can use her to fuel Sora's anger. During a visit to Twilight Town, Saïx warns Sora that Axel desires to turn him into a Heartless. Axel appears after the Heartless invasion of Hollow Bastion to Sora, and informs him that Organization XIII has been using him to get hearts. He then apologizes for getting Kairi involved. Axel later finds Sora in a pathway to the World That Never Was and chooses to fight Nobodies with him. The numbers get overwhelming and Axel performs a suicide attack to save Sora. Fading away, Axel apologizes for kidnapping Kairi and asks Sora to rescue her. When asked what he was trying to do, Axel admits he wanted to see Roxas, who made him feel like he had a heart, and Sora made him feel the same way. With the last of his strength, Axel opens an entrance to the World That Never Was.

Number in Organization: 09
Original Name: Demyx has no known Original Name.
Title: The Melodious Nocturne
Weapons: Demyx uses a sitar to manipulate water clones that attack his enemies. He controls the Dancer Nobodies.
Voice Actors: Demyx is voiced by Ryan O'Donohue in the English version of Kingdom Hearts II and Kenichi Suzumura in the Japanese version.
Demyx was first introduced in Kingdom Hearts II. Demyx first appeared in Kingdom Hearts II at Hollow Bastion with the other Organization XIII members. He later appeared in the Underworld, the world in which he first removes his hood. He is confronted for stealing the Olympus Stone, an object that protects the bearer from the effects of the Underworld. He refers to Sora as Roxas, having been given orders to "use aggression to liberate Sora's true disposition" but nevertheless still proclaiming "they sent the wrong guy for this". He fights Sora. The two cross paths again at Hollow Bastion during the Heartless attack. Upon being reminded that he is a Nobody, and has no heart, Demyx commands the "traitor" to be silent, and uses his duplicates and water attacks; Demyx fades into darkness at the conclusion of the battle.

Number in Organization: 10
Original Name: Luxord has no known Original Name.
Title: The Gambler of Fate
Weapons: His lesser Nobodies are Gambler Nobodies. With games of luck, Luxord is able to transform Sora into a card or a die; and uses his cards as weapons, defense or hiding places. Luxord also has power over time.
Voice Actors: Luxord is voiced by Robin Atkin Downes with an English accent in the English version of Kingdom Hearts II and by Jouji Nakata in the Japanese version
Luxord is described by Jiminy Cricket as "a master of rhetoric". Luxord appears in Kingdom Hearts II at Port Royal from Pirates of the Caribbean: The Curse of the Black Pearl, where he revives the curse of the Aztec gold, and the cursed pirates along with it. Luxord makes use of the opportunity to scout the powerful Grim Reaper Heartless and the gold's curse to ascertain as to whether or not they would be useful to the Organization in terms of Sora's part in their plan and making Port Royal's people assist in it as Heartless. For amusement, he has his Nobodies steal four of the Aztec medallions while having Grim Reaper curse Jack Sparrow. Sora defeats Grim Reaper in order to free Jack from his curse and Luxord collects the forthcoming heart before escaping without fighting Sora and his party himself. At the World That Never Was, Luxord traps Sora's companions in his cards, leaving Sora to fight alone in a battle. Luxord fades back into darkness, unable to comprehend how "Roxas" could kill him.

Number in Organization: 11
Original Name: Marluxia has no known Original Name.
Title: The Graceful Assassin
Weapons: He uses a scythe and his control over flowers to attack.
Voice Actors: Marluxia is voiced by Tatsuya Kando in Kingdom Hearts: Chain of Memories and Shūichi Ikeda in Kingdom Hearts Re: Chain of Memories.
In Chain of Memories, Marluxia and Larxene conspire to overthrow the Organization by using Naminé to manipulate Sora's memories. He gives Sora his first set of world cards to proceed through the castle. He assigns Axel to eliminate Vexen when his plan to use the Riku Replica fails. Larxene fails to kill Sora and is eliminated as well. Marluxia is later confronted by Axel, who accuses Marluxia and Larxene of being traitors for conspiring against the Organization. Axel attempts to kill Marluxia, however, Marluxia returns to the thirteenth floor with Naminé, tricking Sora into fighting Axel for him. Seeing Axel defeated, Marluxia anticipates Sora's arrival on the thirteenth floor. He orders Naminé to erase Sora's memories, but she refuses. When Marluxia implies that he will kill her for disobeying him, Sora demands that Naminé erase his memories for her safety, as his promise will remain and he can protect her. Marluxia says that Sora would become just like the Riku Replica, but the Riku Replica surprises Marluxia, who then engages Sora. The two fight, but Sora realizes he has been fighting a replica of Marluxia. He later finds the real Marluxia, in a new form, and kills him.

Number in Organization: 12
Original Name: Larxene has no known Original Name.
Title: The Savage Nymph
Weapons: Larxene wields kunai and the power of lightning to fight.
Voice Actors: Larxene is voiced by Rieko Katayama in Kingdom Hearts: Chain of Memories and Yuko Miyamura in Kingdom Hearts Re: Chain of Memories.
Larxene was first introduced in Kingdom Hearts: Chain of Memories where she conspired with Marluxia to overthrow Organization XIII by using Sora. She is agile and can call forth bolts of lightning in battle. In Chain of Memories, she entices Sora to believe the false memories Naminé implanted in his mind. Larxene later appears to Sora, after he fought the Riku Replica for the fourth time, planning to destroy them all. Again, Larxene mocks Sora for "chaining" himself to false memories of Naminé and the "promise" he made to her. She has a cruel, sadistic personality and enjoys seeing others suffer. She taunts Vexen after Marluxia charges him with treason and incompetence, and toys with Sora before fighting him the first time. After she discovers Axel's betrayal and sees that her and Marluxia's plans have fallen apart, her playful manner vanishes and she attacks Sora in a rage. She is later killed by Sora, Donald, and Goofy.

Number in Organization: 13
Original Name: Roxas is the Nobody of Sora.
Title: The Key of Destiny
Weapons: He uses the "Oathkeeper" and "Oblivion" Keyblades, which represent Sora's memories of Kairi and Riku, as well as the power of light. As a stronger Nobody, Roxas controls Samurai Nobodies.
Voice Actors: Roxas is voiced by Jesse McCartney in the English version of Kingdom Hearts II and Koki Uchiyama in the Japanese version.
When pre-release Kingdom Hearts II screenshots and video showed this character without an Organization coat, he was featured prominently, emphasizing his importance to the future game's plot. Roxas's backstory and his joining of Organization XIII itself will be explored in the upcoming Kingdom Hearts 358/2 Days, for the Nintendo DS. Roxas will be a playable character in the game.
Unlike the other Organization members, Roxas lacks memories of his previous life, due to the short time Sora had spent as a Heartless. During Roxas's time in the Organization, he and Axel became friends, but Roxas leaves to find answers as to why he possesses the Keyblade. He is confronted by Riku, who defeats Roxas and takes him to DiZ. In Kingdom Hearts II, DiZ places Roxas in a virtual Twilight Town, leaving him without any memory of the Organization and with a fabricated identity to throw them off. While here Roxas begins seeing his other self's memories in dreams. Roxas lives an otherwise normal life in "Twilight Town" until Axel infiltrates it to save him. Despite Axel's attempts to stop him and Roxas gaining back his memories of the Organization, Roxas merges with Sora early in the game, which also causes some of Roxas's memories to influence Sora.
Roxas appears twice more later in the game. The first is a battle with Sora, shown only as a cut scene and never fully explained. In Kingdom Hearts II Final Mix, Sora's battle with Roxas is made playable, and a cut scene is added that shows Xemnas explaining that Axel's death triggered the reappearance of Roxas. Roxas appears once again with Naminé before Kairi enters the corridor of darkness back to Destiny Islands. He and Naminé imply that they will live on within Sora and Kairi as both a part of them and as individuals, as seen in the ending cinematic when they smile at each other through Sora and Kairi.
|
|
|
|
|
|
|
|
|
|
|
|
|
|
|
Posted: Wed Apr 09, 2008 11:22 am
~*The Nobodies*~
In Kingdom Hearts II a new foe has appeared called the Nobodies, they are the cast of bodies of those who have become Heartless and are under the control of the stronger Nobodies - Organization XIII. They are very similar to the Heartless except for the fact that they don't have hearts, despite this most Nobodies have a Heartless equivalent, for example a Shadow and a Dusk, or a Dragon Heartless and a Dragoon Nobody. Below you can find a list of all the Nobodies that are minions of Organization XIII and tactics on how to beat them or on what Reaction Command will appear and what it will do.
Dusk
Dusk's are one of the weaker Nobodies, they rely predominately on speed and have weaker attack. Like all nobodies they are weaker when open to attack, so you can use the Reaction Command Reversal to launch a parry attack and catch them off guard! Dusk's are the first Nobodies to ever appear before Sora in Kingdom Hearts Chain of Memories during the fight with Marluxia and later they steal photos of Roxas during the Roxas' Story in Kingdom Hearts II.
Creeper
Creeper's are the weakest of all the Nobodies, they move along the floor quite quickly then change into different forms such as Swords, then they attack you in this new weapon-like form. The best time to attack them is when they are fighting along side Dusk Nobodies, you can use the Reversal command to parry attack both the Dusk's and Creeper's at the same time! They are the second Nobody that you meet, they first appear before you upon entering the Old Mansion in Twilight Town during the Roxas Scenario.
Dragoon
Dragoon Nobodies are extremely powerful, they are Dragon Nobodies which wield huge Lances. When dodging their attacks a ball of light will appear, if you see this it's your chance to use the Reaction Command Learn, you can keep using Learn as much as you want to launch a series of Jump Reaction Commands afterwards.
Dragoon's rare drop item is Donald's Staff, Nobody Lance.
Assassin
Assassin's are again very powerful Nobodies, they use their stealthy abilities to hide themselves under the ground, then unsuspectingly strike you from behind! Assassin's can't be attacked whilst underground, and when they are underground they unleash a series of slicing blades which can be extremely powerful if you suffer the worst of it. To get an Assassin Nobody to appear above the ground you have to hit with the Keyblade just as it's about to attack you, countering an Assassin will make it appear above the ground and leave it open to attack. The Reaction Command for Assassin's is called Fail-Safe.
Samurai
Samurai's are powerful Nobodies that attack using their Swords and Sheaths as weapons. These Nobodies are extremely tough and can wield up to four weapons at once, which means they can counter your attacks pretty well then attack you when your vulnerable. Like the Assassin this Nobody can flee underground, again by countering it's attacks you can force it to the surface then take your chance to attack with Reaction Commands. The Reaction Command is called Duel Stance, it allows you to fight a Samurai Nobody one on one by selecting a series of commands from the Menu.
Sniper
Sniper's are very fast Nobodies which dodge and dart around Sora, as the name suggests they are Snipers, so they have a Crossbow Type weapon. They fire arrows of light towards you which are pretty hard to dodge. However they aren't so flexible which makes it difficult for them to evade your attacks. Their Reaction Command is called Warp Snipe, which allows Sora to dart around the screen and teleport, just like they do whilst unleashing attacks on all the Snipers in the vicinity. Continuously pressing Triangle Button will allow Sora to repeat this Reaction several times.
Sniper's rare item drop is the Item Synthesis Material Twilight Gem.
Dancer
Dancer's are very quick and agile, however they lack in the strength department. However weak they maybe they usually attack in numbers. The best strategy for fighting Dancer Nobodies is to wait until they have finished attacking, then strike them with the Keyblade. When approached Dancer's will lunge towards Sora and throw him out of the battle.
Berserker
Berserker's are extremely powerful Nobodies, they are dragged by a giant Cursed Glaymore, which they will repeatedly stomp you with none stop. Attacking them from the front is almost impossible because they will counter all your attacks due to the rapidness of their assault. Striking them from behind then attacking them with their own weapon using the Reaction Command, Berserk is the best way to go about doing things. Repeatedly pressing Triangle whilst in Berserk will unleash Sora's final attack with the Cursed Claymore, Magna Storm.
Gambler
Gambler's aren't extremely strong, but they have a fair bit of HP. Instead of fighting they aimlessly float around and try to engage in card games and dice games by using the Reaction Command, Begin Game.Whilst in a game Sora will take on the form of a Card or a Dice, upon winning the game Gambler's become vulnerable for a long period of time. However, going all out and attacking them with full force seems to be a better method! Gambler's rare item drop is Goofy's Shield Nobody Guard.
Sorcerer
Sorcerer's don't physically attack, they just float away and try to evade Sora's attacks. From a safe distance they attack with magical cubes which hover around you and close in to do damage. The cubes will form around Sora leaving a small space to escape, if you manage to dodge their attacks the cubes will take a break before attacking again. At this point it's best to go all out and finish off Sorcerer Nobodies.
Twilight Thorn
Twilight Thorn only appears once, before Roxas at the Station of Awakening. It tries to attack it but is easily overwhelmed by the Keyblade Master because Roxas continuously unleash Reaction Commands on it to finish it off. Twilight Thorn is a giant Nobody which is much powerful than the others. It attacks by smashing Roxas with it's huge hands and summoning smaller Creeper Nobodies.
|
|
|
|
|
|
|
|
|
|
|
|
|
|
|
|
|
|
Posted: Wed Apr 09, 2008 11:24 am
~*The Chasers*~Not much is known about the Chasers other then they are part of a secret teaser at the end of Kingdom Hearts 2 & Kingdom hearts 2 Final mix+. However, recent news has allowed us to speculate on who exactly the are. What Happened in the Secret Trailer ::The secret trailer begins with views of a barren wasteland, with text scrolling across the screen (quotes from Ansem Reports 8 and 9). Ansem Report 8 talks about Xehanort's machine that creates Heartless, while 9 has a line that may hold great significance to the trailer. The line reads "The Keyblade is said to hold phenomenal power. One legend says its wielder saved the world, while another says that he wrought chaos and ruin upon it." The trailer then brings us to a deserty plain with dark clouds over head. A heavily armored soldier is standing by a great beast that has been slain, which quickly erupts into dust and then nothing. This first soldier has chrome armor with a helmet that has rabbit-like earpieces. He wears a cape and holds a giant keyblade over his shoulder which is of an unfamiliar design. To his right, another armoured figure walks towards him, also dawning a cape. This character has ear-pieces that shoot backwards, rather than up. The tinted eyepiece is the same as the first soldier, the eyes are unseen. This second charater has larger forearm armour and is relatively thinner. He is not carrying a weapon. To the first soldier's left is a third character. Much like the first soldier in appearance but there is something about this third soldier that looks feminine. The walk or the figure makes this last character have a female touch. This character is carrying a keyblade as well. The characters moves towards the keyblades as the structure behind turns to dust. As the three are close together, the first soldier moves towards three keyblades sticking out of the sand. The first keyblade in the line is Mickey's Keyblade, then there is The Kingdom Key, followed by Riku's Road To Dawn Keyblade. When the soldier moves closer to them, the ruin he was standing on vanishes into dust. The soldiers pick up the keyblades, the two with the pointed "ears" weild two blades each, the one with "ears" pointing back picks up the Kingdom Key and is holding another Keyblade. There is a quick pan outwards and it is revealed that there are hundreds upon hundreds of keyblades sticking out of the ground. There are four pathes carved out, resembling a perpendicular crossroads of sorts. Suddenly, there is a distant rumble, almost like an explosion. The three look into the distance and through the haze of the heat, an outline can be seen of a figure. Then the following captions show up on screen: "It all begins with birth by sleep."
"Master of Keyblade"
"The Lost Two"
"Memory of Xehanort"
"Chasers"
"Keyblade War"
"It all began with... birth by sleep." The first is that these new characters are in fact human and not a new breed of heartless. , Tetsuya Namura (the producer & creator of KH) has confirmed a few things for us thus far... names for our chasers. BLUE HAIRED GIRL - AQUA ROXAS LOOKALIKE - VEN ENIGMATIC SOLDIER - TERRA Interviewer: "Who are the 3 armoured people?" Nomura: "Those 3 are completely new people who haven't shown up at all. In fact, I've already thought of their names. Back when I was making that movie, I only had their settings but now I've even drawn their faces to give myself a clearer image of them http://www.kingdomhearts3.net/images/aqualarge.jpg
|
|
|
|
|
|
|
|
|
|
|
|
|
|
|
Posted: Wed Apr 09, 2008 11:26 am
~*Keyblades*~Here is a list of ALL Keyblades from KH1 to KH2 along with their picture(s). If you have any descriptions to add, feel free to post them here. I'm too lazy to remember who gave Sora what blade and why. lol Kingdom Key (Realm of Light) - Wielded by Sora  Kingdom Key (Realm of Darkness) - Wielded by King Mickey Mouse  Oathkeeper - Wielded by Roxas  Oblivion - Wielded by Roxas  Way to Dawn (Twilight?)- Wielded by Riku  Kairi's Keyblade - Wielded by Kairi  Jungle King  Three Wishes  Crabclaw  Pumpkinhead  Decisive Pumpkin  Fairy Harp  Wishing Star  Star Seeker  Spellbinder  Metal Chocobo  Monochrome  Gull Wing  Sleeping Lion  Olympia  Hero's Crest  Guardian Soul  Lionheart  Lady Luck  Divine Rose  Rumbling Rose  Hidden Dragon  Follow The Wind  Circle Of Life  Photon Debugger  Wishing Lamp  Sweet Memories  Mysterious Abyss  Bond Of Flame  Fateful Encounter  Mushroom XIII  One Winged Angel  Diamond Dust  Fatal Crest  Fenrir  Ultima Weapon 
|
|
|
|
|
|
|
|
|
|
|
|
|
|
|
|
|
|
Posted: Wed Apr 09, 2008 11:28 am
~*Drives and Forms*~
Sora has a wide variety of forms derived from the new outfit he wears. His basic one is the black outfit. However, when he takes on the power of his friends and of himself, it changes colors to reveal new powers and strengths. The time you can be in any form however is limited to your "Drive Gauges" which are depleted when you are in a form.
So Sora's time in these forms are limited but well worth the time you put into upgrading them. Certain of these form leveling up, allows Sora to use new abilities in his 'Standard Form"
Standard Form
As the name implies, standard form is your form at rest or your 'normal' form. There are no special abilities or advantages other then what is already in your power to do. Makes, sense since this is the initial form you take.
- Standard black costume
- No harmful side effects
Valor Form (3 drive gauge cost)Changes- You change into a red costume - You wield 2 Keyblades - You can choose which Keyblades you use (Default: Kingdom Key & Oathkeeper) Pros- Strength increases - Speed increases - More attacks in each combo - Attack animations are different - You can give damage to Goofy instead of Sora Cons- When merged with Goofy, he is no longer in your party - You can't use Magic - The Drive Gauge runs out
Leveling Up
-Each successful hit on an enemy equals one Valor experience point
-You gain the High Jump Lv. 1, 2, and 3 abilities for Standard Form by leveling Valor
Wisdom Form (3 drive gauge cost)
Changes
- You change into a blue costume
- The command menu changes from "Attack" to "Shoot"
- "Shoot" allows your Keyblade to fire a Magic white bullet at an enemy
- Instead of running, you glide along the floor
Pros
- Magic increases
- Different Magic attacks can be combined to make bigger combos
- Magic can be used in rapid succession
Cons
- When merged with Donald, he is no longer in your party
- The Drive Gauge runs out quicker
Leveling Up
-Each Heartless slain equals one Wisdom experience point
-You get the Quick Run Lv. 1, 2, and 3 abilities for Standard Form by leveling Wisdom.
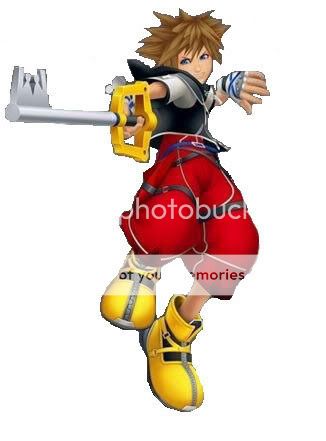 Limit Form (FM+ only, 4 drive gauge cost)Changes Limit Form (FM+ only, 4 drive gauge cost)Changes-Sora's outfit resembles that of the first KH -Your current attack abilities are replaced by attack abilities from the first KH Pros-You gain Sonic Blade, Ars Arcanum, Strike Raid, and Ragnarok, and they heal HP with every hit you land with those attacks. -You gain the growth ability Dodge Roll by leveling up this form -No allies are lost when you use this form, meaning you can use it in 1 on 1 boss fights Cons-You lose all standard magic, like Fire, Blizzard, Cure, etc. -Using the four "special" attacks costs a lot of MP, and is often used up after just two uses.
Leveling Up
-Each complete combo using the four "special" moves equals one limit experience point
-You get the Dodge Roll Lvs. 1, 2, and 3 abilities for leveling Limit form.
Master Form (4 drive gauge cost)Changes- You change into a yellow costume - You wield 2 Keyblades Pros- Strength increases - Magic increases - You don't physically control both of the Keyblades, you control one of them with magic, giving you greater range Cons- When merged with both Donald & Goofy, they are no longer in your party - The Drive Gauge runs out quicker
Leveling Up
-Each Drive Orb collected while in Master counts as one Master experience point
-You get the Aerial Dodge Lvs. 1, 2, and 3 abilities for leveling this form.
Final Form (5 drive gauge cost)Changes- You change into a silver costume - You wield 2 Keyblades Pros- Strength increases - Magic increases - The Keyblades seem to attack as if they have a mind of their own -Even simple actions like jumping cause keyblades to attack -Incredibly good at parrying attacks Cons- When merged with both Donald & Goofy, they are no longer in your party - The Drive Gauge runs out quicker
-Must morph into other forms repeatedly to obtain it, only possible after Roxas duel
Leveling Up
-Each Nobody slain counts as one Final experience point
-You get the Glide Lvs. 1, 2, and 3 abilities for leveling this form.
Anti Form (Completely drains all drive gauges)Changes- You turn into a Heartless like form but remain looking like Sora - You lose your Keyblades and you fight with claws just like a Heartless would -Drive Orbs make you demorph faster upon collecting them instead of slower -4 times more likely to morph into Anti form when fighting an Organization member. Pros- This form appears when you drive a lot - Strength increases - You attack so fast and in large combos that the damage is great Cons- When merged with both Donald & Goofy, they are no longer in your party - "Attack" is the only option on the command menu - The Drive Gauge runs out quicker -Your defense is cut in half -You are unable to pick up HP balls -Only way to voluntarily morph into it is to use a the Keyblade Fateful Encounter, only found in FM+. Leveling Up-You cannot level, nor gain a growth ability from, this form.
|
|
|
|
|
|
|
|
|
|
|
|
|
|
|
Posted: Wed Apr 09, 2008 11:32 am
Summons
Summons generally sacrifice both your allies for a new character who is generally more helpful than any other party member. One summon in KHI doesn't cost any party members. More on that later. For right now, please enjoy the full list of summons in the KH series.
KHI Summons
Simba- Simba is a good summon because his attack, Proud Roar, hits all enemies on the battlefield, regardless of their distance from Simba. The longer you charge his roar, the more deadly it becomes. The catch is that while you are charging his roar, you are completely open to attack. So if you wan to unleash a fully charged roar, you better have a plan to keep yourself from being attacked.
Genie- Big Blue here is a very powerful summon who pummels your enemies with a variety of magical attacks. Very, very useful when you find yourself vastly outnumbered. Unlike Simba, Genie does not leave you open to attack, as he requires no charge time for his attack.
Dumbo: Dumbo is an odd summon. He flies very slow and you ride on his head while spraying a huge water jet at your enemies. He makes up for his poor mobility by making Sora completely invincible.
Bambi: Most players, sadly, never use Bambi because he doesn't attack. But that's not where his strength lies. Bambi has the power to drop literally HUNDREDS of MP bubbles. This means that while Bambi is on the field, you have virtually unlimited magic! Think o fthe damage you could do! As if that weren't awesome enough, the more enemies you kill while Bambi is on the field of battle, the more items Bambi drops. So, in addition to virtually unlimited magic, Bambi keeps you stocked with all sorts of healing and MP regenerating items. These abilities make Bambi my very favorite summon in KHI!
Tinkerbell: Another incredibly useful, yet underappreciated summon. Tinkerbell is the only summon in all the games that does not make you sacrifice your party members to call her. She heals you once about every 5 to 10 seconds, so you don't need to waste magic to cure, or even use items to heal yourself. This makes Tinkerbell invaluable against Kurt Zisa, who seals your magic. As if these things weren't enough, if you die while Tinkerbell is on the battlefield, she will actually revive you! It uses all her power, so she vanishes from the battle after that. If you don't die, she never goes away until the battle is over. Definitely worth a try against those hard hitting bosses.
Mushu: For all those pyromaniac KH players out there, this is the summon for you! Mushu sits atop your head and replaces your attack comand with Fire. When pressed, instead of swinging away with the Keyblade, Mushu fires a stream of fireballs at your target. It's like having a damn minigun strapped to the top of your head! This summon is great for attacking targets fast from a distance, or for keeping opponents at bay if you need a breather to come up with a strategy of some kind.
Com Summons:
You have the same summons with the same attacks in Com as you did in KHI, and they stick around longer and have side effects the more cards you put in a sleight of them. For example, one Simba card damages all enemies in front of him with his roar, but two or three summon cards do more damage, and stun the targets in front. The only new summon is the deadly, the fierce, the magnificent...
Cloud: Upon summoning, Cloud delivers two slashes to the area directly in front of him, then vanishes. These slashes are very powerful. Two Clouds makes it three slashes, and three Clouds allows Cloud to use the high flying Omnislash attack!
One other difference to be noted is...
Genie: Upon being summoned, Genie will cast Stopra, Gravira, or Thundara. The more Genies that are stocked, the more spells he will launch.
KHII Summons
Chicken Little: This little fella is the most overlooked summon in KHII, but he is actually very useful if you know how to play his strengths. His standard attacks are very weak, though. He throws baseballs at your enemies, and throws firecrackers to keep them at bay. However, if your HP alarm starts going off, Chicken Little will heal a small portion of your HP. Also, CL has a whistle attack that draws all enemies to CL's location, just like Magnet. However, this whistle has a far greater range than even Magnega. In addition, unless the targets are completely invulnerable, this whistle will force the enemies to stop dead in the middle of their attack while being sucked in. This whistle has saved my life more than a few times in KHIIFM+'s Critical mode. Chicken Little's FPS limit is on the weak side, though. All it does is rapid fire baseballs and firecrackers at whatever you lock onto using a sniper scope. CL is much more useful when not using his limit.
Genie: Genie is very different from the first two games. If your HP alarm goes off while Genie is on the field, he will heal a little, but that's about all he does. His real strength is in his whopping 4 Limits. All other summons in KHII only have one Limit. This is what makes Genie unique. Genie has four forms, Valor, Wisdom, Master, and Final, just like Sora. If Sora doesn't have a form, than neither does Genie. For all FM+ players out there, Genie does NOT, unfortunately, have a Limit form. Valor Genie repeatedly bashes your enemies with physical attacks, while Wisdom hits pummels them with lasers. These two limits cost the least out of Genie's time limit. Master beats them down with physical attacks, and finishes with a barrage of lasers. This costs a little bit more. Final Genie crushes foes with incredibly swift physical attacks, and the final step is a storm of lasers that blows away all enemies in the room, no matter how far away they are. It costs a lot, but it is very, very worth it. Final Genie is the most powerful Summon Limit you can get.
Stitch: Stitch is also very useful. He doesn't attack in the usual sense, but instead crawls around the screen like a bug. If something takes a shot at Sora, as long as there aren't too many enemies attacking at once, Stitch can deflect it with his laser gun, protecting Sora from harm. He also occasionally plays his ukellele, causing all opponents on the screen to drop various pickups, usually HP orbs. His limit, Ohana, allows you to shoot at one random enemy for damage, or play a ukellele duet with Stitch to cause all enemies on screen to drop pickups. For the final phase, which must be triggered by the player before the limit gauge runs out, Stitch shoots while Sora plays, so you inflict damage and gain pickups at the same time! It should be noted that during the tournaments in the Underdrome, playing the Ukellele in or out of the Limit will cause your opponents to drop Olympus orbs instead of normal pickups, needed for completing the Jiminey objectives in your journal. This makes Stitch very useful for completing tournament objectives.
Peter Pan: Peter Pan attacks whenever you do, allowing you to string together combos that you could never do alone. Every hit struck by Peter Pan causes the opponent to drop pickups, just like Stitch's ukellele. While Pan is fighting alongside you, Tinkerbell heals you periodically, just like in KHI. Tink will revive you only once if you die, as per usual, however SHE WILL NOT REVIVE YOU IF YOU DIE IN AN UNDERDROME TOURNAMENT. Peter Pan's Limit allows you to fly around and strike at enemies during flight. You can even fly up and down, just like in Neverland in the first game. The Flying Boy sucks enemies in to damage them, and Tiny Fairy helps to blow them away. Use each attack according to your situation. Photographs of your adventure in Neverland obstruct your view of the battlefield durint this limit, so have some idea of where you are going before you start the limit. The final blow is just a storm of hits that severely damage the opponent. All attacks in this limit, save for the finishing attack, cause enemies to drop pickups. Just like with Stitch, enemies drop Olympus orbs instead of normal pickups in the Underdrome tournaments. Peter Pan is absolutely invaluable for completing these tournament objectives, as he causes enemies to drop far more orbs than Stitch. One trick, to maximize your orb count, is to use his Limit, but stop right before the finishing attack and let your limit wear off. This is useful because that attack causes major damage and does not allow your opponets to drop orbs with each hit, which is exactly the opposite of what you want to do. The longer they stay alive, the longer you and Pan can hit them with his limit to mooch even more orbs off your opponents.
In conclusion, most players very rarely use summons, but if you practice with each one, in any game, they will become very formidable and valuable assets as you go throughout the games.
|
|
|
|
|
|
|
|
|
|
|
|
|
|
|
|
|
|
Posted: Sat May 03, 2008 7:00 am
The Princesses of Heart
The 7 Princesses of Heart are the only 7 hearts in existance with absolutely no darkness in them. If they are gathered together, they open a path to the Door to Darkness. This was Maleficent's plan in the first Kingdom Hearts, and Ansem (Xehanort's Heartless) took advantage of her plan and went through once the 7 had been gathered. They have a fair amount of power, though. When the Keyhole leading to the Door to Darkness was opened, and darkness threatened to swallow Hollow Bastion, they held back the darkness all by themselves until Sora finally locked the keyhole. Also, it seems that the Princesses will play a pretty significant role in Birth by Sleep. The Princesses of Heart are:
Snow White: Snow White was in the movie Snow White and the Seven Dwarfs, where she had a whole other set of problems. You never get to visit Snow White's world, as it has already been destroyed when Kingdom Hearts begins. If you beat Deep Jungle before Wonderland, you see Snow White being brought before Maleficent instead of Alice. Other than talking to her in Hollow Bastion once she is freed, she doesn't have that much of an impact on Sora.
Alice: From the movie Alice in Wonderland, Alice is the smallest and probably youngest of the Princesses of Heart. She is falsely accused of trying to steal the Queen of Hearts's heart in Wonderland, and her execution was stalled by Sora. Once he brought evidence before the Queen proving Alice's innocence, she became enraged because she was proven wrong. She hoisted Alice's cage high into the air and sicced her card soldiers on Sora. Once the battle was over, Alice was gone from her cage...if you beat Wonderland before Deep Jungle, you see Alice being brought before Maleficent instead of Snow White. Upon defeating the Trickmaster Heartless, the Chesire Cat tells Sora that Alice had been taken to another world...
Cinderella: The star of the movie Cinderella (big leap to make, I know), Cinderella's role is similar to that of Snow White; not very big. She is already in Maleficent's possession at the start of Kingdom Hearts, and her world has been destroyed. However, it is hinted by Nomura that we will be able to go to Cinderella's world in the new game Birth By Sleep...
Aurora: Aurora is the star in the movie Sleeping Beauty. In Kingdom Hearts, she is another Princess who does not have much of a role to play. One point of interest, however, is that Maleficent is originally from Aurora's world, which was destroyed. Aurora is already in Maleficent's possession when Kingdom Hearts begins. Once again, though, Nomura has hinted that we will be going to Aurora's homeworld in Birth By Sleep...
Jasmine: Jasmine comes from the movie Aladdin. She gets into some serious trouble in Kingdom Hearts, as she is relentlessly being hunted for by Jafar, who has overthrown her father and is working in tandem with Maleficent. Therefore, he knows all about her being a Princess of Heart, and has Heartless searching every nook and cranny of Agrabah for her. In the end, she got caught by Jafar, but Sora and the gang came after him and engaged him in combat. While they were throwing down, Jasmine was taken to Maleficent in Hollow Bastion by Riku. In Kingdom Hearts II, she plays a smaller role. She got captured by Jafar again for a minute or two, but that was about all that happened with her.
Belle: Belle is one of the stars from the movie Beauty and the Beast. In Kingdom Hearts, she is already held by Maleficent when you get to Hollow Bastion, but it must have been VERY recently because the Beast just showed up when you land, and he followed Belle after their world was destroyed by sheer force of will. After you free the Princesses, she can be found in Hollow Bastion's library trying to find a book on how to banish the darkness. She gives Sora the Divine Rose keychain, which is a very powerful version of the Keyblade. In KHII you get to go to the Beast's Castle, which is Belle's homeworld as well. She proves herself to be the most gutsy of the Disney Princesses of Heart by elbowing Xaldin in the gut when he holds her hostage, and running away with the Beast's rose (which was also stolen by Xaldin) and Xaldin's dignity. Grinning like mad, at that.
Kairi: Yup yup, Kairi is a Princess of Heart, and the pain in Maleficent's a**, because her heart had taken refuge in Sora's body, and Maleficent can't open the path to the Door to Darkness with just her lifeless shell. She is a native of Hollow Bastion, but she was cast off that world by Xehanort as a child and is now a resident of Destiny Islands. She is the apple of Sora's eye, and she feels the same for him. She is the only Princess of Heart with a Nobody, Namine. Also, she isn't exactly a typical princess either, as she gets to raise a little hell in KHII and hacks up a horde of Shadows along with Riku.
|
|
|
|
|
|
|
|
|
|
|
|
|
|
|
Posted: Mon Jul 07, 2008 10:24 pm
The Bosses
While mostly comprised of Disney Villains, don't let that fool you. These guys are more intelligent and sometimes more nasty than Boss Heartless. Speaking of which, Boss Heartless can be found in the Heartless Bestiary, and Organization XIII members can be found in the Organization XIII. The bosses listed here have not been mentioned in any previous posts. (Rock Titan and Hades KH are optional, but they aren't powerful enough to be considered hidden bosses, so I put them here.)
Cerberus
The massive three-headed dog which Hades uses to guard the underworld. Cerberus is strong, and suprisingly agile for such a big beast. It makes appearances in both KHI and KHII. Throughout the games, it uses fire and dark attacks, as well as potent melee strikes, to crush his enemies. In KHII, use the reaction command combos to knock the brute out and deliver some massive damage while it is unconcious.
Clayton
A big game hunter in the Deep Jungle. Angered because Jane won't let him hunt gorillas, his emotions overcome him and he is possessed by the Heartless, much in the same way a ghost would possess a human. He works in tandem with the Stealth Sneak Heartless to bring Sora and company down. By himself, his only attack is firing his shotgun, though he can also heal himself with an endless supply of potions. Don't let up once you start attacking him, or you could be in for a long fight. Only in KHI.
The Cave of Wonders
In KHI, when Sora attempts to follow Jafar into the Cave of Wonders entrance, the giant tiger head attacks him! Jafar caused the big fella to be possessed by Heartless, and it's up to you to set him free. He is capable of firing lasers from his eyes and spitting huge sand clouds at you. He can also spit Heartless at you, like Bandits, Fat Bandits, and Air Soldiers. His eyes are his only weak point. Climb up and start attacking!
Jafar
The main villain in Agrabah, who uses a snake staff and magic in combat. He steals Genie's lamp and commands him to help defeat Sora. Genie isn't that much of a threat, amazingly, but he is invincible. Go for Jafar and don't let up! He can use a fiery laser and and generate a huge blizzard to attack. He can also swing his staff to defend himself at close range. If you hit him too many times, he can emit a shockwave to get you to back off.
Once Jafar is defeated, he wishes for Genie to turn him into a genie himself. Keep moving and attack Iago to defeat him, as Iago is carrying the lamp.
In KHII, Genie Jafar makes a comeback, thanks to the schemes of Organization XIII. Attack his stomach to open a reaction command, and attack his head to finish the big blowhard for good.
Ursula
A sea witch who causes serious problems for the residents of Atlantica. She manipulates Ariel (twice) to get to King Triton's trident to give herself superpowers. Without the trident, Ursula has minimal combat ability, with only a spin attack to use against Sora and the gang. She mainly relies on her magic cauldron for her offensive and defensive purposes. It makes her invincible, creates whirlpools, and launches meteors into the air. Pump it full of your own magic to cause a backlash and stun Ursula, making her vulnerable. When she supersizes with the trident, her threat level is much higher. She uses thunder blasts and water bubbles, as well as an inhaling attack, to put Sora down. Attack her head to defeat her.
In KHII the ugly octopus comes back, but is not much of a threat as the battle with her this time is a singing battle. If you have good timing, you'll completely crush her.
Oogie Boogie
A big bag of bugs who torments the residents of Halloween Town. A cowardly opponent, letting his machines do his fighting for him. He steals Jack's artificial heart with hopes to control the Heartless completely, but it fails miserably, as a heart is far more complicated then the goofy looking thing Finkelstein creates. Press the button to trap and reach Oogie Boogie. He uses a weak slap attack to defend himself at close range. Ignore it, and attack! After the battle, when Sora and Jack figure Oogie is dead, he comes back and fuses with his manor to have one last crack at our heroes. Climb up Oogie's new body and attack the orbs of darkness to defeat him.
In KHII, Maleficent revives Oogie to help take revenge on Sora, but Oogie betrays her. She then deserts him, leaving him to face Sora and company on his own. Once again, the whelp relies on his machines to attack. Use the reaction command on the presents to break his platform. Then, when he drops down, maul him!
Captain Hook
Captain Hook is a slightly panicky pirate, living in constant fear of the crocodile that ate his left hand. He transports Riku to Kairi, or at least her body, but he does not like Riku at all, as he seems to be overstepping his bounds and almost trying to take over his ship. He captures Tinkerbell and blackmails Sora with her for the Keyblade. Sora squirms his way out of that mess, courtesy of Peter Pan, and engages Hook. He fights with his sword and exploding presents, and also calls Battleship Heartless to support him. Set him on fire and get out of the way for some real entertainment!
Riku
You'll be fighting Riku several times throughout KHI, and once in KHII. In KHI, Riku betrays Sora and engages him once Sora takes the Keyblade back from him. Easily overcome, he is then possessed by Ansem (more on him later) and creates a Keyblade from the Princess's of Heart's hearts. He engages Sora again to take Kairi's heart, and his power is nothing like before. You're in for a very intense one on one fight. Riku poossessed by Ansem, or Risem as I like to call him, fights with slicing strikes as well as projectiles. If you attempt to hit him with magic, especially Fira or Blizzara, he can catch it and turn it into a Dark Firaga and shoot it right back at you. Therefore, offensive magic is not recommended against this opponent. He is also capable of moving at hyperspeed and teleporting at the same time to strike you many times in a short amount of time. Get in the air and Glide to avoid it.
In KHII, Riku's face is shrouded in a hood to hide that he has Ansem's visage. He does fight Sora, but only to hold him off because Sora mistakes him for an Organization member. He is clearly not fighting to kill here, and is therefor not much of a threat despite his immense power.
Hades
There was a pyromaniac loose in Kingdom Hearts long before Axel ever showed up. Hades, the ruler of the Underworld, tries to bribe Cloud to take out Sora and Hercules in the preliminaries of the Games. When he fails, by one means or another, the flaming fool sicced Cerberus onto Sora and his lot, but Hercules stepped in and saved them. Sora finished Cerberus off, and everything was quiet on Olympus. In the Hades Cup, the knucklehead tried a more hands on approach, and directly challenged Sora and company to combat. He is actually pretty easy, so long as you aren't afraid to cast cure. Bounce his fireballs back at him, and use Dodge Roll to go with Hades's rotation when he creates flaming walls from his hands. Keep going with the flow until his flame gets out. Keep slicing Hades up until he goes down.
In KHII, Hades is a much bigger pain in the butt. He sticks to the Underworld, where Sora's strength is sapped and his own increases. When he shifts into his red flame mode, he is invulnerable. Topside, red flame mode never had that effect, it just stopped him from flinching. The only way to knock him out of flame mode is to bat balls of Hercules's aura at Hades. This turns his flames back to blue, and makes him vulnerable. Once Herc joins you, Hades is a pretty easy fight. Just stay away from him when he shifts from red to blue, or you'll get caught in the resulting explosion.
Rock Titan
Revived by Hades before Sora defeats him in the Hades Cup in KHI, Rock Titan is a last ditch effort to put Sora in the ground. Despite his enormous size and power, Rock Titan is incredibly easy due to his speed. Put simply, if Rock Titan were going any slower, he'd be going backward. Threat level minimal. Just run up and pummel him nonstop on his feet. When he falls, climb up him and go for the head. When he hits you, heal. It's that simple.
Maleficent
The most powerful of all the Disney Villains, and the leader of their group in KHI. She is the boss of the game in Kingdom Hearts Mobile, but that was a pretty bad game and was completely overlooked by 99% of the Kingdom Hearts community. Trying to open the door to darkness, she takes Riku under her wing early in the game and begins corrupting him. Finally, when Sora's pack makes it to the top of Hollow Bastion, Maleficent engages them to protect the half-formed Keyhole and the sleeping Princesses she kidnapped. She can summon Heartless to back her up, and uses purple lightning blasts and huge blue meteors to fight. She can also swing her staff to defend herself at close range, but Maleficent's strength definitely lies in long range combat. She floats around on a small platform that Sora can manually knock out of the air or cast Gravira on to force it down to the ground to attack the hag. If she's in real trouble, she can turn into a ball of green light to make a hasty getaway.
After the battle, Maleficent is crippled and tries to get away through a portal of darkness, but Sora tails her to finish the job. Unfortunately, someone else tails Maleficent...Riku possessed by Ansem follows, with his Dark Keyblade in tow, and stabs Maleficent in the heart to unlock the suppressed darkness in her heart. The resulting chain reaction turns Maleficent into the horrible Dragon Maleficent. Her threat level is through the roof, as she is incredibly skilled at close range and long range combat. Capable of setting huge portions of the battlefield on fire for extended periods of time, Dragon Maleficent is one of the toughest required bosses in the game. Her head is her only vulnerable point, and unfortunately, its also the most dangerous part of her. You can get on her back to strike, but it won't be long until she shakes you off and comes after you with a vengeance. Be especially concious of your HP and MP when taking on this opponent!
In KHII, Maleficent is still an enemy at first, but after a few foiled revenge schemes, she helps Sora in order to dispatch Organization XIII. No one knows if her heart is melting, or if she is just using Sora, but she never directly engages Sora in KHII. Perhaps we'll be suprised and she'll help us out in future games...
Chernabog
A giant gargoyle-like creature who lives in a volcano, guarding the interior of the End of the World. You gain the ability to fly during this fight, but Chernabog's power is immense and he has complete mastery over fire. If you had a strategy that worked well on Giant Ursula, use it on him. He is definitely strong, but the increased manuverablility of flight somewhat evens the odds. Overall, he's not the hardest fight you've had at this point, but he's far from the easiest. Don't get cocky.
Ansem
The boss of KHI. His true identity is revealed in KHII as Xehanort's Heartless, making this guy the undisputed king of all Heartless. He creates an extension out of his back that takes the shape of a Heartless-like creature he calls a Guardian. He has several close rang and long range attacks, and even calls on a Darkside to crush Sora. He's very tricky, and even separates Donald and Goofy from Sora when he fights the Darkside and the second round with Ansem. He's not much of a challenge with your allies, but all on your own is a different matter. Keep tabs on your HP and MP while engaging Ansem, or you might find yourself in a very unpleasant situation.
When Ansem gets really mad, he turns into a giant version of himself, and the Guardian part of him turns into a giant demonic ship that captures Donald and Goofy. Having a "super form" is traditional in bosses of Kingdom Hearts games, and this monstrosity is called World of Chaos. It has several weak points on the inside and the outside, and if you want to bring down Ansem, you'll need to destroy all of them. He has a horde of attacks, and a multitude of Heartless is in the ships interior. Free Donald and Goofy, destroy the weak points, and attack Ansem himself to destroy World of Chaos. Ansem's foolishness causes him to call on Kingdom Hearts for the power of darkness. One problem: Kingdom Hearts is light. The light of Kingdom Hearts blows Ansem away, once and for all!
...Or not. Ansem returns in Chain of Memories to attempt to possess Riku again. You control Riku in the final confrontation with Ansem. He fights with his Guardian extension again, but due to the massive beating he took in KHI, he is not capable of using World of Chaos against Riku. Without his super form, Ansem shouldn't pose too much of a threat. Finish the job that you started in KHI, and cut down Ansem one last time!
Riku Replica: An odd boss. He may not be Riku, but he fights exactly like him. You fight him four times as Sora, and twice as Riku, but he gets stronger and uses more of the real Riku's advanced moves with each engagement. When he is himself, he is constantly troubled by the fact that he is just a copy of Riku. When Namine implants memories into him, he shares the same memories as the real Riku, except for his memories of him and Namine being together. Eventually, his memories are uprooted by Namine and he remembers himself, only to challenge Riku to try and win a sense of self, and perishes in the process.
One thing to be noted about the Riku Replica: He was created by Vexen, so he is a homunculus in a sense, but somehow he has his own heart. How did Vexen do this..?
Shan-Yu
The big boss Hun leading a huge Heartless Army in the Land of Dragons. He traps Sora with a bunch of Heartless in a cave, then sends hundreds of Heartless to defeat Sora up on top of the snowy mountains. When Sora repels the attack, Mulan shoots the side of the next mountain with a cannon and Shan-Yu is buried under a huge pile of snow. Of course, that seems just a little too easy. The big lug survives and invades the Imperial City. There, Sora and the gang engage Shan-Yu. He is suprisingly fast, and he is supported by his incredibly annoying falcon that revives no matter how many times you swat the blasted thing out of the air. In addition, you have to guard the doors of the imperial palace from Heartless assaults. Use Valor Form and Red Rocket to destroy the Heartless quickly and only have to worry about the Shan-Yu and his flying rat. Parry his strikes to trigger a Reaction Command, then button mash Triangle to cause heavy damage. As long as you are at a fairly decent level, this fight should be fairly simple. Threat level is pretty low.
Pete
Under Maleficent's orders, he goes from world to world recruiting Heartless for Maleficent's Heartless army. He usually relies on Heartless under his command and other, stronger fighters to defend himself, and no small wonder, cause he's a weakling and a coward. Rebound his bowling balls back into him, avoid his punching attacks and firecrackers, and attack his shield as soon as he puts it up to minimize how much HP he regenerates. You fight him more than once, and there are a few reaction commands that you can take advantage of only in a specific world, like Pinball when in Olympus, when he puts up his shield. Threat level minimal. Don't sweat this one folks, you could put this guy out of his misery blindfolded.
The HydraA creature called on and expertly used by Hades in his quest to be rid of Hercules. Capable of regenerating heads indefinitely unless a minimum of 7 are beheaded at once. Used to hold off Hercules from rescuing Meg so that Sora would be tricked into unlocking the Underdrome, Hercules fails to notice it's regenerative abilities and rushes off to help Sora prematurely. As they save Meg, the Hydra revives, rampages, and destroys the Colliseum. Like I said, Hades used this creature effectively. Sora engages it to at least prevent it from doing any more damage. Thanks to Meg, Phil, and Pegasus backing you up, the Hydra's threat level is diminished. As long as you take advantage of Phil's and Pegasus's Reaction Commands, you should do fine. If you do get into serious trouble, though, find Meg. She tosses out a horde of HP, MP, and Drive Orbs when you approach her.
Barbossa
The pirate who led the mutiny which resulted in Jack Sparrow losing the Black Pearl, and friggin ugly to boot. Barbossa is only vulnerable in the moonlight, which is why Pete sends in Illuminators for support, which absorb light. Before you can harm Barbossa, you need to take out the Illuminator! Once you do that, take advantage of any Reaction Commands, and also take advantage of Barbossa's incredibly devastating weakness to elemental magic. As long as you exploit his weaknesses, Barbossa is not much of a fight. If you aren't much of a magic user, though, you could be in for a rather tedious and somewhat dangerous fight. Threat level depends on your fighting style, in this case.
Scar
Soundly defeated by Simba, his dark emotions allowed the Heartless to possess him. Now he can use fire, lightning, and dark attacks, and is still fast enough to maul you before you even have a chance to think about dodging. If he pins you, use a Reaction Command to free yourself. Attack him close range most of the time, but when his body is charged with electricity, you better attack him at long range. When he is surrounded by dark fire and careens around the battlefield, use the Lion Form's Dash ability to have a better chance of dodging him when he suddenly turns and charges at you. Compared to the bosses you've fought so far, his threat level is relatively high, so watch yourself.
Hostile Program
A program downloaded from the DTD by the Master Control Program to destroy Hollow Bastion's town. Equipped with jets, tracking digi missles, and two different kinds of laser guns, this guy is a pain in the digital butt. When he is damaged, however, he drops data orbs. Collect these, and when your data meter is full, you can use the Reaction Command Freeze to hold the monster in place for some easy hits. Watch out for his huge laser combo at the end; if possible, Freeze him when he tries to use it, and when he unfreezes, use Tron's limit to hopefully finish it.
The Experiment
In a way, this mechanical creature is a lot like Guard Armor, in that its body parts can separate from the main portion of its body. However, this usually happens in response to hitting him with a combo finisher, unlike the Guard Armor, who could do it voluntarily. Also, the separated parts can attack independently, just like the Armor as well. However, only its torso is vulnerable. Once you knock off enough body parts, you can use the Reaction Command Kickspring to launch the torso of the machine at the body parts for damage. Once you do enough damage, it's body parts are destroyed for good, leaving just the torso to deal with. Unlike other bosses, the Experiments threat level starts high, but goes down the more you progress through the battle.
|
|
|
|
|
|
|
|
|
|
|
|
|
|
|
|
|
|
Posted: Thu Jul 10, 2008 10:03 pm
The Hidden Bosses Hidden Bosses aren't always hidden very well, but they are always optional. And a good thing too, because these guys are way, WAY harder than all the normal required bosses. One in particular is the hardest boss I have ever fought in any videogame in 15 years of gaming. With a few exceptions, they generally don't have a lot of influence in the main story. Defeat these guys for some major bragging rights, as well as some pretty impressive bonuses. Some of these guys have been mentioned before, but because they are so hard I think I should go into greater detail here. Kingdom Hearts Ice TitanMost likely raised by Hades before his defeat, and the much tougher cousin of the Rock Titan. This thing is the easiest of the 4 hidden bosses of KHI, but that doesn't mean you should take it lightly, as it is far more powerful than anything you have faced thus far. As this is the Gold Match in the Olympus Colliseum, it is a one on one fight.His only vulnerable point is his head, which is way, way beyond your reach. There are two options you have to hit his head. First, you could hit him with Thundaga. This, however, is a very, very bad idea, as you will run out of magic quickly and do very little damage for it, and then you'll be in trouble. The second way is to bounce the icicles he shoots at you back at him while locked onto his head. The icicles will smack him right in the head. He can fire icicles, breath ice, his very steps send out icy shockwaves, and he is capable of freezing extremely large portions of the arena in about 2 seconds. To keep you on your toes, he can also cause icicles to rise from the ground beneath you to impale you, and he can drop icy boulders from directly over Sora to crush you. Be careful...and for the love of God, don't cast Aeroga, or the icicles you have to bounce back will quintuple in size and you will be unable to reflect them. PhantomThis Heartless has very few attacks; a claw swipe and a laser that homes in on Sora and absorbs his HP for a little bit upon contact before vanishing. However, the real trouble is the clock tower...the Phantom casts a spell on it so that the hands move at hyper speed, and every time the minute hand hits the 12, a party member of yours dies. Permanently. Not even an Elixer will get him back. And once the party members are out of the way...it's your turn. Cast Stop on the clock itself to freeze it for a time, but it won't stay that way forever. In addition, his heart that is its only weak point is only vunerable to certain attacks at certain times. When its heart is red, only Firaga works. When it's blue, only Blizzaga works. Yellow means start calling down the thunder. And when it's white, only physical attacks work. As a result, your magic gets drained very quickly. Have every MP recovery ability equipped, and have a horde of magic-restoring items in hand before engaging. If you don't like to use items during boss battles, it is possible to kill it without items, but you are in for one hell of a battle. Threat level extremely high. Kurt ZisaKurt Zisa is a massive Heartless with a snake's head, six arms, and two monstrous swords. His only vunerable point is his head, and even then you must stun him to get the head to extend from the body to do damage. Kurt Zisa has two extremely annoying modes. In one, he seals your magic and attempts to slice you up with his swords. He holds 2 orbs in his lower hands, and you must attack and destroy these to break the seal on your magic, stun the boss, and make his weak point vulnerable. Careful, as he can fly through the air in a buzzsaw like manner with his body vertical or horizontal, and make several passes switching between the two positions. Jump over him when he's horizontal, and Dodge Roll when he's vertical. In his other attack mode, he erects a shield that can only be damaged with magic. Physical attacks don't do a lick of damage to it, but they do cause it to drop MP balls, so take a couple of swings at the shield if you are low on magic. Kurt Zisa attacks with energy balls and sand tornados in this mode, so have your Dodge Roll ready. When you destroy the shield, Kurt Zisa is stunned again and his vulnerable head extends from his body. Be careful when attacking the snake head, as it can still bite and snap at you to defend itself until the creatures main body revives. Threat level is extremely high, and you should go into this with a horde of Elixers and Megalixers. Summoning Tinkerbell also helps a lot, as she will stay to heal you even after your magic is sealed. You just can't summon her while your magic is sealed, so be extremely quick about it if you want her at the beginning of the fight. SephirothAny FFVII fans reading this are positively wetting themselves as they read this, probably. And I don't blame them. Sephiroth is undoubtedly the hardest of the 4 hidden bosses of KH to beat. He is the Platinum Match in the Olympus Colliseum, so this is a one on one match. With multiple slashing attacks, huge pillars of flame, and orbs of darkness, this guy is one tough customer. And those are just his normal attacks. He also knows an Omnislash like move, and can use a spell called Sin Heartless Angel. If the spell is not stopped by striking Sephiroth before he finishes casting it, it takes away all of your MP, and leaves you with just one HP. So, if he strikes you with this, the fight is as good as over. You have to hit him before he finishes casting it! Last but not least, he can call meteors to crash down on you, which he then proceeds to levitate and rotate with increasing speed, making it very difficult to weave in and out of the spinning meteors. For the end of the attack, he throws a small star at you. No, seriously. Don't even bother challenging this one if you don't have the patience to lose several times and keep on fighting. Kingdom Hearts Final Mix XemnasThat's right, you can fight Xemnas in the "first" KH. Back when KHFM came out, we didn't know anything about him and he had his hood up, so he was just called the Unknown, or the Enigmatic Man. Now that KHII is out, we know he is Xemnas because he fights with the same red lightsabers back then as he does now. Some people think this version of Xemnas is even harder than Sephiroth, but not all of them do. He attacks with lightsabers, lasers, bombs, and a lightning attack that seals Sora's menu. 3 of the bars say "shock," and one says "release." You cannot attack Xemnas until you hit release, and if you hit shock, a portion of your HP is blown off. To make matters worse, release and the shocks cycle positons randomly very fast, so you must have good timing to save yourself. You must do it quickly, too, as your HP is naturally drained even without pressing shock, and Xemnas isn't polite enough to let up on the offensive until you release yourself. He can also turn his body into a black and purple fog to travel around the large arena at high speeds. If he puts up a shield all around his body, (not just the spark wall shield) back off, because he is invincible and his shield is about to shoot off huge lasers. Getting through these lasers without getting hit requires some serious dodging skills, especially at close range. Never let your guard down in this fight, as that lightning menu seal will sometimes hit you at very, very inconveniant times. Kingdom Hearts II SephirothHe's back...Sephiroth is back with his own little sideplot story with Cloud. He is the only hidden boss in KHII, but that's probably because he slaughtered all the other candidates. Sephiroth fights much more fiercely than in KH, but because of Sora's horde of new abilities, he's actually a little easier, despite his increased power. However, if you don't have at least High Jump Lv. 1 and Aerial Dodge Lv. 1, don't even bother challenging him, as it is impossible for you to win. When he uses Sin Heartless Angel this time, he levitates into the air, way too high for a normal jump to reach. He fights in combos, uses homing orbs of darkness, and hundreds of meteors to fight. His three pillars of flame from KH have been upgraded to fifteen pillars of flame that suck you in. Run in the opposite direction and don't let up for a second, and you should be safe. Also, stay on the ground as much as possible so you can use the Block Reaction command when the screen goes dark and Sephiroth performs a lunging slash. All growth abilites are very beneficial in this fight. Kingdom Hearts II Final Mix + Absent Silhouettes These guys are generated from the weapons left behind by the Organization members killed in Chain of Memories and Re:Chain of Memories. They are not Organization members returned to life... they are more like ghosts using the weapons of the real Org members as their media. They are much more powerful than their real selves, however, and should be engaged with caution. Defeating them gives you very valuable get bonuses, however, so they are well worth the trouble. ZexionZexion isn't particularly dangerous, but he is extremely annoying to make up for it. Many players lose patience with this twit and die because of it. To begin with, Zexion poses almost no threat. All he does is zip harmlessly around the stage and zap your allies to trap them into books. Either slice up the books and free your allies, or go straight for Zexion and pummel him. The second option is preferable, because even if you do free your allies, they won't stay free for long. Once you damage Zexion enough, he'll zap you in a book and trap you in an alternate dimension. That's when all hell breaks loose. Zexion is hiding in one of the many, many books swirling around this dimension. You must find and drain the book of all health, hit it with a finisher, and then use a Reaction Command to exorcise Zexion out of the book and yourself out of the dimension. You are now free to damage Zexion again. Within the dimension, the books will ram you, explosions will erupt at your feet with just a flash of light to warn you, and Zexion is capable of turning your menu into a book so that you have to turn pages with Triangle until you find the Free option and turn your menu back to normal. He can also seal you into another book, which you must rip out of with Triangle to survive. Finally, Zexion can warp you to an area of all black, save for 3 spotlights. 2 are red, 1 is blue, and the blue one switches with the other ones. It starts out fast, then it slows down, then the blue light stops cycling and locks in with a white ring that flashes around the perimeter. Once the blue light stops, Quick Run into it, or you'll be pounded with a barrage of missles. If you can get in the light in time, you'll get a free shot at Zexion. Be very patient, and you should be victorious. Compared to the other Silhouettes, his threat level isn't terribly high. Larxene Larxene is probably the toughest of the Silhouettes. The girl of lightning is capable of making copies of herself to cover more ground. Fortunately, all share the same health, and attacking the duplicate still damages Larxene. If you can somehow catch the Larxenes in the same combo, you can cause some major damage. If you select and perform a full combo on the "real" Larxene, you will get a chance to fuse the copy back into the original with a Reaction Command.Larxene can slice you up with her kunai, or hit you from anywhere with lightning strikes and even small lightning storms. Her ultimate move resembles Hades' ultimate move in Kingdom Hearts. She puts up two walls of electricity and rotates them. However, this is accompanied by random lightning strikes to complicate the situation, and is much more powerful than anything Hades could summon up. Blazingly fast and strong to boot, Larxene's threat level is through the roof. You'll want to power up A LOT before engaging this one. She has too many attack formations to outline here, so unless you PM me for a complete strategy, be prepared for almost anything. LexaeusLexaeus actually has the smallest threat level of the five Silhouettes. He starts out weak, but the longer the battle takes, the more his power reading in the top right corner will go up, and the stronger his attacks will be. However, no matter how strong he is, Lexaeus is just too slow to put up much of a fight. As long as are good at dodging and have a lot of magic to fuel Reflega, you'll crush him. Also, if you parry a certain strike, you can open up a Reaction command that allows you to add Lexaeus's current power to your own and strike him with a particularly savage blow to stun him. When he makes a huge canyon wall appear at the last part of his ultimate attack, dodge roll it or reflect it to survive. It is undodgeable otherwise. If you panic, it's over, though, keep a level head. Oh, one more thing: watch out for those nasty throwing attacks of his... MarluxiaMarluxia is a rather unique battle. Only two of his attacks actually cause damage: the pools of miasma he creates on the ground, and the thorn bombs he occasionally summons around Sora and friends. Other than very small miasmas that crop up during his ultimate attack and what is listed above, Marluxia cannot damage you. However, this comes at a price. A number that corresponds to your level appears above your head at the beginning of the battle. Each time Marluxia hits you with a non-damaging attack, that number goes down. Once the number hits zero, you die. Regardless of HP. There are two Reaction Commands in this fight. When Marluxia creates a whirlwind, then attacks with his scythe, if you block or dodge it you have a chance to activate one. If you are closer to Marluxia, you will perform a combo with your Keyblade that severly damages him. If you are closer to the tip of Marluxia's scythe, you will perform a non damaging Reaction Command, stealing Marluxia's scythe and slicing it up with him. It may not do damage, but if you use this command, you will regain some of your lost hits, making this move essential for survival, especially at lower levels. All you Lv. 1 Critical players beware...one hit is all it will take to drop you. VexenBy himself, Vexen is the easiest Silhouette to put down...but the problem is Vexen is not often by himself. A small portal chases Sora down during this battle, and the more you stand in it the more data Vexen obtains on you. Once one of his meters is filled up, Vexen summons your own Antiform to destroy you. This is extremely dangerous, as Antiform is fast, powerful, and it's combos are incredibly long. Without Once More, first time players don't stand a chance. Vexen seems to draw power from your data too, and will unlock more of his attacks as the data he gets on you increases. For each bar of data he aquires, Antiform also gets more HP and is able to use its latent attacks as well, including a very damaging version of Antiglide that not even Sora himself can do in Antiform! Once Vexen fills up all five bars of data...you will be in for a very rough fight. The Digital Organization At the very end of the Cavern of Remembrance, in a room called the Garden of Assemblage, a room full of data copies of each Organization member exists. You must beat the game to unlock all the data copies. There is one copy for each member, and they all have the same attacks as their real selves. (The data copies for Zexion, Larxene, Lexaeus, Marluxia, and Vexen are all based on their Silhouettes, however, and not their original selves in Re:com.) The difference, however, is that they are stronger, they have more defense and HP, the phases of the battle are often out of whack, and they can often string their old attacks together in new ways to make them very unpredictable, even though not a single new attack has been added to them. Some of them are very, very difficult to defeat, such as Digi Axel. The floor sucks your HP out at an incredibly fast rate this time as long as the floor is ignited. If you defeat all 13 Digital Organization members, you will earn the Proof of Non-Existence, the second of three orbs that proves your complete mastery of the game. Good luck, because some of them are fairly easy...and some of them...aren't. And now...last and the worst... TERRA
The Lingering Spirit, the Enigmatic Soldier, the Armored Unknown...Terra is the roughest, toughest opponent I have ever fought in 15 years of playing video games. With incredibly high HP, defense that until you attack him repeatedly and swiftly nearly negates your attacks, and a shape-shifting Keyblade, fighting Terra is a truly traumatizing experience. I've seen him outrun one of my friends using Final Form's Glide Max ON FOOT. Not only that, but he can leap huge distances in the blink of an eye, and sports a gliding ability that makes Glide Max look like you're moving in slow motion. As if he isn't fast enough already, he can also teleport. His Keyblade can shape-shift into a boxing glove, a gigantic whip, a crossbow, a bazooka, and even a flying motorcycle complete with cannons that will fire ice crystals at you if you prove to be too hard to hit with just his bike.. If you are somehow managing to avoid his motorcycle attacks or dodging his various blasts of energy, he can cast Magnega to hold you still. He can also create drone cannons that follow you around until you destroy them or he tells them to self destruct for some reason. If you manage to bounce back his bazooka blast, if it fails to hit him it will come back after you no matter how many times you bounce it back with Guard or Reflega.
Not hard enough, you say? Terra is capable of sealing your menu exactly like Xemnas did in KHFM with his crossbow blasts. To make matters worse, Terra is capable of sealing your magic like Kurt Zisa, only the same seal prevents you from using your items as well, something not even Zisa could accomplish. As if that weren't enough, Terra can seal your physical attacks as well. He can's seal your physical attacks and magic at the same time (you'd be defensless) but this is the only positive part. The only physical attack you can still trigger is Retaliation Slash, and since you'd have to get hit to even make this move an option, I think you can tell that you're far better off using magic. You'll die for sure if you try to just use Retaliation Slash. If you aren't proficient with every method of attack possible, prepare to die a horrible, violent death. Go into this fight at max level with the most powerful weapons, armor, and accessories you have. If you don't have Ultima Weapon, get it. If you fight Terra at Lv. 1...God help you. If anyone needs help, I have pre-typed strategies ready and waiting for both normal and Lv. 1 players.
For beating Terra, you get a synthesis item and more importantly, the Proof of Connection, the third of the three orbs that proves your complete mastery of KHIIFM+. Save this one for last: getting the other two orbs will be good training for fighting Terra.
|
|
|
|
|
|
|
|
|
|
|
|
|
|
|
|
|
|