In Desolation
(?)Community Member

Offline
- Report Post
- Posted: Sun, 24 Nov 2013 21:48:54 +0000
THE ULTIMATE CODE INDEX W/ LINKS TO OTHER RESOURCES
All the codes of the front page in one easy to reference place. Play around with them in the Test Forums. Select, Drag, Copy, Paste into message box and Submit
See HERE for RP thread coding
BASIC CODE (IMG RIGHT)
[imgright]Insert an image link here. No spaces.[/imgright][align=right][color=charactercolor][size=15][b]NAME[/b][/size][/color]
[size=11]
Descriptive text, descriptive text, descriptive text. [color=charactercolor][b]"Character dialogue in colored bold."[/b][/color] Some sort of text going on here. [color=charactercolor][i]Thoughts in colored italics.[/i][/color] Descriptive text, descriptive text, descriptive text.
[/size]
[size=9]WWWHW: Who, what, where, how, why?
OOC: Blank.
[/size]
LISTING CODES (PASTE AFTER IMG CODE)
[list][list][list][list][list][list][list][list][list][list][list][list][list][list][list][list][list][list][list][list][list][list][list][list][list][list][list][list][list][list]
(STUFFING CODE GETS PASTED HERE)
(FOOTER CODES GOES HERE)
[/list][/list][/list][/list][/list][/list][/list][/list][/list][/list][/list][/list][/list][/list][/list][/list][/list][/list][/list][/list][/list][/list][/list][/list][/list][/list][/list][/list][/list][/list]
HIT SPOILER BUTTON FOR PREVIEW STUFFING AND FOOTER CODES (THEY'RE IN SETS OF THREE OR FIVE. PICK A SET TO
STUFFING JUNK (ADD TEXT COLORS THYSELF).
FOOTNOTE JUNK (ADD COLORS OR MAKE SLIGHT CHANGES THYSELF)
STREAMLINED POST LAYOUT (IMG LEFT)
[imgleft]http://i43.tinypic.com/dz1n8.jpg[/imgleft]
[list][list][list][list][list][list][list][list][list][list][list][list][list][list][list][list][list][list][list][list][list][list][list][list][list][list][list][list][list][list]
[b]THIS IS AN EXAMPLE[/b]
[size=11]
Text. [color=blue][b]"Lorem ipsum dolor sit amet, consectetur adipiscing elit."[/b][/color] Vivamus sem sem, lobortis eget sollicitudin id, sollicitudin eu elit. Vestibulum in elit nunc, ultricies consequat felis. [color=red][i]Vivamus eu dolor id tortor interdum pharetra et a libero. [/i][/color]In sit amet est nibh, quis molestie risus. Pellentesque habitant morbi tristique senectus et netus et malesuada fames ac turpis egestas. Sed varius augue mi. Mauris eu lectus et nibh facilisis mattis eget et leo. Ut pharetra tortor sit amet nulla egestas semper. Praesent ac enim urna, in consectetur libero. Praesent semper purus ut mi cursus euismod. Aliquam aliquam, magna sit amet feugiat bibendum, massa libero gravida est, non mollis massa quam nec ipsum. Nam sollicitudin pretium tincidunt. Suspendisse quis nibh velit, nec congue risus. Aliquam erat volutpat. Integer et lacus lectus.
[/size]
[size=18]♪[/size][size=9] LOCATION [The listing doesn't show up in previews. ][/size]
[size=18]♫[/size][size=9] COMPANY [The list brackets have to be in equal number or it won't work.][/size]
[size=18]♪[/size][size=9] OOC [Below is what the code for this looks like.][/size]
[/list][/list][/list][/list][/list][/list][/list][/list][/list][/list][/list][/list][/list][/list][/list][/list][/list][/list][/list][/list][/list][/list][/list][/list][/list][/list][/list][/list][/list][/list]
STREAMLINED POST LAYOUT 2 (IMG CENTER ABOVE TEXT)
[list][list][list][list][list][list][list][list][list][list][list][list][list][list][list][list][list][list][list][list][list][list][list][list][list][list][list][list][list][align=center][img]http://i43.tinypic.com/dz1n8.jpg[/img][/align]
[align=center][size=18][color=purple][b]IT WORKS FOR CENTERED IMAGES TOO[/b][/color][/size][/align]
[size=11]
Text. [color=darkblue][b]"Lorem ipsum dolor sit amet, consectetur adipiscing elit."[/b][/color] Vivamus sem sem, lobortis eget sollicitudin id, sollicitudin eu elit. Vestibulum in elit nunc, ultricies consequat felis. [color=blue][i]Vivamus eu dolor id tortor interdum pharetra et a libero. [/i][/color]In sit amet est nibh, quis molestie risus. Pellentesque habitant morbi tristique senectus et netus et malesuada fames ac turpis egestas. Sed varius augue mi. Mauris eu lectus et nibh facilisis mattis eget et leo. Ut pharetra tortor sit amet nulla egestas semper. Praesent ac enim urna, in consectetur libero. Praesent semper purus ut mi cursus euismod. Aliquam aliquam, magna sit amet feugiat bibendum, massa libero gravida est, non mollis massa quam nec ipsum. Nam sollicitudin pretium tincidunt. Suspendisse quis nibh velit, nec congue risus. Aliquam erat volutpat. Integer et lacus lectus.
No. Listing margins don't work for putting in a wide right margin. There are tricks, but they involve using a white image as a spacer. I like to keep it simple. Let's just do that
[/size]
[size=13][color=blue]☆[/color][/size][size=9] WHERE WHO [color=indigo][x][/color][/size]
[size=13][color=darkblue]☆[/color][/size][size=9] WHAT NOW [color=blue][x][/color][/size]
[size=13][color=blue]☆[/color][/size][size=9] OOC [color=indigo][This is how.][/color][/size][/list][/list][/list][/list][/list][/list][/list][/list][/list][/list][/list][/list][/list][/list][/list][/list][/list][/list][/list][/list][/list][/list][/list][/list][/list][/list][/list][/list][/list]
L-SHAPE. For this, referral to the tutorial post will probably help.
[align=left][img]http://imageshack.us/a/img707/7505/6l80.jpg[/img][/align][imgleft]http://imageshack.us/a/img600/1710/rarp.jpg[/imgleft]
[list][list][list][list][list][list][list][list][list][list][list][list][list][list][list][list][list][list][list][list][list][list][list][list][list][list][list][list][list][list][list][list][list][list][list][list][list][list][list][list]
END PRODUCT involves top aligned left and bottom half in imgleft. All your text stuffing must go after the list codes. Unless you want to experiment with layering code. This is all basic streamlined stuff
[size=18]☺[/size][size=9] WHERE WHO [x][/size]
[size=18]☻[/size][size=9] WHAT NOW [x][/size]
[size=18]☺[/size][size=9] OOC NOTES [Footnote junk goes above list end codes][/size]
[/list][/list][/list][/list][/list][/list][/list][/list][/list][/list][/list][/list][/list][/list][/list][/list][/list][/list][/list][/list][/list][/list][/list][/list][/list][/list][/list][/list][/list][/list][/list][/list][/list][/list][/list][/list][/list][/list][/list][/list]
FANCY TEXT
Also refer to this post for gradients and colors
BOOK ENDED GRAPHICS POST LAYOUT (works for all Images with Widths smaller than 300px, any height)
USEFUL RESOURCES FOR PICTURES
FOR EDITING, CROPPING, and RESIZING. (In order of usefulness). ALWAYS BORDER POSTING PICTURE WITH THIN WHITE BORDER IF YOU DON'T LIST
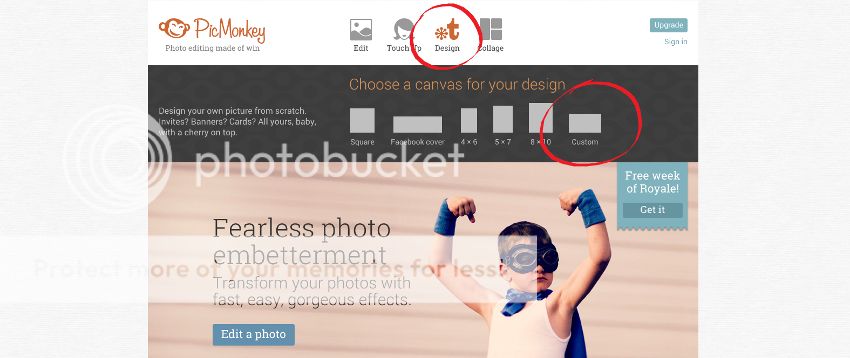
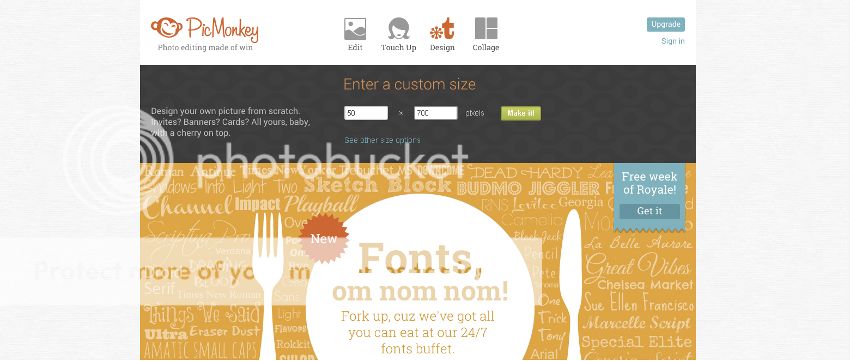
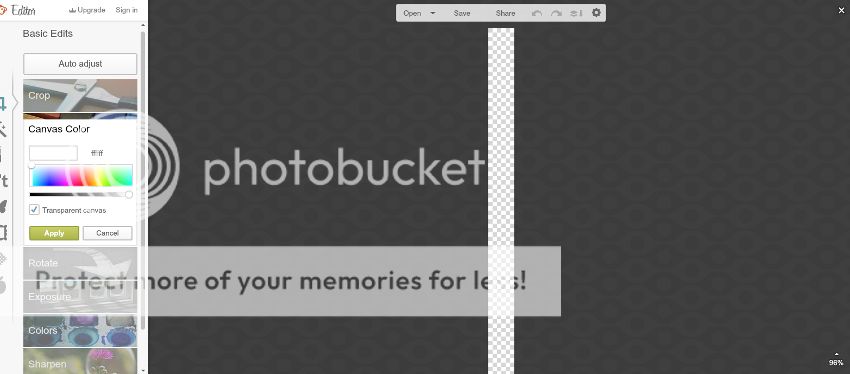
PicMonkey In browser. It also has a Google Chrome app.
pixlr.com There is a mobile app version of pixlr you can find and utilize if you are working from a mobile gadget.
pixlr Express In browser. Very fast. Nice frames.
EZIMBA Quick fast easy image editor and converter
Canva
PsykoPaint
Thumba
PhotoCat. It's OK.
BeFunky has great frames. Mess with Blend Modes is a must.
PiZap is slow, interface is ugly, but collage capabilities are acceptable and fancy.
PIXENATE also has ugly interface. Fun Effects are mildly useful. Would not use. CITRIFY is so basic that it's crap. Phixr and LUNAPIC good for memes. Maybe. Nothing else.
GIMP For those with your own computer but no programs.
Tricks with layering? Multiply, overlay, addition, and screen. GIMP is trustworthy
There is also a quick fixer available on photoshop.com (in their Online Tools menu drop) and the free Aviary app. If I haven't listed something here. It's because I don't trust it... I tried iPiccy and Ribbet. I didn't like them.
FREE MUSIC FOR YOUR MADE UP RADIO STATIONS AND NEIGHBORHOOD COMMUNES
https://bandcamp.com/tag/free-download Music you've never heard before. Name your price $0 and it's free but it's free to listen and you're welcome to tip some of the artists if you want.
FOR DRAWING
If you don't have photoshop and hate GIMP. These are the other free options
firealpaca
krita
Artweaver Scroll down to find free version.
FOR FINDING EVER WONDER WHERE THOSE COOL PICS IN BARTON TOWN COME FROM? LOOK NO FURTHER THAN HERE
lookbook.nu Regular people who want to be... looked at.
Chictopia Like lookbook but differently formatted
NEXT MANAGEMENT Modeling agency. A big one. Just pick a city. Select models. Select gender to browse
PhotoGenics Modeling Agency Professionals. Click on models to view men or women. You can always google "modeling agency" and find more of these portfolio sites.*
pixiv.com For Japanese anime. Customize the picture for use though. (Customize everything. Even real pictures).
morguefile.com Free stock photos. For miscellaneous purposes.
Getty Images Royalty free stock images for building graphics. Collages. Things for your RP thread
*Another way to get pictures and various images from the same model is to simply pick a fashion line like Gucci or Burberry. And type into the search engine "Gucci collection" or "Gucci ad campaign". You can literally type in "Burberry model" and find a face. Too many people use actors and actresses
STORAGE DO YOU REALLY NEED HELP FINDING THESE? I'LL LIST THEM ANYWAY
Photobucket
Photobucket Mobile
Imgshack
Imgshack Mobile
tinypic.com Good site
flickr, Picasa, and imgur are your other alternatives.
I don't recommend Snapfish.
If you use anything other than photobucket, to view them requires selecting "show all images" in account preferences' image display settings.
FOR SHORTENING AN EXCESSIVELY LONG PIC URL NECESSARY FOR SIGNATURES SOMETIMES
tinyurl
bit.ly
USEFUL FOR TEXT AND SYMBOL DESIGN CREATION
Fuzzimo's Label Maker If you're tired of plain font this place makes label stickers
TEXT GEN EDITOR Fancy lettering made by symbols you can copy paste
FOR COLORS AND THINGS
colourlovers for premade palettes. This one is excellent. Perfectly good for all sorts of graphic making.
bighugelabs for making your own palette from a picture.
UTCCG is a thread of just about every shade for every color you could possibly want.
Adobe Kuler
Colourcode
Collor
Colors Palette Generator
Pictaculous
Web Color Data
FOR NAME GRAPHICS
FontMeme.com Try it. It's easy. No download required. In browser.
BannerFans.com is a pretty useful label, title, and... banner maker.
See this tutorial for text header (name, lyrics, quotes, poetry) advice
FOR FLIPPING PLAIN TEXT ONLY
Reverse Text Generator Makes things backwards.
FOR MAKING IT UPSIDE DOWN PLAIN TEXT ONLY
Upside down word generator Enter and copy paste.
FOR SHORT TEXT GRADIENT (RAINBOW GEN) PLAIN TEXT ONLY
http://www.tektek.org/color/
http://www.wordcounter.net/ Best word counter. To check length.
QUICK TIP FOR POSTING FROM MOBILE DEVICES If you have little to no access to a computer, make your first post via a computer.
Then when you are on your mobile device, hit the quote button (beware of hitting edit on accident).
Delete the quotes (and the spoiler if applicable, if the GM stores your post layout somewhere in the thread itself) brackets and you'll be ready to go in style.
All the codes of the front page in one easy to reference place. Play around with them in the Test Forums. Select, Drag, Copy, Paste into message box and Submit
See HERE for RP thread coding
BASIC CODE (IMG RIGHT)
[imgright]Insert an image link here. No spaces.[/imgright][align=right][color=charactercolor][size=15][b]NAME[/b][/size][/color]
[size=11]
Descriptive text, descriptive text, descriptive text. [color=charactercolor][b]"Character dialogue in colored bold."[/b][/color] Some sort of text going on here. [color=charactercolor][i]Thoughts in colored italics.[/i][/color] Descriptive text, descriptive text, descriptive text.
[/size]
[size=9]WWWHW: Who, what, where, how, why?
OOC: Blank.
[/size]
LISTING CODES (PASTE AFTER IMG CODE)
[list][list][list][list][list][list][list][list][list][list][list][list][list][list][list][list][list][list][list][list][list][list][list][list][list][list][list][list][list][list]
(STUFFING CODE GETS PASTED HERE)
(FOOTER CODES GOES HERE)
[/list][/list][/list][/list][/list][/list][/list][/list][/list][/list][/list][/list][/list][/list][/list][/list][/list][/list][/list][/list][/list][/list][/list][/list][/list][/list][/list][/list][/list][/list]
HIT SPOILER BUTTON FOR PREVIEW STUFFING AND FOOTER CODES (THEY'RE IN SETS OF THREE OR FIVE. PICK A SET TO
STUFFING JUNK (ADD TEXT COLORS THYSELF).
[size=10]
Text. [color=color1][b]"Lorem ipsum dolor sit amet, consectetur adipiscing elit."[/b][/color] Vivamus sem sem, lobortis eget sollicitudin id, sollicitudin eu elit. Vestibulum in elit nunc, ultricies consequat felis. [color=color2][i]Vivamus eu dolor id tortor interdum pharetra et a libero. [/i][/color]In sit amet est nibh, quis molestie risus. Pellentesque habitant morbi tristique senectus et netus et malesuada fames ac turpis egestas. Sed varius augue mi. Mauris eu lectus et nibh facilisis mattis eget et leo. Ut pharetra tortor sit amet nulla egestas semper. Praesent ac enim urna, in consectetur libero. Praesent semper purus ut mi cursus euismod. Aliquam aliquam, magna sit amet feugiat bibendum, massa libero gravida est, non mollis massa quam nec ipsum. Nam sollicitudin pretium tincidunt. Suspendisse quis nibh velit, nec congue risus. Aliquam erat volutpat. Integer et lacus lectus.
[/size]
FOOTNOTE JUNK (ADD COLORS OR MAKE SLIGHT CHANGES THYSELF)
[size=9]↳ OOC [[color=color1] ... [/color]] ↳ WHERE [[color=color2] ... [/color]] ↳ WITH [[color=color3] ... [/color]][/size]
[size=9]↘ OOC [[color=color1] .. .[/color]] ↘ LOCALE [[color=color2] ... [/color]] ↘ COMPANY [[color=color3] ... [/color]][/size]
[size=18]✈[/size][size=9] WHERE [x][/size]
[size=18]☻[/size][size=9] WITH WHO[x][/size]
[size=18]☎[/size][size=9] OOC [x][/size]
[size=18]☀[/size][size=9] WWWW&H [x][/size]
[size=18]☁[/size][size=9] MOOD[x][/size]
[size=18]☂[/size][size=9] OOC [x][/size]
[size=18]★[/size][size=9] WHERE WHO [x][/size]
[size=18]☆[/size][size=9] WHAT NOW[x][/size]
[size=18]★[/size][size=9] OOC [x][/size]
[size=18]♠[/size][size=9] WHERE WHO [x][/size]
[size=18]♣[/size][size=9] WHAT NOW[x][/size]
[size=18]♦[/size][size=9] OOC [x][/size]
[size=18]♪[/size][size=9] LOCATION [x][/size]
[size=18]♫[/size][size=9] COMPANY [x][/size]
[size=18]♩[/size][size=9] OOC [x][/size]
[size=18]☺[/size][size=9] WHERE WHO [x][/size]
[size=18]☻[/size][size=9] WHAT NOW [x][/size]
[size=18]☺[/size][size=9] OOC NOTES [x][/size]
♔ [size=9]LOCATION → [/size]
♕ [size=9]COMPANY → [/size]
♖ [size=9]SONG → [/size]
♘ [size=9]OUTFIT → [/size]
♙ [size=9]OOC → [/size]
♚ [size=9]LOCATION → [/size]
♛ [size=9]COMPANY → [/size]
♜ [size=9]SONG → [/size]
♞ [size=9]OUTFIT → [/size]
♟ [size=9]OOC → [/size]
STREAMLINED POST LAYOUT (IMG LEFT)
[imgleft]http://i43.tinypic.com/dz1n8.jpg[/imgleft]
[list][list][list][list][list][list][list][list][list][list][list][list][list][list][list][list][list][list][list][list][list][list][list][list][list][list][list][list][list][list]
[b]THIS IS AN EXAMPLE[/b]
[size=11]
Text. [color=blue][b]"Lorem ipsum dolor sit amet, consectetur adipiscing elit."[/b][/color] Vivamus sem sem, lobortis eget sollicitudin id, sollicitudin eu elit. Vestibulum in elit nunc, ultricies consequat felis. [color=red][i]Vivamus eu dolor id tortor interdum pharetra et a libero. [/i][/color]In sit amet est nibh, quis molestie risus. Pellentesque habitant morbi tristique senectus et netus et malesuada fames ac turpis egestas. Sed varius augue mi. Mauris eu lectus et nibh facilisis mattis eget et leo. Ut pharetra tortor sit amet nulla egestas semper. Praesent ac enim urna, in consectetur libero. Praesent semper purus ut mi cursus euismod. Aliquam aliquam, magna sit amet feugiat bibendum, massa libero gravida est, non mollis massa quam nec ipsum. Nam sollicitudin pretium tincidunt. Suspendisse quis nibh velit, nec congue risus. Aliquam erat volutpat. Integer et lacus lectus.
[/size]
[size=18]♪[/size][size=9] LOCATION [The listing doesn't show up in previews. ][/size]
[size=18]♫[/size][size=9] COMPANY [The list brackets have to be in equal number or it won't work.][/size]
[size=18]♪[/size][size=9] OOC [Below is what the code for this looks like.][/size]
[/list][/list][/list][/list][/list][/list][/list][/list][/list][/list][/list][/list][/list][/list][/list][/list][/list][/list][/list][/list][/list][/list][/list][/list][/list][/list][/list][/list][/list][/list]
STREAMLINED POST LAYOUT 2 (IMG CENTER ABOVE TEXT)
[list][list][list][list][list][list][list][list][list][list][list][list][list][list][list][list][list][list][list][list][list][list][list][list][list][list][list][list][list][align=center][img]http://i43.tinypic.com/dz1n8.jpg[/img][/align]
[align=center][size=18][color=purple][b]IT WORKS FOR CENTERED IMAGES TOO[/b][/color][/size][/align]
[size=11]
Text. [color=darkblue][b]"Lorem ipsum dolor sit amet, consectetur adipiscing elit."[/b][/color] Vivamus sem sem, lobortis eget sollicitudin id, sollicitudin eu elit. Vestibulum in elit nunc, ultricies consequat felis. [color=blue][i]Vivamus eu dolor id tortor interdum pharetra et a libero. [/i][/color]In sit amet est nibh, quis molestie risus. Pellentesque habitant morbi tristique senectus et netus et malesuada fames ac turpis egestas. Sed varius augue mi. Mauris eu lectus et nibh facilisis mattis eget et leo. Ut pharetra tortor sit amet nulla egestas semper. Praesent ac enim urna, in consectetur libero. Praesent semper purus ut mi cursus euismod. Aliquam aliquam, magna sit amet feugiat bibendum, massa libero gravida est, non mollis massa quam nec ipsum. Nam sollicitudin pretium tincidunt. Suspendisse quis nibh velit, nec congue risus. Aliquam erat volutpat. Integer et lacus lectus.
No. Listing margins don't work for putting in a wide right margin. There are tricks, but they involve using a white image as a spacer. I like to keep it simple. Let's just do that
[/size]
[size=13][color=blue]☆[/color][/size][size=9] WHERE WHO [color=indigo][x][/color][/size]
[size=13][color=darkblue]☆[/color][/size][size=9] WHAT NOW [color=blue][x][/color][/size]
[size=13][color=blue]☆[/color][/size][size=9] OOC [color=indigo][This is how.][/color][/size][/list][/list][/list][/list][/list][/list][/list][/list][/list][/list][/list][/list][/list][/list][/list][/list][/list][/list][/list][/list][/list][/list][/list][/list][/list][/list][/list][/list][/list]
L-SHAPE. For this, referral to the tutorial post will probably help.
[align=left][img]http://imageshack.us/a/img707/7505/6l80.jpg[/img][/align][imgleft]http://imageshack.us/a/img600/1710/rarp.jpg[/imgleft]
[list][list][list][list][list][list][list][list][list][list][list][list][list][list][list][list][list][list][list][list][list][list][list][list][list][list][list][list][list][list][list][list][list][list][list][list][list][list][list][list]
END PRODUCT involves top aligned left and bottom half in imgleft. All your text stuffing must go after the list codes. Unless you want to experiment with layering code. This is all basic streamlined stuff
[size=18]☺[/size][size=9] WHERE WHO [x][/size]
[size=18]☻[/size][size=9] WHAT NOW [x][/size]
[size=18]☺[/size][size=9] OOC NOTES [Footnote junk goes above list end codes][/size]
[/list][/list][/list][/list][/list][/list][/list][/list][/list][/list][/list][/list][/list][/list][/list][/list][/list][/list][/list][/list][/list][/list][/list][/list][/list][/list][/list][/list][/list][/list][/list][/list][/list][/list][/list][/list][/list][/list][/list][/list]
FANCY TEXT
[color=color1][strike][color=color2][u][color=color3]COMBINED LOOKS LIKE THIS[/color][/u][/color][/strike][/color]
Also refer to this post for gradients and colors
BOOK ENDED GRAPHICS POST LAYOUT (works for all Images with Widths smaller than 300px, any height)
[imgleft]http://[/imgleft][imgright]http://[/imgright][list][list][list][list][list][list][list][list][list][list][list][list][list][list][list][list][list][list][list][list][list][list][list]
[b]NAME GOES HERE[/b]
[size=9]↳ OOC [[color=color1] ... [/color]] ↳ WHERE [[color=color2] ... [/color]] ↳ WITH [[color=color3] ... [/color]][/size]
[size=10]
Text. [color=color1][b]"Lorem ipsum dolor sit amet, consectetur adipiscing elit."[/b][/color] Vivamus sem sem, lobortis eget sollicitudin id, sollicitudin eu elit. Vestibulum in elit nunc, ultricies consequat felis. [color=color2][i]Vivamus eu dolor id tortor interdum pharetra et a libero. [/i][/color]In sit amet est nibh, quis molestie risus. Pellentesque habitant morbi tristique senectus et netus et malesuada fames ac turpis egestas. Sed varius augue mi. Mauris eu lectus et nibh facilisis mattis eget et leo. Ut pharetra tortor sit amet nulla egestas semper. Praesent ac enim urna, in consectetur libero. Praesent semper purus ut mi cursus euismod. Aliquam aliquam, magna sit amet feugiat bibendum, massa libero gravida est, non mollis massa quam nec ipsum. Nam sollicitudin pretium tincidunt. Suspendisse quis nibh velit, nec congue risus. Aliquam erat volutpat. Integer et lacus lectus.
[/size]
[/list][/list][/list][/list][/list][/list][/list][/list][/list][/list][/list][/list][/list][/list][/list][/list][/list][/list][/list][/list][/list][/list][/list]
USEFUL RESOURCES FOR PICTURES
FOR EDITING, CROPPING, and RESIZING. (In order of usefulness). ALWAYS BORDER POSTING PICTURE WITH THIN WHITE BORDER IF YOU DON'T LIST
PicMonkey In browser. It also has a Google Chrome app.
pixlr.com There is a mobile app version of pixlr you can find and utilize if you are working from a mobile gadget.
pixlr Express In browser. Very fast. Nice frames.
EZIMBA Quick fast easy image editor and converter
Canva
PsykoPaint
Thumba
PhotoCat. It's OK.
BeFunky has great frames. Mess with Blend Modes is a must.
PiZap is slow, interface is ugly, but collage capabilities are acceptable and fancy.
PIXENATE also has ugly interface. Fun Effects are mildly useful. Would not use. CITRIFY is so basic that it's crap. Phixr and LUNAPIC good for memes. Maybe. Nothing else.
GIMP For those with your own computer but no programs.
Tricks with layering? Multiply, overlay, addition, and screen. GIMP is trustworthy
There is also a quick fixer available on photoshop.com (in their Online Tools menu drop) and the free Aviary app. If I haven't listed something here. It's because I don't trust it... I tried iPiccy and Ribbet. I didn't like them.
FREE MUSIC FOR YOUR MADE UP RADIO STATIONS AND NEIGHBORHOOD COMMUNES
https://bandcamp.com/tag/free-download Music you've never heard before. Name your price $0 and it's free but it's free to listen and you're welcome to tip some of the artists if you want.
FOR DRAWING
If you don't have photoshop and hate GIMP. These are the other free options
firealpaca
krita
Artweaver Scroll down to find free version.
FOR FINDING EVER WONDER WHERE THOSE COOL PICS IN BARTON TOWN COME FROM? LOOK NO FURTHER THAN HERE
lookbook.nu Regular people who want to be... looked at.
Chictopia Like lookbook but differently formatted
NEXT MANAGEMENT Modeling agency. A big one. Just pick a city. Select models. Select gender to browse
PhotoGenics Modeling Agency Professionals. Click on models to view men or women. You can always google "modeling agency" and find more of these portfolio sites.*
pixiv.com For Japanese anime. Customize the picture for use though. (Customize everything. Even real pictures).
morguefile.com Free stock photos. For miscellaneous purposes.
Getty Images Royalty free stock images for building graphics. Collages. Things for your RP thread
*Another way to get pictures and various images from the same model is to simply pick a fashion line like Gucci or Burberry. And type into the search engine "Gucci collection" or "Gucci ad campaign". You can literally type in "Burberry model" and find a face. Too many people use actors and actresses
STORAGE DO YOU REALLY NEED HELP FINDING THESE? I'LL LIST THEM ANYWAY
Photobucket
Photobucket Mobile
Imgshack
Imgshack Mobile
tinypic.com Good site
flickr, Picasa, and imgur are your other alternatives.
I don't recommend Snapfish.
If you use anything other than photobucket, to view them requires selecting "show all images" in account preferences' image display settings.
FOR SHORTENING AN EXCESSIVELY LONG PIC URL NECESSARY FOR SIGNATURES SOMETIMES
tinyurl
bit.ly
USEFUL FOR TEXT AND SYMBOL DESIGN CREATION
Fuzzimo's Label Maker If you're tired of plain font this place makes label stickers
TEXT GEN EDITOR Fancy lettering made by symbols you can copy paste
FOR COLORS AND THINGS
colourlovers for premade palettes. This one is excellent. Perfectly good for all sorts of graphic making.
bighugelabs for making your own palette from a picture.
UTCCG is a thread of just about every shade for every color you could possibly want.
Adobe Kuler
Colourcode
Collor
Colors Palette Generator
Pictaculous
Web Color Data
FOR NAME GRAPHICS
FontMeme.com Try it. It's easy. No download required. In browser.
BannerFans.com is a pretty useful label, title, and... banner maker.
See this tutorial for text header (name, lyrics, quotes, poetry) advice
FOR FLIPPING PLAIN TEXT ONLY
Reverse Text Generator Makes things backwards.
FOR MAKING IT UPSIDE DOWN PLAIN TEXT ONLY
Upside down word generator Enter and copy paste.
FOR SHORT TEXT GRADIENT (RAINBOW GEN) PLAIN TEXT ONLY
http://www.tektek.org/color/
http://www.wordcounter.net/ Best word counter. To check length.
QUICK TIP FOR POSTING FROM MOBILE DEVICES If you have little to no access to a computer, make your first post via a computer.
Then when you are on your mobile device, hit the quote button (beware of hitting edit on accident).
Delete the quotes (and the spoiler if applicable, if the GM stores your post layout somewhere in the thread itself) brackets and you'll be ready to go in style.