|
|
|
|
|
|
|

Sabrewolf123 Vice Captain
|
 Posted: Sat Mar 16, 2013 5:15 pm Posted: Sat Mar 16, 2013 5:15 pm
Hey guys, I know sometimes it can be hard to find images you want for making your meister, weapon, witch, etc. So I've compiled some sites here with awesome images as well as explanations on how to use them. First off, some explanations on how to put images in posts in the first place.
The most important thing to know is that Photobucket is your best friend. Not only does it have a host of images, but it allows you to upload and customize these images to the proper size/look/format you want.
So a short walkthrough: 1. If you click on the link above, you'll go to the homepage of the site. In the top right(ish) of the page you'll see a search bar. Type in what you're looking for to find a whole list of images. 2. So let's say I just type in "Anime" and it brings me here. 3. Now you have pages upon pages of images you can choose from. Next, obviously, you click on one. So let's say I click on one. That leads me to the image itself. For example: =anime&filters[primary]=images&filters[secondary]=videos&sort=1&o=13]here. 4. This image is a good size and well drawn, so let's say I want to use this one. On the right side of the page near the top you should see the bolded words: Share Links Each of the links immediately under this is a link to the image. 5. To show an image on Gaia, left click on the link next to "IMG". If you do this correctly, the link box should flash yellow. If it does, this means that the image is already "copied" so you don't need to right click and copy it manually. Then simply go to your post, right click and select "Paste". The image will show up when you post or hit the preview button.  This is the basic tutorial of how to get images from photobucket and use them. Next post I'll talk about resizing images.
|
|
|
|
|
|
|
|
|
|
|
|
|
|
|
Posted: Sat Mar 16, 2013 6:07 pm
Now you may be saying "But Sabre, I found an image I liked but it's too big/small to use! crying ". There there son, I understand. We all run into that problem. So this post is about how to resize images on photobucket if they're not the size you want them to be. The first thing you need to do to resize an image on photobucket is to create an account. (If you already have one you can skip this step.) Don't worry! The account is free to create and very easy. 1. Just follow this link here to go to the sign up page. 2. Once you put in all the information, photobucket will take you to a pop-up with three options of which version of photobucket you want. Unless you want to pay for whatever it is you get more of, choose the far left option for the free version. 3. Click "No thanks" on the tab that comes up and you'll be at your homepage. 4. Okay, now that you have your own account it's time to look for an image you want to resize. Let's go to the search bar again and type "Anime" like last time to bring us back here. 5. Go ahead and click on the same image we used last time =anime&filters[primary]=images&filters[secondary]=videos&sort=1&o=14]here.  6. On the right side of the page, you'll see a tab called "Media Options". It's the second tab down. 7. Under that tab, click the "Copy" button. 8. A tab will come up asking you where you want to copy it to. Unless you've already created your own folder, simply click "Select Album" and then the only option: "Your Bucket" Then click "Copy". There should be a quick bar showing you that it's copying the image. Once it's done it should automatically take you to your library with the image already in it, like this. (In this link there's more images used in other steps. The very last one is the original image I'm referring to.) If this is your first time using photobucket a tab may come up offering you a tutorial. If you want to do that, go ahead. If you don't just click "skip". 9. Now click on the image and it'll take you here. This is a very similar set up to when you first found the image. The major difference is that this copy of the image is now in YOUR library and you can edit it however you want. *Note: In the link I just gave you, it will take you to the picture in my dummy account rather than your own so you won't be able to edit it or see the edit buttons in Step 10, so pay attention to where the buttons in Step 10 are located rather than searching for them in this link. You won't find them there. 10. Let's say you want the image to be smaller or larger for whatever reason. There's several ways to do this, but I'm going to show you the one I use. Remember the tab where the "Copy" Button was located? On that same tab on the right hand side is the "Edit" button. It should say "edit" if you hover the mouse over it. Click it and it'll lead you to a screen with the picture in a box and a tab of new buttons over it. 11. To make it smaller or larger, click on the "resize" button in the list of buttons above the picture. This should open a tab with a Width X Height bar with numbers for each. Keep in mind that smaller images made larger may be a bit fuzzier in their larger form. 12. Type in the number you want. Lower numbers make the picture smaller while higher numbers make it bigger. You may notice that the numbers in both columns will change if you do this. This is automatically done to keep the picture proportional. You can turn this off and on by clicking the padlock symbol between the two numbers. 13. Once you have it the size you want, click the "apply" button. This will bring you back to the screen with the picture being smaller or larger than before. Now click the "Save" button. A bar will come up saving the image and then you will be taken to a screen with the newly sized image. Now simply click the "IMG code" link and paste it onto the post you're writing. Now your newly sized image will appear.   Next post I'll tell you how to crop images if there's things in it you don't want.
|
|
|
|
|
|
Sabrewolf123 Vice Captain
|
|
|
|
|
|
|
|
|
|
Sabrewolf123 Vice Captain
|
Posted: Sat Mar 16, 2013 7:00 pm
This post will explain how to crop photos in photobucket. i.e. how to take parts out of them. Alrighty, let's say I have this picture here and I really like the character on the right because she's happy and I want a happy character, but I don't like the one on the left because she is a psycho killer and she scares me. The blood also scares me. I want to get rid of those things as best I can.  1. The first thing you want to do is go to the image editor (See Step 10 in the previous post if you forgot how) for this picture after you've copied it to your library. 2. Right next to the "Resize" button is a button called "Crop". Click that. 3. I'll be led to a screen with the picture in what looks like a light box. The light part of the box is what will show up in the picture. The dark part is what will be cut. So, I move the left side of the box until I cut out psycho girl and much of the blood. Then I move the top of the box down as well to cut out more of the blood. I also move the bottom of the box downwards so I can get more of the normal looking girl into the picture. Then I click "Save". Now you have a cropped picture containing just the image you want:  It's not perfect of course. Sometimes you can't crop out everything you want and you can only make the image smaller by doing so, meaning you may have to compensate by resizing the cropped image (Just follow the directions in the second post starting with Step 6) but it can also be very useful in some situations if there's something in the photo you really don't like. Next I'll answer a few last questions about photobucket in general.
|
|
|
|
|
|
|
|
|
|
|
|
|
|
|
Posted: Sat Mar 16, 2013 7:20 pm
Sometimes you may have a picture, you use it, it works fine and then one day you come back and it looks like this:  What that means is that the owner of the photo on photobucket deleted it or moved it (as clearly stated). In other words, it's gone. As gone as the money you pay in taxes. *Poof* Hopefully you can find a copy or find the new location it was moved to, but that's really a matter of luck and a potentially difficult search. This is another reason why copying a photo to your library and using it from there is such a good idea. If you copy it directly from the site, the owner of the picture may choose to move it or delete it and there's nothing you can do. If it's in your own library, it's there until you decide to move it or delete it. What else can you do with pictures in photobucket?Well, lots of things. I've only really scratched the surface and many of them I don't know how to do myself. You'll have to experiment on your own to find out all there is to do. But as far as editing pictures you can do all sorts of things, like changing the tone, direction and even adding things. So if you're feeling adventurous or creative, explore on your own!    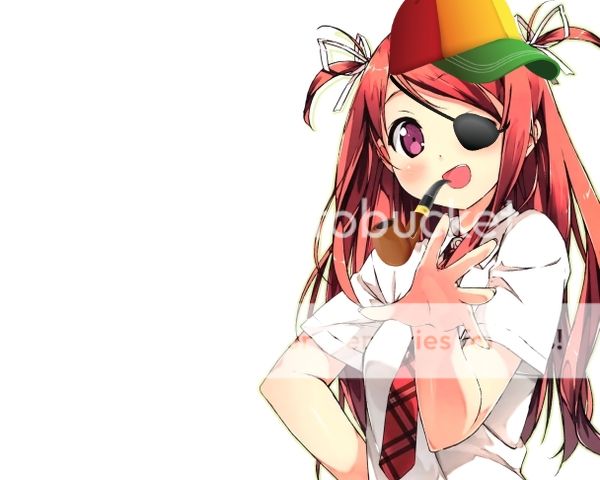 Next I'll talk about how to use images that AREN'T on photobucket
|
|
|
|
|
|
Sabrewolf123 Vice Captain
|
|
|
|
|
|
|
|
|
|
Sabrewolf123 Vice Captain
|
Posted: Sat Mar 16, 2013 8:25 pm
Okey Dokey, so you can't find the image you want on photobucket? No prob. There's plenty of other images sites out there with awesome pics. The problem is that using them in your post requires a slightly different method than photobucket. In this post I'll show you how to use images outside of photobucket in your post. 1. Let's use google images by going to www.google.com and clicking on "images" next to "Search" in the top left of the page. 2. Type in whatever you're looking for and hit enter. I'm going to keep it simple and type in "anime". 3. Choose an image you want and left click on it. Yeah, I know it's obvious but I'm doing this step-by-step so hang in there. 4. I chose the image you'll see in Step 8 as my image. Fortunately, this image fits the size I'm looking for, so I can use it just the way it is. 5. In order to use it, first right click on the image. 6. Now this is IMPORTANT. Once you right click you'll have a selection of what you can do come up by your cursor. Click on "Copy Image Location", NOT "copy image". 7. Now go back to your post and past the url into it. 8. However, this is not enough to cause the image to appear as this is just a link leading to the image. In order for the image itself to appear, go just before the image and type: [img] then go just after the image and type: [/img] Only type what appears in green in this step. Make sure there are no spaces between these and the image link or the image won't appear. Now when you post or preview, the image you copied should appear as a picture on the screen:  Although I used google images as an example, this works for most images on most sites that you want to use. Next, I'll be talking about how to get images you find on other sites onto photobucket so you can edit them if they're too big or small or you want them cropped.
|
|
|
|
|
|
|
|
|
|
|
|
|
|
|
Posted: Sat Mar 16, 2013 9:04 pm
Unfortunately when using other sites (Especially google images) you'll run across images that are either way too big or way too small to use. I know, first-world problems right? Well, in that case the best thing to do is to get these images on photobucket. Not only will they always be there once you upload them, but you'll be able to edit them to your satisfaction. (Posting massive pictures can be aggravating to people, especially those with smaller screens who are forced to scroll left and right to see the whole thing and read the full post.) Let's use this huge picture of this wicked-sick dragon I found on google images as an example. 1. First thing you do is simple and you've probably done it before. Just go to the picture you want to use, right click and click "Save Image as..." 2. I recommend saving it to your desktop just to make it easier to access, (it's what I do) but in reality you can save it wherever you want as long as you can find it later. 3. Once you've saved it, go back to your photobucket homepage. (It'll be the first page you go to when you sign in) 4. Now go to the big orange"Upload" button and click on it. 5. Click on "browse files" in the middle of the screen. 6. Find the location of the picture on your computer and double-click it. 7. Photobucket should automatically upload the picture and it should immediately appear in your library. Then if you want to change the size or whatever, simply follow the steps in the second and/or third posts of this thread. Then your new, previously aggravatingly large image will be ready to post on Gaia. 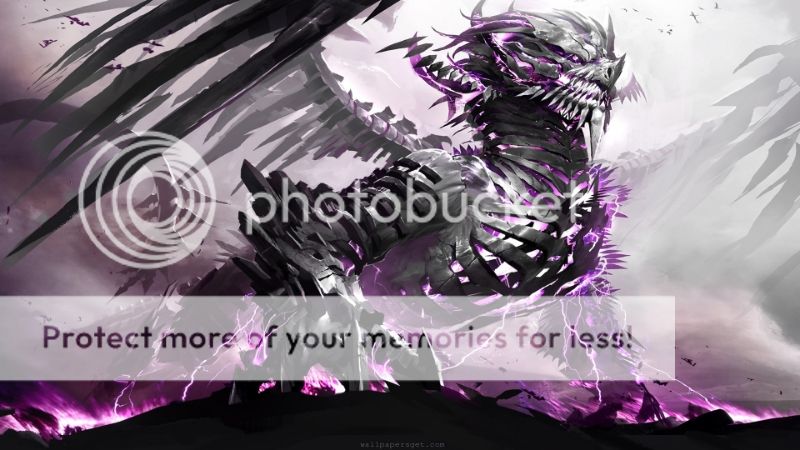 *Note: If you're worried about using this because using too many photos might take up too much space on your computer, don't be. After you upload the photo to photobucket you can erase it from your computer. The photo will still be there to use afterwards. In my next post, I'll give you a list of sites other than Photobucket and Google Images that I think are great places to find images for your characters. As these sites aren't photobucket, make sure you follow either this post or the previous one if you want to use them!
|
|
|
|
|
|
Sabrewolf123 Vice Captain
|
|
|
|
|
|
|
|
|
|
Sabrewolf123 Vice Captain
|
Posted: Sat Mar 16, 2013 10:25 pm
And now for a list of sites that may help you in your search for images.
http://www.zerochan.net/
I don't use this one often but I know people who do and like it a lot so feel free to try it out.
http://www.animegalleries.net/
If you know what character you're looking for, this is a good site to go to. It has the pictures divided by anime and then by character within each anime.
http://www.we-love-anime.com/spgm/index.php
This one is also good if you know what anime/character you're looking for. Click on the letter the Anime starts with and then choose the anime itself.
http://animeartbooks.net/
This one has pics divided up by anime as well as a search bar in the top left just below the line of pictures.
http://kisuki.net/artbooks
This one has artbooks full of images for different anime as well as wallpapers and images.
http://boards.4chan.org/c/
This is a 4chan board focused specifically on a big gallery of random anime pictures. It will first load a sign-up screen with each page but don't worry about that, just scroll down.
http://www.hebus.com/wallpapers/manga/cat22-page1.html
This site is in french, but I've navigated to the gallery for you so all you have to do is click the arrows or choose the page just below the pictures themselves.
Those are the major ones I like. I chose these sites because of the quality of the pictures and the ease of navigation. If you have any questions or any other sites you recommend, feel free to post them here! Also, if a website you want to share has offensive content on it (porn mostly) then please warn the reader that it's on there in your post. Enjoy!
Update:
http://www.minitokyo.net/Series
This is a great site I found that has tons of images sorted by anime
Update 2:
http://safebooru.org/index.php?page=post&s=list
This site has about a billion pictures that you can search through
Update 3:
http://joyreactor.com/tag/anime/41
This site has 42 pages of anime images. A few of them aren't anime, but almost all of them are very well-drawn. There's some nudity on this site just so you know and a lot of the images are sensual in nature. Just a heads-up
Update 4:
http://www.theanimegallery.com/gallery/category:artbooks/page:1
This site has well over 50,000 anime images of random characters.
http://www.deviantart.com/
Don't know why I didn't think of this sooner. It's one of the biggest art galleries out there. Just type whatever you're looking for in the search bar and go. You're bound to find something
Update 5:
http://4nabs.com/galleries/0-10/anime/
Randomly stumbled across this site when messing around. It has tons of images of anime characters both fan created and from actual animes
Update 6:
http://e-shuushuu.net/search/results/?tags=7391
Lots of kitsune images
|
|
|
|
|
|
|
|
|
|
|
|
|
|
|
Posted: Sun Mar 17, 2013 11:35 pm
There's lots of fancy things to do when you're creating your profile layout for your character. You may notice that a lot of people have symbols, shapes and patterns on their character's profile layouts when they post. A lot of people don't know how to do this, so I've taken the liberty of posting a good deal of those things right here. If you want to use them, just copy/paste. Also, I can't claim credit for this; it was someone named DuskMoonFlower or at least that's where the previous person got them from.
~ | ¡ ¿ † ‡ ↔ ↑ ↓ • ¶ # ¹ ² ³ ½ ⅓ ⅔ ¼ ¾ ⅛ ⅜ ⅝ ⅞ ∞ ‘ “ ’ ” «» ¤ ₳ ฿ ₵ ¢ ₡ ₢ $ ₫ ₯ € ₠ ₣ ƒ ₴ ₭ ₤ ℳ ₥ ₦ № ₧ ₰ £ ៛ ₨ ₪ ৳ ₮ ₩ ¥ ♠ ♣ ♥ ♦
Á á Ć ć É é Í í Ĺ ĺ Ń ń Ó ó Ŕ ŕ Ś ś Ú ú Ý ý Ź ź À à È è Ì ì Ò ò Ù ù  â Ĉ ĉ Ê ê Ĝ ĝ Ĥ ĥ Î î Ĵ ĵ Ô ô Ŝ ŝ Û û Ŵ ŵ Ŷ ŷ Ä ä Ë ë Ï ï Ö ö Ü ü Ÿ ÿ ß Ã ã Ẽ ẽ Ĩ ĩ Ñ ñ Õ õ Ũ ũ Ỹ ỹ Ç ç Ģ ģ Ķ ķ Ļ ļ Ņ ņ Ŗ ŗ Ş ş Ţ ţ Đ đ Ů ů Ǎ ǎ Č č Ď ď Ě ě Ǐ ǐ Ľ ľ Ň ň Ǒ ǒ Ř ř Š š Ť ť Ǔ ǔ Ž ž Ā ā Ē ē Ī ī Ō ō Ū ū ǖ ǘ ǚ ǜ Ă ă Ĕ ĕ Ğ ğ Ĭ ĭ Ŏ ŏ Ŭ ŭ Ċ ċ Ė ė Ġ ġ İ ı Ż ż Ą ą Ę ę Į į Ų ų Ł ł Ő ő Ű ű Ŀ ŀ Ħ ħ Ð ð Þ þ Œ œ Æ æ Ø ø Å å Ə ə •
Ά ά Έ έ Ή ή Ί ί Ό ό Ύ ύ Ώ ώ Α α Β β Γ γ Δ δ Ε ε Ζ ζ Η η Θ θ Ι ι Κ κ Λ λ Μ μ Ν ν Ξ ξ Ο ο Π π Ρ ρ Σ σ ς Τ τ Υ υ Φ φ Χ χ Ψ ψ Ω ω • •
А а Б б В в Г г Ґ ґ Ѓ ѓ Д д Ђ ђ Е е Ё ё Є є Ж ж З з Ѕ ѕ И и І і Ї ї Й й Ј ј К к Ќ ќ Л л Љ љ М м Н н Њ њ О о П п Р р С с Т т Ћ ћ У у Ў ў Ф ф Х х Ц ц Ч ч Џ џ Ш ш Щ щ Ъ ъ Ы ы Ь ь Э э Ю ю Я я
ŋ ə ⁿ•
๑☺ ☻ ☼♣ ♥ ♦·۰•●○●ஐﻬ↔ ↕ ▪ ▫ ▬♦ ◊ ◦♫ ♪ ♪ღˇ √ « » ™ ♂♀ ©№®@ ◦º°×°º◦ ´¯`·»ºØغøº¤ø,¸¸,ºº¤øøºﷲﷲ°º¤ø,¸¸ ´¯`•.•●•۰• ••.•´¯`•.•• ׺°”˜`”°º×»- ஆ ௰
Þ ௫
– — … ° ≈ ≠ ≤ ≥ ± − × ÷ ← → · §
α в ¢ ∂ є ƒ g н ι נ к ℓ м η σ ρ q я ѕ т υ ν ω χ у z
₳ Ҍ ₡ € Ҽ ₲ ₣ ₭ Ҝ ₤ ₥ ₦ ₱ ₮ ₩ Ӽ
Ҥ Ҕ Ѵ Ͽ Ͼ Ϯ ϰ ϱ Ϟ ξ ζ Ξ ͽ ͼ ǂ
ɑ ɒ ʙ ɓ ɔ ɕ ɖ ɗ ɘ ə ɚ ɛ ɜ ɝ ɞ ɟ ɠ ɡ ɢ ʛ ɥ ɦ ɧ ɨ ɩ ɪ ʝ ɫ ɬ ɭ ɮ ɯ ɰ ɱ ɲ ɳ ɴ ɴ ʀ ʁ ʂ ʈ ʉ ʊ ʋ ʌ ʍ ɣ ɤ ʎ ʐ ʑ
☺ ☻ ☼ ♠ ♣ ♥ ♦ ♪ ♫ ░ ▒ ▓ ▀ ▄ ■ □ ▪ ◦ ₴ ۱ ۲ ۳ ۴ ۵ ۶ ۷ ۸ ۹ ۞
α в c ם/∂/δ є ғ ɢ н ι נ к ℓ м и σ ρ q я s т υ v ω x ץ/ч z
§__° _°_ °__§
Ⓐ Ⓑ Ⓒ Ⓓ Ⓔ Ⓕ Ⓖ Ⓗ Ⓘ Ⓙ Ⓚ Ⓛ Ⓜ Ⓝ Ⓞ Ⓟ Ⓠ Ⓡ Ⓢ Ⓣ Ⓤ Ⓥ Ⓦ Ⓧ Ⓨ Ⓩ
ⓐ ⓑ ⓒ ⓓ ⓔ ⓕ ⓖ ⓗ ⓘ ⓙ ⓚ ⓛ ⓜ ⓝ ⓞ ⓟ ⓠ ⓡ ⓢ ⓣ ⓤ ⓥ ⓦ ⓧ ⓨ ⓩ
① ② ③ ④ ⑤ ⑥ ⑦ ⑧ ⑨ ⑩ ⑪ ⑫ ⑬ ⑭ ⑮ ⑯ ⑰ ⑱ ⑲ ⑳
❶ ❷ ❸ ❹ ❺ ❻ ❼ ❽ ❾ ❿ ⓫ ⓬ ⓭ ⓮ ⓯ ⓰ ⓱ ⓲ ⓳ ⓴
⓵ ⓶ ⓷ ⓸ ⓹ ⓺ ⓻ ⓼ ⓽ ⓾
Ȁ Ȃ Ȧ Ӓ Ӑ Ʌ Ⱥ Ά Α Λ Ѧ Д ᾈ ᾉ ᾊ ᾋ ᾌ ᾍ ᾎ ᾏ • ȁ ȃ ɑ ɒ ɐ ȧ α ά Δ д ӓ ӑ ᾀ ᾁ ᾂ ᾃ ᾄ ᾅ ᾆ ᾇ ᾰ ᾱ ᾲ ᾳ ᾴ ᾶ ᾷ
Ƀ β Ѣ • Ђ Ъ Ь ъ ь Ϧ ɓ ʙ ϐ ѣ б в Ҍ ҍ
Ȼ ʗ Ͻ Ͼ Ͽ Ϲ Ѽ Ҁ Ҫ • ɔ ȼ ς ϲ ѽ ҁ ҫ
ɖ ɗ ȡ ʠ δ
Ȅ Ȇ Ӗ Ɇ Ѐ Ȩ Ȝ Έ Ё Ε Ξ Σ ξ Є Э Ӭ З Ѯ Ҿ Ҽ Ӛ Ә Ӟ Ҙ ә • ə ε έ з є э е ϵ ϶ ȅ ɘ ȇ ɇ ȩ ѐ ё ѯ ҿ ҽ ӛ ӟ ҙ ӗ ӭ
Ϝ Ғ Ӻ • ϝ ɟ ʄ ӻ ғ
Ѡ Ѿ • ɠ ɡ ʛ ɢ ɞ ʚ ɕ
Ȟ Ή Η Ң Ҥ Һ Ӈ Ӊ Ҕ ᾘ ᾙ ᾚ ᾛ ᾜ ᾝ ᾞ ᾟ • ʜ ɦ ћ ʮ ʯ ɧ ȟ ɥ ђ Ћ н ӈ ӊ ң ҕ ҥ
Ȉ Ȋ Ί Ϊ Ῐ Ῑ Ὶ Ί • ȉ ɨ ɩ ɪ ȋ ϊ ΐ ῐ ῑ ῒ ΐ ῖ ῗ
Ɉ Ј • ɉ ȷ ʝ ϳ
Ќ Қ Ҟ Ҝ Ҟ Ӄ • ʞ ɮ κ ќ қ ҝ ҟ ҡ ӄ
Ƚ ζ • ʟ ɫ ɬ ʅ ɭ ȴ ʃ ʄ ʆ
Ϻ Ӎ • ɯ ɰ ɱ ϻ ӎ
Ƞ Ν Π Ѝ Ҋ Ӣ Ӥ Ώ Ω Л Й • ȵ ɲ ɳ ɴ ή π η и й ѝ л ҋ ӣ ӥ ᾐ ᾑ ᾒ ᾓ ᾔ ᾕ ᾖ ᾗ ὴ ή ὴ ή
Ȍ Ӧ Ȏ Ȭ Ȫ Ȯ Ȱ ʘ Ό θ Ѻ ϴ Ӫ Θ Ѳ Ю ф Ὸ Ό • ȫ ȭ ȍ ȏ ȯ ȱ ɵ ɸ σ ϕ ό Φ ѻ ѳ ӧ ӫ
Ρ Ҏ Ῥ • ρ ϼ Ϸ ϸ φ ҏ ῤ ῥ
Ɋ Ϙ • ϙ ɋ Ϥ ϥ ϱ
Ȑ Ȓ Ɍ Я Г Ѓ Ӷ Ґ • я ɹ ɺ ɻ ɼ ɽ ɾ ɿ ȑ ȓ ɍ ʀ ʁ г ѓ ґ ӷ
Ș Ϩ ϩ Ϛ • ϛ ɛ ɜ ɝ ʂ ȿ ș
Ț Ⱦ Ҭ • τ Ϯ ϯ ȶ ʇ ʈ ț т ҭ
Ȕ Ʉ Ȗ Ώ Ω ц • ȕ ȗ ʮ ʯ ʉ ʊ υ μ ϑ ϋ ύ ΰ
Ʌ Ѵ Ѷ • ɣ ʋ ʌ ѵ ѷ ῠ ῡ ῢ ΰ ῦ ῧ
Ϣ Ш Щ • ϣ ш щ ѿ ѡ ʍ ώ ψ Ψ ω ϖ ᾠ ᾡ ᾢ ᾣ ᾤ ᾥ ᾦ ᾧ ῲ ῳ ῴ ῶ ῷ ὼ ώ
Ϫ Ж Җ χ Ӽ Ҳ Ӿ Ӂ Ӝ • ж ϰ ϗ ӽ ӿ ҳ ӂ ӝ җ
Ȳ Ɏ ϒ ϓ ϔ Ύ Ϋ Υ Ў У ц Ѱ Ӱ Ӯ Ӳ Ӵ Ҷ Ҹ Ӌ Ῠ Ῡ Ὺ Ύ • Ч џ ў ү ұ ɣ ɏ ȳ ʎ ʏ ɤ Ϟ λ ϫ ӯ ӱ ӳ ӵ ҷ ҹ ӌ
Ȥ • ɀ ʐ ʑ ȥ ʒ ʓ ȝ
? Ɂ ɂ ʡ ʢ ʔ ʕ ʖ ˀ ˁ
Ȣ ȣ ȸ ȹ ʣ ʤ ʥ ʦ ʧ ʨ ʩ ɶ ы ʪ ʫ Ӹ ӹ
љ њ Ѹ ѹ Ѫ Ѭ Ѥ ѥ ѧ Ѩ ѩ ѫ ѭ ѱ
҈ ҉
҈ ҉
← ↑ → ↓ ↔ ↕ ↖ ↗ ↘ ↙ ↚ ↛ ↜ ↝ ↞ ↟
↠ ↡ ↢ ↣ ↤ ↥ ↦ ↧ ↨ ↩ ↪ ↫ ↬ ↭ ↮ ↯ ↰ ↱ ↲ ↳ ↴ ↵ ↶ ↷ ↸ ↹ ↺ ↻ ↼ ↽ ↾ ↿
⇀ ⇁ ⇂ ⇃ ⇄ ⇅ ⇆ ⇇ ⇈ ⇉ ⇊ ⇋ ⇌ ⇍ ⇎ ⇏ ⇐ ⇑ ⇒ ⇓ ⇔ ⇕ ⇖ ⇗ ⇘ ⇙ ⇚ ⇛ ⇜ ⇝ ⇞ ⇟
⇠ ⇡ ⇢ ⇣ ⇤ ⇥ ⇦ ⇧ ⇨ ⇩ ⇪ ⇫ ⇬ ⇭ ⇮ ⇯ ⇰ ⇱ ⇲ ⇳ ⇴ ⇵ ⇶ ⇷ ⇸ ⇹ ⇺ ⇻ ⇼ ⇽ ⇾ ⇿
℀ ℁ ℂ ℃ ℄ ℅ ℆ ℇ ℈ ℉ ℊ ℋ ℌ ℍ ℎ ℏ ℐ ℑ ℒ ℓ ℔ ℕ № ℗ ℘ ℙ ℚ ℛ ℜ ℝ ℞ ℟
℠ ℡ ™ ℣ ℤ ℥ Ω ℧ ℨ ℩ K Å ℬ ℭ ℮ ℯ ℰ ℱ Ⅎ ℳ ℴ ℵ ℶ ℷ ℸ ℹ ℺ ℻ ℼ ℽ ℾ ℿ
⅀ ⅁ ⅂ ⅃ ⅄ ⅅ ⅆ ⅇ ⅈ ⅉ ⅊ ⅋ ⅌ ⅍ ⅎ ⅏ ⅐ ⅑ ⅒ ⅓ ⅔ ⅕ ⅖ ⅗ ⅘ ⅙ ⅚ ⅛ ⅜ ⅝ ⅞ ⅟
☽☾✗✘✓ ✔ ☐ ☑ ☒ ✕ ✖✚✪✣✤✥
✱ ✲ ✳ ❃ ❂ ❁ ❀ ✿ ✾ ✽ ✼ ✻ ✺ ✹
✸ ✷ ✶ ✵ ✴ ❄ ❅ ❆ ❇ ❈ ❉ ❊ ❋ ❖
☀ ☂ ☁ ❣ ✚ ✪ ✣ ✤ ✥ ✦ ❉ ❥ ❦ ❧
❃ ❂ ❁ ❀ ✄ ☪ ➸ ♨ ☢ ☠ ☭ ♈ ☮ ☯
♋ ☡ ☢ ☣ ☤ ☥ ☦ ☧ ☨ ☩ ☪ ☫ ☬ ☭
♔ ♕ ♖ ♗ ♘ ♙ ♚ ♛ ♜ ♝ ♞ ♟ ۩ ۞
♠ ♡ ♢ ♣ ♤ ♥ ♦ ♧ ✦✧✩✫✬✭✮✯✰ ☼ ❣
♲ ♳ ♴ ♵ ♶ ♷ ♸ ♹ ♺ ♻ ♼ ♽♯♩♪♫♬♭
☰ ☱ ☲ ☳ ☴ ☵ ☶ ☷ ☚ ☛ ☜ ☝ ☞ ☟
☿ ♀ ♁ ♂ ♃ ♄ ♅ ♆ ♇ ♈ ♉ ♊ ♌ ♍
△ ▲ ☆ ★ ◇ ◆ ■ □ ▽ ▼ ❤❥♎ ♏ ✐✌
๑ # @ & * ¥ ☸ ☆ ★ ✪ ¤ ☼ ☀ ☽☾
♡ ღ☻ ☺ ❂ ◕ ⊕ ☉ Θ o O ♋ ☯ ㊝ ⊙ ◎
◑ ◐ ۰ • ● ▪ ▫ 。 ゚ ๑ ☜ ☞ ☂ ♨ ☎ ☏ ✍✡
ಠ_ಠ ◕ ◡ ◕ Ü ö Ö °__° ಥ__ಥ (๑→ܫ←)
(︶︹︺) (*-`ω´- )人 (ц`ω´ц*) (●ゝω)ノヽ(∀<●) (ㄒoㄒ) >_<
⊙▂⊙ ⊙0⊙ ⊙︿⊙ ⊙ω⊙ ⊙﹏⊙ ⊙△⊙ ⊙▽⊙ o(‧'''‧)o
(◡‿◡✿) (◕‿◕✿) (◕〝◕) (∩_∩) ミ●﹏☉ミ (≧0≦) o(╥﹏╥)o
┄ ┅ ┆ ┇ ┈ ┉ ┊ ┋ ⋮ ⋯ ⋰ ⋱
─ ━ │ ┃┌ ┐ ┍ ┑ ┎ ┒ ┏ ┓ └ ┘ ┕ ┙ ┖ ┚ ┗ ┛
┞ ┟ ┢ ┡ ┦ ┧ ┩ ┪
┣ ┫┝ ┥┠ ┨├ ┤
┬ ┭ ┮ ┯ ┰ ┱ ┲ ┳ ┴ ┵ ┶ ┷ ┸ ┹ ┺ ┻ ┼ ┽ ┾ ┿
╀ ╁ ╂ ╃ ╄ ╅ ╆ ╇ ╈ ╉ ╊ ╋ ╌ ╍ ╎ ╏
═ ║ ╒ ╓ ╔ ╕ ╖ ╗ ╘ ╙ ╚ ╛ ╜ ╝ ╞ ╟
╠ ╡ ╢ ╣ ╤ ╥ ╦ ╧ ╨ ╩ ╪ ╫ ╬
╭ ╮ ╯ ╰ ╱ ╲ ╳ ╴ ╵ ╶ ╷ ╸ ╹ ╺ ╻
≡ ≢ ≣ ≤ ≥ ≦ ≧ ≨ ≩ ≪ ≫ ≭ ≮ ≯ ≰ ≱ ≲ ≳ ≴ ≵ ≶ ≷ ≸ ≹ ≺ ≻ ≼ ≽ ≾ ≿
⊀ ⊁ ⊂ ⊃ ⊄ ⊅ ⊆ ⊇ ⊈ ⊉ ⊊ ⊋ ⊏ ⊐ ⊑ ⊒
⊕ ⊖ ⊗ ⊘ ⊙ ⊚ ⊛ ⊜ ⊝ ⊞ ⊟
⊠ ⊡ ⊢ ⊣ ⊤ ⊥ ⊦ ⊧ ⊨ ⊩ ⊪ ⊫ ⊬ ⊭ ⊮ ⊯
⊰ ⊱ ⊲ ⊳ ⊴ ⊵ ⊶ ⊷ ⊸ ⊹ ⊺ ⊻ ⊼ ⊽ ⊾ ⊿
⋀ ⋁ ⋂ ⋃ ⋄ ⋅ ⋆ ⋇ ⋈ ⋉ ⋊ ⋋ ⋌ ⋍
⋎ ⋏ ⋐ ⋑ ⋒ ⋓ ⋔ ⋖ ⋗ ⋘ ⋙ ⋚ ⋛ ⋜ ⋝ ⋞ ⋟
⋠ ⋡ ⋢ ⋣ ⋤ ⋥ ⋦ ⋧ ⋨ ⋩ ⋪ ⋫ ⋬ ⋭
❛❜❝❞【】〖〗►◄﹃﹄『』◢ ◣◥ ◤
≎≎≎≎≎≎≎≎
==== ☠ ====
☆═━┈┈━═☆
± : . : ± : . : ± : . : ±
▄▀▄▀▄▀▄▀▄▀▄▀▄▀▄▀▄
╔══════════════╗
╚══════════════╝
┏━━━━━━━━━┓
┗━━━━━━━━━┛
Oº°‘¨ ¨‘°ºO
•°o.O O.o°•
¨°o.O O.o°¨
—¤÷(`[¤* *¤]´)÷¤—
•·.·´¯`·.·• •·.·´¯`·.·•´
`·.(`·.¸ ¸.·´).·´
`·» »-(¯`v´¯)-»
`•.¸¸.•´¯`•.¸¸.•´
`•.¸¸.••´´¯``•• .¸¸.•´
`•.•●•۰• ••.•´
׺°”˜`”°º× ׺°”˜`”°º×
ண
▀ ▁ ▂ ▃ ▄ ▅ ▆ ▇ █ ▉ ▊ ▋ ▌ ▍ ▎ ▏ ▐
░ ▒ ▓▕ ▖■ □ ▢ ▣ ▤ ▥ ▦ ▧ ▨ ▩ ▪ ▫
▬ ▭ ▮ ▯ ▰ ▱ ▲ △ ▴ ▵ ▶ ▷ ▸ ▹ ► ▻ ▼ ▽ ▾ ▿
◀ ◁ ◂ ◃ ◄ ◅ ◆ ◇ ◈ ◉ ◊
○ ◌ ◍ ◎ ● ◐ ◑ ◒ ◓ ◔ ◕
◖ ◗ ◘ ◙ ◚ ◛ ◜ ◝ ◞ ◟
◠ ◡ ◢ ◣ ◤ ◥ ◦ ◧ ◨ ◩ ◪ ◫ ◬ ◭ ◮ ◯
Next, I'll post some colors.
|
|
|
|
|
|
Sabrewolf123 Vice Captain
|
|
|
|
|
|
|
|
|
|
Sabrewolf123 Vice Captain
|
Posted: Sun Mar 17, 2013 11:39 pm
These are some of the colors you can use in your posts, but these are by no means all of them. Again, DuskMoonFlower gets credit for this. In order to use a color, simply put [color=whatevercolor] and write what you want in color, then put [/color] Red Color'sindianredlightcoralsalmondarksalmonlightsalmonredcrimsonfirebrickdarkredPink Color'spinklightpinkhotpinkdeeppinkmediumvioletredpalevioletredOrange Color'slightsalmoncoralorangeredtomatodarkorangeorangeYellow Color'sgoldyellowlightyellowlemonchiffongoldenrodpapayawhipmoccasinpeachpuffpalegoldenroddarkkhakiPurple Color'sthistleplumvioletorchidfuchsiamagentamediumorchidmediumpurplebluevioletdarkvioletdarkorchiddarkmagentapurpleindigoslatebluedarkslatebluemediumslateblueGreen Color'sgreenyellowchartreuselawngreenlimegreenlimepalegreenlightgreenmediumspringgreenspringgreenmediumseagreenmediumaquarineseagreenforestgreengreendarkgreenyellowgreenoliveolivedrabdarkseagreenlightseagreendarkcyantealBlue Color'scyanaqualightcyanpaleturquoiseturquoisedarkturquoisemediumturquoisedeepskybluecadetbluesteelbluelightsteelbluepowderbluelightblueskybluedodgerbluecornflowerblueroyalbluebluemediumbluedarkbluenavylightblueskybluemignightblueBrown Color'scornsilkblanchedalmondbisquenavajowhiteburlywoodtanrosybrownsandybrowngoldenrodperuchocolatesaddlebrownsiennabrownmaroonGrey Color'slightgreysilverdarkgraygraydimgraylightslategrayslategraydarkslategrayblack
|
|
|
|
|
|
|
|
|
|
|
|
|
|
|
Posted: Mon Mar 18, 2013 7:57 pm
In this post I'll explain how to add Text to your images on photobucket. Sometimes you may have a lot of empty space in your image and you want to fill it up with something, or maybe you want to put your character's name or a quote from them on the picture itself. This is done by creating a text box in photobucket. 1. Go to the photo that you want to add the text to in your library and open it up. Let's use this image again: 2. Open the image editor and go to the set of buttons above the image itself. 3. Click on the arrow just to the right of the buttons to move down the menu. One of the new buttons that scrolls across will say "Text" with "Aa" on the button itself. Click on it. 4. Once you do, the menu bar will change to show new options including colors. A transparent box with the words "Text Here" will also appear on the picture itself. First, take the box and move it to where you want the actual text to appear on the picture by clicking on it with the left mouse button and holding it down until you get it where you want it. 5. Once the box is where you want the text to appear, click inside the box and type what you want to appear. 6. The default appearance of the text will be black and Ariel font. Obviously, in order to change the color you click on the color you want the text to appear in. (There's more colors if you click the arrow at the end of the menu bar) 7. To change the font, click on the words "Ariel Black" and a list of possible fonts will appear for you to choose from. Simply click on the one you want and it will change the text to that font. 8. In order to make the font larger or smaller, first click anywhere on the image outside the text box. You'll see two buttons on the box, one on the upper right corner and one on the lower left. The upper right "X" will delete the whole text box while the lower left arrows will allow you to increase or decrease the size of the text. 9. Click on the arrows and hold down. Now you can drag the box left and right to make the text larger or smaller, and you can move the box up or down to change the orientation of the text if you want it to appear sideways, slanted, or upside down. *Note: You can add more text boxes by clicking on the "Add text" button on the menu bar. 10. Once you have the words you want in the color, font and size you want, simply hit "Apply" and then "Save". Your new image with text will be ready to post. For example, let's say I wanted to name my character "Erica" and put her name on the image. I'll put it in red, use the "Bangers" style font, increase the size and slant the text. Let's say she's a Weapon, so I decide to add a second Text Box describing her Weapon form and putting it just below her name with the same color and slant, but different size and font. Once I finish adding text, I'll get this:  And that's how you add text to an image on photobucket.
|
|
|
|
|
|
Sabrewolf123 Vice Captain
|
|
|
|
|
|
|
|
|
|
|
|
|