This is going to be a long post O_O
gonk ~~~~~~~~~~~~~
How to Make Incense
Incense making instructions. Rediscover how to make incense the way it's been made by virtually every civilization since before the Stone Age; with fine natural incense resins, woods and herbs.
Incense making is a meditative and enjoyable way to exercise our creativity. It's simple, inexpensive and awakens us to the pleasures of earth's aromatic treasures and our interconnection with nature. Create recipes that greet the rising sun with a clean and invigorating aroma, entertain guests with exotic fragrances, purify indoor spaces, enhance dream activity, relax with a soft, smooth, calming mixture that eases the troubles of the day, or blend a warm, sweet and seductive mixture to stimulate your sensuality for an evening of mystery and intimacy.
Since antiquity incense has been used for creating aromatic, fragrant spaces both indoors and out. Incense has always been deeply intertwined with religious ceremonies as well as the practice of medicine. In fact the first reported healing practices, recorded in ancient Egypt, exposed patients to the smoke of incense for healing.
Strengthen your connection to nature as soft clouds of frankincense, mastic, storax, sandalwood, cassia, juniper and lemon grass ascend to the heavens! Lets rediscover the ancient art of how to make incense.
Natural Incense Making
* determine the type of incense you'll make
* determine how you will heat your incense
* gather tools
* gather ingredients
* pulverize ingredients (or use powders)
* mix ingredients
* perhaps a drying or curing time
* heat ingredients
* ahh...enjoy!
What "type" of incense will you make?
*
combustible incense - used when forming your mixtures into cones or sticks by adding a binding material and a combustible material directly to the incense mixture (no reported explosions yet!). One end is lit, the flame then fanned out, allowing it to burn continuously by themselves. This incense is more difficult to make but easier to burn. Makes traveling with incense easy.
*
non-combustible incense (incense of the ancients) - "loose incense" (just the ingredients themselves, after grinding and mixing) or "incense pellets" (loose incense where soft resins, balsams, raisins or dried fruits and honey have been added to form pea sized "pellets"). This incense is heated using charcoal, makko or on mica atop charcoal. This is the easiest method of mixing incense but requires just a few more steps and utensils to burn.
How will you heat your incense?
If you are making cones or sticks then burning your incense is straight forward and simple; you light one end of the cone or stick, fan out the flame and allow it to slowly burn of its own accord. Note: In some cultures it is considered disrespectful to all that is nature to "blow" out the flame.
If you are burning loose incense mixtures or incense pellets, then you'll need charcoal or makko to heat your mixtures.
If you are burning incense outdoors; individual ingredients, loose mixtures and incense pellets can be placed directly in a small campfire (best when there are just glowing coals remaining, no flame) or on a hot rock on the outer rim of a campfire, etc.
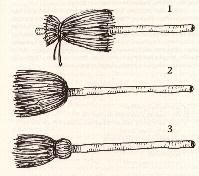
Incense burning vessel
- varies by the "type" of incense you will be burning
* non-combustible incense (loose ingredients or pellets): usually a cup, bowl or saucer shaped vessel filled with ash or sand is ideal (can be made of wood, metal or pottery). Large sea shells, such as abalone, work well too.
* combustible incense (cones, sticks, coils): again a cup, bowl, saucer or shell shaped vessel works well or one of the infinite number of specialty holders designed for this type of incense works great as well.
We encourage you to choose an incense burner that is handmade or perhaps even enjoy making one yourself. There is an energy to a handmade burner that cannot be put into words, it blends perfectly with the burning of natural incense. This "union" seems to be missing, even reversed with a mass produced incense burner.
Note: We have found that using a cup or bowl shaped incense burner filled with ash is the most versatile way to burn incense. It allows for every style of burning that we know of and the burning of every type of incense except coils, though with a little imagination one could probably work that out as well. The incense burner is most versatile when filled with ash (allows for burying charcoals koh doh style as well as using makko), the ash most often used is white rice ash. You can also use sand or pulverized lava rock in these incense burners as an alternative.
Styles of burning non-combustible incense
Lets look at three ancient methods for burning "loose incense" or "incense pellets":
* Charcoal - here we light a piece of bamboo charcoal (without saltpeter or other toxic chemical additives!) and set it in the center of our bowl filled with ash or sand. We sprinkle our incense mixture directly on top of the charcoal or right next to it. The charcoal heats the materials and releases their fragrance into the air. This has probably been the most common method of burning incense throughout history.
* Makko - makko is a natural combustible material from the Tabu-no-ki tree, which grows in parts of Asia. It is a powdered material that burns slowly but with high heat. An indentation is made in the ash using an ash press then the trail is filled with makko powder and compacted slightly using the ash press again (any small form that will make a one way path in the makko makes a fine ash press). See or Makko style page for a photograph.
* Mica - here we use the charcoal method of heating our incense ingredients but with the addition of a small mica plate placed either on top of the charcoal or we bury the charcoal in a cone-shaped mound of ash by using a flat butter knife or incense utensil. A vent hole is poked from the top of the mound of ash down to the charcoal and the mica is then placed on top of the hole and mound of ash. We then sprinkle a small amount of our incense on top of the mica plate and allow the mica to heat up and release the fragrances of our incense materials. This method will produce very little smoke yet still fill the room with rich fragrance. This method originates from Japan and is used for during their Koh doh and Kumiko ceremonies. See our section on Koh doh ceremony for a photograph.
Note: We burn our own loose incense mixtures using mostly the mica or makko methods. After use, the ash can be sifted to remove any incense ingredients that may have spilled into it. Unburned pieces can be reused.
Note: Using saltpeter as an oxidizer is a common ingredient in many charcoals sold today. Saltpeter on today's market is either sodium nitrate or potassium nitrate, both of these are toxic chemicals and warn against inhalation. We recommend using bamboo charcoal or makko to burn your incense. A good way to tell if your charcoal has saltpeter in it is to see if it crackles when lit, if it does it most probably contains saltpeter. Here are MSDS reports on sodium nitrate and potassium nitrate that we've found on the web.
Okay, now that you have chosen what type of incense you wish to enjoy and what kind of incense burner you'll use, it's time to start enjoying the fine art of incense making.
The first thing we need is to assemble our list of tools and supplies to make and burn our incense.
Tools / Supplies
* incense burner - filled with ash or sand
* natural incense ingredients - resins, woods and herbs
* bamboo charcoal or makko powder - makko is needed if making cones or sticks or for burning loose incense on top of makko
* tweezers - to hold charcoal while lighting it
* mica - if using this style of incense burning (mica on top of charcoal)
* mortar & pestle / coffee grinder - to pulverize our ingredients into powders or you can omit this by starting with powdered substances - (however the freshest ingredients are obtained if you pulverize them yourself).
* distilled water or fragrant hydrosols - needed if making cones or sticks
* 2 mixing bowls or food grade plastic bags - to hold our pulverized ingredients until final mixing
* gram scale, measuring cup or spoons - to measure the ingredients in our recipes
* drying cloth or wax paper - for drying some recipes
* stirring spoon
* lighter or candle
* notebook - to record your recipes
* food processor - optional
Incense Ingredients
The starting ground for making fine aromatic incense mixtures is using high quality natural ingredients. Start with some of your favorite woods and spices and experiment with new substances as you become more comfortable and intrigued with the process. Try to always use at least one resin or wood in your mixture as a base. Visit local herb shops, incense stores, nurseries, etc. to uncover hidden aromatic treasures. Here is a partial list of popular incense ingredients from around the world. Wine, honey, dried fruits and fragrant hydrosols are often used as well. Recipes and suggestions are listed later in this article. All ingredients should be stored in a dark, cool space.
Herbs Resins Woods
Ambrette seeds
Cassia
Chamomile flowers
Cinnamon bark
Calamus root
Cardamom seeds
Clove buds
Cocoa Grass
Coriander seeds/fruit
Dream Herb
Fragrant Grass
Galangal root
Ginger Lily
Henna
Herb Bennet
Hops
Hyssop
Iris flowers
Juniper berries
Juniper twigs
Lavender flowers
Lemongrass
Marjoram
Mistletoe
Mugwort
Patchouli
Quince
Rhododendron
Rose, cabbage
Rose, damask
Rose, French
Rosemary
Saffron
Sage, White incense
Sage, garden
Sage, Russian
Sage, common
Spikenard
Star Anise
Sweet clover
Sweet Grass
Thyme
Vanilla
Verbena
Vetiver Amber
Aloe
Balsam - Peru
Balsam - Tolu
Balsam - Copaiba
Benzoin - Siam
Benzoin - Sumatra
Borneol Camphor
Copal - Gold
Copal - Black
Dammar
Dragon's Blood
Elemi
Frankincense
Galbanum
Labdanum
Mastic
Myrrh
Opoponax
Sandarac
Storax Aloeswood / Agarwood
Cedar
Cedar - Red
Cedar - Himalayan
Cedar - Atlantic
Cedar - Lebanon
Juniper
Sandalwood
Spruce - Australian
Spruce - Norway
Pine - Scotch
Pine
Mixing Ingredients - Making Loose Incense
If you are not starting with powdered ingredients then of course you must pulverize them using a mortar and pestle or coffee grinder. Electric coffee grinders produce too much heat, allowing for the loss of vital chemicals from our ingredients and therefore shouldn't be used. Also, most resins will break the blades of electric coffee grinders.
If you freeze your resins for a short while (1/4 hour or so), they will be much easier to pulverize. We've found that resins can only be ground or powdered using a mortar and pestle. We prefer using the Mexican Molcajete for this because of it's rough texture.
Woods are very difficult to pulverize with a mortar and pestle and really require the use of a hand crank coffee grinder of some sort or simply beginning with powdered woods.
If you are just starting out making incense mixtures then you should keep the number of ingredients down to three (3) to begin with, perhaps one wood and two herbs, or one resin, one wood and one herb, etc. As you get used to making incense you can slowly expand the number of ingredients you use.
So the first step is to choose the recipe you will use and gather the ingredients needed.
We recommend pulverizing your ingredients by "class" by grinding woods first, then herbs and saving the resins for last. Resins, if young and soft, will make a mess of your mortar and pestle and its best to keep freezing them to get them powdered. We also recommend saving them for grinding last, which allows you to grind everything in your recipe before you have to clean the mortar and pestle. We weigh each ingredient in our recipe after grinding, then keep one bowl for all our dry ingredients and another for all our resins.
Mix all your dry ingredients together first (herbs & woods), separately mix all your resins together then add your resins mixture to your dry mixture and mix together thoroughly. We like to throw the completed mixture into our mortar and pestle again and grind it all together one last time to help blend the aroma of each ingredient into the others.
Congratulations! You now have a "loose non-combustible incense mixture" and are ready to enjoy the aromatic treasure you've just created. We recommend aging mixtures for a couple of weeks so that all the aromatics permeate into each other and produce a single bouquet of fragrances. You can heat this mixture as it is over charcoal, on mica on top of charcoal, on mica on top of ash under which hot charcoal is buried, or on top of makko.
If you are making "incense pellets" or "incense cones or sticks" then you still have a little work to do.
Making Incense Pellets
It's quite simple to make pellets from any loose incense mixture. They add a richer fragrance to any mixture and more dimension to your incense making.
There are many choices as to what you'll use to bind your pellets. Many resins come in a pliable form permitting the "molding" of pellets. Labdanum is often used in recipes of Japan to form pellets, some called neriko, a recipe used in the fall and winter seasons as well as for tea ceremony. Simply combine all other ingredients first, then add them to the labdanum, or other pliable resin, and knead well. Dry these pellets in a ceramic jar with a lid for 2 - 3 weeks.
Dried fruit can also be used to make incense pellets. We commonly use sulfur-free, organic Sultana Raisins or dried Prunes, though we have a batch drying as we write this where we've used dried Apricots. Honey is also used in this process as a preservative for the dried fruit, and adds a delightful warm fragrance to a mixture. Honey itself can be used to form pellets from any dry mixture without the use of any fruit or pliable resins.
We've found using about 1/2 - 3/4 of a cup of dried fruit for every 1 cup of loose incense mixture works well. We like to soak our dried fruit overnight in a heavy red wine before using. Once soaked overnight and drained, we add the fruit to our loose incense and use a food processor to blend this entire mixture together. If you do not wish to use a processor, then mix a small amount of fruit with a small amount of your mixture and mash it together with a mortar and pestle and continue this process until all of your mixture has pulverized fruit in it. Transfer the entire mixture to a mixing bowl and drizzle in about one teaspoon of pure honey for every 3/4 cup of dried fruit, knead this together very well. At this point you can either crumble the mixture with your hands and spread it out on a cotton cloth, cardboard, wooden board, wax paper, etc. and store it indoors, out of the sunlight, allowing it to dry. You can also form pea-sized balls with your hands and then spread them out to dry. Drying time can take 2-4 weeks depending on climate. The mixture should be turned daily for proper drying. Alternatively, you may also place your pellets in a ceramic jar with a lid and allow them to age for up to a year. In Japan, the ceramic jar is sometimes buried in the ground for up to a year. This type of mixture can be burned on charcoal, mica over charcoal, or directly on makko.
Making Incense Cones and Sticks
Pulverizing your ingredients into a very, very fine powder is one of the keys to making cones or sticks that will burn properly. Follow the directions above for mixing ingredients as loose incense but grind everything to an ultra fine powder.
There are many ways to make cones and sticks, some people use gum arabic or tragacanth to bind their sticks or cones. They mix this with charcoal or saltpeter to gain combustion. As stated in our "styles of burning" section above, we recommend against the use of saltpeter or charcoals that contain saltpeter because it is a toxic substance.
We're sure there are a myriad of other ways to form sticks and cones. We'll share our own method with you, which is to use makko (a.k.a. tabu) to form incense cones and sticks. Our makko is made from the bark of the tabu-no-ki tree, which grows in Asia and is a natural combustible material that is also water soluble. When added to loose incense mixtures with a small amount of distilled water or hydrosol, makko allows for the forming of incense cones or sticks. Because it is water soluble, the exact amount of makko to add to a mixture depends on the humidity of your environment and the amount of resins and woods in your mixture.
First we recommend letting your "loose incense mixture" sit at least overnight to allow the ingredients to "blend" together. Once aged a day or more you are then ready to add your makko and form the incense into whatever shapes you desire. We recommend testing a small amount of your mixture first. You'll need a mixing bowl, your hands and either distilled water or a fragrant hydrosol and some wax paper. If you have a mixture with no resins in it, then you will most likely need to add only between 10 - 25% of makko to your mixture. (i.e. If you use 4 tablespoons of loose mixture, try adding 1/2 - 1 tablespoon of makko). If you have resins in your mixture then you may need 25 - 80% makko in your mixture. You'll have to play with this yourself to see what works with your particular mixture and in your particular climate. We highly recommend you record in a notebook the exact measurements of your recipes so you can recreate the ones that come our perfectly and adjust those that don't.
Very slowly... add a little water and mix with your hands, you want the mixture to become gummy and pliable yet still hold form as you mold it. Using your hands, knead the mixture very, very well then form it into cones or sticks. Cones are relatively easy to form. To make sticks, use a piece of wax paper on a flat surface and roll the mixture into sticks with your hands. You may also wish to obtain blank bamboo sticks that have absolutely no additives and roll your mixture onto the sticks. Allow your cones or sticks to dry at least a couple of weeks - again this depends on climate. You want to keep them away from sunlight and heat during this time. Sticks will dry faster than cones. Cones you can tell are dry by turning them upside down and looking to see if there is any color difference in the center of the bottom compared to the outer edges. Once dry, light one of your creations and see how it burns and smells. If it doesn't burn steadily, then you need to increase the amount of makko to the mixture. If you think it burns too fast, then decrease the makko content. A great thing about this method is you can grind up any cones or sticks that didn't come out right and adjust the makko content by adding more makko or more loose incense mixture to them, add a little water and begin again.
~~~~~~
This article is from:
http://www.scents-of-earth.com/makyourownna.html(go there to find some incense recipes if you need or want them =^^=)