|
|
|
|
|
|
|
|
|
 Posted: Wed Mar 02, 2011 12:46 pm Posted: Wed Mar 02, 2011 12:46 pm
ThePersonInFrontOfYou The map also looks like a pair of keys. Most of the dungeon maps in this game look like stuff.
|
 |
|
|
|
|
|
|
|
|
|
|
|
|
|
Posted: Fri Mar 04, 2011 7:19 pm
Chapter 10: Tarin is the Island's IdiotHey everyone. Well, I'm glad it's finally the weekend. That means I actually have time to get this 230+ image chapter made. It's just been staring at me since Monday. Well, let's get the show on the road, shall we? Last time we left off, we just cleared the Key Cavern.  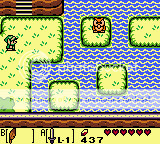 And before we can even get anywhere, we're greeted by Stalker Owl.   Three, smartass. Considering this is only chapter 10, we've made a ton of progress. Then again... some of these chapters are pretty extensive... ._.;;     Yeah, yeah... we know the drill. Get instruments, play 'em in front of the Egg, go home. Anything you wanna tell us that we DON'T know yet?     Okay... Yarna Desert it is, then. This chapter is... basically collecting stuff again, amongst other things. Right now, make your way across the water by jumping across.    We're going to pay that owl up there a little visit.     Don't you just hate walking all the way around? =_=    And go in the cave.  Just a word of advice, that skull moves.  See that crab? Yeah, that's why. They also tend to hide under grass clumps. If you're on the same line as them (either directly right/left or up/down from it) they will go after you. You could use the Power Bracelet and remove its cover by standing at one of the corners (NE, NW, SE, SW from it), but that takes too much time. It's easier to jump over them as they charge at you.  If you test the wall here, it'll make a different sound. You know what that means.   Head right on in.  Jump and take the stairs. 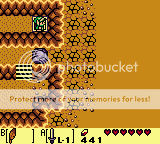 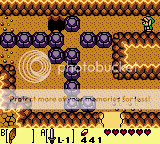 Push the boulder into the pit and keep moving left.    And that's how you make the opening you need. Head out the cave exit.  Link: Ack! Too close, flying Goomba! Dx Head north while evading these guys.  Rid yourself of these flying octoroks and talk to the Owl.  Better bust out that digging spade.  Digging around will reveal a Secret Seashell.  That makes 10. We have business at the Seashell Manor. Head back into the cave.  Uh oh, it looks like pushing those two blocks near the top will trap you. Better find another route. Go to the right.  Climb up those stairs.  Believe it or not, you can actually jump down from here. Take the stairs out and make your way back to the Seashell Manor.   With 10 seashells, the house will give you another present, and it's another Secret Seashell.  Just 9 more to find until something good happens. Make your way back to the cave.  We're gonna head south this time.     If you need to make a phone call to Ulrira, here's a spot. If not, head to the right.  We can see a statue on the other side. We'll cover that another time though.  Cutting the grass clump gives us a Secret Seashell, making that 12 if you're following along. Head south.  You can technically make the jump and if you time it right, cut the grass and land safely without getting hurt. But it's kinda pointless to go down there, since there's deep water and we still don't have any floaties to make it across. Instead, head left.  Again, if you know how to swim, you can go check out that grass clump. It'll be worth your time. Keep going left.  Use the boots+feather combo to make it across.  There's a house here. Let's check it out. o:  Link: It's... deserted and run-down. Doesn't look like it's been taken care of in years. ._. Head north from this house. Also, remember this location for later.   You'll have to toss the boulder out of the way to get that chest. The 50 rupees is nice, though. 3nodding   Huh... doesn't this look familiar...? Yep, that's right. We're back on the beach. Head back to town. From the greedy shop, head to the right.   Head into the cave (can't recall if you had to bomb it or not. Chances are you don't).   Yay, more money~ Go back to town.   With both the Power Bracelet and the Peggy Boots, we can now check this place out. Toss the boulders out of your way and go in.  Welcome to the Dream Shrine. Climb into bed and take a nap. Link: Well, after all that adventuring and walking we've done, a nap doesn't sound so bad...   Link: ... Well, so much for a peaceful nap. =_= Those weird elephant things need to be charged into with the boots, so don those and run north with them.  Same here.   When you clear the last of these guys, go up the stairs.  Oh lookie. a chest.  Yay 100 rupees~  Link: Dis is mah happeh face. whee Head down the stairs.  With the boots, charge through this crystal.  Head up both sets of stairs.  This is the chest we really want.   Link: Dude, I know how to play this sucker. Watch me play the Song of Storms!  lol, you fail Link. Go learn how to play an actual song in this game, since you learning the Song of Storms only happens when OoT comes out. Which... by this time, it already did. XD Make your way out of the Dream Shrine.  Easier to get out from here.  Now that we're outside, let's pay Marin a visit.     You're not even given a chance to decline her.    The most epic duet in this game.     For interest's sake, I said no. 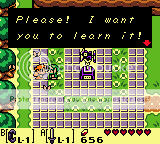  And then she makes you learn the song again. Which frankly, is worth it. I liked this little duet. If you say 'yes'...     And we learn our first song. There's two more in this game. 8D     Link: Yes, darling Marin. I'll play it every now and then so I can think of you. Make you way to Grandpa Ulrira's place.  If you go up to one of the windows, you can trigger a photo event.  And here's Stalker Mouse.   Link: No, not really.   Link: ... Horrible title. gabriel sama, you name it. Yeah, yeah... I know.  "Grandpa Ulrira Discovered a Sex Hotline!" Believe it or not, there is only one phone that doesn't have Old Man Ulrira answering. That's right. His own phone. If we use Ulrira's phone, who answers?    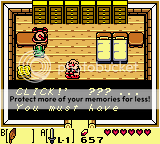  This... Bucket Mouse must have realized we were not Ulrira and quickly hung up to hide its relationship with the Old Geezer. Anyway, moving on. Head over to the Teleporter just outside of town.  From here, head East.   Go ahead and bomb that wall.  Now go in.  Since we have the boots, we can go through here. 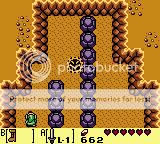   Yay, rupees. 8D Head north, and stay on the right side. You know, on a whim, I started poking the walls. And guess what?  Different sound. There's a secret room I was not aware of here. Bomb that sucker and go in.   Oh hey, there's a Piece of Heart~  That completes our heart! And since we have 4 pieces of heart, there's an additional message.    We now have 7 hearts. Awesome. Make your way back out of the cave.  Head East some more. 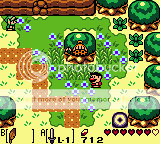 Well, here's Tarin. So that's where he went after the mushroom incident. Hopefully, he isn't about to do another stupid thing. Oh hey, a wall we can blow up.   Nice place for a Great Fairy. Once we healed up, let's talk to Tarin.  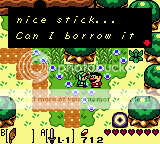  Link: Uh... sure, Tarin.  Tarin: Ehehehehehe... >8D Link: ...?  Link: Wait... Tarin, what are you--   Link: You idiot! D8 And now we watch the result of Tarin's stupidity.      Link: ... I hope he gets stung good. stare Grab that beehive/honeycomb looking thing.    Link: Oh we know EXACTLY what happened... If we head south...  It brings us right back to where we blew up the pig boulder. Make your way to the Seashell Manor.       Both areas are of importance, but we're more interested in the Animal Village. Since we can't swim and all... Cutting the grass clump will reveal a route.    I recommend getting rid of the fish first before charging.  Leaving that tunnel brings you out here. Head south.   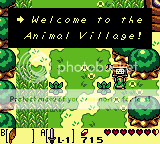 Link: Huh, I wonder why it's called the Animal Village.  Link: Ah, it's because its inhabitants are animals. I see.   Link: And... they talk too. Why am I not surprised? Head into the first house.        Basically, he's saying that the only way to get into the Yarna Desert is currently blocked due to a fatass Walrus, who's snoozing and won't wake up. If we go into the next house...  Link: ... Is... Is he panting a nude?! O_o;;    Link: Oh, that was your doing? I'm impressed.    Link: I'll be the judge of that. Let's see...  Link: .................................. I don't think I wanna know what that is... Leave the building and go right.  House on the left is...  Definitely a place of importance later. The other house...  Empty, but also a place of importance later. Head south.  Go inside.      Well, since you asked so nicely...    We traded our Honeycomb for a Pineapple. We've made quite some progress in our trading sequence, haven't we? Oh wait, the bear has more to say.          So long story short, if we bring Marin to the Animal Village and give the Walrus a solo performance, he'll get out of our way and we can continue our quest. Head outside and go left.  We're gonna go see the Walrus so we at least know where to go.  Oh hey, another Teleporter. Sweet.   There's the fatass. And yep... he's blocking our path.  "We Dream of Marin" would have been a good title for this chapter too. Anyway, let's make our way to the Teleporter.    Jumping in that will take us back to the one near town.  Now let's go see Marin.  Bwah? She's not here?    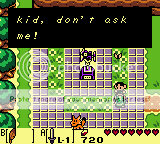 Link: Being ignorant and blaming it on your age will not get you anywhere in the real world, kid. Let's go see if she went home, or at least the Village Idiot Tarin made his way back.   Well, looks like our maiden Marin is at the beach.      If you must, you can bomb that wall...  But it's empty. It's a place of importance for later, though.    Link: Marin... Will Link be able to use his charming skills to get Marin to Animal Village? Is he man enough to take care of her as they make their way through the perilous journey between villages? Is Link clean, or should he go take a bath after all the running around and fighting he's done lately? Find out next time, when we take Marin out on a date.
|
|
|
|
|
|
|
|
|
|
|
|
|
|
|
|
|
|
Posted: Thu Mar 10, 2011 12:07 pm
Chapter 11: Link: EVERYONE IS TRYING TO INTERRUPT OUR DATE! GAHHHHHHH DXSup folks? Last time, we collected a ton of crap and made our way to the Animal Village only to learn we can't get past a Walrus cuz he's sleeping. If he were snoozing in any other place, it wouldn't be that bad. But nope... he's blocking our way. Only way through him is to get our girl Marin to sing him a song. So guess what this chapter is about? That's right! It's the long awaited DATE CHAPTER~ 4laugh Link, mah boy. You ready? Link: Y-yeah... >/////> Awesome, let's get this started. 8D  We left off right around here, where we see Marin gazing out at the ocean. She'll hear us approaching and turn to face us.  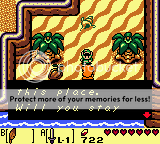 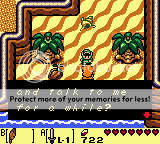 Let's keep her company, shall we? Even though we're not really given much of a choice. XD The screen fades and we're now staring out at the water. One of my favorite Ballad of the Wind Fish mixes be playing here.   Link: I dunno. Maybe they were always here?    Link: Beyond the ocean is a thing called 'the rest of the world'. It's really nice.  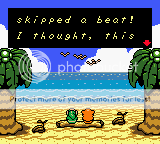 Link: >/////>   Link: Message? Nah... I just got shipwrecked. I may be a messenger for the Royal Family, but I don't have any messages for you... Sorry... 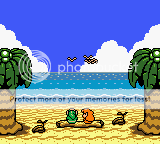 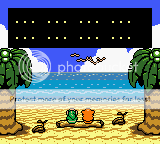 Link: s**t... must find new topic to talk about... gonk So... Uh, nice weather we've got.   Link: Sea gulls are fun. They love Hyoi Pears. 3nodding   Link: Not the best idea... I know a gull that tried singing... couple didn't like it and it took a musically-talented crab to set the mood right. Speaking of which... Sebastian, think you can set the mood for us? wink 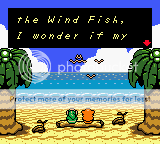  Link: Or you can wait until the Wind Fish grants me a boat. Then I can take you and show you the world. <3  Link: ... Sorry, did I go too far with the Disney references?   Link: Bwah? Of course I am! Can't you hear me talking?! D8 Actually Link, the readers and myself are the only ones that can hear you. You... don't really talk much in this game. Link: s**t! We have an audience! Marin, let's GTFO! Can't work my pimpin' skills if the pimp lord's watching! -selects no when given the option-    Link: My head was in the clouds because you were talking about being a bird. I wanted to see what you would see. And dammit, gabriel sama! Now I need to listen to her talk all over again! Dx Oh please, you liked it. -selects yes when given the option-   Link: Huh? o////o Nice, Marin. You barely managed to save that one.    Link: I'll protect you.  You know... that was completely pointless Link. She's not an item. You just want to look up her dress. Link: >///////////> S-shut up...  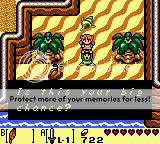 I set this chance up for you, Link. Don't eff it up. Link: Just leave the date to me. You just focus on commentary. >8| Fine... rolleyes  So Marin will follow you around to just about anywhere. Well, except into the Dream Shrine and dungeons. She's also capable of jumping when you jump and running when you run. But... I don't think she knows how to swim either. I wasn't stupid enough to jump into deep water while on the date. There's a ton of stuff we can do while on our date, so let's head off to the first point of interest.   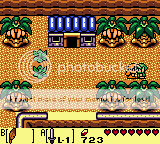 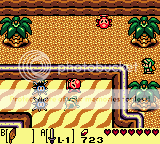   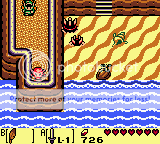 Let's take that spot that the octorok is occupying over there on the cliff, shall we? Doing so will trigger a photo scene.  Link: What a great view... and look! I'm chibified, just like her~   She says walk, but it's more of a date.  Aww... he's shy. Let's translate for him. Translation: I want to have more walks like this with you in the future.   Considering you don't leave the village much except to go stare at the beach and go sing at the Animal Village, I can't see you coming here much. Well, unless you wanna think about us.  Translation: Sweet! I have a secret place with Marin~  Ah, she's getting a little upset.  Translation: ********. I forgot I can't talk unless given a option, and this ain't one of them.  Link: GODDAMMIT STALKER MOUSE! CAN'T YOU SEE I'M-- 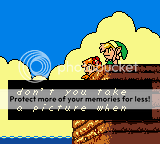 Link: -- TRYING TO HAVE A MOMENT HERE?! CAN YO--  Link: --U PLEASE LEAVE BEFORE I HAVE TO SERIOUSLY M--  Link: --ESS YOU UP?! ... Dammit, he's not listening. =__=   Link: .... Well, at least it's something to remember this date... Stalker Mouse then leaves and we go back to the game. 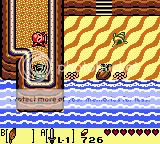  Let's head back to town, shall we?  Believe it or not, the kids are the only ones that will even say anything about your date in town. 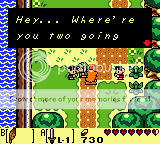  Link: We're on a date. If this was the Japanese version of the game, I could probably take her with me to the Dream Shrine and get some action. Damn American censoring. =_=  Link: I should really smack you for pulling the whole 'I'm ignorant cuz I'm a kid' bull s**t on me...  Jump into the whole to trigger the second photo event.  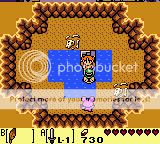 Link: Dx! Swordisstabbingmeinthebuttandmagiccrackisgettinginthewoundohgodthepain.  And... yeah, he's back to interrupt your date.  Of what, Link hurting? You can take plenty of those if you follow him around. Link: DOES NOBODY CARE THAT I'M HURT! DX Eh... It's just a flesh wound.  Oh, forget that title... I've got a better one.  Marin actually showing some concern, because she loves you. Secretly. Nintendo tries to make it subtle.  Link: -KO'd- -several minutes of slapping Link around after getting the sword out of him later-  Let's visit home, shall we?  Tarin be snoozing. 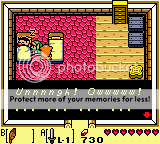   Note to self and others: Don't pull a Tarin and smack beehives with a stick without protective gear.   Link: What? I'm just examining the craftsmanship of this chest. Oh, one of the drawers just opened by itself. Hot damn, these are a fine pair of panti-- I mean... this is a nice chest. Smooth, loverboy. XD Head over to where you usually find Marin, where that rooster grave is.  Approach it to trigger another KODAK moment.   Link: Let's take a picture in front of here for our date. 8D  Link: What the? Tarin, should you be up? o:     Link: What?! NO! THIS IS MY DATE. I WILL NOT HAVE YOU INTERR--  Link: Oh, and you just to wedge right in between us. I know she's your daughter, but no need to go force yourself to be the center of attention. Minor characters like you should just stay in the background.   ... No. I refuse to say that, or let that be the caption for this picture.   Link: Thank you. Both of you go away now. Let's head over to the crane mini-game shop after the photo event. 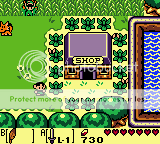  Approach the store clerk to trigger this next little scene.   Seeing how much cash we've got, and how amusing this scene is, sure, why not? It's only 10 rupees.  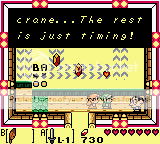   Store clerk then gives Marin instructions on how to play. Course, this guy thinks that girls can't play games like this. Cuz he's a minor NPC and they don't have souls.  Marin will then take the controls.  Store Clerk: Hah, you missed everything! 8D  Store Clerk: Huh? Hey wai--  Store Clerk: Noooooooooooooo... Dx -flailflail- 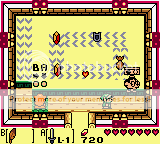  And thus marked the beginning of Marin's dark path down the path of SM by taking the store clerk as her prize. 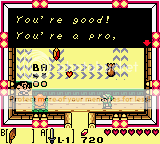  Yes. Yes she is.   He's just mad cuz a girl can do better than him in the crane game.  So after we get forcefully evicted from the crane mini-game shop, let's see what else we can do around town.   Yeah, digging triggers this little easter egg. Link: You know... if I dig a deep hole, I can probably leave the island that way...  Hitting a cucco triggers this, but if we do it enough times...   Link: I think my heart skipped a beat. Did I ever tell you I love you, Marin? <3  Link: Aww... ._. Also, this is a one time thing. Once she gets that out of the way, she'll go back to saying stuff about not hurting the cucco. Well, since we're already beating up cuccos, might as well show you what happens if you do it enough times...   Yep. Like most other Legend of Zelda games, we get a swarm of cuccos flying after you. Link: RUN AWAAAAAAAAAAAAAAAAAAAAAAAAAAAAAAAY! gonk They go away if you enter the next screen, which is nice since we don't want to have the cuccos cause us to lose our 'no death' perfect ending. Also, it was a little hard getting a good shot while trying NOT to die during the swarm. XD Only got hit a couple of times, so it was all good. Next, let's go to a house that has some pots and smash them. 8D   Link: I've always been a bad boy. But you like them bad boys. <3 After that, go play Ballad of the Wind Fish on the ocarina.    Yep, she said you sucked, Link. And what was all that last chapter about you being so good at playing stuff on the ocarina? 8D Well, that's all we can really do in town. And we're nearing the end of our date. Let's go see Stalker Mouse and see if he's got our pictures ready. 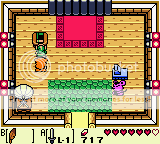 Oh look, they are.  "Haha That Cloud Looks Like a Butt!" "Mah Spleen!" "No One Loves You, Tarin." I love Marin's face in that last one. Looks like she wasn't happy either when Tarin decided to interrupt the date. Anyway, let's head off to Animal Village. You can either take the scenic long route or take the Teleporter thingy to it. 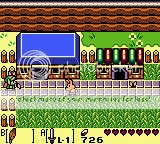 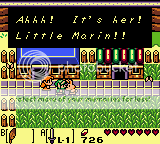 Marin comes by here often, since the bunny is clearly happy she's here. Make your way to the Walrus.    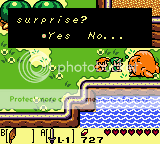 We love surprises.   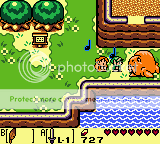 The Walrus will wake up and then start headbanging.  After a while, he'll start jumping and headbanging.  And then he falls into the water.   Link; I don't see any bubbles... Marin, I think your song just gave him a heart attack and he died. D8  Link: What the heck does this loser want? 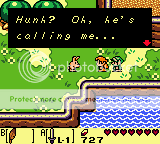 Link: Marin is not a call girl! D< 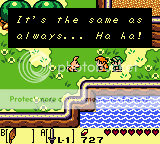 Link: They do this to you all the time?!   Link: If I come back and there's an orgy, I'm going to be so pissed.  And then she leaves. Link: I LOVE YOU MARIN! >//////////////>  Link: -sniff- I miss her already. Poor loverboy. And that concludes this chapter. Next time, we'll explore the GerudoYarna Desert, get another trade done, and try to reach the 4th dungeon. Until next time~ Thanks to Tiki for telling me about the shovel and cucco comments Marin makes.
|
|
|
|
|
|
|
|
|
|
|
|
|
|
|
Posted: Mon Mar 21, 2011 5:32 pm
Chapter 12: About Damn Time This Gets Done.Sup folks? This chapter was already started like... two weeks ago. I worked on a bit of it while waiting for my plane at the airport, and then after that it was Spring Break. I would have finished it up over the break except I was too busy having fun. Like chillin' with friends and playing video games I can't normally play at campus (like Persona, Pokemon, and Devil Survivor). But yeah, now that the break's over. I can finally get back to work. So, uh... let's get started. When we last left off, Link was on his once-in-a-lifetime date. We got the walrus out of the way, so we can go back to adventuring.  Link: Marin! I love you! Come back to me! D8 Link, you can write your sappy love letters and blog about your date later. We've got work to do. Link: ._. Fine... Let's head through the opening now that the Walrus is gone. 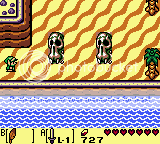 And we have reached the Gerudo Desert~ Link: Where be our sexy thieves? 8D Actually, this is Yarna Desert. No thieves. Sorry Link. Link: ._. Head right.  We'll need to get up there where those rocks are later. Up we go.  Mario fans will recognize these guys. They're the Pokey you can find in most desert areas in the Mario games. Only difference is that these guys are green. I guess they're a little ripe. It takes a couple of whacks with your sword to take them down, so once they're gone, head left. 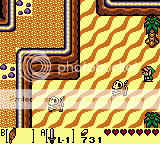 There's a bunch of leevers in this desert, so chill and take them down quickly before it gets rough. Head up.  More leevers. Fun. Take them down and head up.   Cue mini boss battle!  Our opponent this time is a sand worm that leaps out of the sand. Kinda makes you think of Molgera and Twinmold from later games. In order to beat him, you gotta smack his head with your sword while staying away from the center of the room. If you get too close, you'll fall through the quicksand and you'll have to make your way back up, just like with the first boss. The feather helps here because you can jump over the center if you get too close. Anyway, once you hit him in the face enough times...  He'll explode.  Oh, and he drops the Angler's Key too. Grab that before it falls. 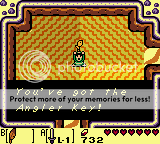 There's no way you can avoid falling once you get it, so just fall.  You'll land here. Watch out for the enemies hiding in the holes as you head towards the opening on the right.  Boring room. There might be a couple of blobs lurking, but they're not worth our time. Take the stairs.  You'll come out here. If you fell during the sand worm fight and you didn't beat him, just head to the left. You'll be right back at the quicksand room. Talk to the owl after the leevers are dead.    Cryptic as always, Mr. Owl. Take the right exit on the south part of the area.  Leevers and a Pokey. Take them down, then head south.  Keep going.  Okay, look under them boulders for a nice surprise.  Oh, a shell.  This makes... 13, I believe? Start making your way out of the desert.  Take the left side when you head south. Much faster and safer.  And Stalker Owl makes another appearance. Link: stare    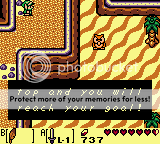 So now we have to head up towards the mountains and seek out a waterfall to find our dungeon. Sounds simple, right? Head back to the Animal Village to check up on Marin. 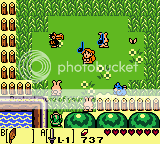 Link: Marin! <3 Easy there, horndog. We have other things to do, and she'll be safe here. -drags him away- Link: Dx Since we gotta go up to the mountains, head towards the Camera Shop where Stalker Mouse hangs out. Use the Teleporter on the outskirts of Animal Village to save you some time.  We're finally going to scale a little bit of the mountain. Awesome, no?    Take out the goblins and move the rocks, then head up and right.  Take the stairs, mkay? It'll be worth it. 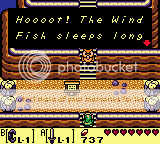 Stalker Owl visits again. =_=      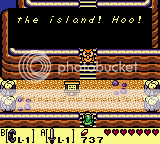 Long story short, the Windfish Egg is just beyond here. If we wanna go home, we'll need to come back here with all 8 instruments. Stalker Owl finally goes away, and we can go see the Egg for ourselves.  There it is, in all its majestic glory. If we play our ocarina now, with the Ballad of the Windfish...   We'll play the actual Ballad of the Windfish, using all the instruments we have in our possession. Since we've only got three right now, it doesn't sound like it should, but it's still pretty sweet. Just imagine it once we get all 8 instruments. Anyway, head back down the stairs.  Head right.  There's no point going down really, so there's either up or right. Head right for now.  Take out the goblins and move that boulder.   Take down these guys, and wander around a little for now. 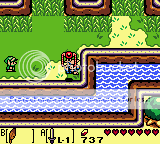 Those spiders are actually the Tektites you see in pretty much any Zelda game except for WW. They're not that hard to kill, really.  We'll want to remember this place for later. That cave in the water houses one of the ocarina songs.  A very large waterfall, and a keyhole. You thinking what I'm thinking?    And behold, our dungeon. Now if we could only get to it... Head right for now.  Oh look, a Teleporter. Go in to activate it. Once you come back, head right.  There's some stairs here, but there's nothing you can do about it. Why you ask?  It's the one-way route from the dungeon. You'll need to find another way to it. If you head right from the stairs...  There's no way to cross right now, but that cave over there is pretty important. Come back after the 4th dungeon. Make your way over to that intersection near the Egg.  Head up this time.  Toss the boulders aside and head inside the cave.  Take down the Hardhat Beetle and Keese, then venture right.  Smash that top crystal, push the boulder right, then south. Take the stairs when you're done.  Couple of Keese and a green Zol (I called them blobs, but Zol is their actual name) lurk here. Take them out then head right.  Another Zol and more goddamn bats. Beat them and take the stairs.  There's a piece of heart on the other side of this wall, but we can't find the stairs. I've looked around a little and wasn't able to find any fake walls. There's supposed to be one in this cave, so maybe I just didn't look hard enough, but you're definitely able to get it.  Don't bother trying to make the jump. It's too far, even with the Boots+Feather combo. Remember this place when you get a Hookshot. For now, head through the hole in the wall.  Open that chest.  More money. We're just about at 800 rupees. Another 180 more to go before we can afford a bow. 8D Head back into the cave.  Don the Peggy Boots and run right.  Break the crystal and head out.   Oh look, it's Papahl. Looks like he did get lost. Well, let's go see him. Go into that cave.  Couple of bats, a green Zol here and there. Nothing special. Head up.  Take the stairs.  Link: Oh look, a chest. Ackbar: Be careful Link! It's a Trap!  Yep. Like in the 3rd dungeon, there's a Zol in this chest. Take him down.  Nothing appealing to this room except for some Keese. Get rid of them and head out.  We can't reach that house for the time being, so head down and left.  It's our friend Papahl. He looks happy to see us.     Eh, sure. Let's give him the Pineapple.    And now he eats.  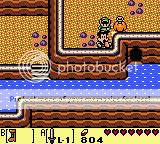 Omnomnomnom.  Link: You totally forgot we were still here, didn't you? Jerk.    And he gives us a flower.  Link: Papahl, now that you can move again... Go home. Go home... -dons shades- and be a family man. YEAAAAAAAAAAAAAAAAAAAAAAA! cool Head up from Papahl.  You can jump down from that cliff over there to save some time.  Looks like Papahl's already gone home. Head right.  Keep going.  This place looks unusually dry. Wanna know why? It's because it's right above the dungeon! Jump down the cliff.  And here's the fourth dungeon! If you wanna head back, take the stairs. Though I think you might need the flippers. I dunno. That doesn't matter. Go inside.  Lo and Behold, we have reached the Angler's Tunnel. Next time, we'll clear this place and FINALLY learn how to swim. Catch ya later~
|
|
|
|
|
|
|
|
|
|
|
|
|
|
|
|
|
|
Posted: Wed Mar 23, 2011 1:31 pm
'Sup folks.
Just a few announcements before we get started.
1. As the new rules pertaining to all LP chapters from here on out, I will now be editing the title so that when a new chapter is up, it'll show that a new chapter is up.
2. Also, with the new rules, there may be times where it looks like there's new stuff but there's a bunch of reserved posts. Don't worry. The chapters will come up eventually (once I stop Link from editing my hard-worked stuff). It's just to deal with the influx of posts coming in. This is a DQ/W guild, after all. Not an LP guild.
3. I will now be answering your comments in the opening post. This is to avoid the influx of posts coming from the LPs. If you wanna have Link answer your questions and respond to comments, shoot me a PM and title it 'Link's Mail Bag'. When he's not adventuring, he'll grudgingly gladly set time aside to respond.
With that out of the way, please enjoy the rest of our featured presentation.
|
|
|
|
|
|
|
|
|
|
|
|
|
|
|
Posted: Wed Mar 23, 2011 1:33 pm
Chapter 13: About Damn Time We Learn How to Swim.'Sup folks, and welcome back to another exciting chapter of LP! LoZ: LA DX~ Last time we left off, we scoured the Yarna Desert for the Angler Key, then jumped off a former waterfall to reach the 4th dungeon. Let's get started, shall we?  Behold, the 4th dungeon. We're really making progress, aren't we? 3nodding Nothing special about this entrance, so head up.  Remember these guys? They're BAAAAAAACK~ Just bust out your shield and flip the Spiked Beetles over before giving them a painful death to get that door open. And if you lost your shield to a Like Like... well, you're screwed. Go back to town and buy an new one. It's probably why that Teleporter's just outside anyway. Once all the enemies are gone, the door will open. Head through it.  More of these guys. Take them down, and watch out for Sparky. Note: You can actually kill these guys and their Anti-Fairy counterparts with the Magic Powder, but Sparks will not drop fairies if you do so. Now that the enemies are vanquished, check out that chest.  Oh god. It's the HOPE-RAPING COMPASS! XD Head south.  The door slams shut when you step in, and the HRC chimes. If you wanna open it, just get rid of the Tektites. And if you wanna get to the chest, smash those crystals on the ride side and move clockwise. Opening the chest will give you... 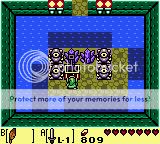 a key. Yay~ Backtrack to the room above the entrance. 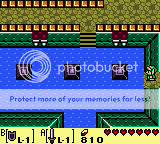 This time, we'll head up the stairs before going to the right. 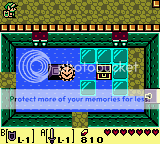 Keep moving to the right. 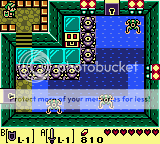 This is why I didn't use the key. There's just another locked door behind it. But look there! A chest! Let's check it out, shall we? And it's a...!  Stone beak. stare Well, it's fine. Head back to the previous room and go up this time.  Just go up.  Keep going, and take that right at the end.  We're not heading down those steps to try that jump just yet. Head up instead.  Oh look, another chest. Let's open it up.  Yay map. 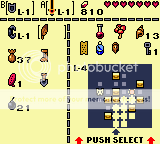 The dungeon doesn't look that scary, really. I wanna say it's shaped like a fish. Link, you're the adventurer here. What do you think? Link: An angler fish, maybe? That thing sticking up at the top middle could be the light. And it sticks with the dungeon name. Huh... sounds reasonable. Anyway, head back down.  Wait for the Zol to jump down the hole before you even try this jump. You need to use the Boots+Feather combo to make it. So uh... Fly Away NowHead right once that jump's made.  The HRC chimes again and we see a new enemy. Those are Peahats. Yes, the same bastards you see strewn all over Hyrule Field in OoT like they own the place, and the same harmless guys you see in TP when you're in that Sky City. You'll also notice a cracked block. Hmm... cracks... don't you think they're like cracked walls? Drop a bomb to blow up the cracked block, then push the other block into the water to claim your prize.  Sweetness. Head north now. 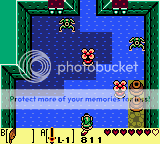 Check the pots if you're low on bombs. If there's nothing, you can always venture back near the entrance. There should be floating bombs just northwest of the entrance. Keeping going up. 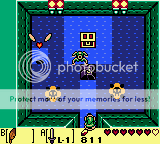 Couple of Anti-Fairies and a Tektite, as well as a floating heart. Bomb the block and claim the chest. Oh, and the HRC chimes again. 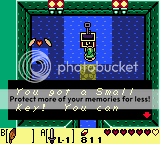 Yay, key. Grab the heart if you need them. Okay, now venture back to the cross-gap room. 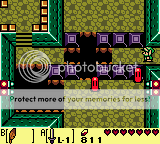 Make the jump, then go all the way back to that locked door you saw a good while back. 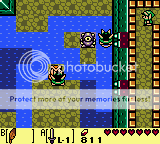 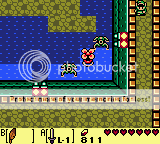 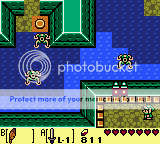 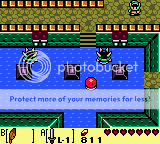 Yes, you will have to defeat those Spiked Beetles again.  Use the key.  Kill the Tektites as you jump across the room, then use the key on that door at the top of the room.  You can't reach that chest, so just head north. 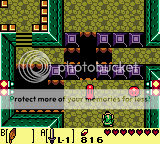 Oh look, now we're on this side of the room. Take out the Zols, then jump across with the Boots+Feather. Once you're across, head north.  Use that last key to get that keyhole block out of your way, then push the block behind it up. Kill the rest of the enemies before heading left. 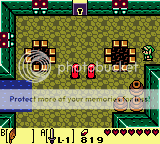 You'll hear the HRC again. Guess what? You need to kill the two Zols over there. Simple enough, right? Well, after they're gone, the key drops... into the left pit. Link: No worries, right? Head back to where you found those stairs and take them. 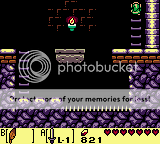 Link: This'll be a breeze. mrgreen Just jump over onto this moving block and then... 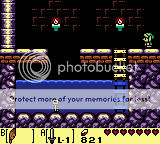 Link: ... ********. gonk Yeah, we need the Flippers to get this key. We've got no choice but to leave it alone for now. Make your way back up the stairs.  Kill these guys and go left.  Yes, we heard the area clear chime. stare Just head south. 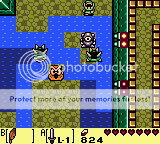 You wanna know what I like about these Spiked Beetles? If you time it right, they'll charge/wander right into the deep water and drown. That makes this room a lot easier. Go talk to Mr. Owl. 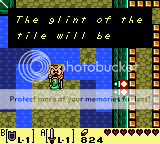  So there's a room or two with tiles on the ground and you gotta step on them in a certain order. Fortunately, there's the sparkles to help out when you get to them. Keep heading south. 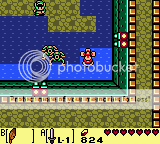 Wait for the Peahat to move and get rid of the Tektites as needed before you jump across. Stay on the shallows as you head left. 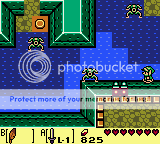 The door slams shut when you wander in, but nothing you can do about it. Just keep following the shallow water path left. 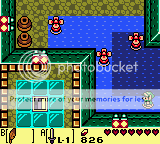 Again, wait for the Peahat to move before you head north. 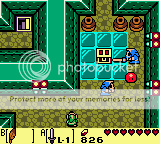 There's a chest here, and a couple of Stalfos and a Zol. Not too hard. Link: Let's check out that chest~ Wait, Link! It's a trap! D8 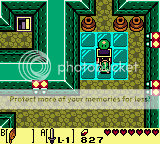 Link: Goddamn Zol. =_= Anyway, head north after all enemies are gone in the room.  These are one of the sets of tiles the Stone Owl mentioned. We can't complete it yet since we can't swim, so just head right. 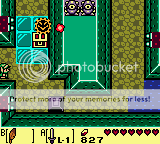 Did I mention that some Eyegores that you usually see at the entrance of dungeons can be found in some of the other parts of the dungeon, and SHOOT FIREBALLS at you? Well, now you know. Dodge the fireballs and head to the chest. 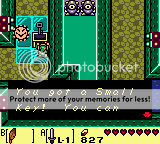 You'll get a small key for your trouble. Go north for now. 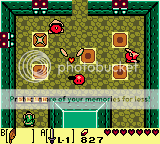 This is the other tile room the Owl Statue mentioned. See how the tiles sparkle? We can't do anything about it now, so head back to where you found the Zol in the chest. 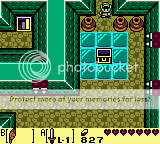 Head left for a moment. 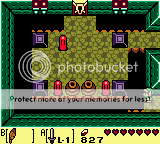 Yes, the Nightmare's Lair is THAT close. You can't make the jump unless you're really skilled, but even then, it's a dead end without the Flippers. Head back to the previous room and go south this time. 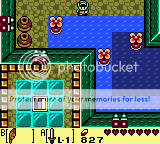 Backtrack to the room where you saw the key fall into the pit. If you recall, there was a locked door there. 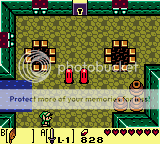 Get rid of the Zol once more and use your shiny key on the locked door to trigger the mini boss battle. 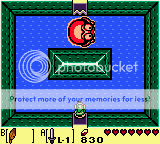 If you played OoT, you'll probably remember the Big Octo from inside Jabu Jabu. It's the exact same battle, only in non-3D graphics. Link: Can I get some battle music? Here you go. 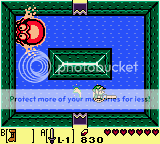 Link: Huzzah!!!! This guy is a pushover. He'll just circle the room, so don your Pegasus boots and play Cat and Mouse with him. When you stab him in the back, make sure you turn around and run about halfway around the room while he's spinning. If you do it right, he'll turn the face you, pause, then turn around and keep running in the path he was originally going. Just chase after him with the boots and stab his a** a couple of times and he should go down quickly. 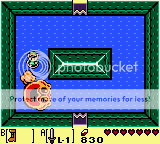 He'll explode when you beat him enough times, and he'll drop a fairy. A portal back to the entrance will also appear. For now, just grab the fairy if you need it and head through the newly opened door.  You'll see that the blocks are immediately closing off the way, so quickly jump through and wait.  Link: Oh no. Whatever shall we do? D8 Just grab that lever thing near the colored tiles with the Power Bracelet and pull back all the way.  Link: Oh look, the way's open. Dash across to the left door before it closes, and watch out for Sparky. Though, you don't really need the Peggy Boots to get through. You have enough time to make it without them. Just don't get squished. XD 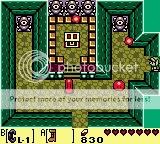 Couple of Zols, and more fire-flinging Eyegores? Really. =_=  If you take out the Zols, the Eyegores will stop attacking and the door will open. Go check out the chest now.     Oh goody. We have the Flippers. Now we can swim. 8D Press B to dive when you're swimming. When you're underwater in the underground portions (like where the key was) you just use the D-pad to move around. And you can use your sword underwater in those areas. So that's pretty cool. 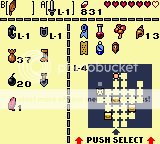 What's even cooler is that the Flippers are a passive item. You don't need to have them equipped to use them. Anyway, head south.  Oh look, we're back in this room. And we have some new enemies. Introducing the Iron Masks! These guys have gotten a lot of name changes. They're Iron Masks in the three GBA Zelda games, Hiploops in MM, and Helmasaurs in LttP, Minish Cap, 4 Swords, and TP. You can't really do damage to the front, so get behind them and attack their exposed backside. There is an item later in the game that makes beating these guys a breeze. Once the enemies are gone, step on the tiles that have the sparkles appearing.     Stepping on the 5 tiles in the proper order will merely reopen the locked door. But remember the order you followed in stepping on the tiles for later. For now, head south.  And dodge the fireballs and the Zols and swim across to the right, breaking in those flippers. You know Link, I'm surprised they fit you perfectly. They're always a pain to put on. Link: This... isn't as easy as you think it is. >_o  We're back in this room. You know, now that we have the Flippers, we can go get that key. So head right. 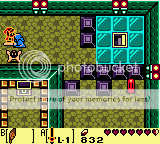 Down the stairs.  Across the pit. 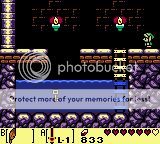 And dive!!!! Once you get the shiny key, make your way out and back to the stairs. 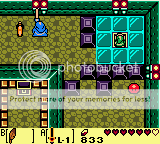 This time, we're going to get that one chest we passed earlier that's a few squares south of our location. 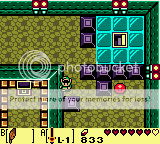 Push that block in order to go south. 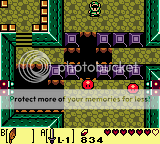 Wait for that Zol to fall before making the jump with the Boots+Feather combo, then keep going south. 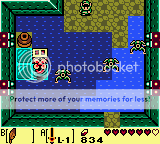 Swim over to the chest. 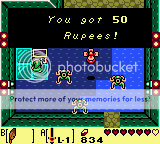 Yay 50 rupees~ Make your way back to the stairs. 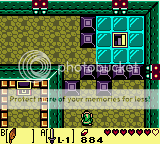 Push the block and head left. 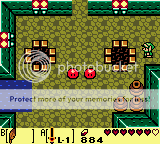 Go south. 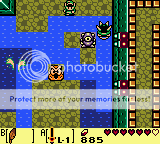 Head left in the water. 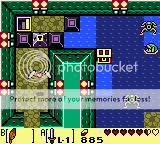 Watch out for the Tektites as you make your way to the chest.  Yay, another 50 rupees~ Head south now. 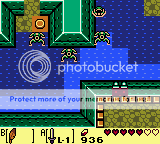 Ignore the switch for now, and head to the Zol chest room.   Head north after you clear the enemies.  Take out the Tektites before you try solving this puzzle. If you listened to me earlier and remembered which order you stepped on the tiles in the other room, this shouldn't be too hard. If you didn't... well, at least I have the images. 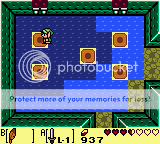 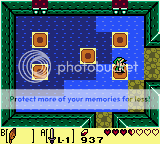   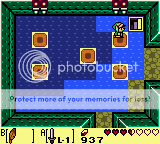 That will make the stairs appear. Go down them. 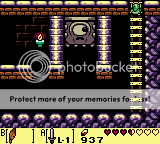 Oh look. Nintendo added some Thwomps to the game. We've already seen the Mega Thwomp (that red block that turned blue when we ran into him in the previous dungeon). You can either use the Peggy boots to dash across, or you can tease the guy by getting close, then backing away before he hits you. Doesn't matter how you get across, just head left.  Use the same tactic to get across, and climb the ladder. 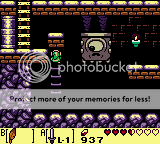 Hmm... How do you suppose we get up here? It's a little trick, but the timing's fairly difficult, especially when you're low on hearts like me. You need to trick the Thwomp into falling, and while it's on the ground, you need to climb up the ladder and jump on top of it.  Link: Woo~ Elevator to ladder! blaugh Time the jump before jumping left and climb up the ladder.  Head south of this room.  As you can see, there are the floating bombs that I mentioned earlier. But right now, open the chest. 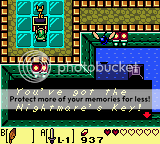 Woo~ Nightmare key! Save yourself some time and trouble and head to the previous room and jump off the ledge. Then swim to the right. 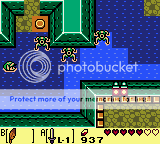 You need to push the switch this time, which will open the door. 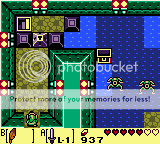 I've already taken the floating heart, but it's there. If you need more health like I do... 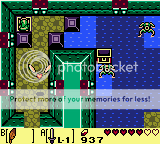 Just take the stairs and climb back out. The item will reset itself. Once you're fully healed, take the stairs again. 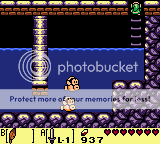 Oh look. Cheep-Cheeps from the Mario series. Since you're underground, you can use your sword to slash them. And if you need to surface quickly, use the feather. Either avoid or slice through the fish and head left. 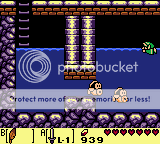 Same thing here. Link: Sometimes, when I'm bored, I pretend I'm Solid Snake and try to get around these guys without being seen. 8D Nice, Link. sweatdrop Take the ladder up. 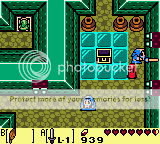 We're back in this room. And we know what lies to the left of us... 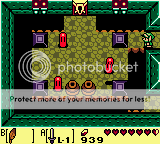 That's right. The Nightmare's Lair. Push that block out of the way, kill the Zols, and if you need hearts, check under the pots.  The timing for this Piece of Power could not have been any better. XD Don't you feel invincible too, Link? Link: Aw yeah. Save, heal up, whatever. Then use the key on the door and head on through.  Link: The boss is stairs? Nah... you'll need to take them to reach him. 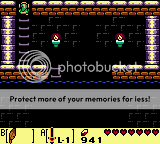 Link: Down into the depths too? Yep. 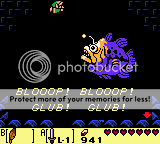  Link: Food? b***h, please. I'll turn you into sushi. Gimme some battle music to fit my invincibility! Done.This guy is a breeze. With the Piece of Power we just picked up, he's a fly banging against the heavens. As long as you stay above him, he can't run into you. You really only need to worry about falling boulders and the occasional small angler fish, but even they aren't much of a threat. His weak point is that light on his head. Spam spin attacks and sword strikes and he shouldn't be any trouble. 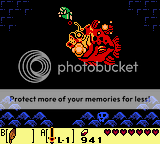 This guy literally took about 15-20 seconds for me to beat. He's that easy. And the Piece of Power is just too powerful. XD Anyway, after he's gone, he'll drop a heart container. 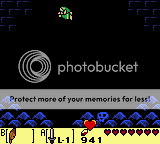  With another heart in your hands, surface and take the ladder back up.  The door's open now, so head on through.  Oh look, a technicolor harp.  I wonder if I can use this in place of an HM and teach a Pokemon Surf? 8D Anyway, like usual, it'll play some notes before warping you out. I really like the Surf Harp because it sounds beautiful when it plays.  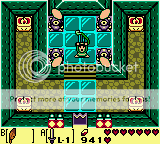 And as usual, we'll get a hint on where to go next.   Looks like we'll put our flippers to good use again to reach dungeon 5.  And now we're back outside. That's all for today folks! Next time, we'll get a new song, get a piece of heart or two, complete the trading sequence, and maybe... just maybe get enough seashells. Catch ya next time on LP! LoZ: LA DX!
|
|
|
|
|
|
|
|
|
|
|
|
|
|
|
|
|
|
Posted: Wed Mar 23, 2011 1:37 pm
Ch. 14: STALKER TRIPLE COMBO!'Sup folks, and welcome to another exciting installment of LP! LoZ LA DX! We've got a super long chapter this time... 268 images. And that's just this chapter. I know my friend's Firefox is gonna cry when she reads this. Will yours? Ready for this action-packed session? Grab some popcorn and get comfortable, cuz it'll take a while for all the images on this page to load. Lesse... last time we left off, we had just finished off the Angler Fish in Angler's Tunnel. My goddess, he was pathetic against the might of the Piece of Power.  We're gonna head left first. Into the waters we go! 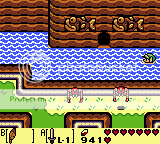 Remember seeing this cave? We'll finally get to see what's inside~  Oh man, I love this guy. Easily one of my favorite characters in this game.    Why yes. Yes we do have an ocarina, Manbo.   Link: What is it with fish and going 'Bloop'? stare And dance time~        Link: Oh! 8D  Woo~ New song!!!!    This is the one teleporting song you get in the game. It is amazing. I'll show you where it takes you shortly. For now, head out of the cave.  Funny how we're standing on a patch of land that shouldn't even exist. Head to the right.     We have some business in this cave. Go in.  Now, it looks empty, but you shouldn't judge a cave by its empty nature.  If we dive... right around here...  We'll pick up our fifth piece of heart. Pretty sweet, huh? Leave the cave and swim south.  Okay, climb out of the water, and walk all the way back to that cliff overlooking the 4th dungeon. The one you jumped off of.  Don't Jump!!! We're heading to the right! 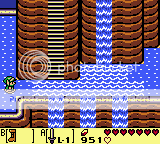 Take the stairs.  Go left. 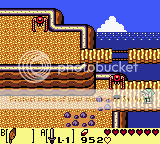 Keep going left.  Remember this cave for much, much later. Inside is a key to another dungeon, but we don't have the means of getting to it. The house over here is the Cucco house. Not special for now, but be sure to come back here around the time you have to go to the Eagle's Tower and with your special companion you need. Head up the stairs and head right.  Head right some more.  Upon entering, you'll see a boulder slide just a little to the left, making it look uneven compared to the other two. Enemy's hiding in there. Get rid of it while you're moving boulders.  Under the boulder on the far right is a secret seashell. Snag it.  I... don't remember what number we're on. 13, maybe?  I suppose you could head right, but there's really only a Spiny Beetle hiding under the grass clump. And he's not worth your time. Make your way back to the stairs that lead into the pool of water.  Swim to the right.  Into the cave we go.  See that one random dry patch in the midst of all that shallow water? Pretty suspicious if you ask me.  Bombing the wall next to it will reveal a new opening, so head on through.  Smite fish and take stairs.  You know... I wonder what this way leads? Head south.  Holy s**t... look at all those chests. eek Link: Treasure time! Treasure time! Okay, the order is very tricky... I goofed and had to leave the room. But if you leave the room, all the chests will be emptied. And you will lose whatever spoils you didn't get. They're all varying amounts of rupees though, so if you're strapped for cash and you don't want to steal the bow, listen carefully.  Start with this chest and get 20 rupees. From here, head four spaces left and one down, then push that boulder down.  20 more rupees get. I don't have images for the rest of the chests, and I've worked through every possible path you can take. But it is impossible to get all five chests from the top side of the room. You can get four of them, at most from the top side. To do so, head back to where you moved that first boulder and head one south. You should be NE of the chest on the far left. Push the south boulder down one, then walk all the way around to the boulderless chest. Inside should be some more rupees. Then head one right and push the boulder blocking the SE chest to claim the rupees in there. There's nothing you can do about that last chest, so just head outside.  Head south. It's all you can do.  Beat up the Tektite, then check the chest.  Another shell. Goody~ Head back inside and make your way back to where you bombed the wall.  Head right.  Dodge the Spiny Beetle under the skull and head out.  Head right. It's the only thing you can do.  Talk to the Owl.   Yeah... any further is far too risky for us. And we don't want to go to the Eagle's Tower yet. Now would be a good time to test out our new song! Go to your ocarina. You'll see that there's now an option. There will be Marin's head, then a fish. Select the fish (option 2), then play the ocarina.  We will be warped...  Right outside of Crazy Tracey's place. Pretty frikkin' sweet, huh? Head south.  ... Hey, Link? Link: Hm? Don't look behind you. Link: Whut, why? confused  Link: Dude, there's nothing there. Heh... well, whatever. You'll see it soon enough. Link: ... Weirdo. Go to town. Since we have 999 rupees, which is the max in the game, we might as well go snag us the bow.  Link: What the?! A ghost?! O___________________o Yep. Tried to warn ya earlier. Dude's been following ya ever since we warped. Link: -flips the ******** out- burning_eyes -sighs- I guess I'll go call them. IntermissionHey Link? Link: Y-y-y-yes? So I just finished chatting with Ghostbusters. They said the ghost isn't going to try to kill you or possess you or anything. It's a safe ghost. Link: I-i-i-i-if y-y-you say s-s-s-s-s-so... Right, now that that's been settled, go into the shop.  999 > 980, in all video gaming sense. We're getting this bow.  Link: The next time you'll see us, we'll be robbing your shop.  The ghost tends to fade in and out of the realm of existence, which is why some of the images don't show the ghost. But don't worry, he's there. And you can't kill him either, since... you know... he's already dead. Link: Dammit. Head to the Animal Village.  We need to head into the desert where we fought the mini boss. Link: Can we get some deserty music? Yeah yeah... here you go.  Drop down the hole.  Link: I think the ghost likes the music. I'm more surprised you're not flipping out over the ghost. Ghostbusters really calmed you down, huh? Link: I'm treating it like it's a mere figment of my imagination. If you say so. rolleyes  The north wall has a hollow sound, so poke around and bomb it. Then go through the opening.  Oh look, another piece of heart.  This makes 6. We're halfway there. Make your way back to Animal Village.  Link: Marin-baby, I miss you. <3 We have stuff to do, lover boy. I'll give you a chance to listen to her another time. -drags off- Go to the NE sector of Animal Village.  Head into the house on the left.  If you've been following along on the trading sequence, you should have the Hibiscus. Talk to the goat to continue the trade.  Link: Yes. Yes we did.    Link: As long as it doesn't have to do with exorcisms. I've got my own figmental ghost issue.    Link: Hey, I'm not the Mailman. Get him to do it! He... uh... doesn't exist. Not until Majora's Mask. Link: Seriously? Dammit. Fine. We'll take your stupid letter.  Link: I'm not the only one creeped out by the random heart stamp she put on this letter, am I?   Even the game doesn't seem as enthusiastic. XD Leave the Animal Village for now.  Head north.  You know, since we're not in any rush, I can show you something sweet. Remember when we used crack on these guys? You can actually talk to them when they have the googly eyes.  Link: They're... Jamaican? O_o;; Head left.  Jump in the water and head south.  Now west while dodging Zora.  Here's that girl in the water we saw a while back. She's actually a Mermaid, and is someone in the trading sequence. But we can't trade just yet with her. So head south.  This formidable looking place is actually our next dungeon, the Catfish's Maw. Unfortunately, the ghost will freak out if you try to go inside of it, so we can't deal with the dungeon for now. Head back to the Animal Village.    Link: Huh? Who said that? O_o Every now and then, the ghost will tell you to take him home. His house is that wrecked one near the beach. For now, head south.   Go left.  Over the bridge.  Talk to Mr. Owl.   The bridge in particular is the one you crossed over just now. And it's got two things we need to do there. Unfortunately, we can't do either of them now, since a) we don't have the necessary trade item, b) we have the ghost with us so we can't trigger the photo event, and c) it can't be triggered until we trade him the item. If you dig around him...   You'll find a secret seashell. In case you didn't realize it yet, we're gonna collect lots in this chapter. If we head south over the bridge and down the next screen...  We don't have the means to get across this, which means we can't go see the Mermaid Statue. Well... not for long. Head right.  Nothing really special here. Get in the water and make your way back to the big fish in the water. 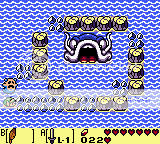 Freaky little b*****d, huh? Head left.  Climb up the stairs to dry land and head south.  Keep going south.  Remember this island? Now that we can swim, head over to it.  Under that clump rests another seashell. Snag it.  This is seashell number 17. -just confirmed by looking into the future- Which means the ones we picked up earlier are actually 15 and 16. 14 might be in there too. I dunno. Too lazy to look back. Head to the right once you get back onto the mainland.  Jump across and slash at the grass. If you time it right, you can actually land on where you cut the grass and not fall into the hole. Head down the stairs.  Since we have the flippers, we can clear this area. Head north and watch out for man-eating fish.  Go left.  Take the stairs.  Hey, we're behind some trees now. Head left. 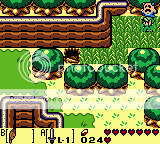 Take the stairs.  Huh... doesn't this look familiar...?  Sprinkle some crack as tribute to Satan.  Link: Hey look, a fairy-- WAIT A MINUTE!  Link: ACK! SATAN'S BACK! gonk   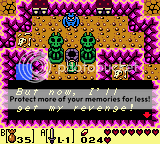  -clicks yes- Link: W-what?! D8 Dammit, Link. Did you forget the last time we saw this guy, back in the Mysterious Forest? He actually gave us stuff. Link: Oh. Right. >///>;;    More bombs? Hell yes.  Link: I can never get used to this tingly feeling. Well, considering you just pissed on yourself, I don't think so either. Link: Dammit, they didn't need to know! Dx     And then Satan went vacationing in Hawaii. While Link the pants-less wonder goes to get a new tunic, let's take a look at our inventory.  Satan: Fueling Terrorism since the dawn of time. Seriously. 60 bombs? Link has gained 1000 exp! Link has leveled up! Link has now classed into 'Terrorist'! Backtrack all the way back to the first staircase. 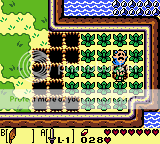 Cut the grass, jump the pit, and head left.  Left some more.  Don your boots and use the Boots+Feather combo to make the jump.  Approach the house. 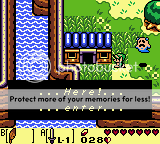  This is the ghost's house. He wants to go inside. Nice little trivia for you. In the manga, the ghost appears around the same time as in the game, just shortly after the 4th dungeon. However, in the manga, the ghost lives in the desert, whereas in the game he lives by the beach. Also, in the manga, he was a former warrior. We don't know what he was in the game, and we probably never will. Also in the manga, he gives Link a sword after he breaks his in the 4th dungeon. He doesn't give us a sword in the game. We get one elsewhere. Go in for now.  Link: Yeah, this place was totally like this since before I showed up here on my date with Marin. >.>;;  Link: Don't worry, she and I totally didn't bang in your bed. >//>;;  Link: Don't worry, I already moved your stash of porn to a different location, since uh... you don't need it anymore. >/////>;; It doesn't show, but yes, the ghost does go to the dresser.  Link: I honestly don't know what to say about that corner of the house, Ghost Figment. >.>;;   Poor guy... Who knows how long he's been dead. But he misses his former life.  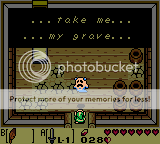 Link: I suddenly have the urge to go visit a grave. I wonder why. Because he told you to? Link: You can see Ghosty, the figment of my imagination? ... Wooooow... stare  We then get booted outside. Play Manbo's Mambo to warp.  The grave's pretty close to here, but there's a couple of things I'd like to do first. Move the boulder and head left.       That house belongs to the one and only Mr. Write, who writes shitty fanfiction that you can usually find on fanfiction.net or whatever the site is called.  Interesting trivia about this guy. He's apparently the model for the adviser in the original Sim City, and even has a name like his (Mr. Write -> Mr. Wright)! Also, in the later Zelda series (Oracle of Seasons), we see Mr. Write's sprite again, only this time he's named Mr. Left! Har har i c wut u did thar, Nintendo. Anyway, give the guy the letter.  Link: Yes. And next time get yourselves an actual mailman.   Link: Wut.  Oh Nintendo. You've gone and given us another reference to your firstborn, the Mario series. Here's Princess Peach... who's named Christine. Link: The goat is a lying whore! D8<  Link: But... that's not her! scream Link, enough. Such are risks of long distance relationships.    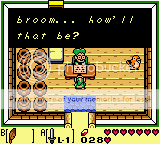 And so he gives us a broom for connecting him and the goat. May they live very happy lives, and hopefully not produce any crossbreeds.  Link: Isn't this... Maple's Broom? I'm surprised you know who she is, considering she doesn't exist for another couple of years. XD    Oh look, the game's concerned about this guy too... Anyway, head back to Mabe Village.  Link: Hey Bow Wow. 3nodding Head south. We're gonna see the Granny who lives with Phone Gramps.  Normally, we see her sweeping happily away, but for some reason, her broom's gone. Link: She probably swept and swept until the thing disintegrated. Either way, she's got the cleanest yard in the universe.  Her husband deals with phones. Granny prefers email. And we know what's her favorite email provider. That's right. Yahoo.   Yes, Granny. It's for you.  Link: I knew it! She's a witch! And what do we do with witches? BURN THEM! -whacks Link- This isn't Monty Python and the Holy Grail.    A fishing hook for a broom... Well I guess we can go fishing now. 8D  That is a big fishing hook. O_o;;    Link: You mean it can evolve? I want it to become a Pikachu. 8D -facepalm- XD Anyway, play the Manbo's Mambo since I'm lazy and don't feel like walking.  Head south.   Toss the boulder, then... let Link decide. Link: Right! Cuz there's a cemetery there!  Link: This is the place right? Ghost: ..... no....  Jump the gap and head left.  There's the ghost's grave. Toss the boulder and head south.  One or two things I'd like to do before we go to the grave. First... cut the lone grass clump.  Digging where it was will reveal a secret seashell. Grab it.  This is 18. 2 more before we hit 20. Head to the right.  Watch out for the zombies (whom later become Redead... those horrible bastards...), toss the boulder, and take the stairs.  Take down the beetle and Keese before heading right.  Bomb that cracked boulder, then stand where it used to be. Normally, you shouldn't try this unless you have the hookshot. But screw that. If you count, it's a mere three space gap. You've cleared it plenty of times before. Don the Boots+Feather and jump, then jump over to the piece of heart.  This makes 7. 5 more to go. 8D If you take the stairs after pushing those boulders off the ledges...  You'll end up SMACK... dab in the middle of ghost territory. Push the gravestone you just came out of and backtrack to the other staircase.  Toss the boulders and head left. Take out any zombies that come near you.  Take the left most stairs.  I always disliked this scene. Wanna know why? You get rid of one stalker, and two more show up. Stalker fest! 8D Anyway, approach the gravestone to trigger this chain of stalkers. =_=    Translation: I have a present for you in a jar back at my house. Bye bye. It's a secret seashell. Pretty sweet. And as soon as the ghost goes into his grave...  Stalker Owl appears.  Last time we saw your ugly mug was... back in the desert? Don't say it's been a while, because it hasn't.    Yes, we know where the dungeon is. We swam past it like 3 or 4 times already.    Which is odd, considering if we're getting rid of his Nightmares, he should be sleeping more peacefully... So after Stalker Owl leaves, approach the grave to bring the other consistent stalker.  Link; Haha. His name was Stupid. What kind of parents would name their kid that? XD  Link: Oh god, Stalker Mouse. Dx  Link: I'm laughing at this guy's name. What are you doing here? Stalking me as usual, huh? stare    Link: The ghost doesn't exist. It was merely a figment of my imagination. I decided on this. Just because he's afraid to admit he was stalked by a ghost pretty much this whole chapter. XD  Link: Eh, sure. Since we're more chibi, might as well take advantage of the moment. 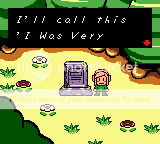  Link: Pfft. I wasn't scared. Sama, give a better title!  Link: Heheh, I'm posing. Because I'm that awesome.  "I'm With Stupid. The question is, who's Stupid?" Okay, run all the way to the entrance of the Key Cavern. The third dungeon, you know?  Head right.  Jump in the water and swim north.  We can finally reach this grass clump. Make sure you cut it from the north side. Otherwise the prize will fall in the water and you'll have to leave and re-enter to get it. 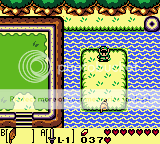 Cutting the grass will reveal a secret seashell. 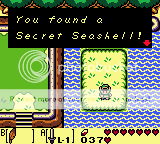 This makes 19. One more to go~ Head to the castle.  Go right.   Take the bridge and head north until you find a place you can enter the water.     Get in the water and swim left, all the way around the castle.    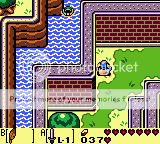   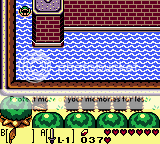 Dive around the wall near the holes. 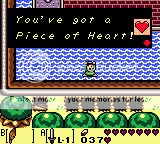 You'll find a piece of heart. Sweet. And it's number 8, which means we have another heart now. Woo~ Get onto land, then warp via Manbo's Mambo.  Go all the way to the Tail Cave, the first dungeon.  Go left.  See that lonely tree, I want you to run into it with the Boots. Trust me. It's worth your time.  That's right, it drops a seashell. Grab it.  That makes 20! But wait... let's go claim the treasure the ghost left for us at his house.    Gasp! Another seashell! Grab it.  This makes 21. There are a grand total of 26 Secret Seashells in the game. You only need 20. Once you have 20 or more, head to the Seashell Manor. It's south of the castle and west of the Animal Village, if you forgot.  Go in.  Since we have 20, head on through the pillars and approach. 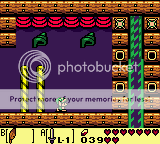 The bar... it's full! Link, what does the scouter say about its power level? Link: -crushes scouter- IT'S OVER 9000!  Link: What job? O_o;; And then awesome stuff happened.    Link: Oh man. O_O  Link: The sword... it's gone super saiyan! O_O  Link: It's so big... is it safe to touch? o: That's what she said. 8D Go take the sword.  Feel the power! UNLIMITED POWER!    Link: Yeah, just in case. You know... if I ever get shipwrecked again or if it gets knocked out of my sheath because pirates suck at aiming... you know? Behold, the Seashell Sword. This weapon is so fine. I love it. It's twice as strong as your normal sword, and comes with a special ability. If you are fully healed... swing the sword.  Sword beams. That's right. You can attack from a distance. Granted, sword beams do about as much damage as your level 1 sword, but still! That's pretty damn sweet! And that's all for now. Damn, there were 268 images, and I took out a few but it still took most of the night to write. Next time, we'll take on a dungeon exclusive only to Link's Awakening DX and acquire a tunic that will make us more powerful! Don't miss the next action-packed chapter of LP! LoZ LA DX!
|
|
|
|
|
|
|
|
|
|
|
|
|
|
|
Posted: Wed Mar 23, 2011 1:39 pm
Chapter 15: COLORBLIND PEOPLE HATE THE COLOR DUNGEON! Hey everyone, and welcome back for YET another exciting edition of LP! LoZ: LA DX~ Tonight, we'll be exploring an optional dungeon, exclusive only to the DX version of Link's Awakening. Not only that, but it's filled with exclusive enemies you can't find anywhere else! So what are we waiting for? Let's get started! Last time, we did a bunch of stuff around the island like getting a new heart, completing the Secret Seashell quest, and doing more trades. Oh, and we got a new stalker for a while before getting him home.  We need to go all the way back to town. So go do that. 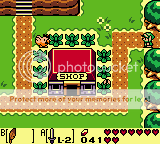 We need to head to the library. Dunno where it is? It's the building where we saw those two kids playing catch. Link: Library? Pfft. Only nerds need them. I'd rather play catch. If you're going to be that way, then I guess we don't need to get you a super cool new item for you, since the directions are inside the library. Link: Whoa whoa whoa. Did I say they were for nerds? I meant they were for awesome people. Let's get going.      And there's the library. Go inside.  If you came here anytime before the Moblins came to town and ran off with Bow Wow, you'll notice that there is now a book sitting up on the bookshelf. And you can't get to it until you cleared the Key Cavern, since you'd need the boots to get it. Since we're here, might as well point out a few things. The library can be used as a guide on how to do stuff early in the game. It teaches you how to use a sword, stuff on bombs, how to use your weapons properly, yada yada yada. There's three books worth noting at this very point in the game. The first book of interest is the bottom right book on the right side of the room. It contains some heavy spoilers, but you can't read it until you complete the trading quest... which can't be done until you beat the Catfish's Maw. The second book is a map, which I'm about to show you.     This helps, since if I open my own map, it'll cause the game to freeze and we don't want that.  Here's the map of the island! I'll point out the whereabouts of the remaining dungeons for you. Aren't I nice? 8D  To the west of the Animal Village is the 5th dungeon, the Catfish's Maw. We've already explored this area, so you should know where it is.  To the east of the castle/north of Animal Village is the enigmatic 6th dungeon, the Face Shrine. Plot twists and spoilers and all sorts of heavy stuff await you here.  All the way up in the NE corner of the mountains lurks a tall building known as the Eagle's Tower, the 7th dungeon. We'll need help from a blue friend of ours to get there, and no... it's not a Wooper.  And finally, on the other side of the world lies the 8th dungeon, Turtle Rock. It would be extremely foolish of you to try to get to this dungeon WITHOUT clearing the other seven dungeons, since there is a wave of fire that WILL KILL YOU if you try to pass without a Mirror Shield. I barely managed to get past it once, and trust me... you do not want to take on the 8th dungeon without at least getting the item from the 7th.  And this is where we need to go for the 0th dungeon, the Color Dungeon. Okay, now that I've shown you this map, it's time to focus on the last book of interest. You see that book up on the bookshelf? Don your Pegasus Boots and run into the wall holding up the book.  You can now read it. Yay~ Link: But I don't know how to read. D8 ... Sometimes I wonder how the hell you're still alive, Link. Link: sweatdrop I've got you, at least. ._.   We're instantly prompted with a question. Yes, we wanna read the book. How else will we find the legendary 0th dungeon?   That spot I pointed out on the map is where the five gravestones of interest are.  And yes, you will have to push in numerical order, from 1 to 5. Gravestone 2 takes a while to push... for me at least. It's like the buried dude is trying to stop me from moving it. If the graves aren't moved in the right order, there will be no entrance.     So yes, work hard, and you will be rewarded.  Link: It's a world colorblind people will never get to experience. So yeah, maybe your way to the cemetery. Either walk since it's not that far or be a lazy bum and warp. If you don't know where it is, it's right next to the Witch's Hut where we made the drug deals way back when.  Head on to the right.   Oh look, Link's worst nightmare. Boos and zombies. Link: O____________________________________________________o  Here's our spot. You know Link... I think you'd need to find your courage. Link: Whut. Why?  Link: OGOD WHY DO GHOSTS COME OUT OF GRAVESTONES?! Dx ... Because it's their tombstones? And yes, there will be ghosts that come out of the graves if you touch them. I do believe one of the graves (not in this current screen) houses a really big ghost, so be careful. Fortunately, with our level 2 sword, we should be alright.  Once you get the graves pushed in the right order, a set of stairs will appear under the last grave. Go on down... TO HELL! twisted  I kid. This is actually the Color Dungeon. Colorblind people, you have no idea how sorry I feel for you when you go through here. Fortunately, I'll do what I can to guide you along.  As you can see, it is the 0th dungeon. Pretty interesting, huh? Anyway, go talk to the skull kid on the left.  To colorblind people, it's kinda the same.    Basically, if this guy is one color, then his brother is the other. They are never the same color. Colorblind people, you will select blue.  Link: Why should we? o:   Heed this guy's warning. Seriously. If you ran out of Magic Powder, the Mysterious Woods is just outside. Go get more.     The brother pretty much says the exact same thing. Red's your color here.  Link: Seriously, who's there to tell? :/   Seems like we're expected... Link: Hey, can this be the dungeon theme? 8D This? -listens- ... This is not a strip club. You're not having this play. Link: Aww.... ._. You get this instead. Anyway, head through the opening those two made.  Behold our first new dungeon-exclusive enemy! ... Whatever the heck these guys are. If you approach them, they'll move towards you, and they will usually try to pop up behind you or under you, so move towards them when they move to you, then slash. Not difficult overall. Moving on.  The goal is to get all the bear statues to be blue. That's pretty much what the Owl tells you throughout this dungeon. Not hard... yet.  Once they're all blue, a chest will appear. Go open it.  And it's our favorite item, the HRC! 8D Head on to the right.  Only thing we can really do is head to the right. Watch out for that guy though, as he drops bombs. If you have the Seashell Sword and full hearts like I do, you can easily get rid of him from a distance. All the more reason I love this weapon. <3  Here's yet another dungeon-exclusive enemy... whatever they are. See how they're a specific color? Well... colorblind people can't really tell. Swipe them with your sword, then get out your Power Bracelet to pick them up and throw them into their respective holes.  Once you get both, they will explode and a chest appears.  Stone beak. Now you can hear all three Owl Statues say the exact same thing in this dungeon. 8D Head south.  These guys again.  They look like colored Grimers from Pokemon when they try to hit you. When you kill them all, head to the left.  Take those guys out quickly. If you let them jump around long enough, they'll die on their own by falling into the pit, but you'll be strapped for jumping space. Oh yeah, and the HRC chimes too.  Inside is a key. Head through the only way you can.  I was hoping for a no-damage run through this dungeon, but I got bombed the moment I stepped through. Head to the right again.  Head up now.  This time we have two flying guys, both of which drop bombs. Take them out quickly, then jump on the things to the other side.  This puzzle is the same as the one from one of the earlier rooms, only they added a third color into the mix. This is slightly more difficult, but doable.  Once they're all blue, you'll be rewarded with a key. Head right.  And now there's a new color of Grimer. Kill them or leave them alone, it doesn't matter. Use the key on the door and prepare for the first mini-boss battle.   What a fool. I have the perfect song for this.  This is exactly why you need to have some Magic Powder. You can't hurt him in this form. His attacks include shooting lighting bolts in the four directions (usually the corners) and running into you. He also jumps when he gets hit with Magic Powder, and shifts forms.  When you hit him with Magic Powder, he becomes a Zol and is vulnerable to your blade. Slash him as many times as possible, and if he tries to shift back to his invulnerable form, hit him with Magic Powder. It hurts him.  After enough hits from your sword and Magic Powder, he'll explode and release a fairy. Pick it up. Since this dungeon isn't one of the main dungeons, there won't be a warp to the entrance. Not like you need one anyway. Head to the left.  The Hope-Raping Compass will chime. Just push the blocks out of your way...  Like so... Then claim the chest.  The Nightmare Key. Oh good~ Start backtracking.       Use the key on the locked door.  Doesn't his pose remind you of that one mini-boss you fought back in the second dungeon? That's because it is the mini-boss from the second dungeon, with a few tweaks.     Link: What, go home and be a family man? I can't do that, seeing as you locked the doors. This guy isn't too hard. He fights like the second mini-boss, like I said. But he is also able to jump and make boulders rain down, and if you don't jump when he does, you'll be stunned. He's also capable of picking you up and throwing you. With the level 2 Sword, he's not hard.  A few swings with the sword and he's down. He's much easier than the other mini-boss. He'll also drop a fairy, so heal up and go right.  As usual, take these guys out quickly. You'll also be locked in, so look for the switch to open the doors.  Link: Found you, switch-baby~ Go north.  Bunch of Zols in this room. Piece of cake.  You'll be given a Map for your trouble. Let's take a moment and open it up.  It's in the shape of a tunic. I wonder why... Also make note that there's a room you missed at the beginning. We'll head there momentarily. Head to the right from the map chest.  Again, just hit these guys with your sword and throw them into their respective holes. For the colorblind, just throw whatever you can in whatever hole. Maybe you'll get lucky.  I timed it perfectly to avoid falling into the hole when the enemies poofed. You'll get a key for your efforts. Head back.  Go left this time.  And looky here... there's only two colors, but there's nine statues you gotta make blue this time. It'll take a while to get it done... But once you do...  The way will open. But first... backtrack to the room where you found the compass.  Poke along the south wall. You'll find a hollow wall.  Link: Link used bomb!  Link: It's SUPER EFFECTIVE!  And look at all those rupees. Pay attention to my rupee counter.  That's almost 150 rupees from this room. Pretty sweet. Okay, head back to that 9 statue room.  Go north.  Couple of Zols here. Nothing special. If you need hearts, check the pots. Once you're all healed up, go to the left.  You need to hit that crystal to get to the Nightmare's room. There's plenty of ways to do it.  If you have the level 2 sword and fully healed, just swing and let the sword beam do the rest. 8D Save, take a quick bathroom break, do whatever, because the boss of this place is quite a pain.  He doesn't look that bad, right?   This guy regenerates his health, actually. Link: Battle music, now! Fine fine... here.  His main choice of attack is shooting those projectiles at you. You can get in close and get a couple of swings in, but you'll have to hit him A LOT, and FAST. Otherwise he'll just go right back to Blue and you'll have to start the fight over. I kept my distance and spammed the sword beams. I made a small mistake in the last chapter. Sword beams actually do as much damage as your level 2 sword. Which is much better than what I told you.   Once you dish out enough damage, he'll say he's in the danger zone and start attacking with other things. I killed them before I could see what they were, and before I could stall for time, I already killed him. Oops. sweatdrop 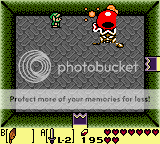 Yeah, he's dead.  And all you get is a fairy... which I don't really need. Head into the new room.  There she is... the fairy queen. Approach her.       And now is a good time to check out my poll... lesse... Link: 1 vote for red. 2 for blue. We're a small guild, so I wasn't expecting high numbers. Oh well... looks like we're getting blue for defense.  Yes, we're quite sure.  We got the Blue Tunic~  Link: W-wait a minute. You're going to dress me? O//////o    As the description says as we're changing into the blue tunic, it'll reduce all damage we take by half. The red tunic will double the damage we deal. Since we already have the level 2 sword, there's no need for the red tunic. And it's easy on the eyes for the colorblind.  The room then fades away...  As the Fairy Queen warps us out. 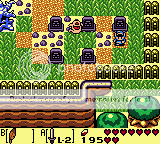 And we find ourselves right back in the cemetery. That's all for this chapter. Join us next time as we explore the 5th Dungeon, the Catfish's Maw, and face probably the smartest mini-boss to ever exist in the history of Zelda games. See ya~ Link: Ack! Ghosts! Dx
|
|
|
|
|
|
|
|
|
|
|
|
|
|
|
|
|
|
Posted: Wed Mar 23, 2011 1:40 pm
Chapter 16: Skeletor Wolf: Can't Let You Do That, Star He-Link!Hey guys, and welcome back for more LP! LoZ: LA DX! Let's get started, shall we? Last time, we kicked some a** in the Color Dungeon and picked up some fine threads.  Link: Ack! Ghosts! Dx We need to head over to the Catfish's Maw. Since we passed it so much in the previous chapters, we should know where it is? No? It's in the water just west of the Animal Village. 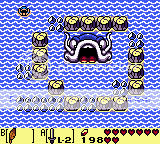 Huh... there's this rock wall blocking us from reaching it. But not to worry!  If you dive here...  You'll come down here! Link: I have an unlimited breathing capacity, so I can like... basically live underwater. I'm part Zora! 8D   And with some swimming, we'll pop up inside the circle and can now enter the place. Woo~  Dungeon 5... the Catfish's Maw. Ironically enough, there's really no catfish involved here... well, except maybe for the entrance. But other than that... nothing really. Head left.  There is a chest on the other side of that wall, but the gap is WAY TOO BIG to make the jump. So just head on left and kill the stuff that gets in your way.  The door locks and... guess what? We have to fight Helmasaurs in this dungeon! Yep... these punks can only be hurt from either the side (if you swing it right) or from behind. The masks protect them from all damage. Link: Takin' the Helmasaur from behind... Never knew these guys liked it doggysty-- -shot- Don't go there. -lowers gun- Anyway, once the enemies are routed, the door will open, so head left.  More Helmasaurs~ Oh, and a chest too.  The HRC returns!!!!!!! Ignore the Helmasaurs, since killing them would only unlock the door, and instead take the stairs.  You need to time your jumps when you get on those pulleys. Step on one and it'll go down while the other goes up! Get across, but don't take the ladder.  You'll have to do the same thing here. Pulley one (the closest to you) is connected to the second pulley from the left, so that means the far left pulley is connected to the second pulley from the right. Jump across and take the ladder. If you happen to fall or you wait too long, just head back to the previous room and climb the ladder.  And the HRC chimes, so there be a key here. Link: I'm gonna kill those Stalfos! twisted  And... there's no key. Link: D8! No worries... we can get it. Just smash the two crystals between the spread out blocks and push them together so that it forms a square in the middle of the room.  You'll be rewarded with a key. Head on to the left.  Link: And... there's nothing here. Remember this place for later... since it's related to the mini-boss. Head back to the Compass room.  Kill the two Helmasaurs to get out.  Use your key on the door once you clear the room of enemies... or don't kill them. Your pick, really.  Head on north. But take out the Stalfos heading your way.  The door will lock the moment you take a step forward, so kill all the enemies to go on through.  What? The doors locked! Looks like...  Yep, looks like a Mini-boss battle. Link: Battle song, now! Sure, he-- Skeletor: Can't let you do that, gabriel sama. FFFFFFFFFF-- He overrode the theme with his own! This guy's real name is Master Skeleton. He'll jump around and swipe at you with the sword. You can knock him down with a spin attack...  Then drop a bomb to deal damage to him. If you happen to have the Level 2 sword and are at full health, you can also dish out damage with the beams, but they won't do as much as the bombs. After three or four hits with the bombs...   Skeletor: I'll be back. And... He runs off. Link: Coward. >: He's... actually pretty crafty... o: Anyway, with him running off, we can head right now.  Link: Oh hey, a chest!  Link: What the...? O_o;; Where's the stuff? Oh hey, a note... it's from Gary ******** Oak. It says... "Gary was here. Link is a loser." Link: ... I have no idea who the ******** that b*****d is, but when I meet him... HE'S DEAD.Oh wait... wrong note. XD  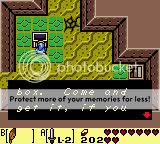  Link: FFFFFFFFFFFFFFF-- Master Skeleton... the smartest mid-boss in the history of Zelda Franchise. Link: ... What did he take...? ._. The dungeon's item... the hookshot. Link: OTL|||||| All we can do is head north.  We need to push the block up, then head left. Since... you know... that's the only way we can go now, since the right is locked.  Take out the enemies here and watch out for the Traps. Make your way north.  Take out the Tektites, then jump in the water and DIVE!  Oh look, Bloopers. Yet ANOTHER monster from the Mario series.  And they even threw a Goomba down here. If you need hearts, go jump on him. Then go swim up.  And... we're here too early. Backtrack through the water and make your way back to where all the Tektites were. Then head north.  The door's gonna lock, and it's on the other side. But you have a reason to be over here. There's a couple of Zols that pop up on this side, and you need to defeat them. Since you can't kill all of them from here, all you can do is backtrack to the 4-way room, with the center block.  Push it the only way you can, and head north.  Oh hey, I already killed the enemies before I could screencap. sweatdrop Link: ... Nice. Anyway, jump across and head right. Ignore the chest for now.  And there's nothing spectacular here... well, except for the floating bombs. Backtrack to the previous room and head north this time.  Take out the star and the Hooded Stalfos, then head to the left. Again, you can't reach the chest.  And we're now back to this room. Kill off the remaining Zols, and the door will open.  Link: b*****d, I'LL GET YOU THIS TIME AND TAKE BACK THE HOOKSHOT! >D Actually... if you look at the blocks, it says 3. Which means this is where we fight him the third time. Link: DAMN YOU SKELETOR! I HOPE HE-MAN CRUSHES YOU GOOD IN THE CARTOON! D< He's a crafty one... Head left.  Take out the Stalfos and grab the heart before opening that chest.  Yay map. Backtrack all the way to the 4-way room with the center block, and push it down this time. Press on the switch too and head to the right.  Link: Ha! Here we go! Round 2, ********! D<   Link: You're more of a pest! I'll get you for taking the hookshot! Battle music, now! Let's try th-- Skeletor: Can't let you do that, gabriel sama! Dammit, he got me again! Dx You're on your own for this fight, Link. Link: gonk Fortunately, his tactics don't change. Just use the spin attack and bomb combo to damage him. After 3 hits with the bomb...   Link: YOU COWARD! D< And... he gets to fight another day. Fortunately, we were just at the room where he appears again, so head there. Note: You will have to kill the Zols again to open the door. But if you do it right, you can easily get rid of them from the top side of the room. It doesn't matter how you do it as long as you get the door open.  Link: Round 3... sama, do we have something that can power me through this fight? I think I've got something... let's give it a shot when he appears.   Link: You're even peskier! sama, battle music, now! How's th-- Skeletor: Can't let you do that, gabriel sama! Ack! Not only did it not work, but he's using a Star Wolf theme from Star Fox 2, which was NEVER RELEASED! You're on your own again! Link: WHAT?! O_____________________________O;; Same tactics the last two times works, so after a few hits with the bombs...   Link: Gah. He doesn't die! D< He's being careful, Link... Fortunately, he's almost finished. Go deliver the final blow! Grab the floating heart in the room to the left if you need it, then backtrack to where you found the first key. Note: When you get back to the 4-way room... You will have to push the block down and head in either left or right, then come back and push the block again to go to your destination.  Once you're at the room where you found the first key...  Take down the enemies and heal if you need to. Then head left for the final encounter with Master Skeleton. Link: Wait! Before we go in... do you have a song that won't be overridden by his? Override, huh...? I have an idea. Link: ... stare Just go fight him. =_=    Link: I'm the goddamn Energizer Bunny. >:  Link: Time to settle this once and for all! sama, battle music! Take th-- Skeletor: Can't let yo-- OVERRIDE, ********: W-W-What?! IMPOSSIBLE! Deal with it. cool This time, he's not going to run away, so use the Spin attack to stun him, and bombs to damage him. Do this a couple of times and you'll be victorious!  Link: Farewell... Master Skeleton. You were a coward, but you were... ah, I've got nothing good to say about him.  Link: Oh hey, hookshot. o:    It's a pretty sweet item. Can hook onto blocks, rocks, chests, boulders... it can do damage too. And best of all... well, watching it might be easier to explain. Head back to the compass room.  Aim at a Helmasaur's face and use the hookshot to...  TAKE OFF ITS MASK!!! Go through the door when it opens.  Kill stuff and take the top right route.  Use the hookshot on the chest!  Link: I'm SpiderLink! 8D Opening the chest reveals...  Sweet. Head back to the room with the Tektites.  Dive and swim through.  Use the hookshot on the bridge...  And then it rolls out. What? Optimus Prime, get out of my text. Dx Anyway, cross the newly formed bridge and go to the chest to find...  The Nightmare Key! Backtrack to the 4-way room.  We need to go north.  Once you take out the enemies, jump across. We're going to hit that chest up there, but rather than making a tricky jump, we're gonna make our lives easier.  From here... use the hookshot and...  SPIDERMAN ACROSS! Open dat chest.  Secure yourself some 50 rupees. Now head to the right.  Spiderman your way across and check the chest.  It's a shiny key~ Spiderman back across and head left.  Head north. Stretch out the bridge with the hookshot, then go to the chest.  50 more rupees. Sweet. Grab the floating heart if you need it, then backtrack to where you first fought Master Skeleton.  Head south two screens.  This time we're heading left. 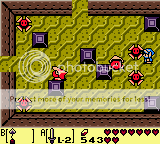 Traps and Helmasaurs galore. Use your hookshot to make your life a little easier. Head left now.  According to your map, there's treasure in this room. Use your hookshot to take off the Helmasaurs' masks and then beat them.  You'll finally get the stone beak for your efforts. Head back to the previous room and head north.  Use the hookshot to entend the bridge once you wipe out the enemies. If you have the bow, grab some arrows.  Just make a loop around and head down the bottom left route. Don't use your key yet.  Head left this time.  Use your hookshot and Spiderman your way across this Trap-filled room.  Link: Can't touch this, Traps. 8D But those Zols will. : Take the top left opening.  Hookshot across and open the chest once you beat the Helmasaurs.  Awesome. Another key. Backtrack two rooms to the right, where that bridge was.  Extend the bridge and cross it.  Use the key on the block and head left.  Link: What the? Didn't we already fight a mini-boss here?! Some dungeons like to up the ante. Fight hard, Link. Link: Battle music? |: Eh... sure. Since there's two of them, this will do... So these crabs... their weakness is their eye, and it is closed most of the time. When they open their eye, they usually shoot a fireball at you. Their other form of attack is charging at you, which you can usually tell when they stop and shake. Take them on one at a time.  Link: That's one...  Link: And there's the other! Neither of them will drop a fairy, but instead a single heart. Link: Those cheapskates. However...  A warp appears, so these guys were the real mini-boss. If you're low on hearts, don't worry. Head through the top left now that it's unlocked.  And take the stairs.  There's Goombas crawling around here, so if you need hearts, just jump on them. Need to go up?  Do what Spidey does and Hookshot on the dragon statue. Jump on the Goombas for hearts, then head left.  Wait for the Goomba to be close to under you before you drop. Once you get the heart, hookshot up onto the dragon statue and take the ladder.  Use the key on the key block, then walk all the way around so you can hookshot onto the block on the other side. Then head left.  Nightmare door already? But there's some rooms we didn't bother exploring! Well... you don't need to worry about that. Nothing important in those places anyway if you check your map. Though... if you wanna go check out those rooms, head all the way back to where you found the empty chest and take those stairs. Save and take a small break before opening the door for the boss fight.   Link: Think you can stop me? 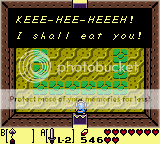 Link: I don't taste good. And then the fight starts... almost.  His tail will then burst out of the center of the room, and will proceed to spin around.  And then he'll make holes in the walls so he can attempt to eat you. Link: I need battle music! D8 ... Fine. This guy is actually pretty formidable. If you stick to the outside and hug the walls and the corners, you can barely avoid his tail when it swings around. Wait for his head to pop out on the wall, then use the hookshot when his mouth is open to draw him out. 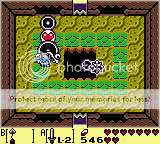 The further away you are, the more he will come out and the slower he'll slink back into his hole. You need to attack the heart to deal damage to him.  There are times where you pull him out, but it's not really him but a smaller version of him. If that happens, run away. It'll chase after you and blow up after some time. Once you dish out enough damage and defeat him...   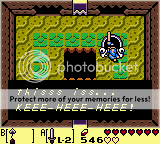 Link: What? I thought this was a normal island! o: Oh my. A not-so-subtle hint about the island.  Link: Why you.... Die!  And he blows up. And we are awarded with a Heart Container.  Woo, more health. Head through the north door.  New instrument time!!   We got the technicolor Marimba! That's our 5th Instrument! 3 more to go! And as usual, it'll play some music before we get warped out.   And once again, we're given our hint.   Ooh, foreshadowing. Link: What? There's something about the Island we don't know about? D: 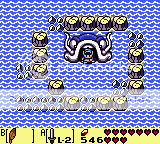 And then we find ourselves right outside of the Catfish's Maw. Link: sama, what's with all this foreshadowing? Tell me what's going on! D8 And that's all for this chapter. Next time... we'll finish the trading quest, get some more Pieces of Heart, and... uncover a secret that will forever change the course of the game. Link: Oh goddesses... don't tell me... Marin's actually a guy! Dx
|
|
|
|
|
|
|
|
|
|
|
|
|
|
|
Posted: Wed Mar 23, 2011 1:44 pm
Chapter 17: Damned If You Do, Damned If You Don'tJunpei: Hey guys, and welcome back to another chapter of... yep, you guessed it! Junpei's Believe it, or Don't. ... Huh? Oh, wrong place. -swaps places with gabriel sama- And I was wondering what the hell I was doing with a flashlight in front of the Persona 3 cast... sweatdrop Sorry, welcome back to LP! LoZ: LA DX. Last time, we kicked a** and took names inside of the Catfish's Maw. Tonight's gonna be a little different. Since the day I'm writing this up just so happens to be my birthday and all (woo~), I'm only going to do a little commentary and let Link handle most of the rest. So let's get started, shall we?  Link: I shall make this catfish swallow some bombs. Maybe that will teach Lord Jabu Jabu to not swallow me in the future! >D We're gonna take care of the rest of the trading sequence now that we have the hookshot, so jump in the water and take a swim to the bridge that leads to the lone Owl that we found a seashell nearby.   If we take a dive right near the bridge, it'll lead us to a new place.  Link: I'm gonna cut the line and be a jerk to this guy. Kekeke. Use the feather to get on the boat. Then talk to him.   Link: My sword. Now gimme all your fish or I stab you dead.  Link: ... You've been fishing without a fishing hook this whole time? Someone does NOT know the basics of fishing. Though... I guess he's better than some fishermen who use BALLS as their hooks. lol  Link: And if I don't give you the hook? neutral   Link: ... Hook, or whatever he fishes up... I think I'll take whatever he'll catch.   Link: Said pro lost his hook to a fish that got swept up by Granny during one of her sweep raids.  -20 minutes later- -one hour later- -one day later- Link: Zzzzz.... No... stupid rabbit... that's my Marin... Zzzz  Link: Huzzat? You finally caught something?   Link: Your supposed big fish is actually a necklace. Well, this is better than fish.   Link: Aww... I wanted it to become a Pikachu... oh well. -shrugs-   Link: Considering how long it took for you to catch something, your next catch is gonna be SO out there... I'd say something like a mouse you randomly fished while it was in an inner tube. I hope it's Pikachu next time. Next we're gonna go see the Mermaid, who was looking for her lost necklace. Link: I bet that fisherman hooked her, and she had to sacrifice her necklace to get away before she ended up on one of 'Junpei's Believe It... or Don't' shows.    Link: But... I found it. D8   Link: Oh, I'm picking the scale? Hmm... you strike a good deal, Fishie. I think I will make that trade.  Link: Bloop bloop bloop. Translation: Free perk! Seeing her bewbies~  She has some enormous scales.    Link: Sell it on the Market for lots of rupees, duh. 8D I'm sure there's some rabid guy out there craving proof of Mermaids and Atlantis. The mermaid will then jump around a couple of times before finally disappearing. Link: It's a ritual. She's opening a portal to make her way back to Atlantis. She saw the surface like she wanted. Make your way back to the Animal Village.  Link: I wanna see Marin-baby. I had a dream that those damn bunnies are tricking her with their cuteness before running off with her. :< We're gonna head back towards that one gap we couldn't cross that's just south of the bridge we dove under to find the fisherman.  Link: Spiderman myself across like a boss. Head north.  Now left.  Link: Oh hey, there's the Mermaid Statue. -stares- Aww... I was expecting her bust to be a little bigger, like on that Mermaid I got to ogle while plucking the scale.   Link: Whut? No! Curse you right hand for doing that! I was going to make MILLIONS off that scale. Dx  Link: o: Or I can find treasure and make millions that way. That sounds way more fun and legit.   Link: I-Is that...? Oh Goddess, it is!  Link: X-Ray Monocle GET! Time to change the title to Link's Peeping Adventure! 8D Actually...    Basically just lets you see invisible stuff and tiny text. Kinda like the Lens of Truth in the N64 games. Link: Aww... that's no fun. :<  Link: .... How the hell did I not get hit by these guys walking towards that room? I must be a ninja! ninja Okay, back to the Animal Village. We actually have some business here. No way. o:   Link: Marin-baby I missed you! <3  Link: Has my playing gotten better? <3 ... We were actually here for other business, but... whatever. I'll let him goof off for a little while, as reward for working hard the past couple of chapters. ... and that's enough. Link: D8! B-But-- You were about to use the Magnifying Lens on Marin. =_= Link: It's called the X-Ray Monocle and you have no proof! Whatever. Moving on. Link: -pouts-  Head into the house on the right. And... isn't that Granny? Link: The Wicked Witch of the West has made it to the East! Where's Dorothy? I thought I told you she wasn't a wi-- Link: -throws a bucket of water at Granny, then lights a fire on her- BURN THE WITCH! D< ... I hope Maple and Syrup steal all your items and kills you. =_=   Link: Oh goddesses, sama's getting his revenge! Dx  Link: A... Zora?  Link: I don't need to use it on you, since you're already naked. Woo, naked Zora babe! 8D   Link: Less talking, more posing baby!  Link: Stalker mouse?! ...  Link: I'll let today slide, since you came at a great moment. Take a picture of the sexy girl Zora. 8D     Link: No you won't. sama, name please! :3  "Princess Ruto Before OoT"  Since the Zora is still technically an enemy in this game... friendly or not, you can still kill them. Link: Ruto was a man in this game! It had to die! Leave the Animal Village and go to the stairs that first led you towards the Animal Village.  You can also use the hookshot to get across with those weird rocks. Okay, head over to the Teleporter thing near Mabe Village...  We're gonna get a new song, and it's a little tedious to get to it. But it's worth it, since we need it for the 7th dungeon. We're getting it now because we have time.    Yes, I'm aware you could have made the jump back when you had the Peggy Boots, but you wouldn't be able to do much here anyway without the hookshot.       Use the hookshot on the boulder to get to this sign, and when you want to get out, toss the other boulder and hookshot onto the weird rock on the other side of the pit.           Link: -Pant... pant- .... about... -heave- bloody time...  Link: I saw the stairs appear. I'm not that stupid, you dumb sign. stare  Link: It's Wart from the Super Mario series! o:   Link: Since King Koopa has taken over the Mushroom Kingdom, Wart has moved on to take over the music industry!      Link: I dunno... I could just go to the Indigo-Gos and write this badass jazz song... for FREE since I'm the Guitarist!  Link: But... I guess I can see what sort of talent you have. And then there was madness.       Link: O_________________________________e  Link: I learned "Sy"! Now I can be royally screwed over whenever witches appe-- hey, wait a minute! D8! 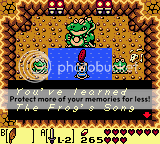    Yep, that's the actual purpose of this song. Bringing stuff back from the dead. I tried it on the zombies during my free time, and it doesn't bring them back, sadly. Nor is it an insta-kill.    Link: Lies. Lies and Slander. It only brings Witches like Bernkastel and Lambdadelta and Beatrice and Granny. Dx To the library, since there's that one book we can read with the Magnifying Glass!  Link: You'd think I'd be able to play catch by now...  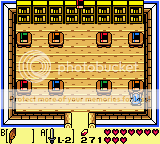 This book, remember?    Link: ... Is this the foreshadowing you, the Mysterious Voice, and the 5th Nightmare warned me about? Nope. 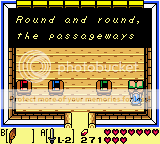  Link: ... That's just up 4 times. neutral I have heard rumors that the book is incorrect, so if it is, I will post the correct way to get through. But! That will not happen until the very end of the game. I hear there's 3 correct ways you can take.   Link: I was not aware secrets smelled... Seeing that fisherman from earlier inspired me to go fishing, so let's do so. To Bow Wow's place.  Bow Wow: -barks- Link: Hey puppy.  Link: I think it's way more fun to use the sword beams on the Cucco than to go fishing. stare Did I mention there's a Piece of Heart you can get if you catch all the fish? Link: -wearing a fishing hat and wading boots- Let's go fishing. 3nodding  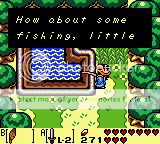   Link: It's actually cheaper to fish here than at OoT's Lake Hylia. But in TP you can fish as much as you want. And you're on a boat.     Link: So easy, even a caveman can do it.  Link: Let's start off simple and catch some small fish.   Link: Only 5? Lame. =_= And yeah, you have to pay 10 rupees again each time the hook comes back to you, whether you have a fish or not.   Link: Now that's better. 3nodding  To get this last fish, you have to cast it as shallow as you can, then wiggle it towards you a bit before letting it sink, then wiggle again for a bit before letting it sink again. Just keep doing this until it gets close enough to the fish.  Link: ABABABABABABABABABABABABABABABABABABABA He's button mashing. Apparently instead of reeling, they replaced it with an A and B button.    So once you catch all the fish, you find a Piece of Heart in the last one, and get rewarded with 20 rupees for the catch. Link: ... Spent 50 rupees, got back 55 rupees and a Piece of Heart I got to rip out of a fish's chest... nice small profit. Okay, head back to where you first found your sword on the beach.  Link: I miss them blue seas. I miss home too. But I like life here. Now if only those damn rabbits would leave my Marin alone...   Link: Oh hey, it's that cave I blew up and there was nothing inside. Now there is, since you have the Magnifying Glass.  Link: Huh... there's actually something in here...   Link: If it washed up on the beach, chances are it's mine.  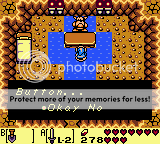 Link: I have to trade something of mine for something else of mine? What a cheap b*****d... I strongly recommend trading the shovel. The rest of the items on you are too important and too needed for future dungeons for you to trade away only to need back. And I think he won't take anything but the shovel anyway. XD  Link: My Lucky Australian Stick!   Well, you can't dig up hearts anymore, but the Boomerang is a fine item. If you can find the last stalker companion, you can use that with him and really be invincible. The combo is seriously broken. XD Anyway, since we have this, let's go to the Animal Village again via Teleport.  Link: I get to see Marin-baby again! Twice in one chapter! Goody~ 4laugh And ignoring Link's desires to be with Marin, we're gonna walk past her singing and go towards the desert, but instead of going into the desert, we're heading north of that.  Link: -pouts- I wanted to see Marin. :< Bomb the wall and head in.  Take out the Beetle, then hop across to where it was.  Link: Dis wall needs to go boom!  Link: Goddamn Bats...  Link: Oh hey, a Piece of Heart! So you need to throw a bomb over the fence to blow up the cracked boulder, then walk all the way back around.    Link: A gap? Looks like a job for Spiderlink. Climb up the stairs for the Piece of Heart.  Link: 10 down, 2 to go. Fortunately, we've seen where one of them is, and the other isn't for a good while, so no need to rush.  Link: I can jump down. 8D Okay, make your way out of the Animal Village. It's about time we do something plot related. Link: You mean everything we just did wasn't plot related?! Dx      Link: This is new... o:  Link: Goddamn Stalker Owl. Dx      Link: I can learn in the library. stare This has something to do with what myself, the Mysterious Voice, and the 5th Nightmare hinted at. Link: -wearing Indiana Jones-esque clothing, complete with whip and hat- Let's go see this shrine.   If memory serves me correctly, there should be a Secret Seashell to the north, on the right side. If not, there's definitely one around this area, though I don't remember where. But since we have the Seashell Sword, it's not like there's anymore seashells for us to find.  Link: Ooh... ruins. o: ... why this song, sama? I thought it sounded a bit like something that could play in ruins. And because I am following a certain theme. Link: ... okay.... ._.   Link: Ack! They move! Dx Fortunately, they can be defeated with the Boomerang. Aren't you glad we picked one up? Otherwise, we'd have to kill them with like... bombs, or arrows. And that's quite wasteful when you miss.     If you can move the bottom right statue on your side, there's a staircase leading down.   Link: Yay money.     Here we are... the entrance to the South Shrine... Link: sama... you're starting to make me worry a little... w-what's this secret? You don't usually play Higurashi/Umineko songs unless something big is gonna happen. .______.   Battle Battle against the Southern Shrine's guardian time! Link: MORE HIGURASHI?! D8!    I only took so much of a beating trying to get pictures. XD I blame this incredibly tiny battle space. Link: -pant- ... -pant- .... I almost... died.... =_=  Without this, we can't get to the 6th dungeon. So Link... are you ready? Link: ... -steps forward-  Link: I can see something on the wall up ahead... lemme get the powder to light those torches...  Link: It's... a painting.  Link: Let's see... it says ...         Link: ....... What?! O________________________________O I love how the message is specifically towards us, since we're the castaway. It's like the island ancients predicted we'd come here.  Link: Illusions... you mean... everything is... a lie? The world. It doesn't exist. It's merely... something created by the Wind Fish. If you wake him up... everything will disappear. The island, the inhabitants... even the girl you love, Marin. All will disappear forever. But if you don't wake him up, you will never be able to go home and create sequels, let alone beat the game. Link: ...... So that's why you wrote the title like that... Oh man...  Link: No...  Link: No... No...  Link: No... No.... NO! I REFUSE TO ACCEPT THIS! DX   Link: NOOOOOOOOOOOOOOOOOOOOOOOOOOOOOOOOOOOOOO!   Link: -falls into despairs- ... Well, while Link is despairing, I think this is a good spot to end the chapter... Next time... hmm... next time, we'll make our way to the North Shrine where we'll encounter our 6th dungeon, the Face Shrine. I don't know if Link has the strength to go on though...
|
|
|
|
|
|
|
|
|
|
|
|
|
|
|
|
|
|
Posted: Wed Apr 06, 2011 2:05 am
Chapter 18: THE WATER IS TOO FAST! AHHHHHHHHHHH! DX Hey everyone... so yeah. Last chapter, Link learned the power of friendship the truth about Marin actually being a guy about the island. I dunno if he's quite ready to face the remaining three dungeons since he's quite the indecisive punk, but we have no choice. THE SHOW MUST GO ON!  Link, you gonna be okay? Link: Yeah... like you said, the show must go on... I can't stop, not after going this far. Leave the Southern Shrine.  And Stalker Owl visits us.   Link: Yeah... I did...    Link: So in the end, we don't have any proof after all...     Link: Interesting metaphor there... I suppose sama's the only one who really knows, but he's making me figure it out on my own... Leaving it all up to chance.   Link: Trust my feelings? You know it is to be true. Link: ... This isn't some poor attempt to make me pull a Star Wars parody, is it? .... That's the last time I'm letting you watch my movies when you're on break.  Link: Cheeky b*****d... he does know the truth but he won't tell me... Go ahead and make your way out of the ruins.  Well, we're incredibly low on hearts, so uh... let's head back to the Animal Village to get some hearts from the grass. What? Another Intermission? Have I run out of jokes?! And now we're fully healed. Woo~  Ironically enough, if you beat those flying goombas with the boomerang, they drop fairies (usually). Which would have saved us a lot of time.  If you look at the screen, you can see the boulders making a path. But we're gonna ignore that for now.  Let's head up, but on the right side.  Hey look, an Owl.   Link: .... This owl really wants me dead, huh? ._. Cryptic as always, Mr. Owl. Head back to where we saw all those boulders two screens ago.  Toss boulders out of your way as you make your way up on the only side you can.  Toss the boulder, cut the grass, and toss the remaining boulders as you go left.  Bomb that bombable wall and take a peep inside.  Link: .... There was a fairy fountain here? FFFFFFFFFFFFFFFF Could have saved us some time if we came here instead of risking death getting back to the Village. But we'd have to deal with more flying goombas. Ah well. Too late now. XD Leave the cave.  We're gonna go swim and waste some time, since if we take the south route we'll actually reach the dungeon, so take the north ramp.  You can still get hurt from the bombs if they explode on land, even if you're underwater. Naruto: Believe it! Link: O_________O O____________O Link: -stabs Naruto- Take the stairs, then head right. 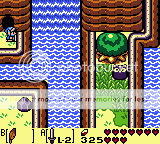 Oh would you fancy that? There's a cave here. o: 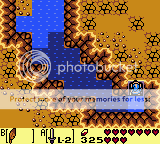 Swim north.  Jump down and take those stairs.  Hmm? Doesn't this place look a little familiar?  Oh hey, look at that. We're on the other side of that gap just beyond the Angler's Cave. 8D   And there's a house here. And... a raft? Link: Read the sign, read the sign!    ... I guess we go in.  Huh, isn't that just a recolor of the guy back at the mini-game shop in Mabe Village?  Link: Oh god, his face. D8   Link: Expensive little p***k. >8|   Link: And... I guess the raft can move now?  Link: Oh hey, it is! Just so you know, the controls are simple. I highly recommend having the feather on at least one of your buttons, as all the items on the rapids are floating. Well, except for the ones on the islands. Direction pad moves you. If you don't move, you'll be at the mercy of the current. Oh yeah, you can't use your weapons freely. Projectiles and such can't leave the raft.  Link: Sword beams are no go! D:  Link: Ahh... I'm gonna let the current take me...  Link: O_____________________________________________________O OH GOD FIGHT THE CURRENT FIGHT THE CURRENT! Dx  Link: Dx! I CAN'T FIGHT THE CURRENT! Doesn't matter which waterfall you drop down from, as the floating items will be everywhere. Of course, if you want the items that on the islands, you need to take the left waterfall. 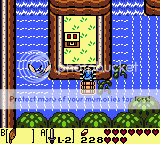 With some effort, you'll end here. Don't worry, the raft won't be left behind if you head up onto the island from the steps.  Rupees, yay. Just to the right of this island is another...  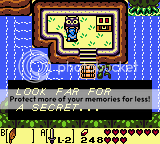 Secret in question is actually a secret seashell, which we no longer need. Speaking of which, any secret seashells found in chests are now replaced with Rupees.  And here's 20 more rupees.  Link: This area feels like an INFINITE LOOP! o: 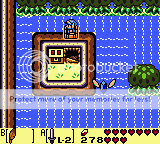 This is the area in question, with the secret shell. As you can see, there's an underground path to it.  Eventually, you'll reach the end of the rapids and drop off a waterfall. Link: Don't... ever.... let me do that again.... What he doesn't know is that I forgot to save earlier, so I made him go through this a couple more times. ;D 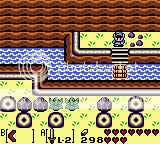 You need to ditch the raft.  And it suddenly disappears when you leave the screen and come back. Head to where you found the fairy fountain.  Now we're taking the south route.  You'll need to activate the statue on the left, then either kill it off with your boomerang, or wait in the water and watch as it falls in and drowns. Doesn't matter your method, as long as it's gone.  There be some stairs you can take.  Some fish in the water. Take them out, then head left.  You can't get to the 6th dungeon without the hookshot. Nice try, people who tried skipping dungeons.  We'll be on this side now. Take the right route.  Oh look, keyhole. Shove that key in there.     Link: And there's the 6th dungeon. Head around and take the steps up there.  Heh... time to head in.  Behold, the 6th dungeon, the Face Shrine. Link: I guess it's shaped like a face? Your face. 8D And that's all I've got for ya. Next time, we'll clear this place and watch as our bracelet powers up! See ya next time.
|
|
|
|
|
|
|
|
|
|
|
|
|
|
|
Posted: Wed Apr 06, 2011 2:08 am
Chapter 19: This Guy Fails Way Too Hard.Sup folks? Sorry for the delay. Had to deal with a bunch of stuff, but fortunately, I'm back. For a while anyway. And guess what? I have a new chapter for you.... Is what I would like to say... True story. I was giving the 6th dungeon a second test run today (since the last one I gave was back in the end of April and a lot has happened since then) and I accidentally saved over the file after beating the dungeon instead of reloading the file. Whoever heard of putting the save and load buttons on the emulator right next to each other? It's crazy stuff. Enough to get you sent to the loony bin! But I digress... So instead of more page stretching with over 100 images, I'll give you three videos from someone named SlimKirby. Nothing against him, but... I think he struggled way too much with this dungeon. Not because he didn't upgrade his sword or tunic yet, but because he didn't know what he was doing. Here's a few tips from Link about how to make this dungeon a little easier. Link: Right. So I have a couple of things to say so that you don't endure as great of a hell as SK did. 1. Those guys that fade into the ground and have hats? Yeah, those are wizrobes. There's a few tactics I use/seen used against these guys. Best way to go is to stun them with either the hookshot or (if you have it) the boomerang. Then use either a single bomb or 4 arrows to take them down while they're paralyzed. Sama tended to group them together using Hookshot Spam and then dropped a single bomb to blow them all up. ... I have seen people use something called 'Bomb Arrows'. Basically it's having both the bombs and arrows equipped and then pressing both at the same time, which will result in an arrow flying off with a bomb attached to the front. Much faster than using the hookshot/boomerang and bomb/arrow combo, but the timing takes practice and uses up both a bomb and an arrow instead of just a bomb or four arrows. Use whichever suits your fancy. 2. Later on in the dungeon, you'll encounter things that have a horse's head. Kinda reminds Sama of a chess piece. If you watch SK's video, you can see him struggle quite a bit. But we picked up something very early on about the horse heads that save a lot of time. Find a spot on the wall while throwing to see if it'll land standing up or on its side. If it's standing, take the second horse head, stand where you were when you threw the first horse head, and toss it at the same place as you threw the other. If you did it right, both will be upright and you'll be free to move on. 3. You can actually get the level 2 Power Bracelet very early in the dungeon. In the room with the orb and the Shy Guy, you need to drop a bomb on the crystal and take the top right route. Wait until the block comes up before entering the next room. That red path leads into a wall, so bomb that area and go into the next room. Kill the enemies and take the stairs that appear, then move through to the other side. Once you pass the underground area, you should see a small Tail and two Wizrobes. If you do, great. If not, I guess we took the wrong stairs or something. But if you defeat the enemies and the door opens, just head up. You should see a big statue in front of the door, a chest on the left and a pot on the right. Chest holds the level 2 Power Bracelet. 4. There's some areas in the dungeon where the floor tiles will fly up and shoot at you. The simplest method I found was to find a corner and hold your shield up. You could swing your sword each and every single time a tile comes near, but don't you thing holding a button is a lot easier on the fingers than mashing a button? 5. There's a chest later in the dungeon surrounded by pots. It won't open normally, so just chunk a pot at it to open it. Some of the doors in the dungeon respond in a similar fashion and need a pot or a statue thrown at them to open. 6. One of the chests on the right side of the room holds a Magic Potion. If you already used the one you have or you have one and are badly hurt, it'd be a good idea to pick it up. You have to get on the raised blocks and jump around to reach the stairs though. 7. For those who have played some of Zelda's other games, like OoS and OoA, as well as... LttP (I think?), you'll recognize the boss. He's... actually the easiest boss I've fought yet. Just stay on his face once he's stopped throwing crap at you and just bomb him a couple of times. Oh, he does open holes in the ground, but it's not that hard to dodge them. And now that Link has given you hints to get through, let's see SlimKirby's videos on the dungeon~ Part 1Part 2Part 3Note: SlimKirby finishes the Face Shrine halfway through the 3rd video, but you don't have to worry about what he does next. He's just going to go learn the Song of Soul from Wart over in the Sign Maze (You know, that area where we got the third song from the frog dude after the 5th dungeon?) So yeah, sorry the chapter was so short. I'll try not to goof next time. sweatdrop
|
|
|
|
|
|
|
|
|
|
|
|
|
|
|
|
|
|
Posted: Wed Apr 06, 2011 2:17 am
Chapter 20: CAUTION! INNUENDOS CONCERNING BLUE CUCCO SHOWN BELOW!Sup folks? Welcome back to another installment of LP! LoZ: LA DX. I have great news. ... I didn't goof this time with the images. 8D Better news as well. ... I have images up to chapter 23 uploaded and ready to work on. Isn't that great? Sure, it means a lot of work for me, but that also means even bigger things! What bigger things you may ask? Well, after chapter 19, we reached the end of the 6th dungeon, right? Chapter 20 covers the path to the 7th dungeon, the Eagle's Tower. Chapter 21 shows you how to clear it. Chapter 22 is more stuff and how to reach Turtle's Rock and the 23rd chapter is beating the 8th dungeon. Still not getting it? There are only 2 more chapters left of LP! LoZ: LA DX! That's right, we'll reach the end of the game by chapter 25!!!!! I know, I'm sad about it too. We've come so far, and we're almost at the very end. But we'll worry about that later. For now, I have a chapter to do. Ready Link? Link: -snoozing- Oh right, since I goofed last chapter, I gave him some freedom and called in a stunt double. So to take his place while he naps... hmm... who should I call...? -pulls out a list- Marin, I'm calling you up to the stage. Marin: I'm doing the chapter? I-I feel so honored! It's like my first step towards my dream. But wait... aren't I...?Yeah, precisely why I'm calling you to the stage. You haven't been seen in a while. That, and I wanna tease Link a little. That okay with you? Marin: Well, I dunno about the teasing, but yeah... I'll give you a hand with the chapter. Thank you so much. 3nodding No problem. Let's get started.  So we cleared the 6th dungeon. We've got business far away from here, on the west side of the island. 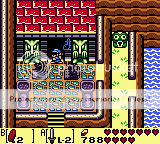 So we play a little bit of Mambo's Song to get us to where we need to go.  And we're right by Crazy Tracey. Marin: I should probably learn that song. It would make coming back from the Animal Village a lot safer... And we need to go to town, so go do so.  Marin: I see my usual spot is empty as ever, though Papahl's child is doing a good job keeping it safe. Marin: I see my usual spot is empty as ever, though Papahl's child is doing a good job keeping it safe. We can finally push this now.  Marin: I... wonder what's down here... you'll protect me if something happens, right Sama? Marin: I... wonder what's down here... you'll protect me if something happens, right Sama?I got this, Marin. Your life is safe with me.  Marin: Eek! Bones! That poor Cucco. D: Marin: Eek! Bones! That poor Cucco. D: We'll need the song from Mamu/Wart for this...  Marin: Is that... a spirit? eek Marin: Is that... a spirit? eek It's friendly.  Marin: It went inside the bones... o: Marin: It went inside the bones... o:Yeah. It did.   Marin: Is that... the flying rooster? I thought it was just a myth! Marin: Is that... the flying rooster? I thought it was just a myth!  The man. The myth. The legend. The infamous Blue c**k Cucco. His real name is the Flying Rooster, and is the final companion you get in the game. You may be wondering why he's called a 'flying rooster'. We'll you'll find out.  Marin: ... Marin: ...Something wrong, Marin? Marin: The Cucco is very friendly. o:-insert witty p***s joke here-  If you equip the Power Bracelet, you can actually fly. Pretty sweet. You're also invulnerable to attacks while doing this. Even better. Want me to sweeten the deal? If you have the boomerang, I recommend tossing that first before grabbing the blue c**k and flying. The boomerang's gonna hang under ya and you can fly around, smiting enemies in the screen. Now that is awesome. Make your way out of the grave.   Now that we're out, we need to head to the warp and go to the one near the 4th dungeon.   Marin: Oh that's right... there was one of these teleporters just outside of the Animal Village too, wasn't there? I should use that to make travel easier... but I like singing... Hmm... what a dilemma. Marin: Oh that's right... there was one of these teleporters just outside of the Animal Village too, wasn't there? I should use that to make travel easier... but I like singing... Hmm... what a dilemma.Save your voice, Marin. Especially since you'll wear it out singing so much. With Cojiro (I decided to name it this since we do in fact have a blue Cucco by the name of Cojiro in OoT), we need to head towards the mountains. So start walking.        Marin: ... Marin: ...Something wrong, Marin? You've been watching Cojiro pretty intensely. Hm? No, I--Oh, I get it... you naughty girl. You wanted to tame the blue c**k for yourself. Marin: WHAT?! NO, I... >///////<Ahahaha, you got so red. 8D I'm kidding, dear. Heading up the stairs, we'll run into a familiar face.  Oh hey, Stalker Owl. 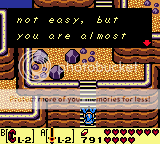   And then he goes away after talking about the Wind Fish. Anyway, toss the boulder aside and go into the cave.  You can fly around these guys, so do so.  I know how to get that heart, and we will get it. Two chapters from now.  We could have actually gotten this chest after the 5th dungeon using the hookshot...  But flying is the only real way to travel nowadays.  50 rupees is pretty nice. Fly around the pit and head right, then take the exit on the right side of the cave.  The Eagle's Tower needs a key, so let's go get that.    Marin: This spot is all dry... Marin: This spot is all dry...We drained it to reach the 4th dungeon. Marin: Oh wow... sounds like you two had a lot of adventuring done...Yeah.     Go into the cave.   There are two ways to get through. You can either be lazy and use the Cucco to fly around the pits to head north...  Or be boring and push all the boulders and hookshot across.  Just so you know, you really do need to have the Flying Cucco with you, or else you can't clear this area. At all.  Ride that Blue c**k to the other side.  There's our last key. Marin: So that's what they look like... o: Bird key get. Bird bird bird is the word. Make your way out of the cave.  Go up to the house.  If we have a Mario, we must have a Luigi. And here he is. Marin: As the... c**k Man?Yes, as the... damn, Marin. That was pretty bold of you. This is the Cucco Man, who looks like Luigi.      He seems to be rather fond of your bouncing c**k. And by that, I mean the Flying Rooster. Marin: *giggles*Head on out and go back down the stairs.      Head into the cave.  Yeah, we've been in here before.    We turned back here a good while back, since this leads up to the Eagle's Tower.   Cryptic as usual, Mr. Owl. Marin: They are the Guardians of Secrets, after all.Huh... so they're replaced with the Stones of Truth in later games. Makes sense. Less cryptic, and more fun to goof with.  Up we go.  Beat the keese or fly around, then move right.   Take the exit.  We will see that bottom portion soon enough. Head left, but not down the stairs.  Into the cave we go. Marin: You sure go through caves a lot.We do. I'd make a sex joke involving the blue cucco and caves, but that would go over your head.    Take the stairs up.  Stun the Beetles, then fly over them. Stay on the risen area, as you can't cross the pit since it continues onto the next screen.  Hookshot across, then jump down onto the safe ground before heading out.  We're now down here. The bombable wall houses...  Marin: Is that a Great Fairy? This is my first time seeing one. o: Marin: Is that a Great Fairy? This is my first time seeing one. o: Once you get healed, head to the other opening.  North you go.  Take the stairs.  Go left.  Head south through the exit.  And we're now on the very top of the mountain. Marin: ....What's on your mind this time, Marin? You've been watching that c**k again. Marin: I was reminded of the time I got to walk around with Link a good while back.Oh, the infamous date chapter. So, since Link's still sleeping, talk to me. How do you feel about Link? Marin: Um... ahahahaha... >//////>;;Your response is more than enough answer, Marin.  And here's the Eagle's Tower. Marin: It's... so big...... That's what she said. Toss the boulder aside and put the key into the keyhole.        Marin: Did you really need all those images of the tower turning? Marin: Did you really need all those images of the tower turning?Um... yes. sweatdrop  And there's the entrance into the tower. Like all previous companions, the cucco cannot follow you into dungeons. Head on in.  And here's the 7th Dungeon, the Eagle's Tower. Good stopping point for us, as we are just one image shy of 100 images. That's all we have this chapter. Thanks again to our guest star, Marin, for stepping in while Link was resting. Marin: Thanks again for having me. <3Catch us next time as we clear the tower and get a stronger and sturdier shield. Until then, see ya~
|
|
|
|
|
|
|
|
|
|
|
|
|
|
|
Posted: Wed Apr 06, 2011 2:19 am
Chapter 21: Bringing Down the Tower of the GodsHey everyone~ Welcome back to the ever-popular LP! LoZ: LA DX! Last time, we resurrected a blue c**k and grabbed the Bird Key to enter the target of our 7th dungeon, the Eagle's Tower. Link's back with me today. Link, mah boy. How are you feeling? Link: Headache is killing me... I recall playing a drinking game with you on the number of times we could get away with rooster joke, and then after that... it's a blur. Anyway, sorry I wasn't able to help out last chapter. Don't worry about it. I had one of your girlfriends take over while you were out cold. Link: Wait, what? Marin was here, and you couldn't bother waking me up? D: You had sleeping pills in your water. Frankly, I'm surprised you're even awake right now. Link: ... WHAT. Anyway, let's get started. 8D  Here we are in the Eagle's Tower. This place is different from all the other dungeons we've faced so far. Why? There are four floors. But we'll cut it down to size in a jiffy. Head right to start. 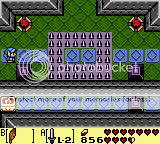 Dodge the traps and the spikes like a boss, and keep heading right.  Defeat all enemies in the room to be rewarded with a key, which you will use on the door.  Scale those stairs to reach the second floor.  We can't reach that chest yet, which is a shame. Nor can we do anything about the crystal. Another thing to note about this dungeon: The pits you see around the tower will bring you down to the floor below you, excluding the ones on the first floor. Keep that in mind, as we'll have to use them for later. Head north, as that's the only way you can go.  There's the two sliding blocks on the left to bar you from passing through, and a big metal ball that will be your best friend in this dungeon. I recommend leaving the ball right by the sliding blocks, then go and pull the lever as far back as possible to open the way. Let go, grab the metal ball, and head left through the blocks.  One more thing to note about the dungeon: There's gonna be pillars like the one you see here that need to be destroyed. All your weapons are ineffective, but that's why we have our friend Mr. Metal Ball with us.  Throwing the metal ball at the pillar will cause it to break and collapse. One pillar down, three more to go. If the metal ball happens to fall down into a pit, just head back to where you first found it and it'll be there.  Toss the metal ball over the raised platforms for now. We'll swing around and pick it up shortly. Head north for now.  Oh look, it's the chess pieces again. Take out the Anti-Faerie and start tossing them around.  Once both are upright, a chest will appear.  Yay, dungeon map~  As you can see, four floors. You can't even access the fourth floor normally. Which is why we're breaking the pillars. Head back south into the previous room.  Do a jump over the pit and land on the bottom-right portion of the screen, then head south.  Oh look, another pillar. Jump over the pit, grab the floating heart if needed, then head up the left side of the room and jump that pit.  Grab the metal ball and head south.  Toss it across.  Then jump over. Take the metal ball and introduce it to the pillar. Forcefully.  Down she goes. Two down, two more to go. Leave the ball behind and head south.  Hit the crystal, and then head back up.  Take the metal ball up the left side and head north.  Now that the platforms are down, you can push the block up. Take the ball with you as you head left.  Head north and jump the spikes.  Heh. You thought we were done with the card enemies from the first dungeon? Think again. As usual, you have to have them show the same suit when you hit them. If they're all hearts, they'll drop hearts.  Once they're all gone, a chest appears.  It's the ever-faithful HRC. Take the metal ball with you and head down the bottom-left opening.  Lob the metal ball across the fence.  Once it's across, you'll have to come back for it later. So head back north.  Take the stairs.  Defeat the enemies if you desire, then head left.  First thing you'll probably notice in this room is the new enemy you have never seen before. Kinda looks like... Kirby, right? This guy is the Anti-Kirby, actually. Spawned in this meta-universe by the forces of Nintendo.  Even comes with sucking powers. And damn, is it strong. Head back to the previous room and head down.  If you're low on hearts, grab the floating heart. Then head back up.  Take the top left route this time.  Anti-Kirby can only be damaged with explosives. But he doesn't sit still long enough for you to lob a bomb at him. So we'll have to do things a little differently. I believe I introduced the bomb arrow concept a few chapters ago, where you have bombs on one button and arrows on the other. Press them both at the same time and you will fire bomb arrows.  Bomb that suckah.  Boom~ Once the Anti-Kirby is no more, continue down the path.   Heading south again will put you to the room left of the entrance, and there's nothing special down there anyway except for a Wizrobe.  Whether it's for seeing the entire map or just for kicks, don't spend too much time here.  Take the stairs.  Take out the Sparks and head right, first.  As you can see, two bombable walls and another pillar. Backtrack to the previous room.  Head south.  The boss is a pushover. The real threats are the pits and the fireballs that come shooting out of the fireplaces.  Once you beat this guy...  You'll get a key. Heh, looks like the dungeons are stepping up their game by bringing in multiple mid-bosses. This isn't the one that will get you the warp, however. Head right once the key is yours.  Kill the cards, don't kill them. Up to you.  A chest spawns if you do happen to beat them, but we can't reach it for now. Head right again.  We're now back in the crystal room. We need to get on top of those raised platforms, so hit the crystal once. Then use either a bomb or the boomerang to hit the crystal and make sure you are on top of the platforms when it hits so you'd be on the raised parts.  Once you are, head to the right.  I suppose you can use the key and save yourself a lot of backtracking, but it's up to you. Head north once the Anti-Faerie is gone.  Oh, you can now get to the treasure chest.  You got... a Mirror Shield!    I don't use the Mirror Shield much, but I am still rather fond of it. It will stop most attacks, and even reflect a few. Yes, that includes the beams from the Beamos. Anyway, fall down the pit now.   And you will land on the raised portion. Head as far north as you can go.   Open the chest.  Small key get~ Jump down and head left. Watch out for the enemies of course.  Take the stairs.  We're now back in this room.  I headed south once more to grab the floating heart. You don't have to, if you are at full hearts.   Push the block and head through.  Go north.  Take the stairs.  Take the upper left route.  Take down the Anti-Kirby and follow the path.   Take the stairs. By the way, the chest holds a Stone Beak. We'll grab it shortly.  Defeat the Sparks. Then head south.  Head to the right.  Beat the cards.  Chest appears. Head left.  Now north.  Go through the one-way door.  Find a corner and pull out your new shield. Then just hold it.  The tiles will rise and fly at you. Once they're all gone, the door opens. Go through it.  Oh hey, you're back with the metal ball. And look, there's a pillar. You know what to do.  Bring that pillar down.  Poke the walls, and you'll find a place you can bomb. So blow it up before heading through.  We're now in sight of the last pillar. I suggest blowing up the other bombed wall. Head back to the previous room to recollect your metal ball.  First push that block into the pit.  Then toss the ball across and jump over before going into the next room.  Push the block out of the way, then head south.  Head south again.  You need to part ways with the metal ball again for a while, so toss it over the fence.  Once it's over, head all the way back to where you found the compass, which is north of the pillar you just smashed.  Take the stairs.  Take the upper left route.  Get the Anti-Kirby out of your way.  Keep going.  Take the stairs.  Kill the Sparks with the boomerang and head south.  Head right.  Defeat all the cards again to make the chest appear, then head right.  Grab the metal ball and head back to the previous room.  Toss the ball across the fence, and make sure it doesn't fall into the pit. Then head left.  Go north.  Through the one-way door.  Bust out your shield and find a corner. Once the door's open, head through.  Go through the opening in the south.  Keep going.  Hookshot across. I can't recall what was in the chest, but I left it alone for now. Grab the metal ball and head north.  Smash the final pillar with the ball.  Down it goes. That's all four pillars.  A cutscene occurs, where the tower, having lost its supports (the pillars), drops down an entire floor.  Now the fourth floor has melded with the third. Look at your map for a moment.  The fourth floor is now gone. It's part of the third floor now. Head south.  Check inside the chest.  Bombs? Yay. Drop down the pit.  We're now back at the entrance. Head left.  Now north.  Take the stairs.  Head through the one-way door.  You can either wait for all the tiles to go, or wait for an opportunity to fall into the pits on the far left side.  Now that we're up on this side, head as far north as you can go. 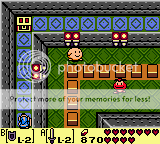 Open the chest. Yay money~ Backtrack to the stairs. Either stay on the raised portion, or jump down to do so.   Take them up.  Go through the one-way door.  Again, protect yourself from the flying tiles.  You need to fall down on one of the pits in the middle. Either the one I fell in, or the ones above and below that pit.  You'll land on the raised platforms. Follow it south, but don't jump off.  Head for that chest.  Stone beak acquired. Jump down and take the stairs.  Take out the Sparks if you need health and head south.  Head right. We need to head for the crystal room.   Take the stairs. I don't recall if you need to hit the crystal first or not.  If the platforms are raised, go back downstairs and hit the crystal. If not, clear the enemies and head north.  Take the route on the right.    This is the real mid-boss. He's a really big pushover. Even so, a mid-boss is a mid-boss, and will have a fight song. Ready Link? Link: I'm tired of this dungeon. Let's just hurry up and finish this place. Couldn't agree with you more.  This guy is pretty pathetic, even for a enemy. He'll play his flute and summon his minions: little bats. If you kill all of them in one round, the fight's over and you win.   He will say this, regardless of if you kill them in one round or not. Link: I don't think he realizes they're all dead yet.   This is sadly not the last we see of him. Anyway, head north.  Kill off the Sparks, then push the two blocks together.  A chest will appear. Since we heard a chime, it's probably a key. Maybe even the boss key.  Yep, there's the Nightmare's Key. Head south.  Now left.  Left some more.  I don't recall if I hit the crystal or not in the Nightmare Key room, so if the platforms on the left are raised, go back and hit the switch to lower them. If they're down, head left.  Head north, though it really doesn't matter.  You're blocked in. Since you can't lower the crystal to get through since the room before had platforms as well, just backtrack to the area outside of the boss room.  Save, rest a little, then go on through.  ... You thought we were at the boss, didn't you? Hahaha, the game got you. Head north.  Dodge the traps and the beamos and head right.  I hated this puzzle quite a bit. You need to get both of the chess pieces upright, while dodging a beamos that fires beams at you.  Once they're both up, a chest will appear.  If you're in need of a resurrection potion in case you die, this is where you can get it for free. Head back to the previous room.  If you're low on hearts like I am, I suggest backtracking to the Nightmare Key room.  Kill the Sparks with the boomerang to get some fairies to heal up. Then head back to where you opened the boss door.  Of course, if you needed hearts, you could always jump on the Goombas. Head north.  Take the stairs on the left, and squash Goombas as needed.  Hookshot the block to get across, then head south.  Head right.  Save, take a small break if needed, then head up the stairs.  We're now outside. Head up the ladder.  Oh look, it's the mid-boss from before.    Link: He says he's gonna get revenge. Too bad for him we don't lose to wimps.  And then he summons an eagle to fight us with. Link: Boss music time? Let's do it.  The boss itself is not difficult, especially if you figure out the pattern early on. He'll fly around out of reach, but sometimes he'll try to fly into you.  Swat him with your sword and he'll fly up and away.  Once he starts taking some damage, he may pause around here before unleashing a flurry of sharp feathers at you, and a strong gust of wind. Just hold your shield out and move towards the boss so you don't get knocked off the ledge.  He'll also start divebombing you, talons first, when he's near death. A swing or two after that will finish him off.     He sure loves talking, doesn't he?  Link: And then he blows up. What's with all of them blowing up once we beat them? Are the enemies terrorists or something? The world may never know, Link.  Grab the Heart Container to add another heart to your lineup of health, then head down the ladder. Or jump down.  Go through the doorway.  Jump down towards the boxed off area on the right.  I paused to show you that we still had a few keys, since I didn't use them on the two blocks I pointed out (one to the right of the crystal room on the 2nd floor, the other in that room with the beamos on the third floor with the raised platforms). There's also a room I didn't visit, but there's nothing special there.  Head through the doorway to claim your prize.  There it is. The technicolor organ.   I'm rather fond of this one too.   As usual, we have some notes played before the light starts forming around us as we get warped out of the dungeon.   This message is unusually cryptic, but that's fine. You guys have me after all to guide you to the last dungeon.  And we're back outside. That's all for today. Next time, we'll grab another piece of heart, two more photos, and head off towards the last dungeon, the Turtle Rock. Until then, see ya~
|
|
|
|
|
|
|
|
|
|
|
|
|
|
|
|
|
|
Posted: Wed Apr 06, 2011 2:21 am
Chapter 22: Marinblocked by the Village Idiot Once More.Hey everyone, and welcome back to LP! LoZ: LA DX! Last time, we cleared the Eagle's Tower and picked up a nifty new shield. Today, we're gonna go grab another heart piece, two new pictures, and then head off towards our last dungeon, the Turtle's Rock.  We just finished this place, so go ahead and jump off the ledge in front of you. 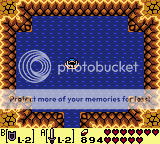 If you jump from the right ledge, you'll land here. If not, well... just warp with the song and head towards the Animal Village, since we have business there.    We need to find our buddy the fisherman that hangs under the bridge, so go to him.      Once you reach the bridge, dive.  You'll see our friend Stalker Mouse swimming about. Link: I guess he has a pair of Flippers too. Jump onto the boat and talk to the fisherman.     He'll try to make up his last catch by catching you a big fish.  Link: Looks like he hooked Stalker Mouse. o: The fisherman is oblivious, of course.   And we reel in the catch of the day.  Link: Apparently Stalker Mouse is one of the bigger catches he's had...   Link: What, you want a picture? Sure, I'll pose~  Link: ... Whoops. sweatdrop   It's amazing how Stalker Mouse can stay up there in the corner. Link: Maybe he's part Spider? Who knows. Anyway, here's the new picture we get.  "That's What You Get For Not Catching a Fish!"  And you get sent back out. Head towards the entrance of the 4th dungeon.  We need to head back up the mountain, so let's get going. Namely, to the spot above the 4th dungeon.         Skip a few shots inside the cave since we've gone through it so much...  We'll finally get that piece of heart today.     Now that we're here... head right.  Up the stairs.   Head left.  Head inside the Cucco house momentarily.  Link: Seems like Luigi stole our Flying Rooster. Head back outside.  Head to the right.   Toss the boulders out of the way and watch out for the crab under one of them. Once they're out of your way, keep heading right.  Defeat the crab, then wander back and forth on the bridge to trigger another scene.  Link: Oh god, Stalker Mouse.    Link: Horrible title. Sama, if you would do the honors?  Indeed. Back up.   And he trips... 8D  And falls.  "Who Put That Banana Peel Up There?!" Now that that's done, let's head back to the Cucco House.    Head left from here.  Hookshot across and keep going left.  Link: Huh? Isn't that...?     Link: Don't worry, Marin! I'll save you! Hookshot across, and when you swing past, you'll bring Marin with you.   Link: No problem, Marin. <3  Link: Well, I best get going...  Link: Hm?   Is this the confession we've been waiting for? o:  Link: ... And leave it to the Village Idiot to interrupt things when the mood was good... AGAIN. stare   Link: ... alright. ._.  Link: Wait!  Link: ... It's nothing. Stay safe, Marin. And then she walks off. Too bad Link couldn't confess right there.  And then Stalker Owl shows up.          Link: So Marin's song is what wakes up the Wind Fish, and... the last dungeon is this way. Alright, looks like we're almost at the end of our journey! Once Stalker Owl leaves, head to the left.  Link: Huh... a lone plant growing on the cold mountains... let's cut it.  Link: Oh hey, a cavern!  Before you go all the way left, I recommend poking the walls on the bottom. One of them you can bomb.  Here we go!  Dodge skulls and head right. 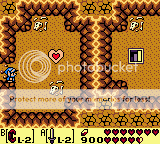 And there's that piece of heart!  One more to go~ And don't worry, we'll get it next chapter, as it's located within the last dungeon. Backtrack to where you bombed that wall.  Go left now.  Jump down and take the stairs.   Hookshot across and head left.  Take the exit.  Caution! Caution! Falling boulders! Climb that mountain!  Take those stairs and head right! 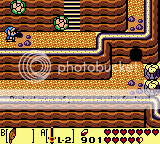 Keep climbing!  Head left.  Oh hey, a chest.  Yay money. Head left. 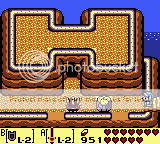 Drop down.  Bomb that wall and head on inside.  Head north.  This is why I recommend clearing the 7th dungeon, the Eagle's Tower, before forcing your way here. You will have a very difficult time forcing your way past that pillar of fire without the Mirror Shield. It's doable, but you will lose that bottle of yours doing so.  The Mirror Shield pushes the flames away, so once you get close enough, head left to avoid the flames, then take the stairs.  Head left.  You can already see a bit of the last dungeon.  Beat the Like Like and the Leevers and head left.  If memory serves, you've seen this area before. A long, long time ago. It's just a few screens north of Mr. Write's house. Keep going left.  Defeat the birds.  The Ballad of the Wind Fish will not wake up the Turtle. You need to play the third song.  The stone will break off the Turtle, and it will awaken.   Yes, you will have one small mid-boss battle in order to get in...  Fortunately, he's not too great of a threat and you can finish him off very quickly. Once he's defeated, his head will blow up.  Often times, a rupee will drop when you beat him. And there's the entrance. Head on in.  And here we are... at the last dungeon of the game, Turtle Rock. That's all for now. Come back next time to see us clear this complex dungeon and grab a very, very awesome item. Until then, see ya.
|
|
|
|
|
|
|
|
|
|
|
|
|
|
|
|
|
|