✦ The Paths of the Dark and the Light ✦
Link to Event Thread
Special Adventure for The Dark and the Light - 1 Year Anniversary Event.
Date Open: April 1, 2013
Date Closed: May 31, 2013
You MUST be finished with the entire Adventure by the end date.
~~~~~
Solo Or Group Adventure
May be of any Path or Race.
You may have no more than 3 people doing this adventure as a group. At any time, should you wish to quit, then go to Quit. But if you quit, then you may not do this adventure again.
Rating:

Reward: Depends upon the path you choose. But you will receive 1 Dragon Orb and 1 Ysali Dragon's Tear. There are opportunities for getting ingredients as well.
Choose which path you wish to travel, Light, Dark, or In Between.
Light Side: Anodyne:
For whatever reason, you are on Eowyn. Perhaps you have come looking for Kiandri or Firani Dragons to kill. Or maybe you have come to steal Drakein eggs or possibly just exploring this dry land.
As you wander the desert you spot a strange cave entrance in the side of a sand dune. When you go to investigate you can see that after the tunnel goes down somewhat there is a wooden door.
If you knock on the door continue reading, otherwise leave and do not continue this adventure.
A tall and majestic figure opens the door. She doesn’t look like any Magescian you’ve seen, her golden skin is lightly scaled and her crimson hair piled on top of her head revealing three strange crystals projecting from where her ears should be. A smile reveals fangs and the woman waves her draconic looking hand to invite you inside.
"Ah! Just as I was about to leave a visitor arrives! How delightful." you sense no menace from her as she invites you in.
"Please, come in, come in! Would you like anything to drink? I know how the desert can make one so very thirsty. Unfortunately, I cannot offer more than tea or water at the moment." she says as she steps back and allows you to enter.
The room you enter is clean and rather light for a cave. The floor, walls, and ceiling are all made up of stone, though plush carpets cover the floor. There are some woven tapestries depicting scenes of flying dragons and Drakein upon the walls. There is only one chair in the corner; the rest of the furniture appears to be made up of low tables and large cushions. Perhaps the majority of her visitors aren’t Magescian at all? She waves at you to take a seat somewhere.
"Oh, how rude of me. I almost forgot to introduce myself. I am Anodyne, one of the Drakeinian leaders." she says with a smile before continuing on.
"I know this may sound rather presumptuous of me; but would you care to do me a favor? I was just about to leave and gather some ingredients that I need for an enchantment; but I do have some rather urgent business keeping me here that I would rather not leave if at all possible. Could I rely upon you to go gather them for me?” she asks.
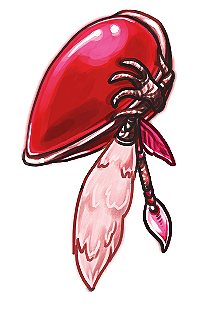
"I would be willing to give you a Dragon Orb as well as a Ysali Dragon's Tear in return for this favor." she waves her hand at a glowing orb and tear shaped gem on the single self in the room. You recognize the orb as an Aedaun Dragon Soul Orb, though you have never seen a real one before, there are plenty of pictures of them.
Should you accept, go to "Task 1".
Should you refuse, go to "Quit".
Task 1:
Task 2:
Task 3:
Failure:
Success:
Final:
As you wander the desert you spot a strange cave entrance in the side of a sand dune. When you go to investigate you can see that after the tunnel goes down somewhat there is a wooden door.
If you knock on the door continue reading, otherwise leave and do not continue this adventure.
A tall and majestic figure opens the door. She doesn’t look like any Magescian you’ve seen, her golden skin is lightly scaled and her crimson hair piled on top of her head revealing three strange crystals projecting from where her ears should be. A smile reveals fangs and the woman waves her draconic looking hand to invite you inside.
"Ah! Just as I was about to leave a visitor arrives! How delightful." you sense no menace from her as she invites you in.
"Please, come in, come in! Would you like anything to drink? I know how the desert can make one so very thirsty. Unfortunately, I cannot offer more than tea or water at the moment." she says as she steps back and allows you to enter.
The room you enter is clean and rather light for a cave. The floor, walls, and ceiling are all made up of stone, though plush carpets cover the floor. There are some woven tapestries depicting scenes of flying dragons and Drakein upon the walls. There is only one chair in the corner; the rest of the furniture appears to be made up of low tables and large cushions. Perhaps the majority of her visitors aren’t Magescian at all? She waves at you to take a seat somewhere.
"Oh, how rude of me. I almost forgot to introduce myself. I am Anodyne, one of the Drakeinian leaders." she says with a smile before continuing on.
"I know this may sound rather presumptuous of me; but would you care to do me a favor? I was just about to leave and gather some ingredients that I need for an enchantment; but I do have some rather urgent business keeping me here that I would rather not leave if at all possible. Could I rely upon you to go gather them for me?” she asks.
"I would be willing to give you a Dragon Orb as well as a Ysali Dragon's Tear in return for this favor." she waves her hand at a glowing orb and tear shaped gem on the single self in the room. You recognize the orb as an Aedaun Dragon Soul Orb, though you have never seen a real one before, there are plenty of pictures of them.
Should you accept, go to "Task 1".
Should you refuse, go to "Quit".
Task 1:
She thanks you for helping her, claiming it will be a huge help. Her first task for you to do is to go to Serenia and gather some of the golden sand from Lake Amafel's banks.

This will take IC time to get there and back. Feel free to RP whatever adventures or misadventures you have along the way.
Roll 1d100.
1-20: Failure! You get the sand but as you go back to Anodyne, disaster strikes and the container is broken and the sand blows away in the wind. Return to her with nothing. Go to Failure.
21-99: Success! You get the sand and return to Anodyne. You may choose to give the sand to her or say you failed (if you do this you keep the sand). Go to Success if you give it to her. Go to Failure if you keep it.
100: You get 2 of the item! You may choose to keep them both or give one to Anodyne. Go to Success if you give one to her. Go to Failure if you keep both.
Task 2:
Her next task is for you to go to Lake Tyluafel and bring back some of its healing waters.

This will take IC time to get there and back. Feel free to RP whatever adventures or misadventures you have along the way.
Roll 1d100.
1-20: Failure! You get the water but as you go back to Anodyne, disaster strikes and the container is broken and the water drains away into the ground. Go to Failure.
21-99: Success! You get the water and return to Anodyne. You may choose to give the water to her or say you failed (if you do this you keep the water). Go to Success if you give it to her. Go to Failure if you keep it.
100: You get 2 of the item! You may choose to keep them both or give one to Anodyne. Go to Success if you give one to her. Go to Failure if you keep both.
Task 3:
Her last and final task is for you to go back to Serenia once again and go look along Lake Tyluafel‘s eastern bank in the early morning and look for a softly glowing herb called the Gold Petalia.

This will take IC time to get there and back. Feel free to RP whatever adventures or misadventures you have along the way.
Rol 1d100.
1-20: Failure! You search but can’t find the herb. Go to Failure.
21-99: Success. You find the herb and return to Anodyne. You may choose to give the plant to her or say you failed (if you do this you keep the light herb). Go to Success if you give it to her. Go to Failure if you keep it.
100: You get 2 of the item! You may choose to keep them both or give one to Anodyne. Go to Success if you give one to her. Go to Failure if you keep both.
Failure:
After Task 1 and/or 2: Anodyne sighs, perhaps she should have just gone herself instead. She gives you another chance. She is so very disappointed, you looked like you could handle such a simple task; but perhaps you were just unlucky.
If you failed Task 1, go to Task 2. If you failed Task 2, go to Task 3.
After Task 3: Anodyne just shakes her head with disappointment. She should have just gone herself. Go to Final.
If you failed Task 1, go to Task 2. If you failed Task 2, go to Task 3.
After Task 3: Anodyne just shakes her head with disappointment. She should have just gone herself. Go to Final.
Success:
She praises you and thanks you for your hard work, her face reveals that she is thankful for you taking on this task for her. You’ve allowed her to focus on whatever important chore she needed to do. The more you succeed, the happier she gets.
If you give her two of one item, she thanks you profusely but hands you back one saying she doesn't need both.
Go to the next Task or Final if you have just finished Task 3.
If you give her two of one item, she thanks you profusely but hands you back one saying she doesn't need both.
Go to the next Task or Final if you have just finished Task 3.
Final:
If you gave Anodyne all 3 of the items, then you receive the Aedaun Orb and Ysali Dragon's Tear. If she only receives 2 out of the 3 items then you receive an Aiskala Orb instead. If she receives only one item then you only get a Firani Orb. If she gets nothing she sends you away with nothing but her disappointment and a a declaration that you need to try harder not to fail.
Dark Side: Rhazes:
For whatever reason, you are on Eowyn. Perhaps you have come looking for Kiandri or Firani Dragons to kill, perhaps you have come to steal Drakein eggs, or maybe you are just exploring this dry land.
As you wander the desert you spot a strange cave entrance in the side of a sand dune. When you go to investigate you can see that after the tunnel goes down somewhat there is a stone door engraved with Drakein figures.
If you knock on the door continue reading, otherwise leave and do not continue this adventure.
You hear a grumbling and muttering form the other side as whoever lives here comes to open the door.
Before you stands a strange reptilian looking man. He looks more dragon than man, and behind his back float two ethereal skulls.
If you have a bonded with you, he attacks and you must flee before his power! He does not condone Magescians who enslave his people. You must quit or choose a different path. If there are no Bonded with you, then continue reading.
"What d'ya want?" he growls grumpily,
“I’ve got things to do and no time for foolish games." he pauses and thinks for a moment. "Actually, on second thought...I do have a use for you."
He grins malevolently and reaches out to grab your arm and drag you into his lair. His room has spikes hanging from the ceiling, fur rugs cover his floors and trophies line his walls. There are no chairs, only large cushions and low tables in the room.
"I need three ingredients for an enchantment I'm creating. And you, fool, will get them for me! I haven't the time for these pitiful errands...there is a situation that requires my attention to be here. If you wish to leave here alive you will do as I say; otherwise, I'll have my minions hunt you down and you don't want to know what they'll do." he says as he gestures to the floating skulls behind him.
"Just so you know, I am not completely heartless. If you complete the tasks I have in store for you, I'll let you live and give you a Dragon Orb...possibly even a Dragon's Tear as well for your efforts." he states as he smirks cruelly at you.
Go to Task 1.
Task 1:
Task 2:
Task 3:
Failure:
Success:
Final:
As you wander the desert you spot a strange cave entrance in the side of a sand dune. When you go to investigate you can see that after the tunnel goes down somewhat there is a stone door engraved with Drakein figures.
If you knock on the door continue reading, otherwise leave and do not continue this adventure.
You hear a grumbling and muttering form the other side as whoever lives here comes to open the door.
Before you stands a strange reptilian looking man. He looks more dragon than man, and behind his back float two ethereal skulls.
If you have a bonded with you, he attacks and you must flee before his power! He does not condone Magescians who enslave his people. You must quit or choose a different path. If there are no Bonded with you, then continue reading.
"What d'ya want?" he growls grumpily,
“I’ve got things to do and no time for foolish games." he pauses and thinks for a moment. "Actually, on second thought...I do have a use for you."
He grins malevolently and reaches out to grab your arm and drag you into his lair. His room has spikes hanging from the ceiling, fur rugs cover his floors and trophies line his walls. There are no chairs, only large cushions and low tables in the room.
"I need three ingredients for an enchantment I'm creating. And you, fool, will get them for me! I haven't the time for these pitiful errands...there is a situation that requires my attention to be here. If you wish to leave here alive you will do as I say; otherwise, I'll have my minions hunt you down and you don't want to know what they'll do." he says as he gestures to the floating skulls behind him.
"Just so you know, I am not completely heartless. If you complete the tasks I have in store for you, I'll let you live and give you a Dragon Orb...possibly even a Dragon's Tear as well for your efforts." he states as he smirks cruelly at you.
Go to Task 1.
Task 1:
He demands you bring back some Dark Sand from around the Twilight Pillar.

This will take IC time to get there and back. Feel free to RP whatever adventures or misadventures you have along the way.
Roll 1d100.
1-20: Failure! You get the sand but as you go back to Rhazes, disaster strikes and the container is broken and the sand blows away in the wind. Go to Failure.
21-99: Success! You get the sand and return to Rhazes. You may choose to give the sand to him or say you failed (if you do this you keep the sand). Go to Success if you give it to him. Go to Failure if you keep it.
100: You get 2 of the item! You may choose to keep them both or give one to Rhazes. Go to Success if you give one to him. Go to Failure if you keep both.
Task 2:
He laughs and sends you all the way back to Soudul with the task of going to Lake Koralifel and bring back some of its dark waters.

This will take IC time to get there and back. Feel free to RP whatever adventures or misadventures you have along the way.
Roll 1d100.
1-20: Failure! You get the water but as you go back to Rhazes, disaster strikes and the container is broken and the water drains away into the ground. Go to Failure.
21-99: Success! You get the water and return to Rhazes. You may choose to give the water to him or say you failed (if you do this you keep the water). Go to Success if you give it to him. Go to Failure if you keep it.
100: You get 2 of the item! You may choose to keep them both or give one to Rhazes. Go to Success if you give one to him. Go to Failure if you keep both.
Task 3:
For his last task he tells you to go out into the desert and find the strange construction site that the Orderites have been working at. He tells you that near the site a very special herb grows that he wants you to pick. The herb is small, dark green, and has very spiky stem with spiky leaves at it's top. It's called Thistlethorn.

This will take IC time to get there and back. Feel free to RP whatever adventures or misadventures you have along the way.
Rol 1d100.
1-20: Failure! You search but can’t find the herb. Go to Failure.
21-99: Success! You find the herb and return to Rhazes. You may choose to give the plant to him or say you failed (if you do this you keep the spiky herb). Go to Success if you give it to him. Go to Failure if you keep it.
100: You get 2 of the item! You may choose to keep them both or give one to Rhazes. Go to Success if you give one to him. Go to Failure if you keep both.
Failure:
After Task 1 and 2: Rhazes grumbles and growls about idiots and sending a Magescian/Drakein to do a Drakeinians work, he should have just gone himself instead. But he will give you another chance. How disappointing, you looked like you could handle such a simple task.
If you failed Task 1, go to Task 2. If you failed Task 2, go to Task 3.
After Task 3: Rhazes throws his hands up in disgust, he should have just gone himself. Go to Final.
If you failed Task 1, go to Task 2. If you failed Task 2, go to Task 3.
After Task 3: Rhazes throws his hands up in disgust, he should have just gone himself. Go to Final.
Success:
Rhazes smiles, so he was right in having you do this. Apparently not all Magescians are worthless meat bags. Now he has his stuff and he didn’t have to do anything! Go to the next Task or Final if you have just finished Task 3.
Final:
If Rhazes received all 3 you get the Diabli Orb and a Ysali Dragon's Tear. He says that perhaps you might be useful in the future. If Rhazes only received 2 out of 3 items then you receive an Aiskala Orb instead and he sighs and says while useful, you aren’t worth more of his time than he has already given you. If he gets only one item then you only get a Firani Orb and he growls in disgust about how pathetic and useless you are. He then kicks you out into the desert and says that you need more training before you are worth more of his time. If he gets nothing he roars on and on about useless meat bags and how stupid and worthless a Magescian/you (if Drakein) is. He kicks you out after you have been yelled at or gotten your reward.
Neutral: Arick Skyeforge:
Information Arick’s shop is movable, and he sets up shop within one of the cities in Magesc. That is where you have found him today. His shop is just inside one of the main cities on either Serenia or Soudul (you choose).
You have found your way to Peddler’s Rock. A traveling shop for everything, including some things not quite legal. A tall and burly Dovaa greets you as you come in and asks if you have a moment to spare.
"Hey there little one, may I have a word with you? I'm in a bit of a bind. You see, got a spot of trouble that needs dealing with but I can’t leave my shop unattended. Could you lend me a hand, perhaps?"
If you agree, continue to read, otherwise RP your response and leave the adventure.
He smiles with relief upon your agreement, "Thanks a bunch, partner. I have a few tasks, mostly need some help restocking, but there is one that I’d like you to do first. Not really all that earth-shattering, just…finding something for me." he says, rubbing the back of his head a bit embarrassed.
Go to Task 1.
Task 1:
Task 2:
Task 3:
Opened Letter:
Failure:
Success:
Final:
You have found your way to Peddler’s Rock. A traveling shop for everything, including some things not quite legal. A tall and burly Dovaa greets you as you come in and asks if you have a moment to spare.
"Hey there little one, may I have a word with you? I'm in a bit of a bind. You see, got a spot of trouble that needs dealing with but I can’t leave my shop unattended. Could you lend me a hand, perhaps?"
If you agree, continue to read, otherwise RP your response and leave the adventure.
He smiles with relief upon your agreement, "Thanks a bunch, partner. I have a few tasks, mostly need some help restocking, but there is one that I’d like you to do first. Not really all that earth-shattering, just…finding something for me." he says, rubbing the back of his head a bit embarrassed.
Go to Task 1.
Task 1:
"I've lost a letter on my way here this morning. It’s extremely important to me and I’d prefer that no one read it." a small blush and awkward expression passes over his face. "But since I can’t leave the shop, you’ll have to go back along my path and try to find it for me."
The path to the shop is a rather winding one with many bushes, trees, and shrubs along it. So many places for a letter to hide.
Roll 1d100.
1-10: You find it but it’s been opened already! You return and may say you didn’t find it or you may give it to him. Have fun explaining why it’s open. Go to Opened Letter or Failure (if you decide to say you didn’t find it).
11-70: You find the letter and it’s closed. You may open it and read it, or you may return it to him unopened. Or you may not return it if you don’t want too. If you return it unopened go to Success. If you open it go to Opened Letter.
71-100: You can’t find it at all. Go to Opened Letter.
Task 2:
This task is more important, his stock of pearly scales is running low and he needs you to go get three for him. He tells you that there are two ways to get them. One is to fight an Oralrik and the second is to search the banks of Serenia’s lakes for the scales.
You must RP your traveling and search/fighting.
Fight:
Search
You must RP your traveling and search/fighting.
Fight:
Treat this as a Dragon battle. Go to the Creature thread for more information on this creature.
The place he tells you to go fight an Oralrik is in a small stream leading to Lake Tyluafel. The Oralriks you see here are smaller than the ones you’ve normally seen.
Use these stats for them: Level 15, LUK > 10. They drop 3 Pearly Scales when you win and drop nothing should you lose.
Or you may go to the lake and try finding a larger Oralrik.
Level 20, LUK > 15. Gain 5 Pearly Scales from this creature for a win. Gain only 1 for a loss.
Should you win, you may give all three scales to Arick or give nothing to him at all. Go to Success if you give them to him and Failure if you decide keep them.
Should you lose, Go to Failure.
Search
]Roll 1d100.
1-10: Failure, you find nothing. You may return to Arick with nothing or try to fight an Oralrik instead. Go to Fight or Failure.
11-99: Success! You find 3 of them. You may give all 3 to Arick or nothing at all. Go to Success if you give them to him or Failure if you decide to keep them.
100: Success! You find 6 scales! You may keep 3 and give 3 to Arick. Go to Success.
Task 3:
This time he needs Nocturnal Spikes, he’s out and a customer came by asking for some and he said that he would have some by tomorrow.
You may fight an Riistäjä for its Spikes or you may search the forest of Souldul for them.

You must RP your traveling and search/fighting.
Fight:
Search:
You may fight an Riistäjä for its Spikes or you may search the forest of Souldul for them.
You must RP your traveling and search/fighting.
Fight:
Treat as a Dragon battle and use the stats below. Go to the Creature thread for more information on this creature.
Level 20 LUK > 15. Drops x2 Nocturnal Spike and x1 Nocturnal Fur when defeated. You may keep the fur as a bonus.
Level 20 LUK > 15. Drops x2 Nocturnal Spike and x1 Nocturnal Fur when defeated. You may keep the fur as a bonus.
Search:
Roll 1d100.
1-10: Failure, you find nothing. You may return to Arick with nothing or try to fight a Riistäjä instead. Go to Fight or Failure if you decide to return with nothing.
11-99: Success! You find 2 of them. You may give all 2 to Arick or nothing at all. Go to Success if you give them to him or Failure if you decide to keep them.
100: Success! You find 4 spikes! You may keep 2 and give 2 to Arick. Go to Success
Opened Letter:
If you found the letter:
If you didn't or say you didn't find the letter:
Go to Task 2.
The letter is a love letter! With some really bad poetry too… Poor Arick, he may be good at selling stuff but poetry is not his strong suit. You notice that he is writing to an “Apicius”. Could this be the same Legendary Dovaa who makes the strongest Potions? Or is it a different person?
When you return to Arick and give him the letter what do you say? Do you try not to show that you read his terrible writing, or tease him about his bad poetry, or do you try to give him hints on how to write better poetry?
No matter what you say, Arick is very embarrassed! His face is bright red as he blushes and he buries his face in his hands.
He doesn’t blame you for what happens, it’s not your fault the letter was open, right? Eventually he recovers and asks if you will do another task, this time dealing with his shop and nothing personal.
If you didn't or say you didn't find the letter:
"Blast. I truly hope no one else found it. Better that it gets lost and destroyed than someone reading it." he mutters under his breath. Shaking his head in disappointment he assigns you your next task.
Go to Task 2.
Failure:
After Task 2: Arick grumbles and sighs but acknowledges that perhaps the task was too difficult; but not too worry, he’ll give you another chance. How disappointing, you looked like you could handle the critter, but perhaps you only found the strong ones and not the weak Oralriks he mentioned.
Go to Task 3
After Task 3: Arick sighs and shakes his head, oh well. The Riistäjä is a dangerous creature, maybe he had judged you to be stronger than you actually were.
Go to Final
Go to Task 3
After Task 3: Arick sighs and shakes his head, oh well. The Riistäjä is a dangerous creature, maybe he had judged you to be stronger than you actually were.
Go to Final
Success:
Arick grins, so he’d judged you right! You were good enough to do the tasks he needed done. So nice to know that there are dependable people out there.
Go to the next Task or Final if you have just finished Task 3.
Go to the next Task or Final if you have just finished Task 3.
Final:
If Arick receives all 3 you get the Gaili Orb and an Ayrala Dragon's Tear. He is happy and relieved. "Oh, thank you so very much, young one. You really did me good there! Here, take this orb and tear as thanks for a job well done!"
If Arick only receives 2 out of the 3 items, than you receive just a Peisio Orb instead. "Well, you didn’t get everything, but you certainly did me a favor, so here, take this orb as thanks."
If he gets only one item than you only get a Kiandri Orb. "Well, at least one task got done. Thanks for your time, little one, take this as thanks."
If he gets nothing he sighs and simply waves you away with a very disappointed look upon his face.
Quit:
You get tired of running errands for these lazy people, or you just can’t do what they have asked of you, or maybe you find something more interesting to do. Perhaps you just can’t stand the fact that you failed so many tasks. Whatever your reason for quitting, please RP it and leave the adventure.
If you do this than you may not try this adventure again!
If you do this than you may not try this adventure again!