
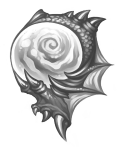
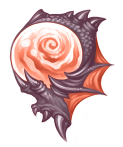
✦ Cave of Dragons ✦
Solo or Group Adventure
Must be of the Battler Path
Must be of the Battler Path
Rating:

Reward: Multiple Dragon Orbs, Possibly 3 Nocturnal Fur
Rumors have reached your ears of a cave full of many dragons where an awesome fighter like yourself could go. There are even a few whispered rumors of some nice treasure within! So you decide to go, either alone or with some friends, and check this cave out!
Upon reaching the cave in Eowyn, you notice that the cave itself doesn't appear to be anything special as you approach. Perhaps the rumors are not true...
Do you:
A) Go inside? Roll 2 4-sided dice and go to "Room 1"
B) Leave? Go to "Exit"
Room 1
First die: If the number is 1-3, you encounter a Ysali dragon. If the number is 4, you encounter an Ayrala dragon.
Second die: If the number is 1, you are nervous and take a 10% penalty to your luck chance. [So if your normal luck range against the dragon is 61-100, it is now 71-100. If it was 91-100, you must now roll a 100 to succeed.] If the number is 2-4, nothing happens and you fight as normal.
The first room is fairly well lit with the light from the cave entrance illuminating the area. There, on the other side of the room, is a dragon!
From this point, treat as a normal dragon hunt and every participant rolls to see what the result is.
If you win, do you:
A) Move deeper into the cave? Roll 2 4-sided dice and go to "Room 2"
B) Leave? Go to "Exit"
If you lose, you must RP fleeing from battle and are done with the cave. You keep any items and experience you may have found. If you have 500+ words, this may count for an RP as well as a dragon hunt.
Room 2
First die: If the number is 1-2, you encounter a Ysali dragon. If the number is 3-4, you encounter an Ayrala dragon.
Second die: If the number is 1, nothing happens and you fight as normal. If the number is 2, you manage to feel very lucky and get a 10% bonus to your luck chance. [So if your normal luck range is normally 61-100, it is now 51-100. You cannot go below 6-100, though.] If the number is 3, nothing happens and you fight as normal. If the number is 4, you have encountered a Silx instead of a dragon. See "Creatures" below to see stats. You still fight just like in a dragon hunt, only against the creature instead of a dragon.
This room is not as well lit as the previous room, but you can still see well enough to see the whole room. There, across the room once again, is your opponent.
From this point, treat as a normal dragon hunt and every participant rolls to see what the result is.
If you win, do you:
A) Move deeper into the cave? Roll 2 4-sided dice and go to "Room 3"
B) Move closer to the entrance? Roll 2 4-sided dice and go to "Room 1"
C) Leave? Go to "Exit"
If you lose, you must RP fleeing from battle and are done with the cave. You keep any items and experience you may have found. If you have 500+ words, this may count for an RP as well as a dragon hunt.
Room 3
First die: If the number is 1, you encounter a Ysali dragon. If the number is 2-3, you encounter an Ayrala dragon. If the number is 4, you encounter a Kiandri dragon.
Second die: If the number is 1, the room is empty. Skip straight to "If you win" options. If the number is 2-3, nothing happens and you fight as normal. If the number is 4, spider webs coat the walls of this room and drift about everywhere. Your visibility is lowered, causing your luck chance to be reduced by 10%. [If your normal luck range is 61-100, it is now 71-100. If it is normally 91-100, you must now roll a 100 to succeed.]
The rooms slowly grow darker as you continue to progress into the cave system. You are unable to see into the darkest corners, but you can still see well enough to fight.
From this point, treat as a normal dragon hunt and every participant rolls to see what the result is.
If you win, do you:
A) Move deeper into the cave? Roll 2 4-sided dice and go to "Room 4"
B) Move closer to the entrance? Roll 2 4-sided dice and go to "Room 2"
C) Leave? Go to "Exit"
If you lose, you must RP fleeing from battle and are done with the cave. You keep any items and experience you may have found. If you have 500+ words, this may count for an RP as well as a dragon hunt.
Room 4
First die: If the number is 1-2, you encounter an Ayrala dragon. If the number is 3-4, you encounter a Kiandri dragon.
Second die: If the number is 1, nothing happens and you fight as normal. If the number is 2, you seem to have triggered an old spell and your movement is slowed. Your luck chance is now reduced by 20%. [If your normal luck range is 61-100, it is now 81-100.] If the number is 3, nothing happens and you fight as normal. If the number is 4, you have encountered a Bognotti instead of a dragon. See "Creatures" below to see stats. You still fight just like in a dragon hunt, only against the creature instead of a dragon.
Continuing into the cave system, the walls now start to glisten with moisture where the light hits them. Shadows are becoming darker and more prevalent, but the overall light level is still that of early evening.
From this point, treat as a normal dragon hunt and every participant rolls to see what the result is.
If you win, do you:
A) Move deeper into the cave? Roll 2 4-sided dice and go to "Room 5"
B) Move closer to the entrance? Roll 2 4-sided dice and go to "Room 3"
C) Leave? Go to "Exit"
If you lose, you must RP fleeing from battle and are done with the cave. You keep any items and experience you may have found. If you have 500+ words, this may count for an RP as well as a dragon hunt.
Room 5
First die: If the number is 1, you encounter an Ayrala dragon. If the number is 2-3, you encounter a Kiandri dragon. If the number is 4, you encounter a Firani dragon
Second die: If the number is 1-2, nothing happens and you fight as normal. If the number is 3, you feel especially brave and daring and your luck chance is increased by 10%. [So if your normal luck range is normally 61-100, it is now 51-100. You cannot go below 6-100, though.] If the number is 4, the dragon roars and any Bonded Drakein quake in fear. (No change to your luck chance, but any Bonded Drakein cannot be RPed as helping during this fight.)
The air grows damper as you continue on, a few small puddles appearing on the floor from time to time, especially in lower laying areas and against walls. This room has several large stalagmites jutting from the floor.
From this point, treat as a normal dragon hunt and every participant rolls to see what the result is.
If you win, do you:
A) Move deeper into the cave? Roll 2 4-sided dice and go to "Room 6"
B) Move closer to the entrance? Roll 2 4-sided dice and go to "Room 4"
C) Leave? Go to "Exit"
If you lose, you must RP fleeing from battle and are done with the cave. You keep any items and experience you may have found. If you have 500+ words, this may count for an RP as well as a dragon hunt.
Room 6
First die: If the number is 1-2, you encounter a Kiandri dragon. If the number is 3-4, you encounter a Firani dragon.
Second die: If the number is 1, list all participants and generate a number between them. This participant's luck is halved for this battle. Please recalculate luck chances accordingly. (If you are doing this solo, your luck is halved and you must recalculate your luck chance.) If the number is 2-3, nothing happens and you fight as normal. If the number is 4, you have found a secret tunnel! Do not fight in this room and proceed directly to "Room 17". (This can only occur the first time you enter this room. If you reenter this room and roll a 4, then nothing happens and you fight as normal.)
Glowing fungus grows upon the walls of this room, casting a dim light in those areas. The room is still visible, though it is becoming more like twilight in the level of light. There are still puddles in places, so watch your step!
From this point, treat as a normal dragon hunt and every participant rolls to see what the result is.
If you win, do you:
A) Move deeper into the cave? Roll 2 4-sided dice and go to "Room 7"
B) Move closer to the entrance? Roll 2 4-sided dice and go to "Room 5"
C) Leave? Go to "Exit"
If you lose, you must RP fleeing from battle and are done with the cave. You keep any items and experience you may have found. If you have 500+ words, this may count for an RP as well as a dragon hunt.
Room 7
First die: If the number is 1, you encounter a Kiandri dragon. If the number is 2-3, you encounter a Firani dragon. If the number is 4, you encounter a Peisio dragon.
Second die: If the number is 1-2, nothing happens and you fight as normal. If the number is 3, a sudden rock slide closes off the entrance to this room as you enter. You can no longer chose to move closer to the entrance and instead must either move deeper into the cave or leave. [If you have already had this rock slide happen, nothing happens.] If the number is 4, a sudden gush of water fills the room, slowly you down. Your luck chance decreases by 10%. [If your normal luck range is 61-100, it is now 71-100.]
More of the glowing fungus grows in this room, aiding what little light has penetrated this far into the cave system. The light reflects off the damp walls and puddles, adding to this effect.
From this point, treat as a normal dragon hunt and every participant rolls to see what the result is.
If you win, do you:
A) Move deeper into the cave? Roll 2 4-sided dice and go to "Room 8"
B) Move closer to the entrance? Roll 2 4-sided dice and go to "Room 6"
C) Leave? Go to "Exit"
If you lose, you must RP fleeing from battle and are done with the cave. You keep any items and experience you may have found. If you have 500+ words, this may count for an RP as well as a dragon hunt.
Room 8
First die: If the number is 1-2, you encounter a Firani dragon. If the number is 3-4, you encounter a Peisio dragon.
Second die: If the number is 1, a sudden beam of light hits the room from outside, brightening the light where you can see better. Your luck chance has increased by 10%! [So if your normal luck range is normally 61-100, it is now 51-100. You cannot go below 6-100, though.] If the number is 2, the dragon encountered is a Ysali dragon instead of the dragon rolled. If the number is 3-4, nothing happens and you fight as normal.
Even more glowing fungus in this room, which has spread to the ceiling in patches as well. This room has a large puddle, almost a small pond, in the middle. Watch out!
From this point, treat as a normal dragon hunt and every participant rolls to see what the result is.
If you win, do you:
A) Move deeper into the cave? Roll 2 4-sided dice and go to "Room 9"
B) Move closer to the entrance? Roll 2 4-sided dice and go to "Room 7"
C) Leave? Go to "Exit"
If you lose, you must RP fleeing from battle and are done with the cave. You keep any items and experience you may have found. If you have 500+ words, this may count for an RP as well as a dragon hunt.
Room 9
First die: If the number is 1, you encounter a Firani dragon. If the number is 2-3, you encounter a Peisio dragon. If the number is 4, you encounter an Aiskala dragon.
Second die: If the number is 1, nothing happens and you fight as normal. If the number is 2, there is no dragon in this room and instead you encounter a Notbjavoin. See "Creatures" below to see stats. You still fight just like in a dragon hunt, only against the creature instead of a dragon. If the number is 3, after beating the dragon, you find a small chest! Opening it reveals one healing potion per participant. [If you have found the chest and reenter and roll a 3 again, the chest is there, but empty since you already opened it.] If the number is 4, nothing happens and you fight as normal.
The floors are now very damp, so watch your step! More fungus on the ceiling reflects in the water on the floor. This room has several large boulders scattered about the area.
From this point, treat as a normal dragon hunt and every participant rolls to see what the result is.
If you win, do you:
A) Move deeper into the cave? Roll 2 4-sided dice and go to "Room 10"
B) Move closer to the entrance? Roll 2 4-sided dice and go to "Room 8"
C) Leave? Go to "Exit"
If you lose, you must RP fleeing from battle and are done with the cave. You keep any items and experience you may have found. If you have 500+ words, this may count for an RP as well as a dragon hunt.
Room 10
First die: If the number is 1-2, you encounter a Peisio dragon. If the number is 3-4, you encounter an Aiskala dragon.
Second die: If the number is 1, there is no dragon in this room. Instead, you find yourself facing a large pit in the middle of the room. Along the walls, there is a small ledge of floor remaining. RP crossing (or not crossing) this pit. If the number is 2-3, nothing happens and you fight as normal. If the number is 4, after fighting the dragon you find a locked chest. You can try to open it by rolling one 100-sided die. If you want to try and pick the lock open, add your INT. If you want to try and bash the chest open, add your ATK. Make sure only one person rolls and adds their desired stat! You may not combine your INT and your partners ATK. Only one person may try forcing the chest open or picking it at one time! If the first person fails, then the next gets to try and so on until everyone has failed or someone succeeded.
If your combined die roll and score is 70 or higher, you open the chest to find a Potion of Strength (one for each participant). Otherwise, the chest remains locked. [You can only find the locked chest once and each participant only has one chance at opening it. So if you reenter this room and roll a 4 again, the chest is still there and locked if it was not opened. If opened, it sits empty.]
More of the glowing fungus grows in this room, aiding what little light has penetrated this far into the cave system. The light reflects off the damp walls and puddles, adding to this effect.
From this point, treat as a normal dragon hunt and every participant rolls to see what the result is.
If you win, do you:
A) Move deeper into the cave? Roll 2 4-sided dice and go to "Room 11"
B) Move closer to the entrance? Roll 2 4-sided dice and go to "Room 9"
C) Leave? Go to "Exit"
If you lose, you must RP fleeing from battle and are done with the cave. You keep any items and experience you may have found. If you have 500+ words, this may count for an RP as well as a dragon hunt.
Room 11
First die: If the number is 1, you encounter a Peisio dragon. If the number is 2-3, you encounter an Aiskala dragon. If the number is 4, you encounter a Gaili dragon
Second die: If the number is 1-2, nothing happens and you fight as normal. If the number is 3, list every participant and generate a number from this list. That character has stepped in some fresh dragon poo and will spend the rest of this room stinking. (No effect on luck chance.) If the number is 4, you begin to shiver, lowering your luck chance by 10%. [If your normal luck range is 61-100, it is now 71-100.]
The light from outside no longer penetrates this far, but the glowing fungus has taken over so that you are in a perpetual twilight dimness from here onward. The dampness has now taken a chill to the air as well, leaving a few ice crystals upon the walls here and there.
From this point, treat as a normal dragon hunt and every participant rolls to see what the result is.
If you win, do you:
A) Move deeper into the cave? Roll 2 4-sided dice and go to "Room 12"
B) Move closer to the entrance? Roll 2 4-sided dice and go to "Room 10"
C) Leave? Go to "Exit"
If you lose, you must RP fleeing from battle and are done with the cave. You keep any items and experience you may have found. If you have 500+ words, this may count for an RP as well as a dragon hunt.
Room 12
First die: If the number is 1-2, you encounter an Aiskala dragon. If the number is 3-4, you encounter a Gaili dragon
Second die: If the number is 1, you slip and slide on the ice, lowering your luck chance by 10%. [If your normal luck range is 61-100, it is now 71-100.] If the number is 2, after fighting the dragon, you find a small chest. Opening it reveals an elixer. (One per participant.) [If you have found the chest and reenter and roll a 2 again, the chest is there, but empty since you already opened it.] If the number is 3-4, nothing happens and you fight as normal.
The icy areas are still limited to the walls in this room, but they are larger patches than in the previous room. The chilly air seems to be getting even colder.
From this point, treat as a normal dragon hunt and every participant rolls to see what the result is.
If you win, do you:
A) Move deeper into the cave? Roll 2 4-sided dice and go to "Room 13"
B) Move closer to the entrance? Roll 2 4-sided dice and go to "Room 11"
C) Leave? Go to "Exit"
If you lose, you must RP fleeing from battle and are done with the cave. You keep any items and experience you may have found. If you have 500+ words, this may count for an RP as well as a dragon hunt.
Room 13
First die: If the number is 1, you encounter an Aiskala dragon. If the number is 2-3, you encounter a Gaili dragon. If the number is 4, you encounter an Aedaun dragon
Second die: If the number is 1-2, nothing happens and you fight as normal. If the number is 3, you trip over the uneven floor, lowering your luck chance by 10%. [If your normal luck range is 61-100, it is now 71-100.] If the number is 4, you encounter a Kiandri dragon instead of the rolled dragon.
Now the ice can be found along the walls as well as on them and the air is quite cool. Be careful of your step as this room's floor is jagged and uneven as well as damp!
From this point, treat as a normal dragon hunt and every participant rolls to see what the result is.
If you win, do you:
A) Move deeper into the cave? Roll 2 4-sided dice and go to "Room 14"
B) Move closer to the entrance? Roll 2 4-sided dice and go to "Room 12"
C) Leave? Go to "Exit"
If you lose, you must RP fleeing from battle and are done with the cave. You keep any items and experience you may have found. If you have 500+ words, this may count for an RP as well as a dragon hunt.
Room 14
First die: If the number is 1-2, you encounter a Gaili dragon. If the number is 3, you encounter an Aedaun dragon. If the number is 4, you encounter a Diabi dragon
Second die: If the number is 1, a sudden rock slide closes off the entrance to this room as you enter. You can no longer chose to move closer to the entrance and instead must either move deeper into the cave or leave. [If you have already had this rock slide happen, nothing happens.] If the number is 2-3, nothing happens and you fight as normal. If the number is 4, the ice cracks and you find yourself in icy cold water up to your knees! Your luck chance is decreased by 20%. [If your normal luck range is 61-100, it is now 81-100.]
A brisk wind seems to come from nowhere to run through this room, leaving the floor coated in a thin layer of ice that cracks under your feet as you walk. Luckily, a few large boulders stick up out of the icy area, though navigating the room on them alone will be tricky.
From this point, treat as a normal dragon hunt and every participant rolls to see what the result is.
If you win, do you:
A) Move deeper into the cave? Roll 2 4-sided dice and go to "Room 15"
B) Move closer to the entrance? Roll 2 4-sided dice and go to "Room 13"
C) Leave? Go to "Exit"
If you lose, you must RP fleeing from battle and are done with the cave. You keep any items and experience you may have found. If you have 500+ words, this may count for an RP as well as a dragon hunt.
Room 15
First die: If the number is 1, you encounter a Gaili dragon. If the number is 2, you encounter an Aedaun dragon. If the number is 3-4, you encounter a Diabi dragon
Second die: If the number is 1-2, nothing happens and you fight as normal. If the number is 3, this dragon, if defeated, drops double orbs! (So two for each participant.) If the number is 4, the room is filled with spiders and webs instead of a dragon.
After all the chilly rooms, this room almost seems like a sauna as you step into it. The air is warm and the floor is once more just damp instead of icy.
From this point, treat as a normal dragon hunt and every participant rolls to see what the result is.
If you win, do you:
A) Move deeper into the cave? Roll 2 4-sided dice and go to "Room 16"
B) Move closer to the entrance? Roll 2 4-sided dice and go to "Room 14"
C) Leave? Go to "Exit"
If you lose, you must RP fleeing from battle and are done with the cave. You keep any items and experience you may have found. If you have 500+ words, this may count for an RP as well as a dragon hunt.
Room 16
First die: If the number is 1-2, you encounter an Aedaun dragon. If the number is 3-4, you encounter a Diabi dragon
Second die: If the number is 1, make a list of all participants and roll from this list. That person seems to be overheating in this room and their luck is cut in half. Please recalculate luck chances accordingly. (If you are doing this solo, your luck is cut in half. Please recalculate your luck chance.) If the number is 2, you get a 5% boost to your luck chance for each Bonded Drakein in the room. [So if your normal luck range is 61-100 and there are three Bonded Drakein, it is now 46-100. You cannot go beyond 6-100, though.] If the number is 3-4, nothing happens and you fight as normal.
Steam hovers in this room as the air is even warmer than the last room. The steam curls in a few places where small drafts can be found.
From this point, treat as a normal dragon hunt and every participant rolls to see what the result is.
If you win, do you:
A) Move deeper into the cave? Roll 2 4-sided dice and go to "Room 17"
B) Move closer to the entrance? Roll 2 4-sided dice and go to "Room 15"
C) Leave? Go to "Exit"
If you lose, you must RP fleeing from battle and are done with the cave. You keep any items and experience you may have found. If you have 500+ words, this may count for an RP as well as a dragon hunt.
Room 17
You have reached the end of the cave system! Inside you find a chest. Opening the chest reveals items!!
First die: If the number is 1, you find healing potions (ten for each participant). If the number is 2, you find energizing potions (ten for each participant). If the number is 3, you find elixirs (five for each participant). If the number is 4, you find life and energy boosters (three of each for each participant).
Second die: If the number is 1, you find Potion of Strength (two for each participant). If the number is 2, you find a Shield of the Ancients. If the number is 3, you find an Arrow of Courage. If the number is 4, you find a Bottled Dream.
IF YOU HAVE ALREADY BEEN HERE AND CLAIMED ITEMS WITHIN THE LAST TWO MONTHS, THE CHEST WILL BE EMPTY UNLESS THERE ARE MEMBERS IN YOUR GROUP WHO HAVE NOT. HOWEVER, YOU YOU TRY TO TAKE SOMETHING AND YOU HAVE CLAIMED PRIZES IN THE LAST TWO MONTHS, THE CHEST WILL SLAM THE LID DOWN ON YOUR HAND AND NOT LET YOU TAKE ANYTHING.
TWO MONTHS AFTER THE START DATE OF THE ADVENTURE, THE CHEST WILL RESTOCK FOR ANY NEW ADVENTURES YOU START.
Do you:
A) Move closer to the entrance? Roll 2 4-sided dice and go to "Room 16"
B) Leave? Go to "Exit"
Creatures
Silx - Level 5, LUK > 0. No items are gained from beating this creature.
Bognotti - Level 10, LUK > 5. No items are gained from beating this creature.
Notbjavoin - Level 30, LUK >15. A win gets you x3 Nocturnal Fur.
Bognotti - Level 10, LUK > 5. No items are gained from beating this creature.
Notbjavoin - Level 30, LUK >15. A win gets you x3 Nocturnal Fur.
Exit
At any point, you may leave the cave with any items and experience that you have gained. RP yourself leaving and why you have chosen to leave. If you have 500+ words, this may count for an RP as well as a dragon hunt if you have encountered at least one dragon. (No matter how many dragons you may have encountered, this still only counts as one dragon hunt.)


 Fox Totem: A strange carved wooden fox, it pulses with magic. You may use it to summon a small spirit of a fire fox. The fire fox puts out both light and heat and will obey simple commands. It can send telepathic pictures and simple thoughts to the owner of its totem.