|
|
|
|
|
|
|
|
|
 Posted: Mon Feb 21, 2011 7:27 pm Posted: Mon Feb 21, 2011 7:27 pm
The Lolwut Pear So far so good, I know I'm not wanting to do drugs and turn into a racoon/burst into flames anytime soon. D: This needs to be released to today's youth to warn them of what happens to people who do crack! Also, yay, first dungeon! You're so totally right, Maji. There needs to be a PSA (Public Service Announcement) against drugs in this form! Like, srsly. XD
|
 |
|
|
|
|
|
|
|
|
|
|
|
|
|
Posted: Mon Feb 21, 2011 7:35 pm
Misuki Marishima The Lolwut Pear So far so good, I know I'm not wanting to do drugs and turn into a racoon/burst into flames anytime soon. D: This needs to be released to today's youth to warn them of what happens to people who do crack! Also, yay, first dungeon! You're so totally right, Maji. There needs to be a PSA (Public Service Announcement) against drugs in this form! Like, srsly. XD
|
|
|
|
|
|
|
|
|
|
|
|
|
|
|
|
|
|
Posted: Mon Feb 21, 2011 7:37 pm
gabriel sama Misuki Marishima The Lolwut Pear So far so good, I know I'm not wanting to do drugs and turn into a racoon/burst into flames anytime soon. D: This needs to be released to today's youth to warn them of what happens to people who do crack! Also, yay, first dungeon! You're so totally right, Maji. There needs to be a PSA (Public Service Announcement) against drugs in this form! Like, srsly. XD *Pat pat* There there Link...one of these days when they need a hero, chances are you will either be in Termina or Hyrule.
|
|
|
|
|
|
|
|
|
|
|
|
|
|
|
Posted: Mon Feb 21, 2011 7:43 pm
Belzayne gabriel sama Misuki Marishima The Lolwut Pear So far so good, I know I'm not wanting to do drugs and turn into a racoon/burst into flames anytime soon. D: This needs to be released to today's youth to warn them of what happens to people who do crack! Also, yay, first dungeon! You're so totally right, Maji. There needs to be a PSA (Public Service Announcement) against drugs in this form! Like, srsly. XD *Pat pat* There there Link...one of these days when they need a hero, chances are you will either be in Termina or Hyrule.
|
|
|
|
|
|
|
|
|
|
|
|
|
|
|
|
|
|
Posted: Mon Feb 21, 2011 10:14 pm
Chapter 3: You Have No Idea How Many Times I Had to Reset The Save State Because of the Boss. =_=Last time on LP LoZ: LA DX, we had just reached the first dungeon. Key in hand, let's get that lock open...   Oh good, this was the right key. Let's head on in. 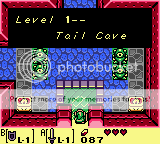 Tail Cave, huh? Interesting name for a first dungeon. Let's start off by heading left. 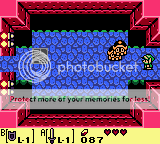 These crab-looking guys are invulnerable. We can smack them around with our sword all we want... we can't kill them. So just knock them into the pit. Once they're gone...  a key drops. Grab that, and go into the room on the left.  Once you enter, the door slams down behind you. There's a couple of green slimes near the chest, but they're not too tough. Once they're gone, claim your prize.  Oooh, a compass. If you've played other Zelda games, you know this handy-dandy little device shows you where the treasure chests are. But in this game...  If you have the compass and enter a room with a key hidden in it, it will make a few sounds to let you know that 'hey, there's a key here!' With the compass in tow, head back through the only door in the room.  Since they fell off the edge, they weren't considered 'destroyed', so they'll respawn. Knock them off again or just move on back to the entrance room.  We'll head up this time.  Jeez, we just got the compass and already we learn there's a key in this room! Isn't that extremely helpful? Watch out for those tiny slimes. They don't hurt you, but...  Link: I am moving so slow... and I can't use any items! D8 So yeah, kill them. Especially when there's bigger and scarier things in the same room as them. Once you get rid of the crab, take a look at that switch.  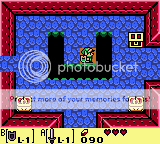 Bam! Treasure chest! 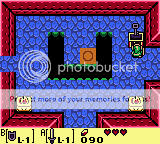 And hey! A key~ Compass didn't lie to us! 3nodding Let's head to the right.  Couple of goddamn keese and a few orange Stalfos. The orange Stalfos can jump, so it's pretty annoying when you swing at them and they just jump away. Just chase them into a corner and swing your sword until they're dead. Link: I wish I could jump like them. ._. Once the monsters are gone...  A chest appears. Inside of it is...  A dungeon map~ Now we know how big this dungeon is! Go on up through the imprint on the wall and it'll swing you into the next room. Unfortunately, it's a one-way route, so if you wanna head back to the entrance, you'll have to find another way.  Nothing special here. More goddamn bats and another jumper. Kill them. While we're sitting in this empty room, I might as well explain some things about your pause menu, seeing as I was too lazy to explain it before. since it's a tad bit different inside the dungeon than outside. 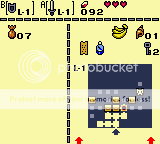 The top portion is always going to be displayed, whether you're paused or not. The portion on the left of the divider is your equipable items. To the right displays other things. You can see we have our dungeon map and compass, our current trade item, the number of secret shells, and how many keys we currently have. Also, it'll show us the map of the place. The flashing spot is your current location. The dark squares are the places you haven't been to yet, the white squares are places you've visited already, the skull is the boss room, and the brown boxes are where there's treasure chests. If we hit select while paused... 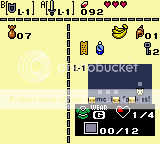 It'll show what tunic you have, the number of heart pieces you currently have, and the number of picture's you've taken. Don't worry about the last part for now. We'll cover that when it comes. Let's unpause and head on to the left.  Here's some new things... You can't kill the circular things spinning around the block and chest, so there's nothing you can do about it. There's also the black worm thingy, which you CAN kill. So kill it. If you were paying attention, there was also a chime, which means there's a key in this room. I'm betting it's in the chest.  Called it. xp Let's head on to the left.  Another one of those worms. If you recall from your map, there is treasure in this room, but it's not a key. So let's kill the worm, either by knocking it off the edge or killing it until it dies.  Chest appears. And inside is...  Sweet. Let's smash the crystals at the south end of the room and venture in.  A simple room with some keese. Doors lock behind ya and in the other path too. You should know the drill by now. Once they're gone, the doors will unlock. No need to head to the right, since...  Yep, leads ya back here. Let's backtrack to the room with the crack on the wall, shall we?   Poke it with your sword. It makes a different sound than when you hit a regular wall. Unfortunately, we don't have any bombs, so nothing we can do about it for now. Head north.  There's a keese, and a spike. Spikes are invincible, so there's no way you can kill them. However... they can only move in a set direction. This one can only move down or to the right. We can handle him pretty easily this time.  Just like that. His movements to the right are now sealed. So let's head on up and use our key on that door. 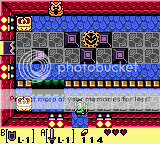 When you step into this room, the door on the left will slam shut. First thing you'd probably notice is that owl on the wall. We can't reach him yet, so just head to the right.  Doesn't look too hard to navigate through. Dodge the shiny circles as you move up and to the left. 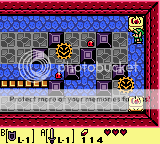 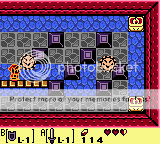 Link: Damn mini slime... slowed me down and got me hurt. >_o  Now that we're on this side of the room, let's look around and see if we can open that door.  Link: My adventurer senses are tingling! This block must be the key to solving this puzzle! Link used Strength! Link can now move blocks! 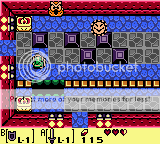 And the door opens. Head in.  Ah... these guys. They're invincible while their spiked side is right-side up. You'll also notice another owl statue there. 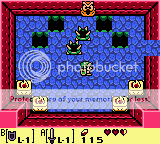 Peppy: DO A BARREL ROLL! Link: Get the hell outta my game, Peppy. stare  Flip those guys over with your shield, then slash their underbelly.  Stairs appear once they're toast. Head on down.  Hey look, goombas! Another Mario reference. Nintendo sure likes their references, huh? Let's pull a Mario and jump... err... fall on these guys. 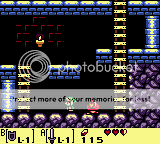 They will always drop hearts if you jump on them. Always. Thank you, Nintendo. Climb up the ladder on the left and keep going.  Another goomba. 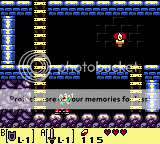 Link: Mushroom go 'squish'. cool Take the ladder up.  Nothing special here. Head north.  There's a floating heart. Unfortunately... we don't have the means of getting it... yet.  Link: Can't... reach... >_< Keep heading up.  There's treasure just past those spikes. 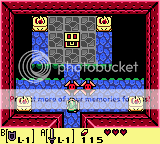 Link: HA! Psych, suckahs!  Link: ... Damn, I tripped and got hurt. But I got past them! Open the chest and we find...  Not a duel disk like Joey did, but a feather. And not just any feather... Roc's feather. Wanna know what's so cool about it?   Yep. It lets you jump now. Equip it and give it a shot. 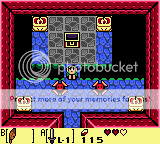 Link: You can keep your Jordans. I've got me Roc's Feather!  Now that the flying heart isn't taunting us anymore, let's backtrack a little.    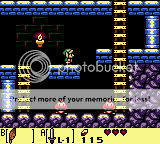 Hey, true story. It took me a couple of tries to take a good shot of Link jumping over the gaps, since my 'B' button is on one side of the keyboard, and the directional pad is on the other side. And I use the mouse to take a screenshot. Kinda hard to stretch my fingers like that and get a good shot. So we won't be doing that anymore.  Just go through the door here. 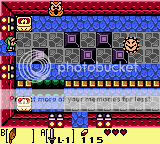 Since we're here... might as well examine that owl statue.     Link: Thank the Gods it doesn't have a beak. It'll be just like talking to the Stalker Owl. =_= Jump the gap, and let's do a bit of backtracking.  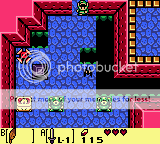    Kill stuff as you see fit on the way to this room, then open the door with your key. 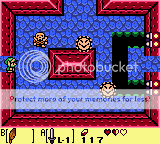 Kill the jumping Stalfos, then head up.  This is an annoying puzzle. If you checked the map, there is in fact treasure here. But to get it, you gotta get these monsters to have the same suit on them when you hit them. 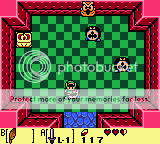 If you hit them, you can freely stand on them and not get hurt.  Link: ... ******** minutes later, after multiple attempts to get them all to show the same suit-  Goddamn... they drop hearts, thankfully, and a chest appears. Open it and we find...  Yeah, a stone beak. Guess what it's used for.   Yeah, the owl statues tell you stuff. If you ever get stuck in a dungeon and you've got a stone beak, seek these guys out. They'll give you some hints about the dungeon that will hopefully make your lives a little easier. Anyway, head back to the previous room.  And head on to the right.  It's your first mini boss battle! Good luck, Link! 3nodding Link: Wha?! HEY! Help me out here! gonk  It's not hard to figure out the pattern. Just jump over the spikes when he rolls them over to you, and slash at him. Unfortunately, this guy is a bit of a jerk and will jump where you are when you're close. You can knock him back with your sword, but he'll probably try to bowl you over anyway. Kinda like he was doing to me.  Link: DIE! D<  Mini boss explodes and drops a fairy, and there's something that appears in the center of this room. Snag the fairy to heal up, then let's take a look at the thingy that appeared.   It conveniently warps you right back to the entrance. Nice little shortcut anytime you need to stop playing and don't want to walk all the way back over there. Let's warp back and head north.   See that door on the other end of the room? That's the Nightmare's room. The first boss battle is this close! We just have one tiny problem... we don't have the Nightmare key yet. Bust out your map.  Link: That lone treasure chest on the map must be where the key's at.     This time... we go this way.    Take out the crab, and then jump over the gap to that key block. Also, did you know? We're over 100 images in this chapter. Pretty crazy, huh? Use that last key you've got...  Then head up the stairs. 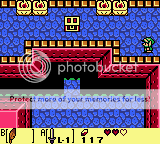 There's the last chest. And inside of it is... 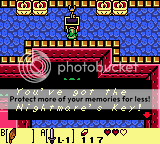 The boss key. Finally! Let's walk all the way back to the room before the Nightmare's room.   The door's open... but we're kinda injured. Let's go grab a heart first to be fully healed, because this boss is mean. Link: Let's get some awesome boss battle music here, please! 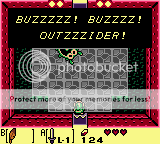 Damn straight we're outsiders. Stop your damn buzzing.  Okay, this guy is really mean. His body prevents all damage, but his tail is the only place where it's not armored. He will move around and cover up that tail of his while trying to ram into you, which deals a full heart of damage. It's game over if he hits you three times. You can prevent damage by holding your sword out, but it makes you easier to get knocked into the pit. Also, the more damage he takes, the faster he moves around.  Don't worry about falling, since you'll just end up in an underground cavern (and you won't lose a bit of your heart either).  Link: -looks up at the hanged dead people- What a sorry way to go... Just head to the right and up the ladder, and it'll take us right outside of the boss room. 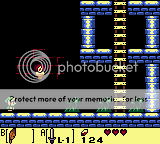  I strictly advise NOT to fall into the pit a lot, since if you do... That's right... the boss battle resets. All the damage you dealt to the Nightmare before getting knocked into the pit is gone. And that SUCKS. -many, many savestate resets later-  Link: Ha... ha... ha... he's finally... dead... Nightmare blows up, from the tail to the head, and then drops...  A heart container. Let's pick it up. 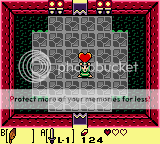 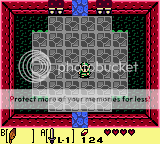 Not only do the doors open and you get fully healed, you also have an additional heart. So now you're a little more likely to survive! Woo~ Anyway, head through the door at the top.  'Lo and behold, there's the first instrument. Walk over to it and pick it up.   Full Moon Cello, get! It will then proceed to play a few notes before there's some flashing lights.   If you listen closely, it actually sounds like it's playing a piece of the Ballad of the Wind Fish that Marin was singing earlier.   Sounds like this is our next destination... We'll be warped out of the dungeon with that flash of light and reappear right at the entrance. 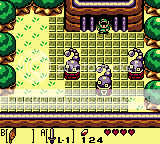 After a long and tiring battle in there, let's head back to town. 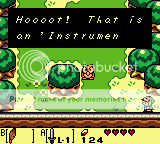 Goddammit, Stalker Owl. Not now... we're tired.    Link: I'm... not real? D8 ... Great, now Link is having an existential crisis. Thanks a lot, you stupid bird. stare 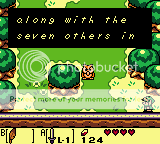   ... So there's eight of these instruments, and we can't wake up the Wind Fish without all eight of them. -sighs- This could take a while... =_=  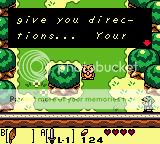  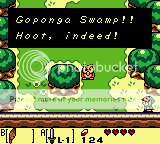 You were instructed to tell us where to go? Who's your boss, the Wind Fish? Isn't it supposed to be sleeping? How the hell can it tell you where to go?! And yeah, we kinda knew we had to go to the swamp. Goponga Swamp, huh? Fine. And then he flies off. Well, we know where to go know. Come on, Link. Let's head back to town.  Link? ... Goddammit, his mind has been broken. DAMN YOU, OWL! DAMN YOU! D< Next time, we'll head back to town to see what's up, revisit the first dungeon real quick to see what's behind the cracked wall, grab some stuff along the way, and then find a new companion. See ya next time! Now if you'll excuse me, I need to go get Link to a psychiatrist.
|
|
|
|
|
|
|
|
|
|
|
|
|
|
|
Posted: Mon Feb 21, 2011 11:43 pm
That was magnificent, here's my notes:
1. Compass: That is one hope-raping object, in my life of Link's Awakening/Seasons/Ages, I've grown accustomed of the chiming/trollfacing and not being able to find how to get the key. D:
2. Hanged bodies: Holy cripes, Koholint Island has some giants among men. surprised
3. Boss- Although I'm not as familiar with Link's Awakening from other titles in the series, I feel your pain *cough*LinktothePastcopy/pastaboss*cough Spin Slash, anyone?
4. Big update- I actually liked it that way, no need for compression or dividing Zelda dungeons into chapters, eh?
5. Screenshot retrying- Oh man, I can totally relate (trying to get a screenshot of Sailor Moon attacking via karate/ballet form) although I can imagine your case being more Hellish as not only do you need to time it right, but steer him. gonk
6. YAYYYYYY!- Keep going, this is very fun to read and I'm sure the other readers agree with me full out.
|
|
|
|
|
|
|
|
|
|
|
|
|
|
|
|
|
|
Posted: Tue Feb 22, 2011 11:44 am
The Lolwut Pear That was magnificent, here's my notes: 1. Compass: That is one hope-raping object, in my life of Link's Awakening/Seasons/Ages, I've grown accustomed of the chiming/trollfacing and not being able to find how to get the key. D: 2. Hanged bodies: Holy cripes, Koholint Island has some giants among men. surprised 3. Boss- Although I'm not as familiar with Link's Awakening from other titles in the series, I feel your pain *cough*LinktothePastcopy/pastaboss*cough Spin Slash, anyone? 4. Big update- I actually liked it that way, no need for compression or dividing Zelda dungeons into chapters, eh? 5. Screenshot retrying- Oh man, I can totally relate (trying to get a screenshot of Sailor Moon attacking via karate/ballet form) although I can imagine your case being more Hellish as not only do you need to time it right, but steer him. gonk 6. YAYYYYYY!- Keep going, this is very fun to read and I'm sure the other readers agree with me full out. Thanks bro. :3 1. Dude, I know that feeling. There was a dungeon in... it was either Seasons or Ages... might have been Seasons, where the compass makes a chime in a room with water. You kill all the enemies, but no key shows up. Turns out the key was underwater the whole time. 2. Giants from Majora's Mask, perhaps? XD 3. Some bosses are just jerks. Everytime I tried to spin attack this one, he'd evade by covering his tail, and I'd get sent flying into the pit. Kinda why this guy took so long to beat. 4. I hate it when LPs have dungeons broken into multiple chapters. Granted, it's hard work for me since the dungeons are only going to get bigger, so I can understand why people break them down. 5. There's a later dungeon where the platforms will move around, so that will be hard to get a good jump shot. Then there's a room where the ground breaks beneath you. And then you've got your large pits where you gotta combo with your items to make that leap, and that will be impossible to take a shot of without messing up and falling in. So yeah, no retakes. 6. Thanks. This week, I'm a little busy (and Link still has a broken mind), but we'll try to get another update sometime this weekend.
|
|
|
|
|
|
|
|
|
|
|
|
|
|
|
Posted: Tue Feb 22, 2011 7:18 pm
Chapter 5: HERE COMES A NEW STALKER!!!Last time on LP LoZ: LA DX, we just cleared the first of many dungeons, and Link had his mind broken thanks to the stupid Stalker Owl. I sent him to go see Old Man Ulrira who lives on the island, who... doesn't say much in person. So instead we're gonna give him a phone call.  -few minutes of therapy later- 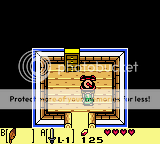 How'd it go, Link? Link: I think I'm gonna be okay now. 3nodding Awesome. Now go back to where I ditched you we stopped last chapter so we can start this next chapter.  So yeah, dungeon cleared, kickass cello snagged... let's head back to town.  Upon entering the town, we hear panicky music and the two kids that normally play catch run up to us. Link: Oh, you want me to play catch with you guys now? o: 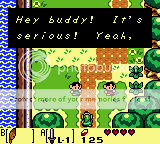 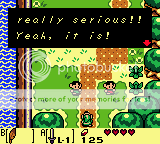 Link: Nowai. Tell me. Tell me tell me tell me.  Link: Maybe they came to sightsee? 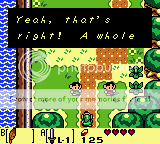 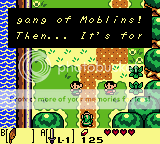 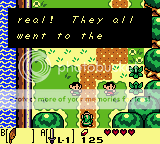 We're not doubting you. 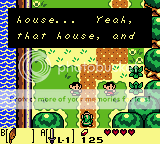 Link: That house? No, that house. Link: They need to be more specific than that. stare 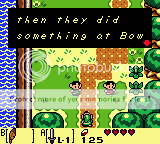 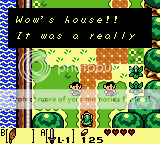  Link: Those foreigners sure are rude. I hope you sic'd the Cuccos on them. That'll teach them a lesson! 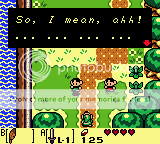 Poor kids passed out from shock. Long story short, Moblins came to town while we were kicking a** and taking names in the Tail Cave, then threw one hellova party that was so hardcore that it scarred these boys for life. Surprisingly enough... there are only 3 people who remember the scene. Everyone else in town will never make a mention of it. Probably got drunk at the party and passed out. I dunno. Let's go look at the damages... 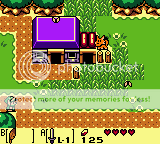 THEY TOOK THE CHAIN CHOMP! D8 Link: THOSE BASTARDS! THIS. IS. SPARTA! WAR! We'll head up to the Mysterious Forest now (it's only a little mysterious).  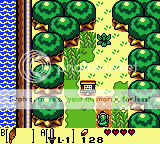 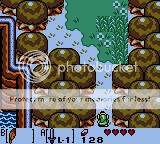 Link: Ooh! Ooh! Roy! Can I go interrogate those guys and see if we can find out where they took that Chain Chomp? Eh... sure. rolleyes NEW MISSION: INTERROGATE MOBBOS UNTIL THEY COUGH UP BOW WOW'S LOCATION. 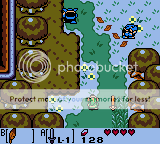 There be some Moblins. Get 'em, Link! Link: RAWR! scream Moblins: gonk 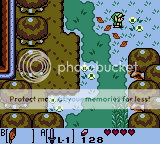 Link: They didn't know anything. Let's keep looking. 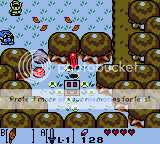 Link: There's another one! Moblin: Bwah? o3o  Link: Nuthin' outta him. These guys sure are keeping quiet. We'll take a short intermission while Link goes to find some information. 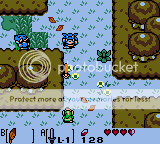 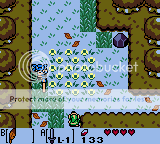  Link: Aye! Avast, ye Sword Moblin! D< Well, I made a quick phone call to Ulrira and got our destination. Link, any luck with the interrogations? Link: Not really... they're staying quiet. That's because they don't tell you where to go. You're definitely not cut out for interrogations. Nice try. 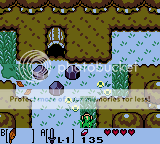 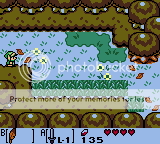  Now that we can jump, let's grab that piece of heart.  Two down, so many more to go. We'll head up this time. 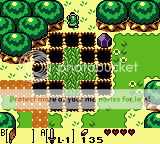  Oh hey, a swamp. Looks like we're near the second dungeon. The only problem is... this isn't the way to it. But that's fine. We have other priorities right now.  Gah! It's STALKER O-- Oh wait. False alarm. 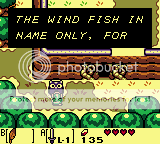  If he is neither Wind nor Fish... then what is the Wind Fish? Why does he even have that name?! There's something I wanna show you guys before we head into that cave next to the owl, so just bear with me for a moment. Remember last chapter when I mentioned photographs when explaining the stuff on the pause menu? Well, we'll go see the guy now. Oh yeah. We're just on the outskirts of Tal Tal Heights. SONG PLEASE!   Bro's got a nice little spot here. Let's head in.  And here we have the camera guy! 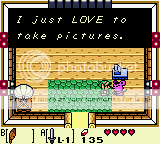 Most of them are illegal shots. When people find leaked images and stuff on the internet and blackmail photos, this is the guy who's responsible for most of them. 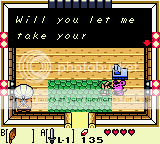  It doesn't really matter what you say... you will still have your picture taken. Either you take the easy route and go with 'yes', or you can deny him taking pictures of you for a little while. He'll get pissed then kick your a** before taking a picture of it. Since I didn't feel like refusing him at this time, I just went with yes.   He won't let you leave until you take your picture, so just go to where he told you to go and get it over with.    Link: You give horrible titles. I would have gone with 'Here Stands the Island's Badass.' Once the picture's taken, he'll wander over to the side.      Congrats... we now have our second stalker, the BIKER MICE FROM MARS STALKER MOUSE. Anyway, let's take a look at our album, shall we?    Link: Dammit, even the album's title sucks. gonk  Move with the D-pad, select with A, leave with B. Simple enough. We've only got one picture so far. 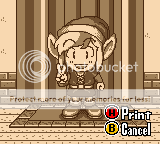 "Here Stands the Island's Badass." If you refused to get your picture taken, you'll instead get this:  "Game Over" Right. Now that that's done, head back over to that cave I mentioned before. Yeah, I reused this image. Shut up and go inside.    Link: I eat weaklings like you for breakfast. You don't taste good at all. Anyway, you'll have to clear all the enemies in the room to advance to the next one. All that's here is a Sword Moblin, so kick his a**.  Go through the door.  Four regular Moblins this time. Not so tough, but it can be overwhelming if they all shoot their arrows at you. Use your shield if you must. Once they're gone, it's time to fight the Moblin Boss.  Oh, one of the Moblins dropped this when I went through. This'll make the mini-boss battle look like a joke. 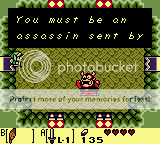  Link: I'm afraid I don't know who Madam Meowmeow is. But I ain't no assassin. I'm just pissed that you guys threw a party. Without me. stressed 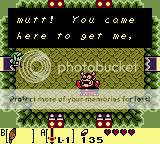 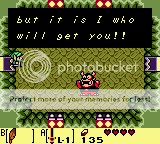 Link: You wish. xp Overall, this guy is a joke compared to the Tail Cave's Nightmare. If one of the Moblins dropped either a Piece of Power or the Guardian Acorn, this guy will be wiped out pretty quickly. He'll shoot a few arrows at you before banging on his chest with his arms, signaling that he's gonna charge at you. Move out of the way and watch as he crashes into the wall.  This is the only time when you'll actually be able to hurt him. He's invulnerable otherwise. Sometimes he'll fake you out and run, but stop just before he hits the wall, so watch out for that. 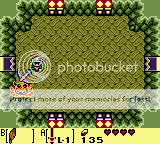 Once he's done, grab the fairy he drops and head to the room on the right.   Well, we found the missing Chain Chomp. Go up to the rock and grab his chain.   Dude. I love Bow Wow. He is the single most badass companion you will ever get in this game, aside from one other character I'll mention later. You only get him for a short time, but he is FABULOUS. Just watch. Link will take him outside and show you.  Link: Come on, doggy! Let's go get your revenge! twisted 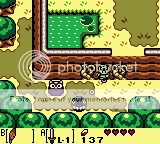  Bow Wow: -barks- 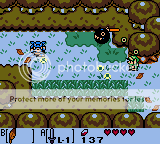 Bow Wow: Omnomnomnom. :V Yeah, that's right. This guy can fight too. And he can eat pretty much any overland enemy. You heard me. Any. Overland. Enemy. Bow Wow is on top of the food chain. Next time, we'll take the dog out on a walk and explore the 2nd dungeon. So see ya then!
|
|
|
|
|
|
|
|
|
|
|
|
|
|
|
|
|
|
Posted: Tue Feb 22, 2011 7:44 pm
So many things I gotta say.
First off: Tail cave. Man the memory comes back to me of that place. Many times of, "OMG! KILL IT KILL IT KILL IT!" That comes along with many LoZ games.
Second: THOSE KIDS NEED TO STOP TAUNTING US! Link, go play catch with someone else, like Marin.
Third: I wish I had some creative titles. But, as for me, I don't think ahead that well.
|
|
|
|
|
|
|
|
|
|
|
|
|
|
|
Posted: Wed Feb 23, 2011 7:36 am
Great LP so far! I've been giggling all the way through!
I can't wait to see you and the stalker ghost. He creeped me out when I was, like, seven or so when I first got this game.
|
|
|
|
|
|
ThePersonInFrontOfYou Vice Captain
|
|
|
|
|
|
|
|
|
|
|
|
Posted: Wed Feb 23, 2011 1:19 pm
Thanks for your support, guys! 3nodding 1. It's always the first dungeon that's the hardest, considering how you start with only three hearts and the boss is able to take out one of those hearts in one hit. So basically you only have 3 tries to kill it. And unlike the Zelda games for the systems, in the handheld ones, you don't have a chance to pick up hearts in the midst of the fight when you're running low.Link: 2. All Marin wants to do is sing. Trust me, I tried asking.3. My titles always come to me if not before I start the chapter, then during it. Chapter 5's title definitely came during it.Glad I could bring a smile or two to your face. :3
Oh that will be a fun chapter. 8DLink: G-g-g-ghost? Y-you mean P-poes, right? D8Anyway, Chapter 5 will be up shortly. For once, it's a short chapter. 8D Which is good news for me, since Chapter 6 is LOOOOOOOOONG.
|
|
|
|
|
|
|
|
|
|
|
|
|
|
|
Posted: Wed Feb 23, 2011 2:18 pm
Chapter 5: I Had a Hard Time Choosing Between 'Good Boy, Best Friend!' and 'Sign: The Most Comical Item in LoZ: LA DX!' For the Title, So We're Going With Both!Welcome back, readers! Last time, we dared to rescue Bow Wow, the Chain Chomp who tormented us every time we passed his house. Let's go check up on our duo, shall we?  Link: He's raring to go. Bow Wow: -bark!- First, let's go let Madam MeowMeow know that her dog's safe. Link: Look! I'm walking the dog! 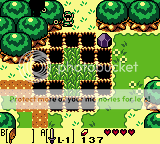 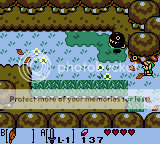 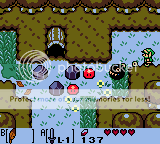     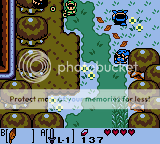 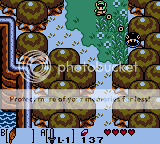 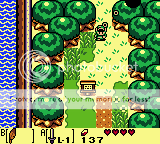 Did you know? That entire time walking back, Link didn't use his sword? Bow Wow did all the work for him. Well, except for cutting the grass. Link: Good boy! Bow Wow: -burp- To Bow Wow's place!  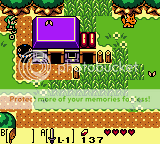 Link: I'll just tie you to your stake... Bow Wow: 8D 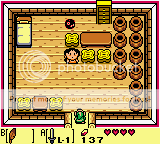 Here's Madam MeowMeow's place. Look, she's got another Chomp! That's what, three dogs she's got? Anyway, let's go talk to her and let her know we got her dog back.   Link: I didn't do it for the mutt. He was just spoils of war. I just wanted to let those Moblins know to never throw a party without me.   Link: Wasn't planning on returning your dog anyway, Kitten.  And so it looks like we've got dog-walking duty! I'm going to go ahead and say this now... I am NOT cleaning up after Bow Wow.  Link: Bow Wow, mini edition. You're not so scary when you're tiny. You're more... adorable. 4laugh Anyway, let's go back outside. There was something I wanted to test since we've got Bow Wow that I forgot to try in previous playthroughs.  So... even though the fox is not as dangerous as Bow Wow, it's affected by Marin's calming song. And it has no effect on Bow Wow. Link: Well, there goes my plan to lull all the monsters out there into a false sense of security with her song before killing them. Guess I'll just have to do it the normal way. Anyway, back to the forest. 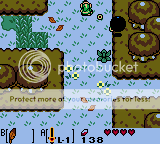 Head north from here.    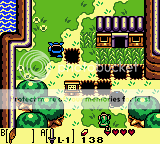 And we're finally out of the forest. The house here is a place of importance for later, so don't forget where it's at! Like the good adventurers we are (*coughcough*), let's check the sign. 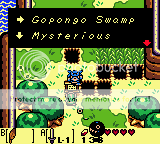 Well, looks like we're heading the right way. Gonna make a quick detour first. Going up! 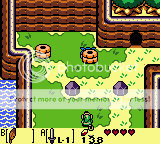 If you've played other Zelda games, then those yellow things should bring back some memories. Yep. Like Likes. Little bastards eat your shield. And we don't want to lose OUR shield. It's got our name on it! Take care of them and the moblin (who's not shown in this image because Bow Wow already ate him the moment I stepped into this area) before going in that cave. 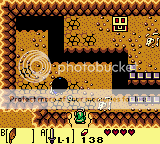 Bow Wow is amazing. The minute you step into a new screen, he lunges at the closest enemy to messily devour them. Even if the enemy hasn't appeared yet. Those slimes in this room never stood a chance. Jump across the pit and go check out the chest.  Link: Woo! Money~ Jump back over and head to the right. 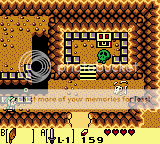 More slimes by the stairs, and we can't reach that chest yet. We will soon, though. So remember this place. Head out of the cave.  More Moblins and Like Likes. You know what to do. Heading up for a brief moment.   These owls don't have much to say compared to Stalker Owl, but they're very, very cryptic. Anyway, head back down and move south. 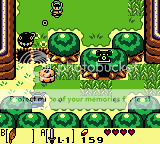 Let Bow Wow get rid of the Like Like before jumping over the pit, unless it's not near it. Then head to the right. 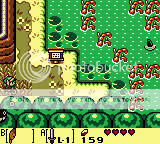 Oh, is this the swamp? Let's see the sign and make sure.  Aww...  Oh, we're cool then. cool 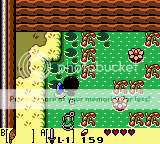 Those flowers are immune to your sword. You can either let Bow Wow devour them, or you can try sprinkling crack on them, but I don't know if that'll work.  Big flower is big. And it shoots FIREBALLS at you. But despite it's size, Bow Wow makes short work of it. 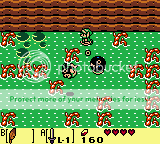 Not only does Bow Wow show that size doesn't matter, it's still holding its place on the top of the food chain. Take the right side when heading down.  Bow Wow spares nothing. He literally devoured the big flower the moment I stepped into this area.  Here's that chest we saw earlier. 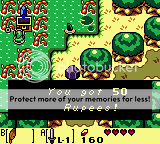 Oh hey, we now have over 200 rupees. We can totally afford that shovel back at the store now. Anyway, head back to where we found that first big flower, then go right.   Looks like we found our next dungeon. But there's those flowers in the way. Let Bow Wow do his thing.  Awesome. Link, go tie Bow Wow to one of the boulders. I doubt it'll hold him though. As much fun it'll be to bring him into the dungeon, we can't. Link: Aww... but it was fun letting Chompy do all the work. D8 Bow Wow: Grr...  Note you can't actually tie him to the boulder. He'll follow into the dungeon, but won't show up inside.  And here's the entrance to the second dungeon, the Bottle Grotto! Next time, we'll cover this place and finally find something that'll let us lift heavy objects! See ya next time on LP LoZ: LA DX!
|
|
|
|
|
|
|
|
|
|
|
|
|
|
|
|
|
|
Posted: Thu Feb 24, 2011 3:38 pm
Chapter 6: So Many Mario References, So Little Time.What? No, I'm totally not uploading these way too fast. I'm trying to keep a one-a-day maximum here, with the exception on weekends. And I totally work on them AFTER I settle all the things that need to be done for the day, including studying. So don't worry. I've got my priorities in check. Anyway, last time, we got to use Bow Wow for a little while and kick a** with him just before stumbling into the entrance of the second dungeon, the BOTTLE GROTTO.  As you can see, there's a chest behind a bunch of pots. We can't get to that... yet. We will soon, though. Head on up to the next room.  Looks like we've got ourselves a dark room! Two firepits are up on the raised area demanding some crack. We've also got the shiny thing wandering about. To our left, we have a key door. To the right, a locked door. Bust out your magic powder. 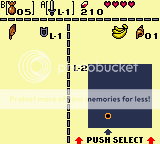 Even though we may be running low, we're actually going to be okay. Sprinkle the firepits with some magic powder to light both of them, then head right when the door opens. 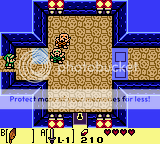 Oh hey, besides the orange Stalfos, we now have a GREEN Stalfos. Unlike his cowardly orange counterpart, the green one will chase after you, then jump and try to ground pound you. But he's not a threat to you. Least, he shouldn't be. Once they're done for...  A key drops. Snag that and head south.  This is a new guy... let's turn him around cuz he looks a little familiar.  Oh hey, a Shy Guy! This guy will mimic your movements and the direction you're facing, but move in the opposite direction. So if you face left, the Shy Guy faces right. If you move up, Shy Guy goes down. Just keep your back to him like so and charge up your sword.  Overall, he's not a dangerous opponent. He won't even attack you. The Shy Guy wants to be your friend! He's just... shy. That's all.  Killing the Shy Guy reveals a chest, and inside of it is...  The HOPE-RAPING COMPASS (as Lolwut has put it)! Like last time, it'll let you know where keys are with a little chime. With compass in tow, head up, and then to the right.  You'll notice that some of the floor in this room is raised. Watch out for the Buzz Beetle (I think they're called that... don't quote me here) and go check out the crystal. Smack it with your sword! 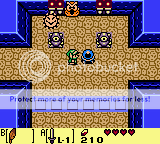 Lo and behold, the floor is now lowered, giving you access to the room south of you. There's more of these crystals in this dungeon, so if you need to change which tiles are raised or lowered, find one of them and smack it. Of course... there shouldn't be any too far away from a crystal. Anyway, head south.  I hear a chime. Key's in here. Get rid of the Hooded Stalfos swordsman. Smack that crystal and open the chest.  Bam, a key. Make sure the tiles are lowered in this room before heading right.  Another chime here. There's also a flying bag of crack. Are we sure we're not high? Jump across and grab the flying magic powder while making your way to the switch. Press it.  Chest appears. Inside of it is...  Another small key. Don't bother with the crystal for now and head around so you can head north.  Pair of Shy Guys. They just wanna be friends. Honest! Sadly, they MUST DIE.  Killing the duo will drop a key. We'll have to backtrack a little to get to it though.  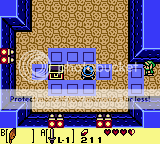  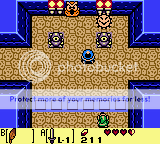  Yes, we did have to hit the crystal in that room where the Stalfos swordsman was. Otherwise we wouldn't be able to get to the key. Now that we have it though, walk ALL the way back to the other side of that wall.  Head right.  Remember these guys? Break out your shield and flip 'em over. Once they're toast, use a key on the door and head up. 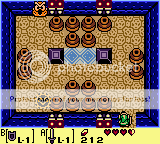 There were a pair of Keese here, but I already got rid of them by the time I got this screencap up. The puzzle's not too hard to solve. Just watch out for the Buzz Beetle.  When you get them like this, stairs appear. Take them.  Anyway, just climb down the ladder, jump over to the moving platform, then jump to the other side when it reaches it.  Jump over to where that platform is and wait for it to come down to you before taking it up to the ladder.  The nice thing about emulators is that these dark rooms actually don't look that dark. It's a lot scarier navigating through rooms like these on the actual cartridge, since you can barely make out the pit in the middle of the room. Since we can see, watch out for the Keese and jump to the middle platform where the flying heart is, then jump across again (watching out for the Buzz Beetle) and go through the one-way door.  Mini boss battle time! Overall, he's decent. When you hurt him, he'll toss a bomb at you. Sometimes, he'll also charge at you. If he grabs you, he'll pick you up and toss you to deal a heart's worth of damage, and you'll be stunned when you hit the ground. So don't let him touch you.  When he's done, grab the fairy and take the portal.  Back at the entrance, let's head north again back to the first dark room.  Use a key on the door to the left and head through.  Pair of bats here, a pair of firepits, and four traps in this dark room. Take out the bats (use the magic powder on the firepits if needed) and then head up once the Keese are gone.  And there is yet ANOTHER dark room. You can also see a chest here, but since the H-R Compass didn't chime, it's not a key. Make your way over, knock the crab off the edge, and seize your treasure.  A stone beak. This'll come in handy... maybe. Make your way back to the entrance. 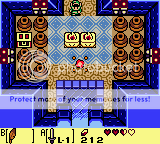 And then take the portal back to the mini boss room.  Go right. 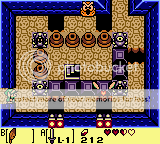 There's stairs in the middle of the room that you can't reach, as well as an Owl Statue, a pair of bats, and a floating heart. Oh, and a couple of pits too. Doesn't matter if you take the top or bottom route, as either way you'll still need to go to the door at the top of the room.  Oh, this is a fun room. You see that thing over there in the bottom left corner? Think of that as a... black hole.  When it flashes red, any movable object in the room gets pulled towards it. Yes, even those bats. Fight against the pull by going in the opposite direction and make your way to that chest carefully.  Snag the map, then carefully make your way up to the north. In the rare instances that you do get pulled really close to it, try to hit it with your sword. It's still considered an enemy, so yes, you can still kill it. Link: Link >>>>> Black Hole. 8D 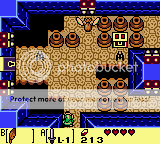 In this room, we have a couple of bats, a treasure chest surrounded by some pots, and a key door to the left. Smite the bats and seize the treasure.  Money money money~ Let's take a quick peek at our map, shall we?  This dungeon is shaped like a bottle. Oddly enough, this dungeon is called Bottle Grotto. If you recall the last dungeon, when we looked at the map, it was kinda shaped like those black worm things we saw. Oddly enough, those things are called 'Tail(s)'. And what was the name of that last dungeon? Tail Cave? Yeah. Nintendo was really creative in coming up with these names. XD Anyway, use your key on the key door on the left and go in.  Link: ASDFJKL; GHOSTS! gonk  Link: My sword! It is ineffective at killing them! D8 Which is why you take some magic powder and light the firepits. You really only need to light one. They'll turn black and try to escape, and then you can go hit them with your sword. Once the ghosts are gone (and Link has changed his pants), a chest will appear. 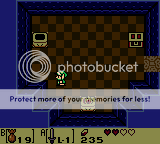 Inside of it is...  Obby. Power Bracelet, level 1!   Not just pots and stones. Grass clumps, chunks of wall in the forest, bottles... Head back into the previous room.  +5 points in strength! Link classed up, from 'Wuss' to 'Heavy Objects Guy'! Take the top right route.  Here's an interesting little puzzle. The H-R compass chimed, so we know there's a key in that chest. But how to get it? Well, there's a couple of ways you can do it... Walk over to where that lone raised block is and smack the crystal.  You can jump over to the other raised platform and wander over to the chest while still on the raised platforms. Or you can drop in between the platforms in front of the crystal and smack it again, then walk right to the chest. I decided to be overly complex and do something that didn't need to be done.    Just a little bit. I got rid of the pots on the far side, then jumped back over and went to get to the chest. Anyway, inside said chest is...  Aforementioned key! We need to smack the crystal once more so that the platforms are raised under you.  Head off to the right.  Take down the mini blob and the crab before continuing to the right. 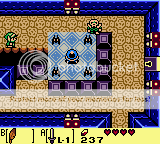 Couple of bats surrounding a crystal and a green Stalfos heading your way. Deal with them. Then head south.  There's a little chime here, which means there's a key. I'm going to be honest here. I HATE this puzzle with a passion. You have to kill the enemies in a specific order to get the key. Also, that bunny behind the blocks can't be killed with your sword. You'll have to throw a pot at it. If you kill the enemies and the chest doesn't appear, you clearly didn't kill the in the right order. Take the stairs and come back to reset the room. I thankfully managed to remember the order by the second try. You have to kill the Bunny first, then the Keese, then the Stalfos. Any other order will not work.  Check out the chest.  Bam! Nightmare Key. We're set. Let's take those stairs in the room, shall we?   First Goombas, then Shy Guys, now Piranha Plants? Nintendo, how many references to your first child, the Super Mario Bros, must you make? Pop in some Mario Underground music, don your 'stache, plumber outfit and hat, and and take down these classic Mario enemies. Head left. 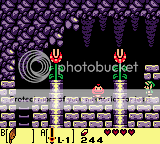 More Mario enemies. Take them down as usual, then take the ladder down.  And we're back to this room! Toss the pot out of your way and head left back to the mini boss room.  Take that portal back to the entrance, then toss those pots out of the way to get to that chest we saw back at the entrance.  If you haven't collected 200 rupees yet, you're clearly doing something wrong. Take the portal back and head to the right and go back down the stairs.  . 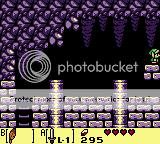 That's how we get back up. From here, time your jump and jump to the pipe when the plant's retreated into it, then climb down the ladder back into the Nightmare Key room.  Head back north.  And head over to the right.  More Bunnies and a Blob. You know how to get rid of these guys. Once they're gone, stairs appear.  Take them down.  There's a movable platform, and a few pots. Go ahead and stand on that platform, and it'll go down. Like so. Link's such a fatty.  Link: I am NOT fat. Dx I'm kidding. Head left from here.  Lone pot here, and another movable platform. Save the pot. You'll see why.  Link: See?! If I was fat, this thing would go down! D< Dammit Link, I said I was kidding. stare Go get the pot and climb back up the ladder with it before standing on the platform.  Down it goes. Take the ladder up.  And we're right outside the Nightmare's room! Jump over to the door, save if needed, then charge in.   Link: Ho Ho Ho? S-Santa?! Are you trapped in that bottle?! Don't worry! I'll save you! D8  You know, I took a small break and let the game run at this image. And guess what? The boss doesn't move until you do. Pretty crazy, huh? I'm surprised it didn't kill me while I let it run. Anyway, after having a staredown with a bottle for a couple of minutes, let's get the show on the road. Link: Can I have a battle song? Eh, sure... I'll see what I can cook up with that cello we got... and here.  So apparently, we're fighting a genie...clown? ... O-okay.  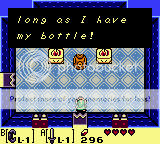 He'll brag about his bottle and how you can't hurt him as long as he's got it. Blah. He's a braggart. This boss battle has two parts. The first, he'll come out of his bottle and start throwing fireballs at you. Just dodge.  After a while, he'll run out and retreat into the bottle, and it'll start hopping around and try to run into you. Just as he enters the bottle, hit it with your sword to immobilize it.     Yeah yeah, keep telling yourself that. stare Just pick up the bottle with your Power Bracelet.  Then toss it into the wall. He'll hop back and reappear to throw more fireballs at you. Just dodge, wait until he goes back in, then stun him with the sword before throwing him into the wall. Do this 3 times total. Once his bottle breaks, the second part of the battle begins.    Oh, whatever shall we do? rolleyes He'll then chase after you. Bat him away with your sword.  Two of him will appear, though one's faint, and will circle around the middle of the room. You can't hurt him, but neither can you. I guess this is his way of re-materializing or something. He'll then reappear and throw a fireball at you. Just dodge and smack him with your sword again. Later, rinse, repeat until he's dead.  Link: Eheheheheh. twisted Genie Clown: burning_eyes  He drops a Heart Container. Go get it.  You know, it's impossible to do a three heart playthrough in Link's Awakening, because the doors don't open until after you get the Heart Container.  With another heart and another Nightmare defeated, head to the left.  Behold, the second instrument.  The RAINBOW CONCH! It'll then play some notes before warping you out of the dungeon. 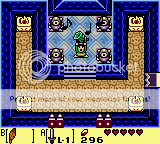  Warpy warp!   And here's a hint on the location of the next dungeon. 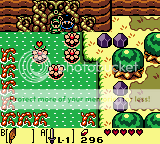 We're now back outside and reunited with our buddy Bow Wow. Link: Didja miss me? Bow Wow: -growl-  Next time, we're going to return Bow Wow, do some things around town, snag a few shells and heart pieces, and then start making our way over to the prairie! See ya next time.
|
|
|
|
|
|
|
|
|
|
|
|
|
|
|
Posted: Fri Feb 25, 2011 3:47 pm
Chapter 7: TREASURE TIME! TREASURE TIME! Part 1Sup, yall? Last time I checked, we had just finished clearing the second dungeon, Bottle Grotto. I'd highly suggest that if you didn't get all the treasure in there yet, get your a** back in there NOW. Since we're returning Bow Wow this chapter, this is your last chance to get everything in there. If you miss this one shot, one opportunity... you'll have to wait a long, long time before you can get back in there. THIS IS YOUR ONLY WARNING. Fortunately, if you've been following along in this LP, you should already have all the treasure in that dungeon. So we're good to go!  This chapter is dedicated to collecting some stuff we couldn't get without some of the items we now have, namely... the Power Bracelet. And because this chapter is all about backtracking to find treasure, I'm not going to show the step-by-step on how to reach some of the locations here. If you don't remember, kindly check back on previous chapters. After all, we're hitting all the old locations this time. Well, except at the very end.  Make your way back here and go inside that cave. 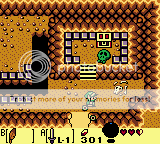 Now that we have the Power Bracelet, we can finally open that chest.  As I stated last chapter... if you didn't have 200 rupees by now... you are clearly doing something wrong. Head back towards the forest and jump the gap near that house we saw earlier, near where we found the key. Make your way back to the cave-side that had the mushroom. 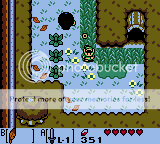 Go inside.  See how there's a piece of heart? Yeah, we can't get it from this side. So just head into the next room and come back. 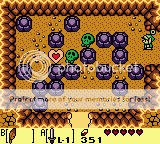 The cave spirits totally reset everything back to their original locations. Pretty sweet, huh? Anyway, toss those skulls out of your way and claim that heart.  3 down... 9 more to go. Why 9? Simple math. You start with 3 hearts. There's 8 dungeons in this game, each with a Heart Container. 3 + 8 = 11. There are a total of 14 hearts you can have, max. The remaining 3 hearts are broken down by Pieces of Heart. 4 pieces make 1 heart. 3 x 4 = 12. Since this is the third one we found, there's only 9 left on this island. Take the cave exit that had the treasure chest in the room.  We wanna head north from here. 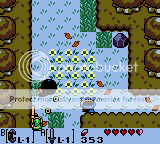 Remember how I mentioned a couple chapters back to remember this place? Well, now we get to see why. Get the Power Bracelet out and lift that block in the corner. 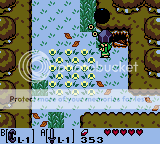 Oh look. Stairs! Take them down.  This certainly doesn't look creepy at all. See that pit between those two skull statues? Sprinkle some crack in there.  Link: Awww... I summoned a fairy. 3nodding  Link: ASDFJKL; THE FAIRY WAS ACTUALLY SATAN! gonk    Link: H-He's g-g-g-g-gonna t-t-take my s-s-s-s-s-s-s-s-soul! gonk gonk gonk crying  Link: N-no... -clicks yes- Link: D8! How could you, gabriel sama?! Dx    Link: N-no-- Wait, more crack? ******** yes! Gimme!! Satan: IMMA FIRIN' MAH LAZER! BWAAH! Zappy zap. Oddly enough, I don't know what happened with this screencap. That top portion should be the same color as the rest of the screen, with only you, Bow Wow, and the flying dude retaining their colors. I'm just going to blame it on the game. So after you get zapped by the flying guy's Shoop Da Whoop...    He'll then fly off after he speaks. Check out how much magic powder you've got. 40. That's right. 40 uses of magic powder. That's twice as much as you could carry before, which means we now have twice as much crack to use. 8D Note: There's more places like this in the game, and each one will increase the carrying capacity of one of your items. I believe... there's a total of three on the island. One to double the magic powder you can carry, one to double the number of bombs you can carry, and one to double the number of arrows you can carry. Seek them out. They're totally worth it. There's one thing I'd like to show off that I'm not sure if the creators of the game intended to do.  See where Link's pushing? There's places like this in the forest that are very, very odd. Usually they're on the corners, like where he's pushing. With the Power Bracelet, grab and pull.  Congrats, you found a secret boulder and some weird graphic where you pulled this out. It's nothing really special. Just wanted to show it off as one of the Easter Eggs. Head south from that location.  With the Power Bracelet, get rid of the boulder blocking your way and the enemies too before getting to the chest. 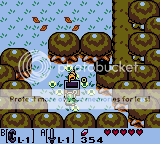 Another Secret Seashell. If I were you, I'd recommend collecting these in increments of 5 before heading to where you need to take them. You'll see why in a different chapter. Well, we're close enough to town as it is. Time to say goodbye to Bow Wow. 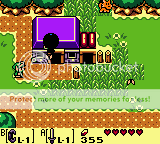 Link: You were a good dog, Chompy. Bow Wow: -bark- :3 Head inside to talk to Madam MeowMeow.  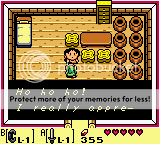   Link: Ma'am, you have no idea how formidable your pooch is. I have seen him devour things easily double his size without any problems. He probably could have escaped from the Moblins without our help, if it wasn't for his chain, Bow Wow's one weakness.  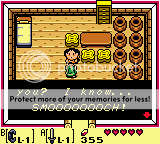 Link: O //////////////////////////////////////////////////////////////////////////////////////o 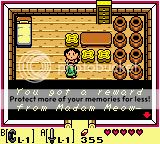  You gotta love the inner voice. It's so totally jealous of Link right now. XD Anyway, head outside to trigger a photo event with Stalker Mouse.  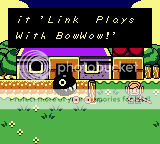 Link: Again with your poor naming sense. You know what, I'll let gabriel sama name these from now on.  The Stalker Mouse clearly does not know Bow Wow very well.   Translation: I am going to ******** you up if you get near my post.  Link: But... Stalker Mouse: Human is higher on the food chain than dog. Link: ....   Translation: I'm warning you. This is your last chance to get away from me!   Translation: That's it! I am seriously going to ******** you up, Link! D<   Seriously, how long does it take for Stalker Mouse to get his camera ready?  Posing like the badass we are.  Bow Wow is not amused.  "Bow Wow: Will ******** You Up if You Get Close to His Post and is Still On Top of the Food Chain." One thing I forgot to make note of when we got the Power Bracelet, I believe. You can also pick up Cuccos with the Power Bracelet.   If we have 200 rupees, we can totally make a stop here.  Oh hey, he finally stocked up on bombs. About. Damn. Time.  There's a secret way to stealing stuff from his shop. I won't show it to you guys just yet, since if you do end up stealing it, people will never call you by your name again.  You're stealing it wrong. stare We have the money for it anyway, just buy it.   Think this is expensive? Wait 'til you see the bow. Okay, we now have a shovel. Let's get some bombs too.  You'll have to leave the shop if you wanna get more.  In the split second we stepped out, he's already restocked his shelves. There's now a bow up there for... 980 rupees. Yeah, that will take forever to get. A lot of people tend to steal that item instead of the shovel, since it's much more efficient than stealing both the shovel and the bow, and easier on your death count. Buy more bombs (20 is your limit for now), then head back to where we traded the ribbon for dog food.  Bust out your shovel and dig.  The location of the shell varies in here, but there is a Secret Shell here. Once we're done here, head back into the Mysterious Forest and make your way to where you found the Piece of Heart surrounded by holes. From there, head right.  I'm pretty sure I showed this place in one of the previous chapters, so if you don't remember how to get here, check for it. The Heart Surrounded by Holes area should at least be familiar to you. If that's still not familiar to you, it's just two squares north of the Witch's house where you made your drug deal. Toss that boulder out of your way and head inside.  This woman is amazing and you should totally remember where this place is. Seriously. You should.    Link: Orly? o:   Link: ... Are you a prostitute? o: The price tends to vary, but this is an amazing deal. If you have the money, get it. If you don't, get the money and get it. I s**t you not, this is important if you want to live. And no, Link. She is not a prostitute. stare 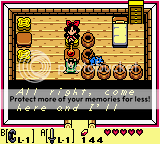  If you were injured when you do this, she'll heal you up, free of charge.     Like she said, this bottle will revive you if you die. Kinda like in the later games when you have a pink fairy in a bottle and you die. It'll heal you up to full health (if I remember correctly in this game). It's a great item. If you do end up dying at some point, come back here and buy more. Like I said, the price will vary. Head south towards the Witch's Hut.  So the Prairie is just south of us. And there's a cemetery to our right. We can explore the cemetery later. I'd like to point out that this spot is actually very close to town.    I only made you go all the way over to Crazy Tracey's place to show you the Revive Potion. You can either head east of town, or south of the Witch's Hut to reach the prairie. Doesn't matter which route, as they both lead up to the same place.  Animal Village is a key location, but we don't have the means to reach it right now. Don't worry about it for the time being. We'll cover that place when the time comes for it to be covered. Head east.  Now, it doesn't matter if you went south from the Witch's Hut or if you went east from town. This is where the two paths converge. There's an interesting device here. Let's go check it out.  Link: WAAAAAAAAAAAAAAAAAAAAAAAAAAAAAAAAAAAAH! Dx   It's a Teleporter (least, that's what I call it. Calling it a Cannon wouldn't be wrong either). There's a few others like this on the island, so if you find one, jump in and it'll take you to any of the other ones you've already found. Head South.  Can't get up there yet. Just keep going south.  Hm? Oh, here's the third dungeon.  We don't have the key, so we'll have to go find it... next chapter. Next time, we'll head back to the Tail Cave to check out behind the cracked wall, snag a couple more shells, meet a Lord, ransack a castle for Golden Leaves, do some more trades, and find a key. See ya next time!
|
|
|
|
|
|
|
|
|
|
|
|
|
|
|
|
ThePersonInFrontOfYou Vice Captain
|
Posted: Fri Feb 25, 2011 4:00 pm
I love how whenever you tell me about a chapter, I love this game so much that I remember the stuff you're gonna do at the same time you do it and prolly sound pretty annoying in the process but whatevs.
Also remember that Bowwow barks when he comes near a Secret Seashell buried in the ground, for all y'all that have never played this game.
And protip: Next time you run into those guys with the card suits on their chests, try to hit them all at the same time with a spin attack right off the bat. They always start out on the same pattern.
|
|
|
|
|
|
|
|
|
|
|
|
|
|
|
|
|
|