Here is how you go from a plain base to a peachy-keen edit

I'm using photoshop 6.0, the paintbrush tool set to 1 pixel, the airbrush tool set to 3 pixels and the dodge and burn tools set to three pixels.
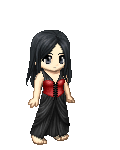
Okay, let's start out with doing a yukata.
The first thing we need to do is get the outline of the robe.
The sleeves are wide but do not reach to the knees like other kimonos.
I'm going to add in some detail lines, so I have some what of an idea where I'm going to do some folds.
I've left space for the obi.

Next thing I'm going to do is select a lighter color and make a new layer UNDER the outline layer. I'm going to then color in the robe.

I'm going to then merge those two layers.
Make a new layer and pick a contrasting color to draw in the obi (sash around the waist).
Remember that the obi is stiff and goes high on the chest. It also has a large bow in back, but that is usually too small to be seen from the front
The obi is in two layers, and the layer underneath is slightly wider than the one on top.

I'm then going to repeat the step of making a layer underneath the outline and color in with a lighter color.

Now obi's are usualy very decorative, and usualy with a contrasting pattern than what is found on the yukata. I'm going to pick a bright, saturated color (like red) and then, after making a new layer, draw diagonal lines on the obi.

Once I've done that I'm going to set the lines to either overlay, color dodge or color burn, and then depending on how it looks lower the opacity.

I settled on overlay, and lowered the opacity to 48%.
Next we're going to make a new layer and outline the lines on the obi with black.

I lowered the opacity to 20%. This is really a subjective thing. Just lower the opacity until it looks right for you
Now it's time to do the decoration on the yukata. I tend to favor naturalistic images on yukata - so that's what we're going to do. I'm first going to start drawing in flowers. Make a new layer, pick a color, and draw a flower.
All i did to get that was draw a five pointed figure, flesh it out with white, then put a center of orange in.

Create a new layer then outline the flower and the center of the flower in black.

Lower the opacity until it looks right. I lowered the opacity on this flower to 35%.
Merge the layers making the flower and make a new layer underneath the layer with the flower.

Every flower has leaves so we're going to make some. Draw in leaf shapes under the flower.
Make a new layer and again outline in black. Leaves have veins so remember to draw them in.

Again lower the opacity until it looks right.
Lather, rinse and repeat until you've filled up the bottom of the yukata.

Merge the layers with the decoration together.
Merge the layer with decoration onto the layer with the yukata.
Duplicate the layer. On the top layer go in with the dodge and burn tools and add highlight and shade.

Now, lower the opacity of the top layer that you just attacked with dodge and burn, until the shading seems to blend in.
Merge the layers together. Create a new layer on top, using the air brush tool and black do some pretty heavy shading.

lower the opacity until the shading blends in. Repeat this step, depening the shading until you're satasfided with the look.
Repeat technique with highlight areas.

merge layers together.
Now we're going to do the exact same thing with the obi. Dupliate the layer, go in with the dodge and burn tools, lower the opacity, merge layers together then go in with the airbrush tool.

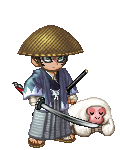
Now we're just about done with the body. I like to add some shading to the skin at the wrists and the neck where the clothing would throw shadows naturaly.

After that you just add in hair and a face and you're done!