- EXPLORATION AND COMBAT -
THE TWO GREATEST JOYS OF ANY PAWN are usually exploring new and mysterious realms, and FIGHTING anything hostile found in said mysterious realms.
Let's go over the basics of exploration and fighting.
EXPLORATION!
HOW TO MOVE
To move, you must either use a special movement ability (usually on SHOE items) or roll a D20. You get a single D20 a day, and you can store up to 3. As posted above, the distance you go depends on the result.
Roll: 1, no move (rats!)
Roll: 2-7, 1 square
Roll: 8-13, 2 squares
Roll: 14-19, 3 squares
Roll: 20, move 1-3 squares, your choice
If you don't like your movement options,
you can choose not to move after a roll. But your D20 goes to waste.
You may only move up/down/left/right or along secret routes (not DIAGONALLY!) and you may not step on a square more than ONCE in any single roll. However, you may make moves like "Left, Up, Right" for a 3-square move, provided there are squares to step on. You can't move OFF the board and you must move the WHOLE distance - not part of it. If you roll 20, you can decide how far you want to move. But if you roll 1, you SKUNK it and your D20 wastes after all.
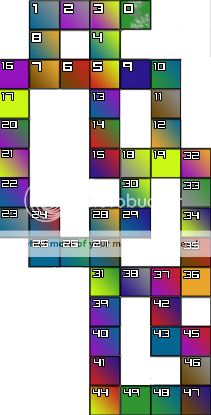
Use the front page map to determine which zone you entered.
If you land on an explored square, you can start playing there right away. Be sure to follow rules for entering and leaving zones.
But
if you land on an unexplored square, you must wait until the next day, for the square to be revealed. You can't move away from the square again, you are forced to stay there until the square is explored the next day.
HOW TO EXPLORE - STAY BETWEEN 0 AND 20
Most zones can be explored, and have an EXPLORATION TABLE clearly marked in the zone description. These tables list roll values from 1 to 20. If a zone doesn't HAVE an exploration table, you can't explore it...
When you explore a zone, you can roll any size of dice from 4 to 20 (Exact: 4, 6, 8, 10, 12, and 20 sided dice are all LEGAL.
Using Random from 1 to X is NOT legal.) You then check to see what happens on the explore table. As you explore, your explore number will go up and down.
Exploring revolves around the EXPLORATION NUMBER. You need to keep it between 0 and 20.
The Exploration number starts at 0 each time you start exploring in a zone. It changes constantly as you search around. And it resets at the start of each day, and also resets if you become lost or move zones.
No matter which dice you roll, your roll is compared to the Explore Table. Your Explore number changes according to the table, you might earn DISCOVERY POINTS - which can be spent discovering new things - and there may be an encounter.
When exploring it is possible to throw more than 1 dice per round. Every dice throw counts - and if your score shoots past 20 or way under 0, you become hopelessly lost. You may also run into several back-to-back fights! Explore prudently.
If a fight starts, you must resolve it before you continue exploring. If there is more than one enemy, you must handle ALL of them before exploring can continue.
ABOUT GETTING LOST ...
As long as your explore number stays between 0 and 20, you can explore this way as long as you want. Roll the dice, change your explore number, and earn battles, Discovery Points and other rewards!
BUT -
If your Explore number goes above 20, you become LOST for 10 minutes for each point over 20.
And if it goes below 0, you become LOST for 1 HOUR for every point below 0.
Getting lost is no picnic.
If you're lost, you can't leave the zone(with ANY method), and
you can't explore, and
you can't use any known buildings or NPCs. Put simply, you're STUCK in the middle of nowhere. In extreme cases, you may be lost for many days or encounter something dangerous.
Once LOST wears off, your Explore Number resets to 0 again and you can resume exploring/playing in the zone normally.
EUREKA! ABOUT DISCOVERY POINTS
As you earn discovery points, you will automatically be rewarded with discoveries the next day. Depending how many you find, you could uncover any number of things in the zone. Most discoveries become common knowledge once found, but there are exceptions.
If you specify a certain thing to look for, the odds of finding it improve, but the odds of getting other things goes down also.
TRINKETS are often found when discovering. It's hard to collect a lot of these, but they make good crafting supplies.
MATERIAL pools can also be discovered. See the section on Material pools.
You might discover something completely unique and interesting. Best of luck.
FINDING MATERIAL POOLS!
One good thing about exploring is the ability to find Material pools (Secondary Resources). These are great for trading and crafting.
If a bunch of Material is over 100 Units, it is probably PUBLIC unless it is specificially mentioned as PRIVATE. Public Material can be harvested by anyone in the zone, whether they found it or not. Any found Material pool less than 100 units is automatically PRIVATE. The finder may decide who harvests it and who doesn't.
HOW TO HARVEST MATERIAL
If there is 100 or more Material in a pool, it can be harvested just like Primary resources, by just posting about it. A base amount of 1 unit is harvested per post.
But if there's 99 or less, you must ROLL to claim it. Roll a 100 sided dice: If the roll is LESS or EQUAL to the remaining resource, you successfully harvest a unit. If it's higher though, you fail to collect anything worthwhile.
Whether a sure thing (100+), a success, or a failure, the Material pool shrinks by 1 unit with each attempt. Once it reaches 0, the Material vein is dried up. Shame! Maybe go find more?
COMBAT!
Do enough exploring, and you're bound to run into something hostile. This is where combat comes into play.
NOTE: Due to it being the first week of the game, PVP COMBAT IS OFF.
It will be switched on after the first week is over.
COMBAT BASICS
1.
When you encounter an enemy, it will have a Roll Table. You will roll for the enemy, to decide how it fights.
2.
You need to keep track of its HP, and occasionally its AP. With clever foes, you may need to track its previous roll also.
3.
If you beat it, you get EXP equal to its level.
4.
You have SOFT damage type if you don't have a weapon, which is the worst.
Fights
can get complicated, but basically,
both players attack each other each turn, and when one side dies, the fight ends.
Each normal round of combat, you will roll 2D6. (if you, or the monster, does not require a dice roll this round, you will roll fewer. If either needs more, you ROLL more. Easy.)
You and the enemy also generate 1 AP each round. Once you reach your maximum AP, you can't gain more. Both you and the enemy start the fight with 0 AP and build up from there.
The first dice are always YOURS. If you need more than 1, the first FEW are yours.
The last dice are always the ENEMY's.. If they need more than 1, the last FEW are theirs.
The enemy's roll table will clearly explain what (and how) the enemy is doing, but how about you?
- COMBAT ACTIONS -
ALL Pawns have access to three basic move choices for battle -Basic Attack, Basic Plunge, and Basic Defense.
Develop your skills and equipment to get better options.
- ATTACK -
The basic combat attack deals your Attack stat, plus the D6 result, in damage.
But if you roll a 1,
your attack MISSES. No damage.
If you didn't miss, lower the enemy's HP by that much (if it defends, calculate accordingly)
You may learn better attacks through the game.
- PLUNGE -
A Plunge Attack, also just called a Plunge, is an
AP-Spending Attack..
It does extra damage and it
can't miss. But it
CAN be reversed.
The Basic Plunge attack deals your Attack stat, plus the D6, plus your current AP, in damage. It also spends all your AP.
You can't miss, so a roll of 1 is simply +1 damage bonus.
Lower your enemy's HP by that much.
However,
if your enemy used a DEFENSE action, the plunge is reversed.
And then, YOU'RE the one who takes the damage!
On a Reverse, you take the exact amount of damage you would have inflicted.
- DEFENSE -
The basic Defense skill, lowers any damage you take this round by your D6 result.
But If you roll a 1, you don't defend any damage at all.
If you catch your opponent using a PLUNGE as you use Defense --
you REVERSE the Plunge!
A plunge reversal works even if you roll a 1 for Defense. If you Reverse a Plunge, your roll doesn't matter - your opponent hits himself instead.
The Attack, The Plunge and the Defense - use these three basic moves to win!
Mastery of the simple leads to mastery of the complex.
- ABOUT SOFT DAMAGE, AND OTHER DAMAGE TYPES -
SOFT is easily the worst damage type.
Without a weapon or skill, all you can deal is SOFT damage. You may find that MANY enemies resist, avoid or defend Soft damage easily.
Slash, Bash and Pierce are the 3 primary damage types - there are many others. In order for a damage to be defended or deflected,
ALL ITS TYPES must be defended or deflected. Certain rare types of damage, like Sonic, can be very hard to defend. Remember to consider damage type when deciding on a weapon or style of fighting.
about running away ._.
We all do it from time to time. Not going so well? Discretion is the better part of survival.
Running away is a Special Action.
The enemy gets one last attack at your back as you flee. If there is more than one enemy, they all get one attack. After enduring the last attack from your foe(s), you escape combat.
VICTORY!
After a battle well fought, the noble Pawn goes to claim his spoils and earn his just rewards. And just what rewards are those? Read on.
ABOUT BATTLE SPOILS
Looting Items
After defeating an enemy, you may attempt to loot something. If you specify a loot target your odds go up. You may only receive 1 item per loot attempt. Roll D100 to see how it goes. Corpses expire, unlootable, after 1 hour.
It's not possible to directly take an item from an enemy, even if they were wingin' it around in battle. Try to loot it instead.
At the end of the day, you receive info on how all your looting attempts went.
Quest Drops
Specific items like quest drops must also be looted. These usually have a success rate included. Beat the failure number and you get the loot. This lets you engage in quests without having to wait.
Healing Up
All Pawns possess the Field Heal skill.
To use Field Healing, roll D6 while posting you are healing. You must NOT be in a Combat, OR "between fights" if you have encountered more than 1 enemy. Each rolled dice restores 1 HP. You can roll more than 1 in a post, but . . .
If ANY dice rolled during healing comes up a 1, you are SCARRED and your Max HP drops by 1. (you still recover 1 HP if possible though)
LEVEL UP! - ER, DOWN? WAIT, WHAT??!
About Gaining EXP and Losing Levels
As mentioned earlier, you are awarded 1 EXP per level, of the enemies you defeat. Beat down a level 6 Bugbear and you rake in 6 EXP.
And, as mentioned earlier, this has a
negative effect on your character at first. The EXP you earn will cause your character to
Level Down.
(When you DIE, the experience points WILL go towards your total level and WILL increase your power!)
As you level down you will lose stats. You can regain some by eating and drinking. You can also minimize losses by voluntarily leveling down (Bundling) You will continue to level down until you reach level 0.
Once you reach level 0 you can safely ignore Level Down. Not before.
Are you ready to handle Level Down? Yes? Good? On we go then.
LEVELING DOWN - THE TWO METHODS
There are two ways you can level down. One is much more pleasant than the other.
LEVELING DOWN - LIKE A BOSS
How to Use Voluntary Level Down (Bundling)
As you play, you have the option of Bundling your EXP for level-down. Each time you earn a "bundle", you store it and voluntarily accept a level-down.
It's strongly recommended that active players start bundling EXP as they reach higher levels. It matters less for newbies, and not at all for characters at level 0.
An EXP bundle starts at 10 EXP when you start a new life, and the allowed bundle size increases by 10 each time you store one, until you die or reach level 0.
(10 -> 20 -> 30 -> 40...)
To Voluntarily Level Down, roll 3 six-sided dice.
If the dice come up:
1,2: You lose 3 Maximum HP. If this would take you below 10 MaxHP, you are off the hook - no penalty for that dice!
3,4: You lose 1 Attack. If it would take you below 1 Attack, no penalty.
5,6: You lose 1 AP. If it would take you below 3 AP, no penalty.
As you can see, the more often you Bundle EXP for leveling down in a life, the less often you have to do it. Also, you are given a fair cushion of stats that prevent TOO much stat loss. This is REALLY handy.
'Specially when you consider the alternative.
LEVELING DOWN - LIKE A WUSS
How to Get Screwed By Mandatory Level Down (Doing Nothing)
If you are above level 0, you have earned too much EXP, you haven't bundled, and the day ends, BAD THINGS HAPPEN.
Each 10 EXP you earned causes a Mandatory Level Down.
These stat penalties are imposed by GM dice rolls - with no cushion for minimum stats.
You also don't benefit from eating and drinking. If you had been bundling, you would regain some lost stats at this point, but instead you're losing stats.
And in the worst case - if you seriously overdo your grinding and don't level yourself down as you do it -
you stand to lose most of the exp you earn, to a Post-Down Penalty, in addition to shriveled level and gouged stats!
Also, in case you can't tell.
Losing a level every 10 EXP is MUCH harsher than losing a level every time you fill a continually growing bundle that starts at 10 EXP.
So, all in all. Here's my real advice.
When you're below level 5... you can ignore Level Down, and the GM will handle it.
Past that, you better man up and start bundling, or you'll find the game a very harsh grind.


 50
50