


Difficulty: 2
Paper Type: Small square. (I use about 1.5"x1.5" squares.)
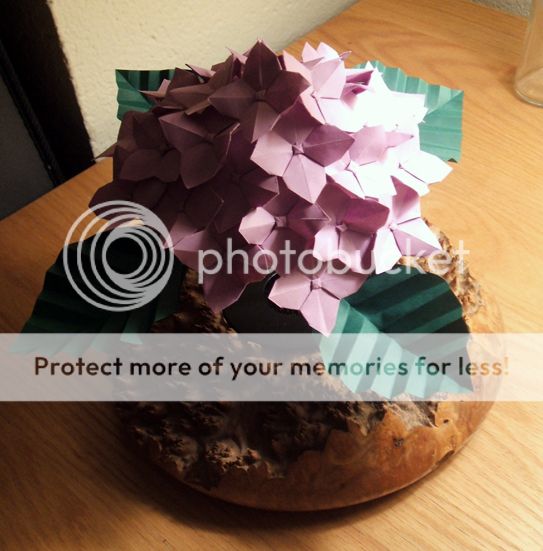
Sheets: 1 per floret. It's probably a good idea to make a 4x4 grid on a larger piece of origami paper and then cut it up to get 16 small pieces of paper. The picture above contains 32 florets made from 2 pieces of 6"x6" paper.
Cuts/Glue: Glue required to assemble florets together
Time: If you get really good, it can take less than 2 minutes per floret.
Source: Blooming Origami by Fumio Inoue
Instructions:

1. Begin with a square piece of paper. Don't go too big here - keep in mind that your finished floret will be only slightly smaller than the original size of your paper.
2. Fold in halves in both directions, then fold along the diagonals. Unfold.
3. Preliminary fold. Note that the loose ends of the paper should be pointing towards you and the closed end pointing away from you.

4. Fold down the top of the square a little bit, and crease heavily. You may want to fold it the other way to reinforce the crease. Unfold the model.
5a. Perform a sink fold on the top of the square, using the creases you just made as a guide.
5b. The finished sink fold.

6. Return the paper to its orientation in step 3.
7. Fold the edge of the top right flap towards the center.
8. Do the same to the other three flaps, making sure to always fold the flaps in the same direction.

9a. Carefully flatten the paper. Your model should look something like this.
9b. This is what the top should look like if you turn it over. However, we want to be working on the side shown in step 9a, so flip it back over again.
10. To lock the edges of the petals, we'll be performing a special squash fold. Fold the paper at approximately a 60-degree angle, making sure you leave a little room above where the fold intersects the vertical crease.

11a. Beginning the squash fold. Be careful not to tear the paper!
11b. Let the right side of the paper follow the fold down, and squash it when you think it's flat enough.
11c. The finished squash fold. Repeat for the other three sides.
Turn your paper over and your floret is finished!

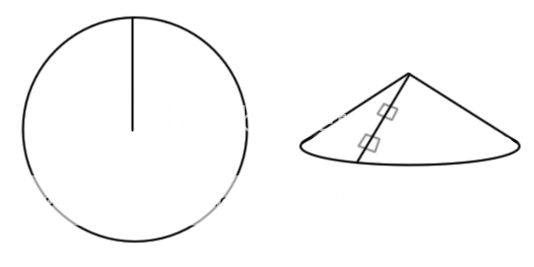
Assembly: Make a cone out of paper that's the same color as your florets. This can be done by cutting out a circle and making a slit that ends in the center, then overlapping the edges and taping them together.
Once you have about 20 or 30 florets, glue them to the cone and cut off the rest of the cone that's showing. I prefer hot glue because it dries quickly. Finish off with some floral wire and some leaves and you're done!