o0NeMo0o
(?)Community Member

Offline
- Posted: Thu, 04 May 2006 04:49:39 +0000
exclaim NEWS exclaim
NEWS For the Old School Profiles, you no longer have to edit the YouTube URL's. Though if you want to autoplay and loop them, you'll still need to add those things are the end of the URL.
exclaim NEW exclaim
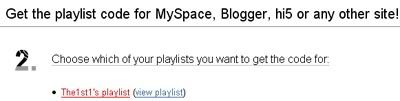
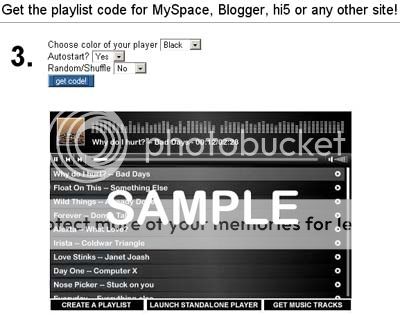
NEW Project Playlist Tutorial: Post #7
..::Graphic Intensive::..
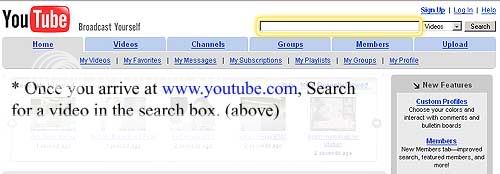
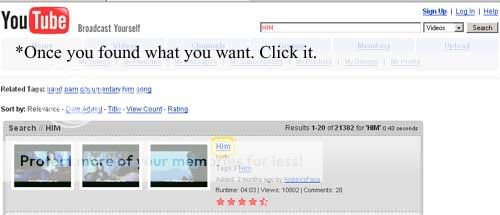
YouTube Tutorial - How to make a YouTube Video, work in your Multimedia Section.
YouTube Playlist Tutorial - How to make a playlist and make it work in your Multimedia Section.
Photobucket Video Tutorial- How to make a Photobucket Video, work in your Multimedia Section.
Photobucket Slidewhow Tutorial- How to make a Photobucket Slideshow, work in your Multimedia Section.
Bolt.com Video Tutorial- How to make Bolt.com video's work in your Multimedia Section
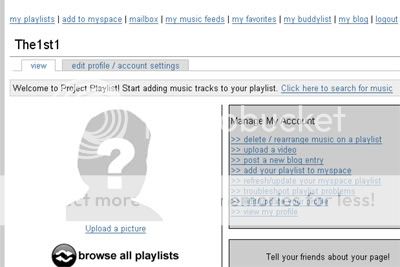
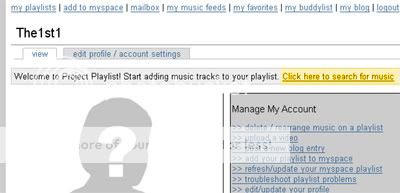
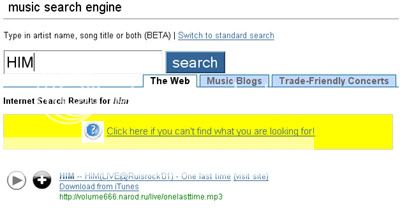
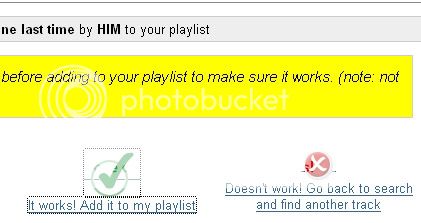
Project Playlist Tutorial- How to make a music playlist from Project Playlist work in your Multimedia Section
+More Tutorials Coming Soon.
DO NOT QUOTE ANY OF THE POSTS ON THE FIRST PAGE.
DO SO AND YOUR POST WILL BE REPORTED
DO SO AND YOUR POST WILL BE REPORTED
I recently found myself helping a lot people correctly obtain/reconfigure the URL from YouTube for thier MultiMedia Section of thier profile. Some of which have gone by other guides and still cannot do it themselves.
So I decided to make a guide, hopefully to better explain, by going step by step. Also using pictures as guides.
****Note: It's sad that I have to say this. Reading and following the pictures is the key. sweatdrop
Table of Contents
Post 1: How to change the URL so the YouTube Video will show in Multimedia
Post 2: How make a Big Video on New Profile!
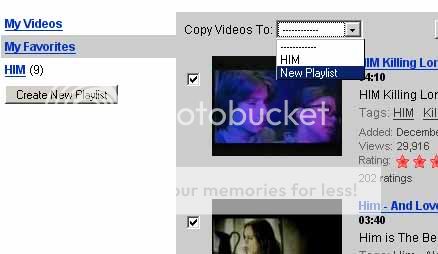
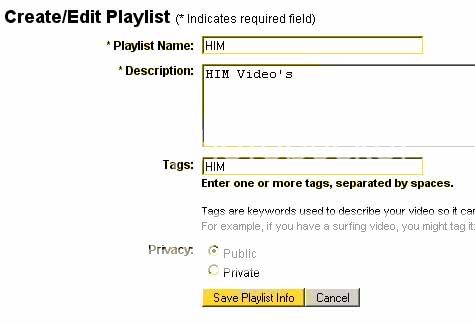
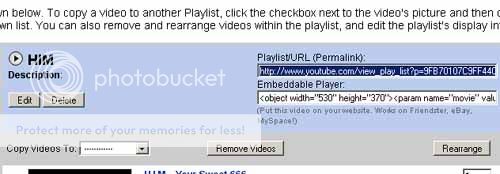
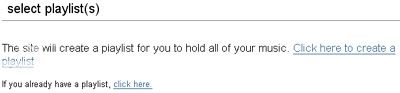
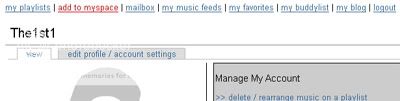
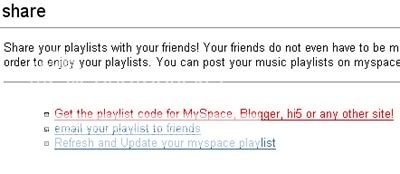
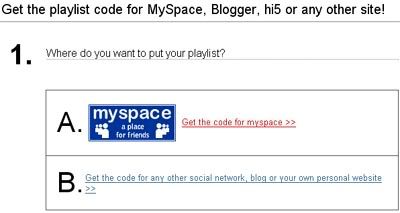
Post 3: How to add a YouTube Playlist to your multimedia section.
Post 4: How to get Photobucket Video's to work.
Post 5: How to get Photobucket Slideshow's to work.
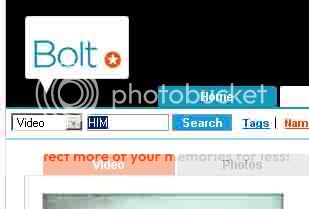
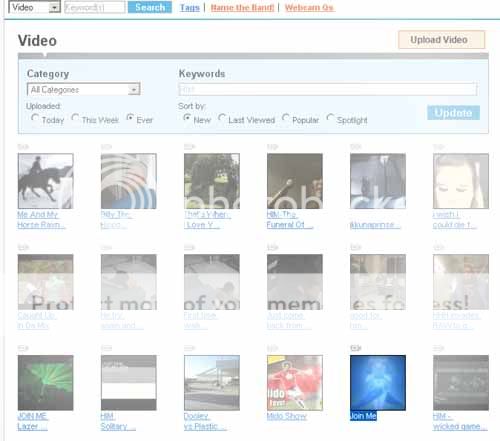
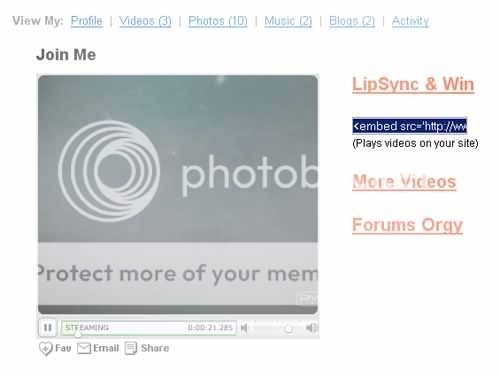
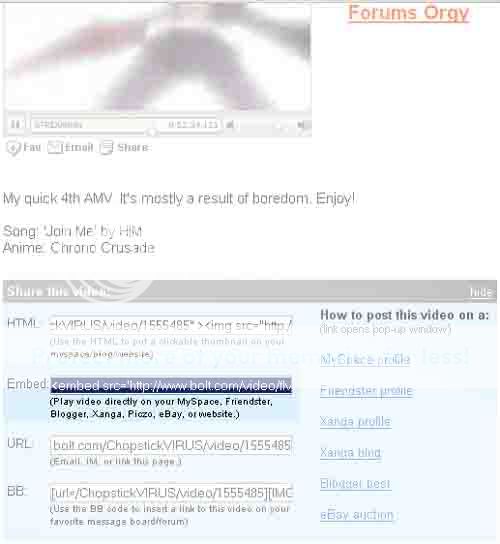
Post 6: How to get Bolt.com Video to work.
Post 7: Project Playlist Tutorial exclaim New
Post 8: Imeem.com Tutorial -- Coming Soon
Post 9: Helpful Links
Post 10: Reserved
Having trouble?..........
Having problems, with the guide. Can't quite understand it. Then I recommend using Saikatsu's Video URL Converter -- This also converts Google Video's.
Step #1
Step #2
Step #3
Step #4
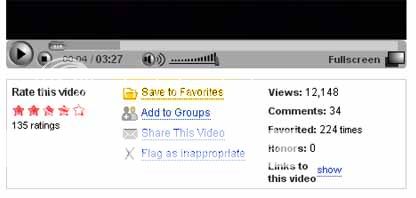
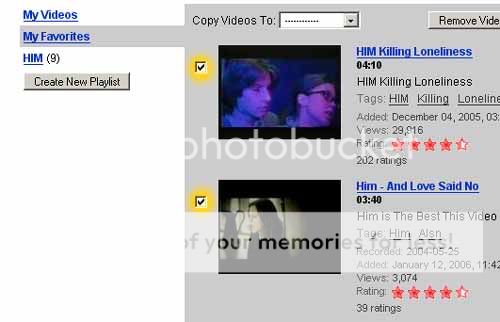
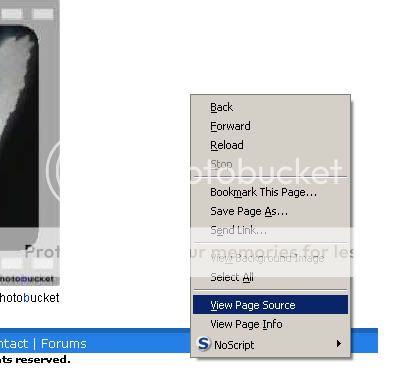
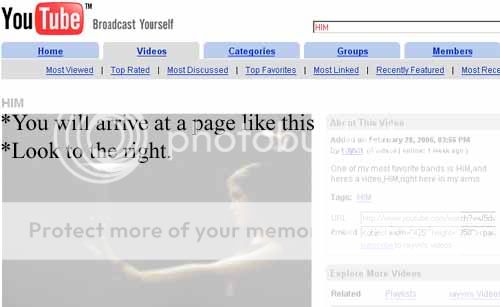
*When you look to the right, you should see this. (See Image Below)
*Now that you are there, you want to highlight and copy the "URL". (See Image Below)
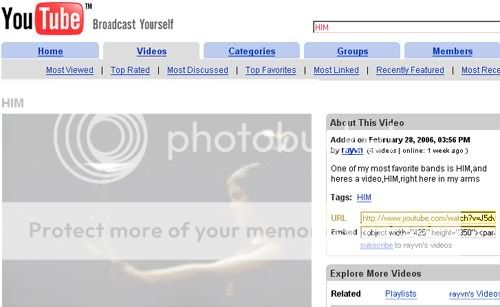
*Now that you are there, you want to highlight and copy the "URL". (See Image Below)
Step #5 -- Old School Profile Shown
NEW PROFILES. PLEASE SKIP TO THE NEXT STEP. STEP #6!
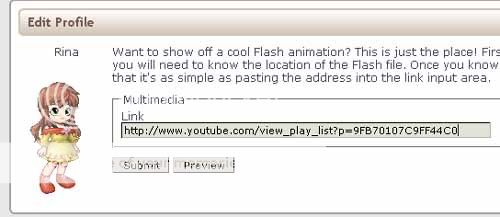
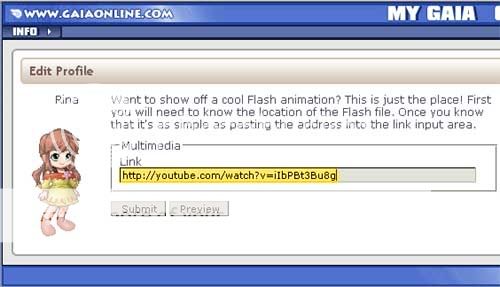
*Now go back to Gaiaonline, Click My Gaia>Account Then Click Multimedia.
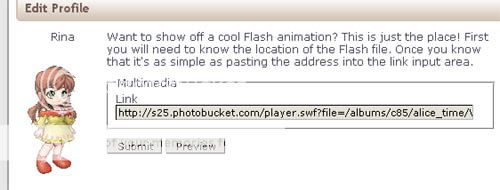
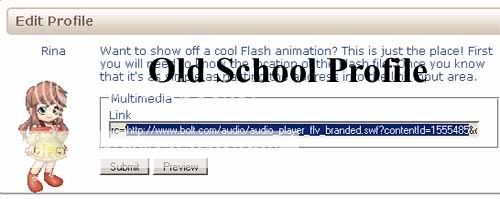
*Now paste the "URL" into the box (See Image Below)
DO NOT PRESS SUBMIT YET
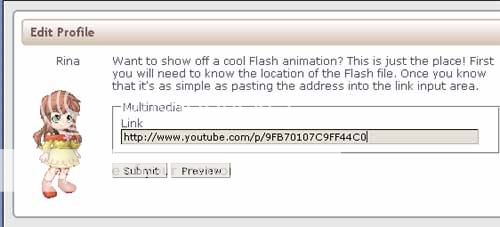
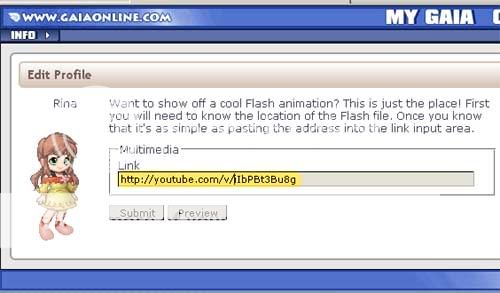
Step #6 --Old School Profile Shown
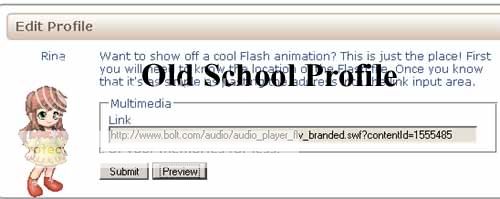
*Now, erase "watch?" and replace the equal sign "=" with a forward slash "/ "
*The end product should look like the picture below.
*Make sure it looks silimar and press submit. If this is for the New Profile, Read the Next Step.
Step #7 -- For NEW Profile!
*Now that you have the correctly Editted URL as shown in Step #6, follow these steps:
Step 1
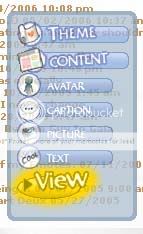
*First goto My Gaia>Profile -- Then click "Edit My Profile"

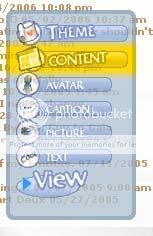
Step 2
*Now Click "Content"
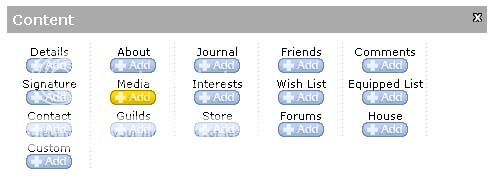
Step 3
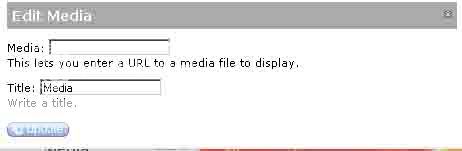
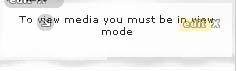
*Now Click "Media" -- Then press "x" to close the box
Step 4
*Now, click "Edit" on the Multimedia box.
Step 5
*Then enter the correctly editted URL.
*Now Press "Update".
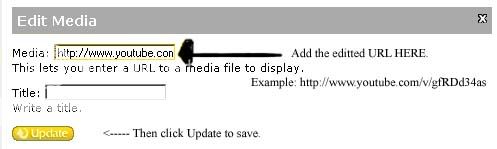
*Now Press "Update".
Step 6
*To Save, click "View"
*Note: This will not Autoplay the video, It will provide a "Play Button". See the next steps to Autoplay.
<---------------------------------------------------------------------------------&
exclaim NEW: Autoplay
To autoplay. After you have Changed the link properly as show above. Add "&autoplay=1" at the end of the url.
Example
http://www.youtube.com/v/LXZnh4IepjY&autoplay=1
exclaim Old School Profile Only - If you want to hide your Multimedia Box, then put this CSS Code in your Theme Override Box (Not the Multimedia URL Box)
#multimedia { visibility: hidden; height: 0px; }
exclaim New Profile Only - If you want to hide your Multimedia Box, then put this CSS Code in your CSS Box. Can't Find it. Edit your New Profile, Click THEME, Then the CSS Tab. (Not the Multimedia URL Box)
.media_panel
{ visibility: hidden; height: 0px; }
{ visibility: hidden; height: 0px; }
<---------------------------------------------------------------------------------&
exclaim NEW: Infinite Loop
Kamiko
**TIP
add &Loop=0 to the end of the url and it will loop endlessly with out going to the share and replay thing...
Example:
Autplay +Loop
http://www.youtube.com/v/LXZnh4IepjY&autoplay=1&loop=0
Non-Autoplay (Manual Play) +Loop
http://www.youtube.com/v/LXZnh4IepjY&loop=0
AGAIN..Having trouble?..........
Having problems, with the guide. Can't quite understand it. Then I recommend using Saikatsu's Video URL Converter -- This also converts Google Video's.